Plastic wishlist

Glow in the dark plastic.

Don’t get me wrong, I like the idea of fluorescing red ABS.1  But, how sweet would glow in the dark plastic be?

It’s like making all of your printed plastic objects twice as useful, since they can be seen at night as well as day.

  1. Is it just me or was this a stealth launch?  I didn’t hear about it anywhere and just happened upon this new ABS plastic while checking on the availability of the new Heated Build Platform. []

Hareware isn’t everything

With Charles Pax’s recent proof-of-concept of a motorized conveyor belt print platform, we’re going to need some software/firmware changes to make full use of these improvements:

  1. Queuing print tasks
  2. Removal/auto-wiping of the test extrusion
  3. Moving the print platform to the front/back/side of the MakerBot for ejecting the finished print
  4. Ejecting the printed part
  5. Returning the platform to 0,0,0 / center

From the video posted on Charles’ site, it looks like he’s managed #3 and #4 already.  The extrusion path around the print that we see in Nophead’s prints probably would work at #2.  I also seem to recall some (such as Zaggo?) have mounted a toothbrush head on the build platform for auto-wiping of the extruder head.

Returning the platform to 0,0,0 is an interesting proposition.  This would seem to work best once the opto-endstops are installed.  I’ve got my set of six fully assembled opto-endstops sitting in a box next to my MakerBot because I haven’t really needed them and they tend to get in the way of printing.  Although the opto-endstops have been removed from the standard MakerBot kits, I think we may now start to see them returning.

Ideas for Cupcake CNC upgrades

Sometimes when using the ReplicatorG control panel I accidentally hit Z- instead of Z+ to adjust the stage height.  As you might imagine, this causes problems.  At best, I end up with the Z stage out of whack.  At worst, the hot and extruding print head slams into the build platform or model and knocks the Z stage out of whack.

Two possible upgrades would be:

  1. A simple bubble level for the build platform and/or Z stage to make it easy to verify the surface is level.  I would imagine bubble levels are relatively cheap.
  2. A bracket that fits around the lower section of the Z axis rods, which would prevent the Z stage from descending below a particular level.  It could be as simple as a little plastic nub that is bolted to the inside of the ‘bot that prevents the stage from being lowered.  Four of them would probably work fine.  OR, you could put an extra nut on each Z axis below the nut that supports the Z stage.  Someone could then design a little plastic widget that would fit on top of that extra nut and have a prong that sticks up – preventing the Z axis from lowering further.

Skeinforge Multiply

In order to step up production of my Beco Block collection (up to 30 pieces now) I ‘ve been using the Skeinforge multiply feature.  Basically you feed it the number of columns and rows and it will make that many of your object in the final Gcode.  For my own reference, and hopefully to help others, I’m putting down this little tidbit about Skeinforge’s multiply feature.

The “Multiply->Columns” feature creates additional sets of your object running from the front to the back of your build platform.  So, if you have “Multiply->Columns” set to “3” and “Multiply->Rows” set to “1,” you will have three objects in a line running from the front of your Y platform to the back of your Y platform.

The “Multiply->Rows” feature predictably operates in a 90 degree rotation from the “Multiply->Columns” feature, with the additional parts running from side to side.  So, if you have “Multiply->Rows” set to “3” and “Multiply->Colums” set to “1,” you will have three objects in a line running from the left to right of your Y platform.

This is a pretty handy feature for production.  One caveat – more is not always better.  In producing the Beco Block FF pieces I’ve discovered their combined warping is enough to ruin the entire print job (on my unheated build platform).  I was printing 2 columns of 3 rows for 6 pieces at a shot.  Unfortunately, with the additional warping I don’t have a single usable FF piece.

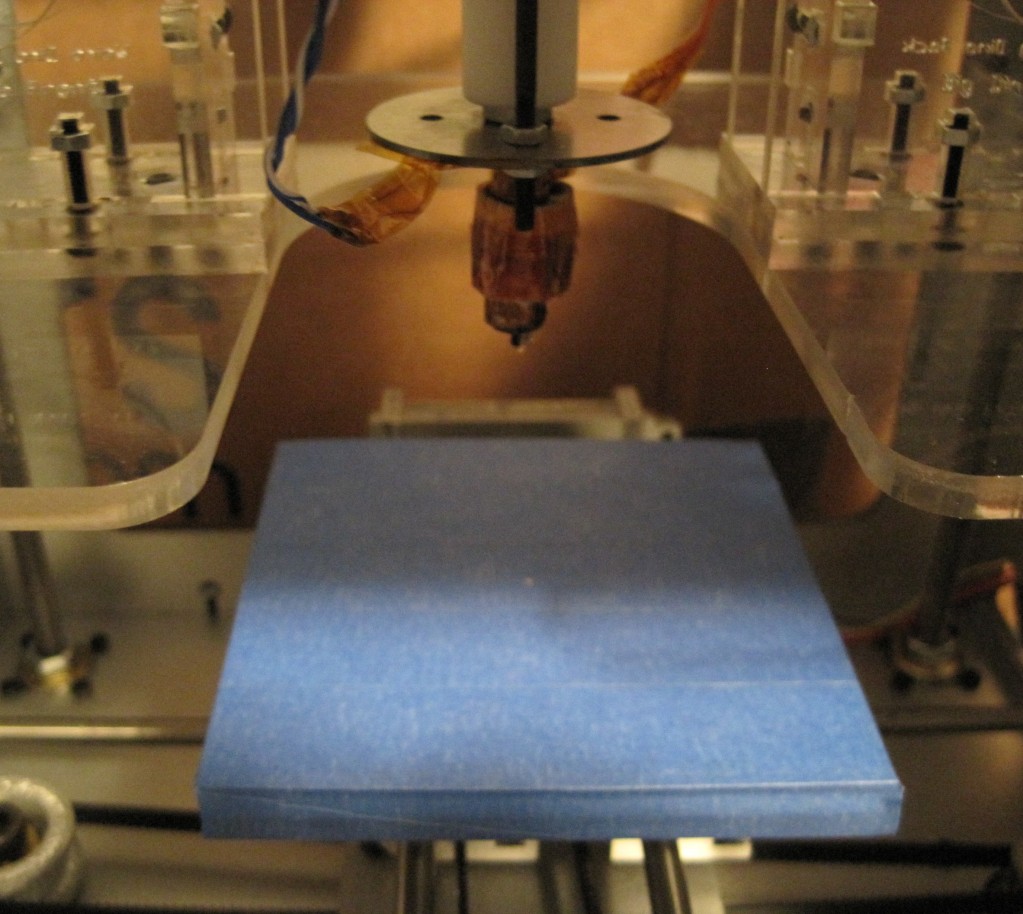
Blue platform

Foam core build platform, covered in blue painters tape

Foam core build platform, covered in blue painters tape

As the caption suggests, this is just the foam core build platform placed on top of the wooden platform and taped down with blue painter’s tape.  The tape has worked very well for my first PLA print, the teapot.  I’ll try this new platform setup in a little bit.

MakerBot Raft Settings

I was having some trouble getting my rafts to stick to the build platform until I did the following:

  1. Switched to the acrylic build base (which I promptly pock-marked with a hot extruder)
  2. Changed the Skeinforge raft settings to those suggested on the Thingiverse blog

If you’re having raft trouble, do both of the above and don’t look back.