Carved Eraser Stamping

I recently stumbled across the world of fantastically charming mini prints and carved erasers by Serena Rios McRae aka Cactus Clouds Art.  This short Instagram post provides an excellent overview of her process.

Serena’s artwork is evocative, accessible, and affordable.  I bought several of her prints the other day.  She also posts how-to’s on YouTube and provides plenty of links to her recommended supplies (Serena’s lists and affiliate links).

These looked like so much fun, I bought a pile of cheap pink erasers off Amazon, repurposed an old set of stamp carvers we had lying around (I had done some linoleum block printing back in high school and my wife had a small stamp making kit from years before), and gave it a shot.  The kids had a great time with this while I fretted about whether they were going to jab their fingers and how many bandaids I’d have to have handy.

After their first stamp, I hacked together a 3D printed holder.  Despite measuring the erasers carefully, it was too long and really, too big for what it needed to be.  Here you can see version 01 taped to a piece of mahogany wood left over from my ukulele project.

This slideshow requires JavaScript.

There were several problems with this first attempt.  The holder was a little too long, so the eraser would shift back and forth.  It was also much bigger than necessary.  I designed it with those large fins on the side to make it easy to tape down, but it really wasn’t necessary and just made rotating the eraser holder a little more unwieldy.  While my kids were carving things using this holder, I went to work printing a few accessories.
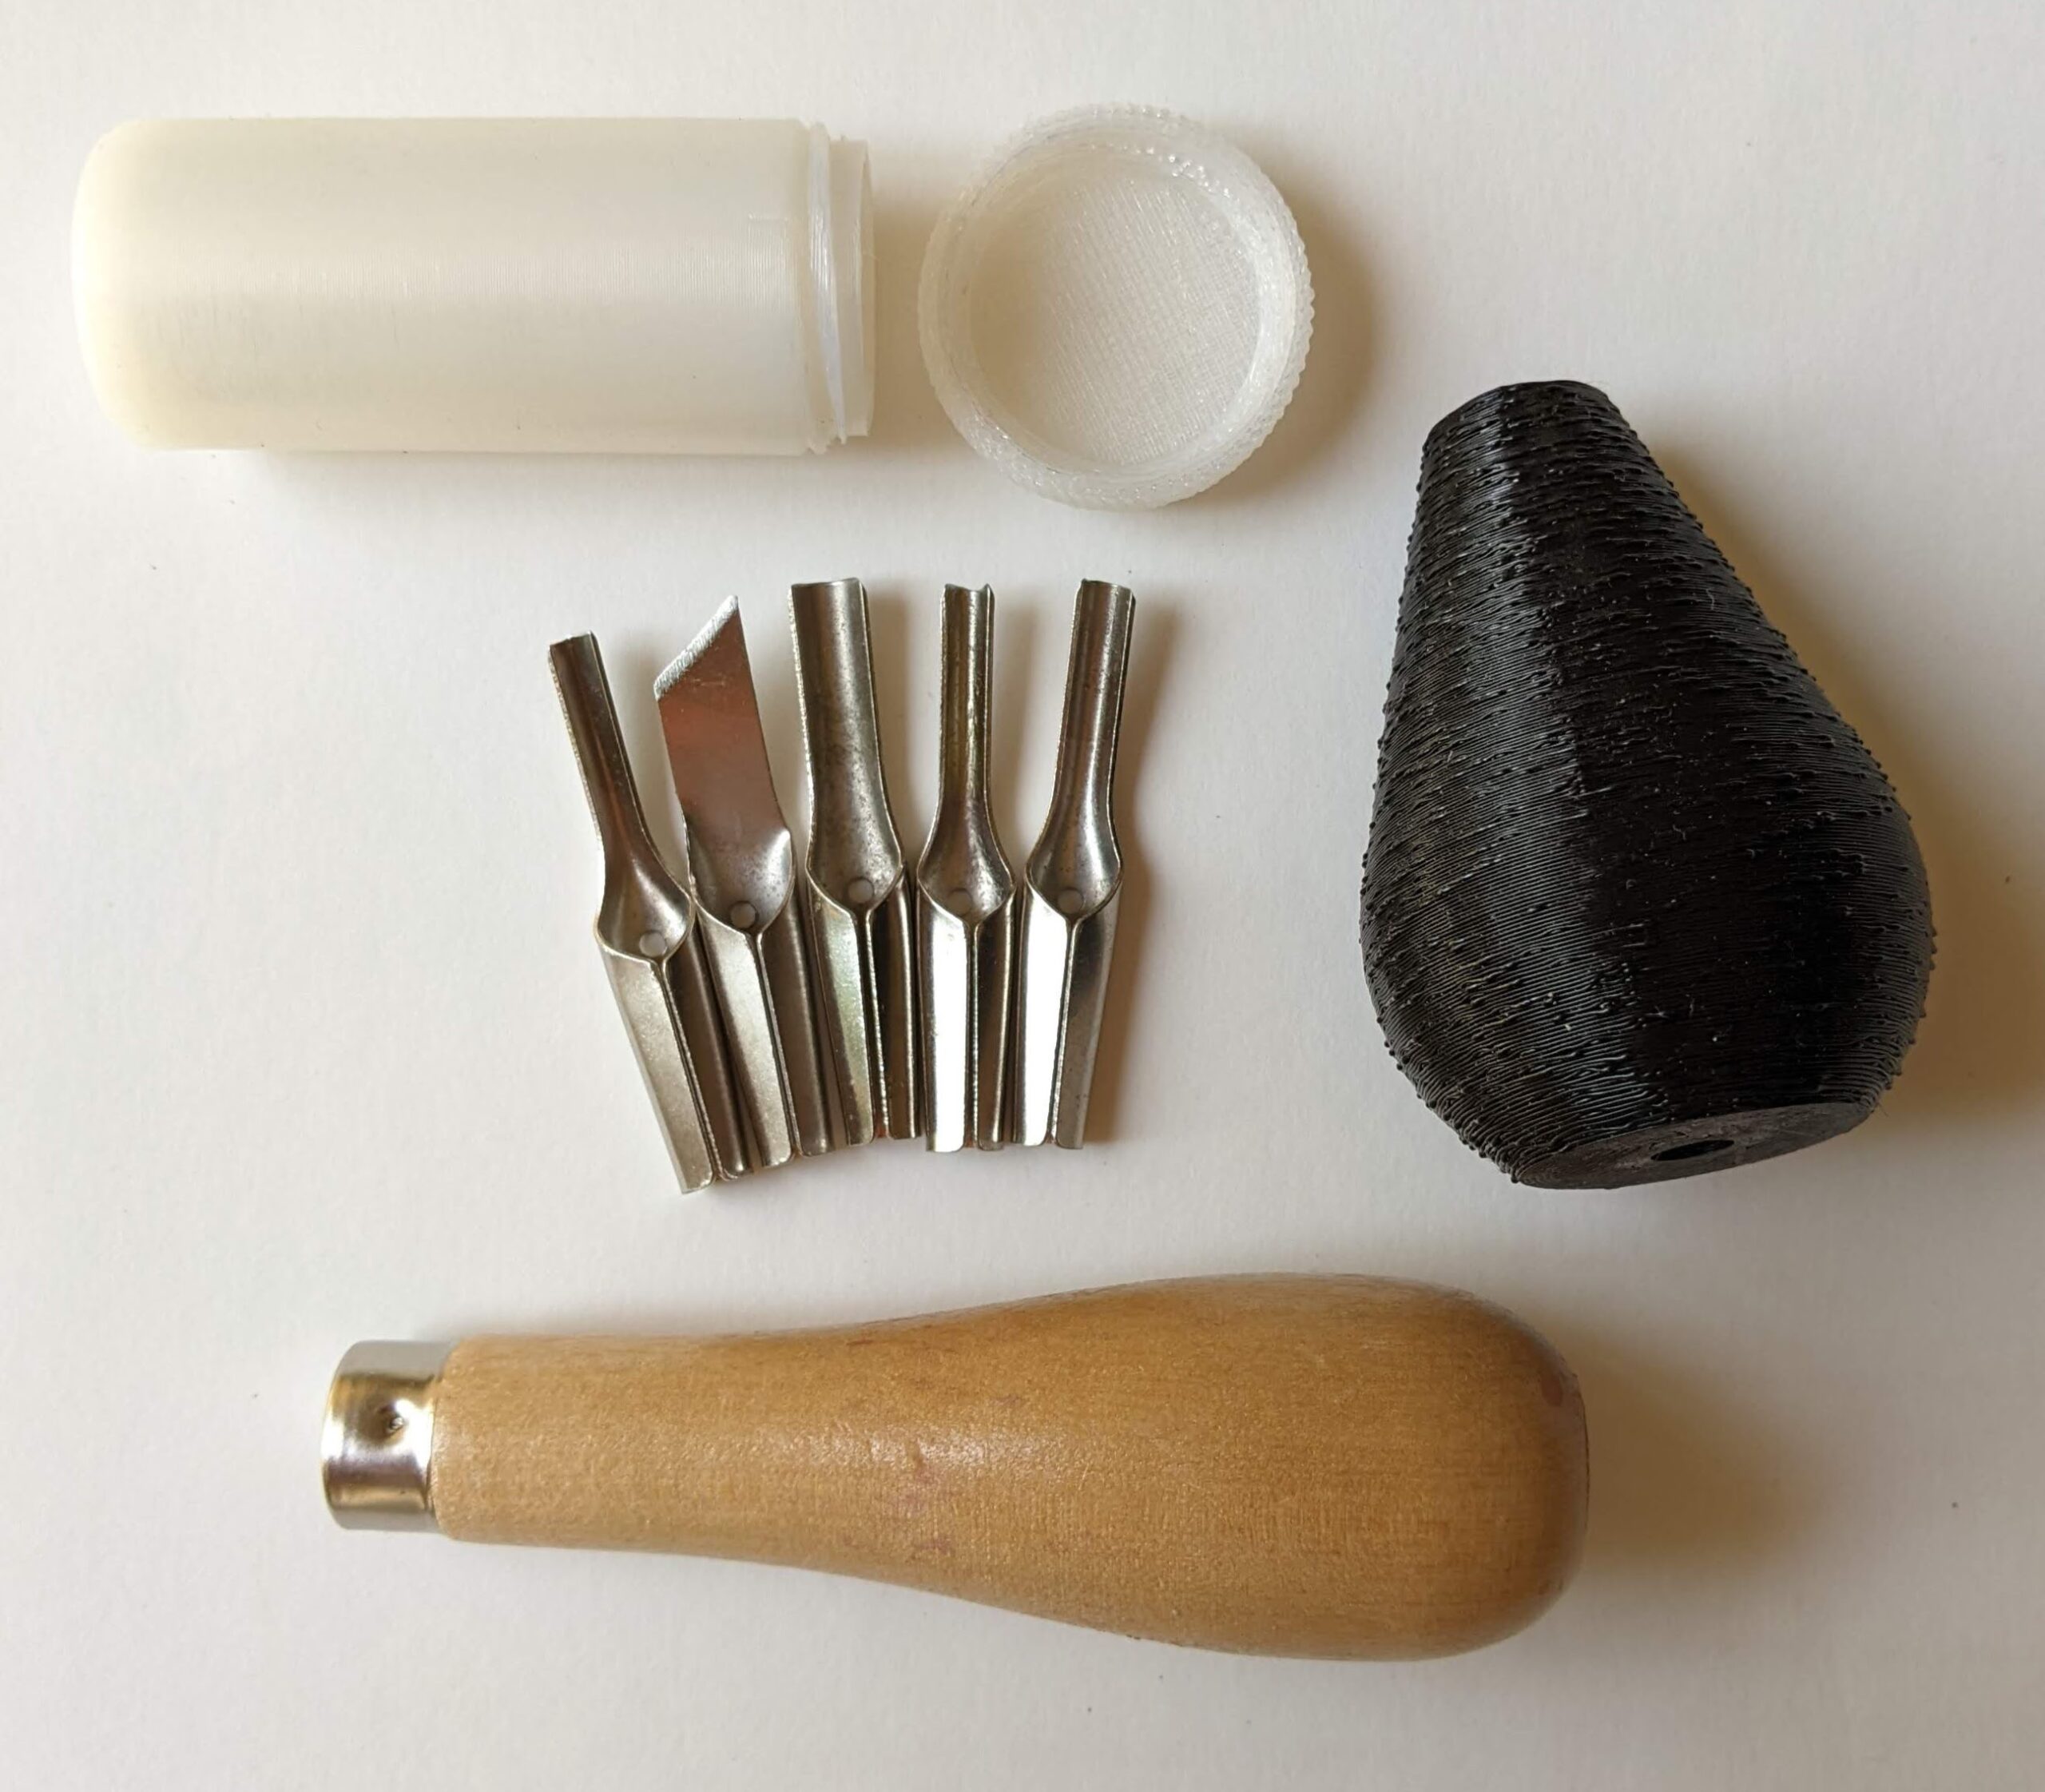
3D printed screw top blade container, extra blade handle

3D printed screw top blade container, extra blade handle

The blades came in a little plastic baggie, so I printed a bespoke screw top container for them so they can be stored securely.  I also printed another blade handle so that two people could carve stamps at the same time – one using the original wooden holder and the other using the printed holder.

The next version was more compact and had dimples on the edges which I hoped would make it easier to hold.  I also added some little ridges inside so the eraser wouldn’t fall through.  Here they are:
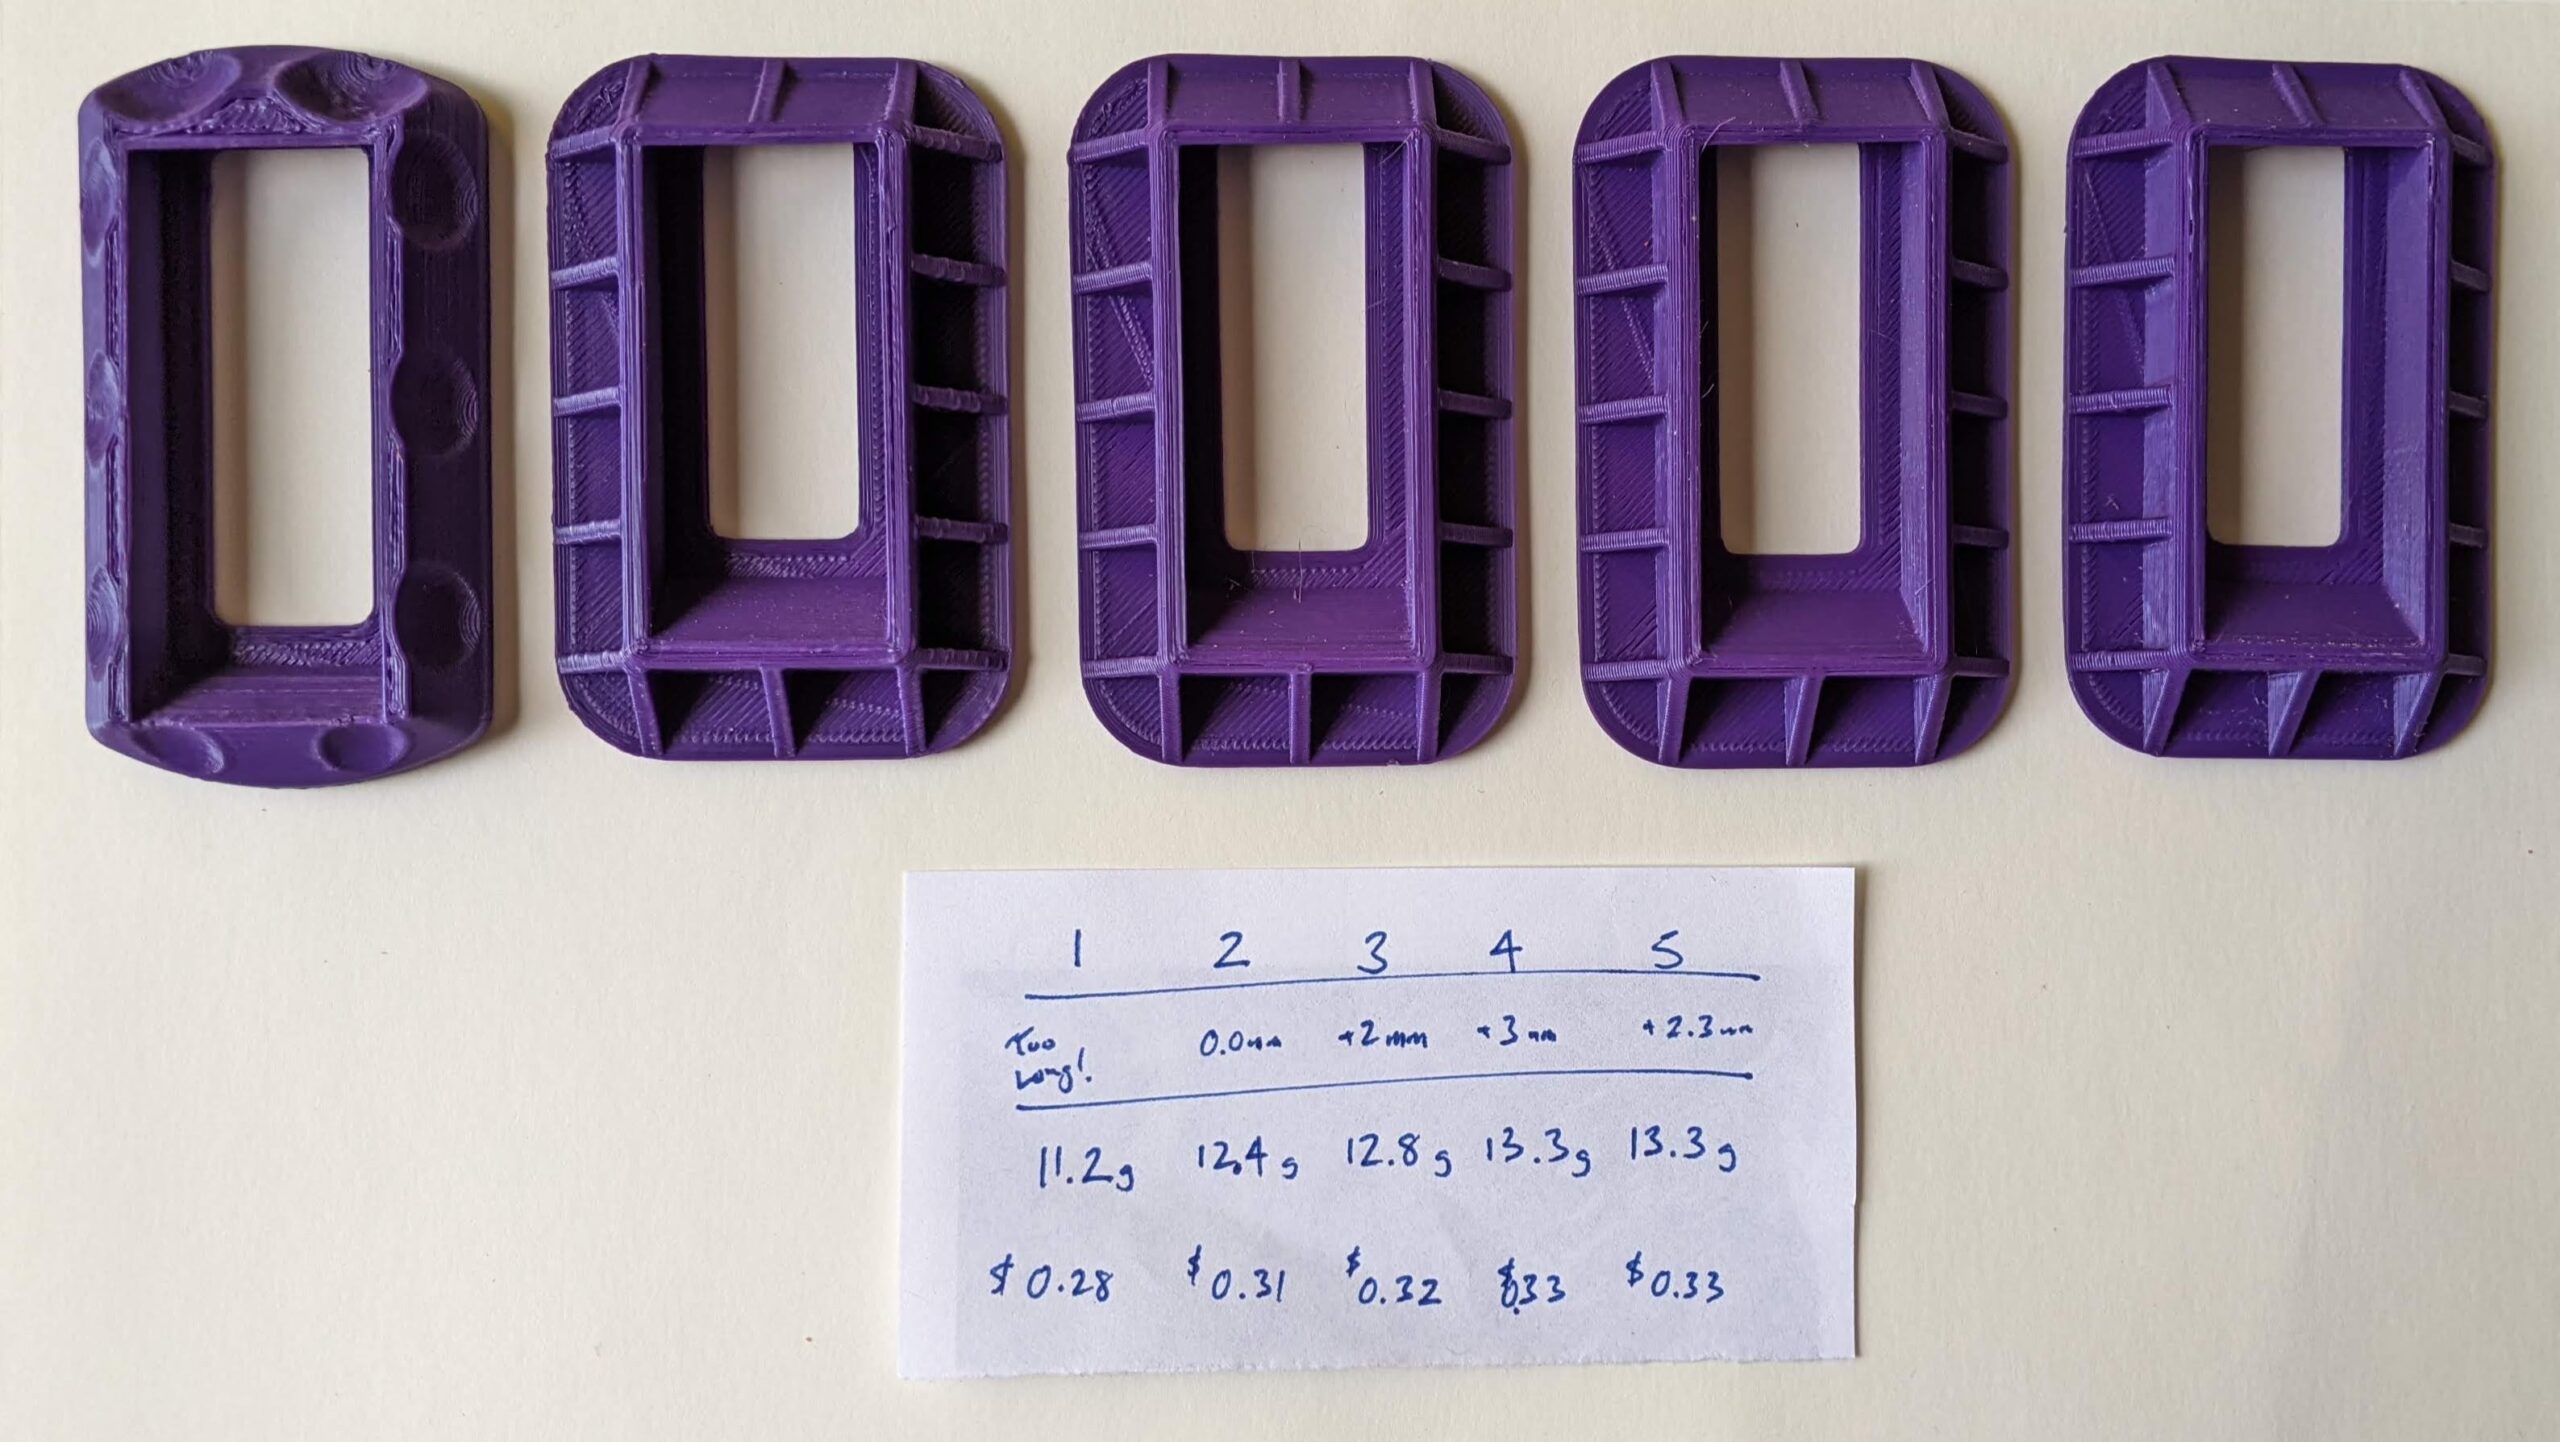
Eraser holders for carving, versions 1, 2, 3, 4, and 5

Eraser holders for carving, versions 1, 2, 3, 4, and 5

The dimples didn’t work.  They weren’t deep enough and my hand couldn’t really grip it very well to keep it from moving while I was carving.  The area for the eraser was a little too long.  Versions 2-5 involved tuning the length just right.  Each one takes about an hour to print and used about $0.30 of plastic.  The final result fit the erasers like a glove.  They nestle in the holder perfectly and are easy to poke out using the little hole.  Admittedly, they might only fit the specific cheap erasers I found.

Here’s my process:

I created a page of eraser templates, which match the length and width of the large and small edges.  Of course, the long section matches the long side of the eraser – but the shorter section only matches the short side of the eraser if you tip it over.
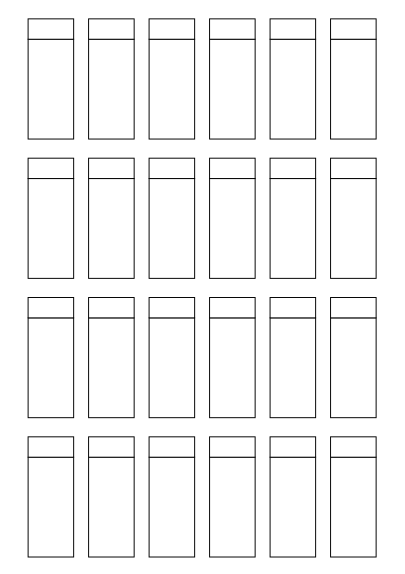
Eraser templates

Eraser templates

I got to use several iterations of the eraser holder for this next section:
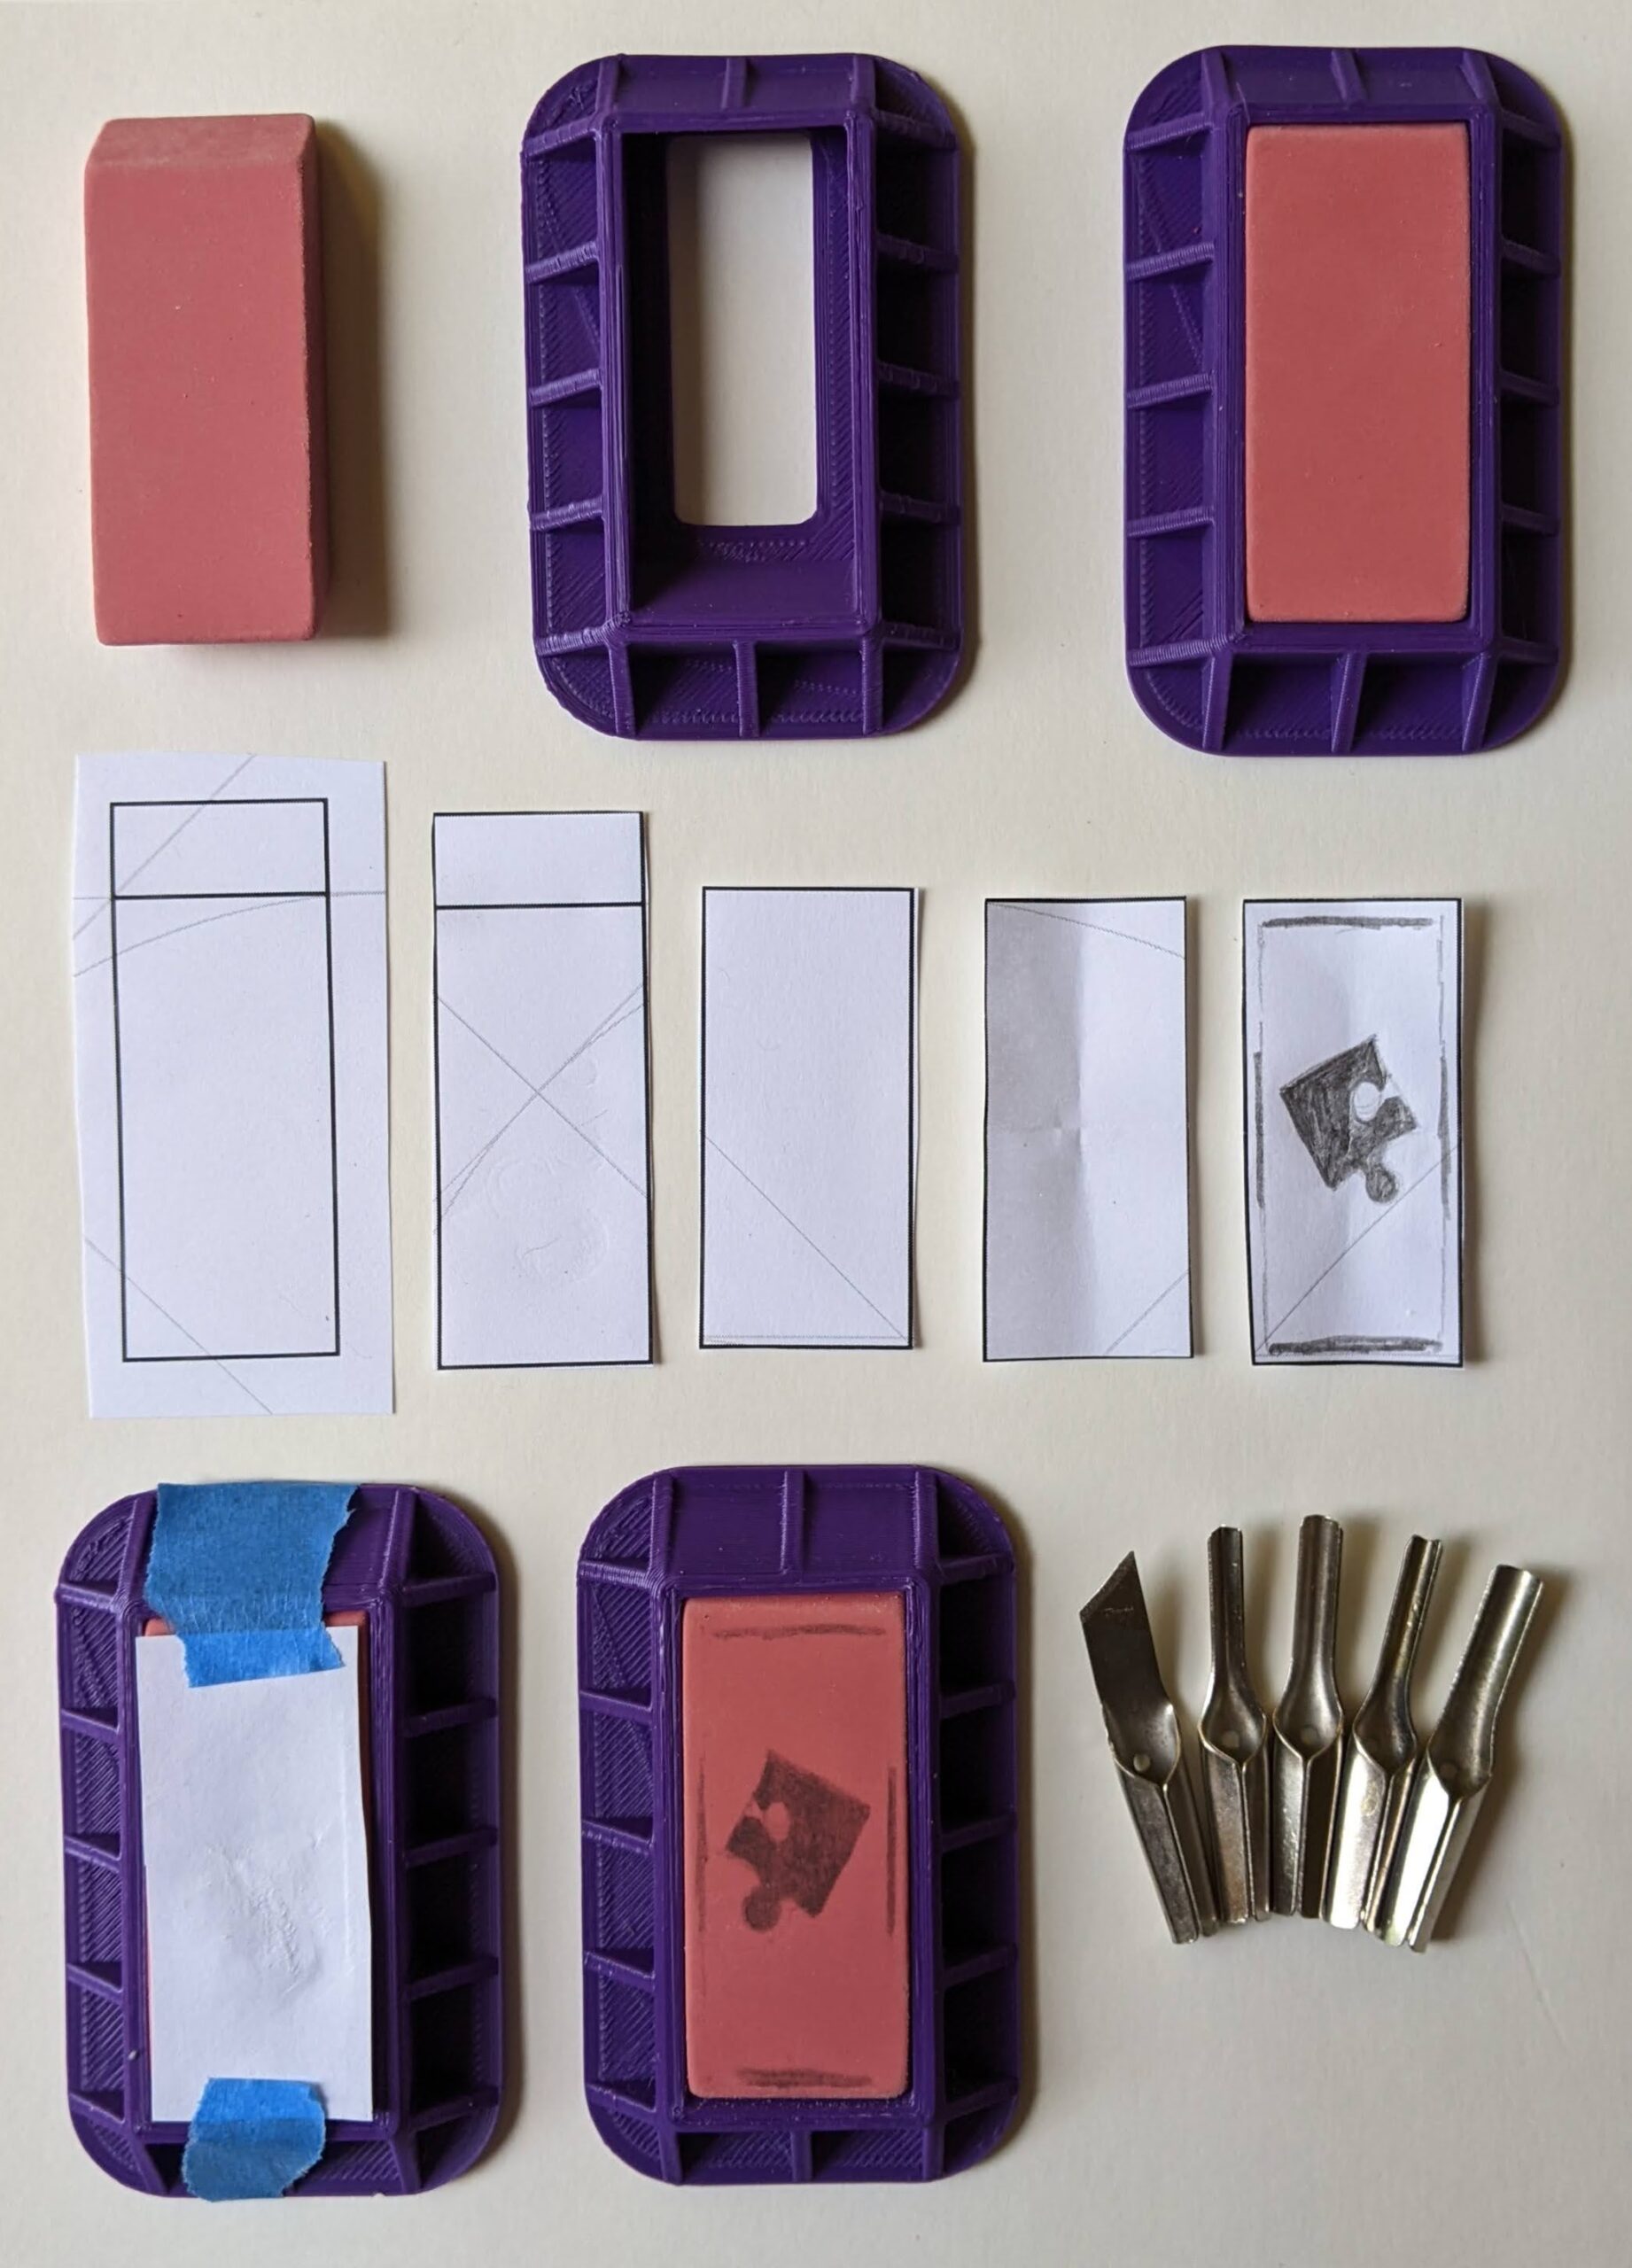
All the pieces, laid out nice and orderly

All the pieces, laid out nice and orderly

The process is pretty easy.  Put the eraser in the eraser holder – it should slip right in, drop in snugly, and lie flush with the top edge of the plastic holder.  After cutting out a paper strip, it’s trimmed to size, creased to locate the central point, and a pencil drawing (drawn as I’d like to see it printed).  This is taped upside down onto the eraser, rubbed along the back (a coin would work very well, but I just used one of the extra eraser holders), and the design is neatly transferred to the eraser.  The neat thing about this process is that I could design something in Inkscape, print it into the template, and color it in with the pencil for transferring to the eraser.

Lastly, let’s see the result!
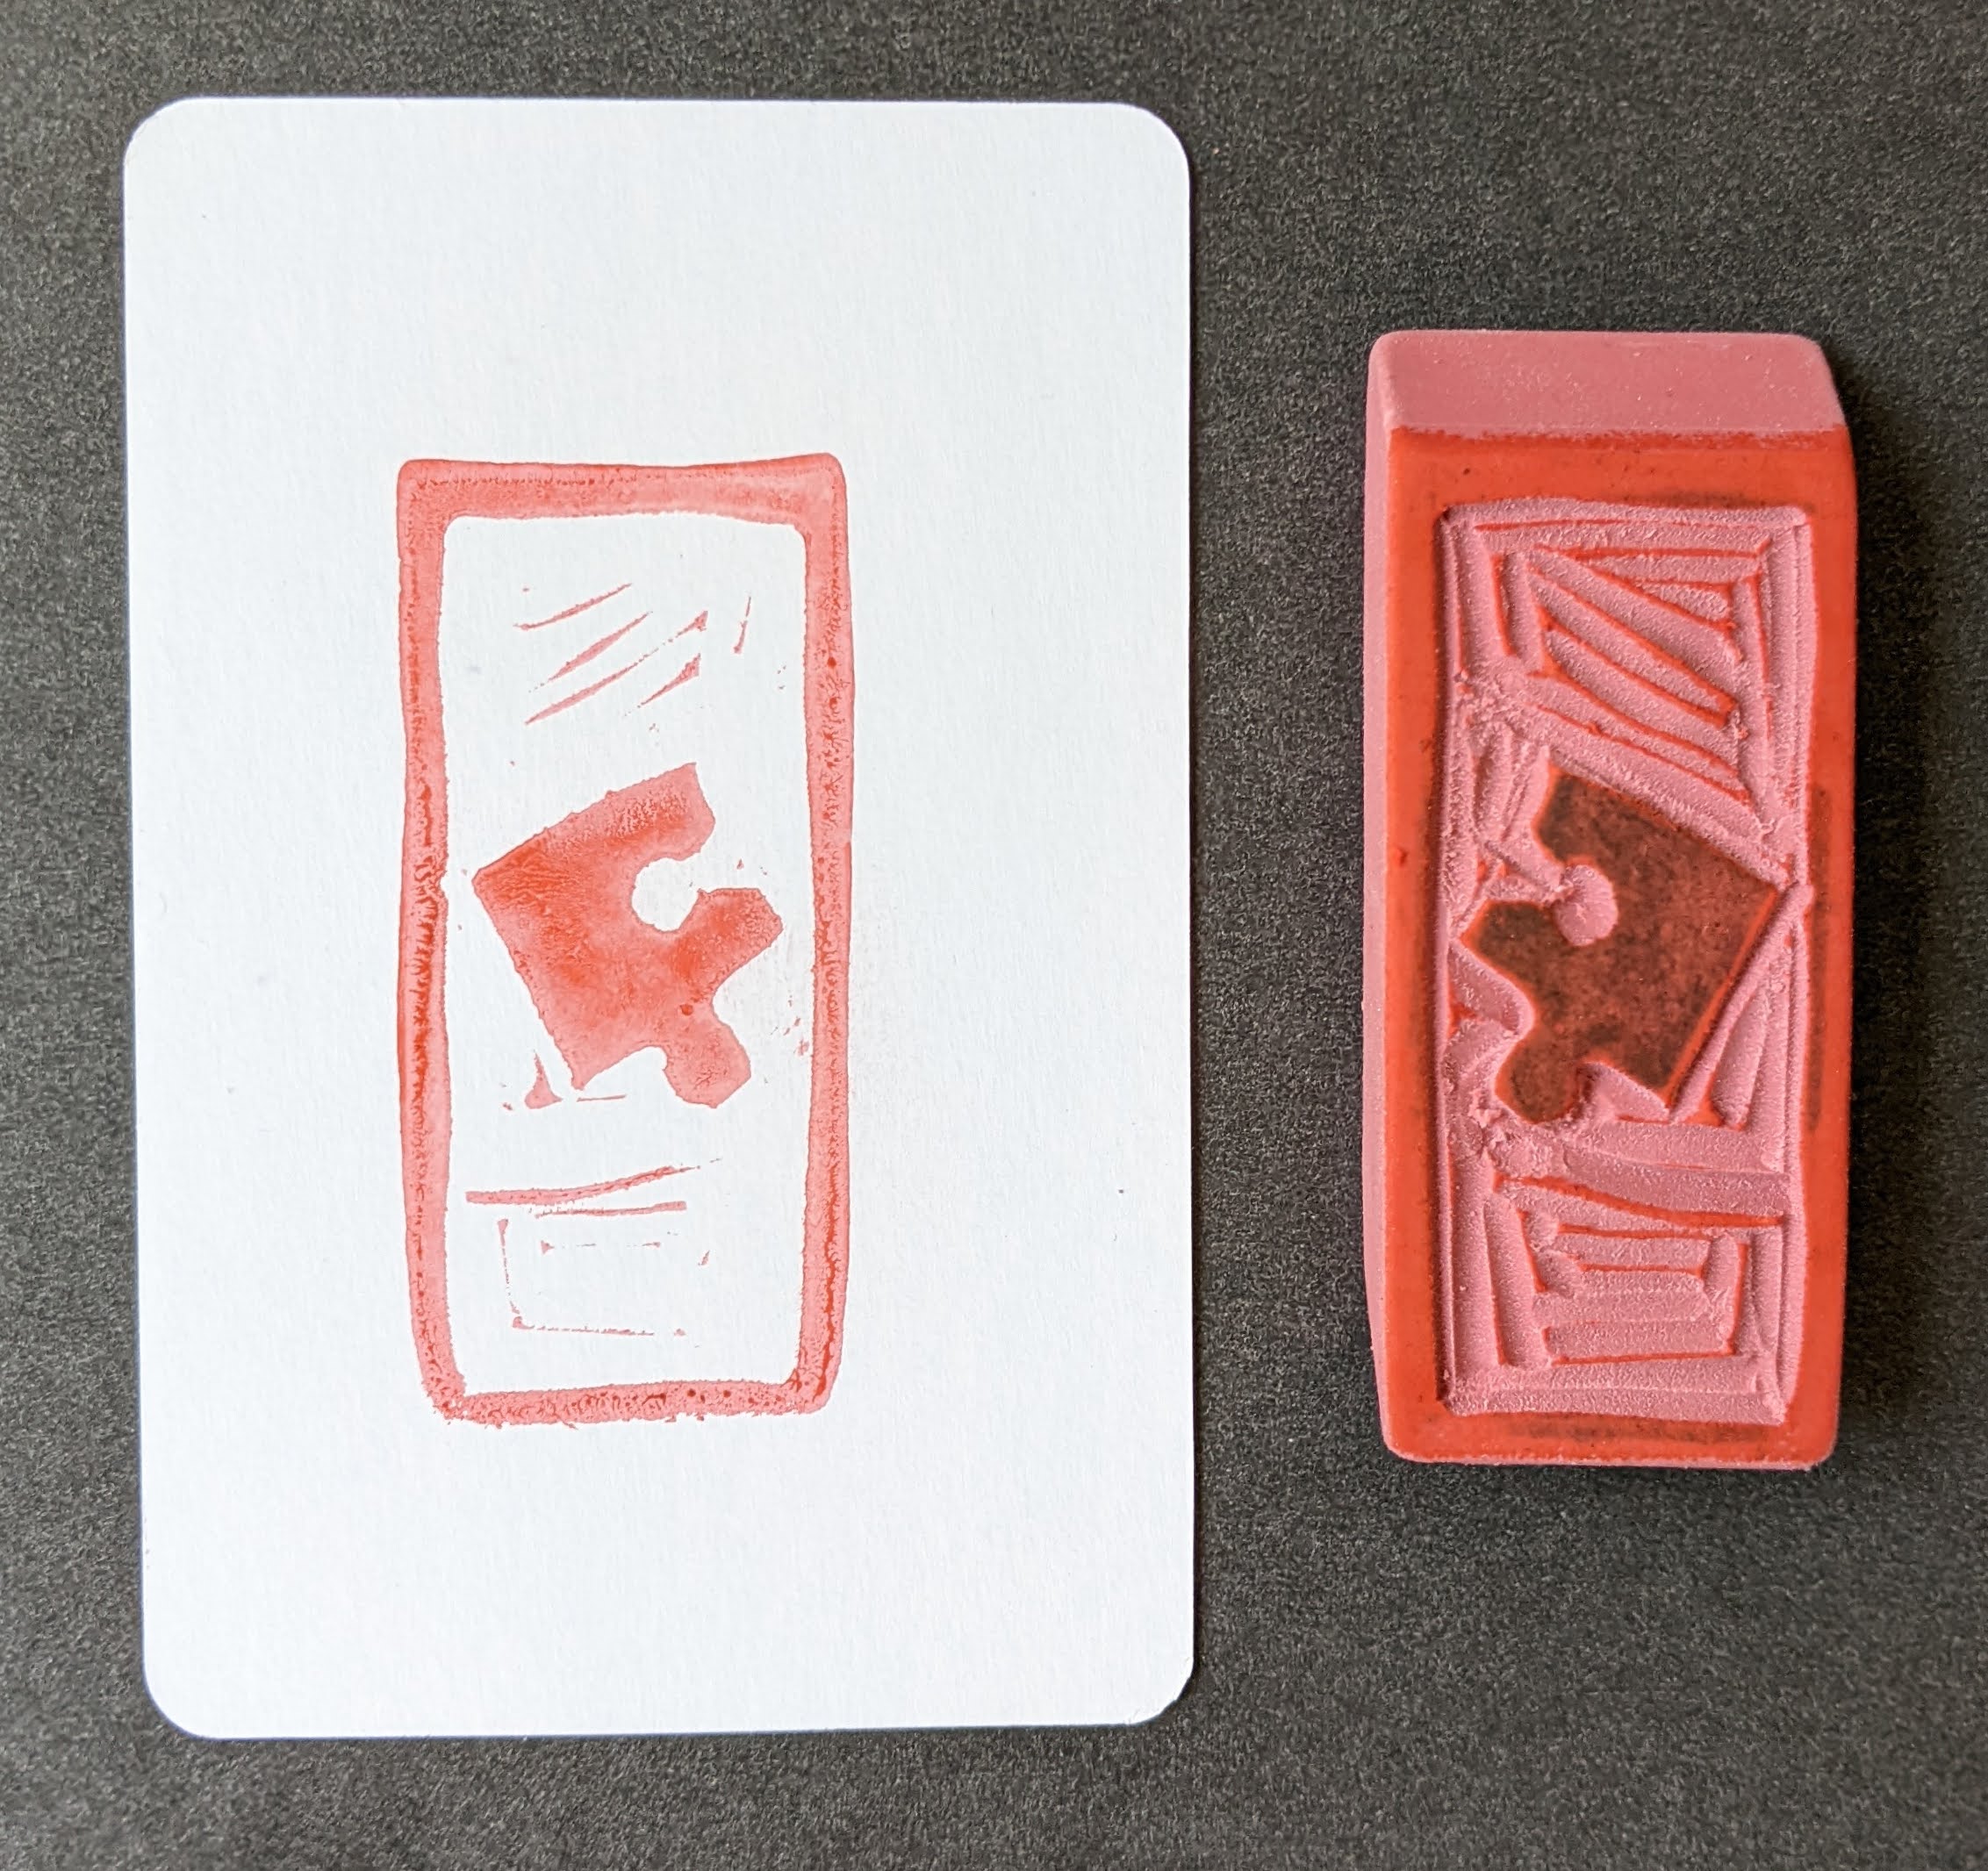
Eraser stamp!

Eraser stamp!

As you can see, the final stamped result matches the orientation of the little drawing.  I just wish I’d saved the little scrap of paper with the original drawing on it!  The eraser holder was a joy to use and the final result looks every bit as great as I was hoping.

If I keep making these, I’ll probably want to upgrade my setup to include Serena’s recommended stamp pad and sharpener (you’ll see them linked in Serena’s Amazon link above).  I’d like to design something to make easy to hold the eraser, center it, and make a clean even stamp, but don’t have a great idea for one yet.  I’ll keep pondering this and maybe whip something up this weekend.

Eraser Stamp Carving
  1. Carved Eraser Stamping
  2. Further Adventures in Eraser Carving
  3. DIY Carved Eraser QR Code Stamp
  1. I mean, I guess it’s version 1 – but I labeled all the purple ones starting with 1 so… []

DIY Soprano Scale Travel Ukulele

I recently entered my DIY soprano scale travel ukulele in the California State Fair and wanted to add a post giving an overview of the materials, design process, progress pictures, sound test and extra information:

1. Final Project Photos

This slideshow requires JavaScript.

2. Materials

  • African mahogany
  • stainless steel rod for the bridge, cotter pins cut and filed for the frets, various hardware (black oxide nuts, bolts, and washers), with fret markers hole punched from iridescent cellophane and laminated into the finish
  • strap hand stitched from seatbelt material, paracord, and upholstery thread
  • custom 3D designed, printed, and finished elements
  • standard ukulele tuners and soprano strings

3. Very fast photo montage with a sound test played on the ukulele

4. Build Process

I blogged my journey from June 5, 2022 when all I had was just a plank of wood and a dream through some updated 3D printed parts in 2023.  Fair warning – there’s … a lot.

  1. Learning Curves and Ukuleles
  2. Building a Travel Ukulele: Getting Started
  3. Building a Travel Ukulele: Cutting Stuff
  4. Building a Travel Ukulele: Cutting, Filing, Shaping
  5. Building a Travel Ukulele: Filing, sanding, filing, sanding, filing…
  6. Building a Travel Ukulele: Sanding.
  7. Building a Travel Ukulele: Test Fitting
  8. Building a Travel Ukulele: Preparation, Marking and Cutting Frets
  9. Building a Travel Ukulele: Shaping Frets, Sanding
  10. Building a Travel Ukulele: Building a Drill
  11. Building a Travel Ukulele: No Turning Back
  12. Building a Travel Ukulele: Sanding, sanding, and finishing
  13. Building a Travel Ukulele: Finishing, sanding, painting, etc
  14. Building a Travel Ukulele: So Much Experimentation, Bridges, Printing, and Sanding
  15. Building a Travel Ukulele: Plancratineering
  16. Building a Travel Ukulele: Swapping Hardware, Fret Experiments
  17. Building a Travel Ukulele: Bridge, Stringing It Up, and a Sound Test!
  18. Building a Travel Ukulele: Improvements
  19. Building a Travel Ukulele: Back to Basics

Thanks for reading!

Building a Travel Ukulele: Back to Basics

This slideshow requires JavaScript.

My experiment with a multi-piece turn around didn’t work.  The idea was for a multi-segment turn around where each string could be tightened and that portion of the turn around would be able to rotate as needed independent of the other pieces.  I simply did not account for the kinds of stresses the pieces would be under through normal use and string tension.  Each segment deformed, resulting in none of them being able to rotate and the slightly less rigid turn around bowing slightly under the pressure.  I couldn’t get a great picture of the deformed parts, but perhaps this will give some idea.

This slideshow requires JavaScript.

In the end, the best result for my ukulele has been a 3D printed turn around, finely sanded smooth, unadorned by paint, with a small amount of lubricant (I’ve used machine oil) over the metal bridge and across the turn around.  These simple elements have, hands down, beat the over engineered / over designed pieces above.  If they were printed out of a more rigid material, milled or turned from solid metal, created by using a system of washers, or made using a full length bolt, I’m sure it would have worked better.

The design of my turn around uses captive nuts in the plastic core, secured by bolts on either side.  This ends up being dramatically easier and cheaper than trying to source very long Chicago bolts and posts – but has a minor downside in that the two bolts don’t actually connect.  As long as the material between the two bolt ends is strong enough to withstand the continued forces of four strings under tension, there shouldn’t be a problem.  However, even printing the turn around with the best orientation for printing strength in PLA didn’t result in a part that could withstand these forces for a long time. 1  One of my ideas for this part involved using bolts that were possible slightly longer or of different lengths so they would both tighten slightly into the same captive nut, resulting in one “continuous” piece of metal for the turn around core, then using washers to ensure / assist in minor distance adjustments.

Here’s how it looks today:

This slideshow requires JavaScript.

I don’t plan on any more improvements for this particular ukulele.  I’ve deeply enjoyed playing it since it became “finished enough” to be playable in August of 2022.  That said, I’ve been thinking about how I would create another one.

  1. CNC Cut Wood.  I spent the vast majority of the time on this project just rough cutting the wood to size using a combination of hacksaw and coping saw blades.  I spent a ton more time shaving wood off the neck using rough files.  Starting with a piece of wood that was already the approximate dimensions and only needed finishing would feel like starting at the 90% mark.
  2. Different Wood.  I went with mahogany for a variety of reasons – but cost was one of the biggest and dumbest of these.  The difference between a plank of mahogany for $10 and the most expensive wood from Rockler at maybe $30 is a rounding error when the project took more than 100 hours of my time.  I’ve suggest that wenge, zebrawood, ironwood, or walnut would be my choice for another attempt.  Of these, I am leaning towards walnut for a deep brown, possibly gray finish.
  3. Strap Attachments.  The strap was not quite an afterthought.  I had always planned on using nylon webbing / seat belt material for the strap and had designed printed strap buttons for hooking the strap onto the ukulele, but in the end I just couldn’t bring myself to drill holes in the finished uke.  This was just as well since I had wanted to try using some paracord in a project for a while.  After using a flame to seal the ends of the paracord and webbing, the result was way too thick to use in my sewing machine and had to be hand stitched.  I’m not great at hand sewing, but it is functional.  Given the dark colors of the thread, paracord, and webbing, the haphazard stitching isn’t very noticeable.  If I really took my time with it I might be able to do a better job.  If it came to that I might want to use some silver or light gray thread to add a little pop.
  4. Acoustic Improvements.  I’ve noticed a dramatic change in the quality of the ukulele sound when I place a book, empty box, or large piece of rigid cardboard between the uke and myself while I’m playing it.  I’ve thought about how this could be incorporated into a new design by creating a system for bolting, attaching, or otherwise connecting a larger section to the ukulele.  Another incredibly interesting option is the plastic sheet used by TitchTheClown.  He used thumbtacks to secure a sheet of plastic from a soda bottle against the ukulele, then a heat gun to tighten it into something like a drum surface.
  5. Other prior improvements per a prior post.
Default Series Title
  1. I’d say it took about six months for the deformations to become noticeable []