I’ve been procrastineering on a “sticky note timer” which would incorporate an e-ink display, be portable, updatable via WiFi, show me what I should be working on, and flash lights at me to give me a sense of movement / time passing / and urgency. Sometimes I use the word “procrastineering” to refer to when I start to spiral on a project and end up in analysis paralysis. But, I think it is more appropriately used when I’m doing a deep dive on a project when I really have something much more important / urgent I should be working on.
A long time ago I added a few components to an off the shelf dollar store tap light and turned it into a game buzzer. While the sticky note timer project was marinating / incubating1 in the back of my brain, I realized that maybe I don’t need or even want something that high-tech. Maybe what I need is something dead simple? As cool as the sticky note timer project is – and it really is neat – there’s a lot of pieces to the puzzle and a fair bit of maintenance that goes along with it once its finished. You have to connect to it, upload a list, set up timers, etc.
I finally decided on something not so easily adjustable, but still flexible in it’s simplicity. Rather than making the setup (adding / updating / uploading lists to a timer) something I have to do in order to start the timer, what if I made it part of the timing?
First, let’s look at what the setup. A dollar store tap light which includes a lot of handy parts – a battery holder, a push button switch, several springs, and a simple and at attractive enclosure.
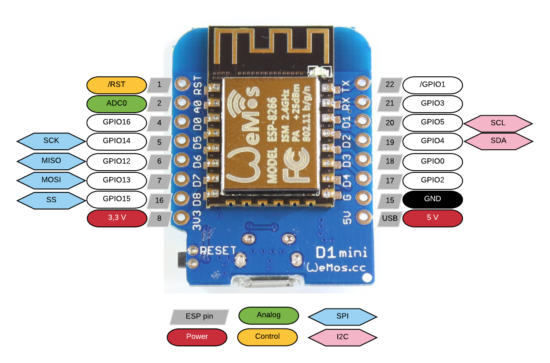
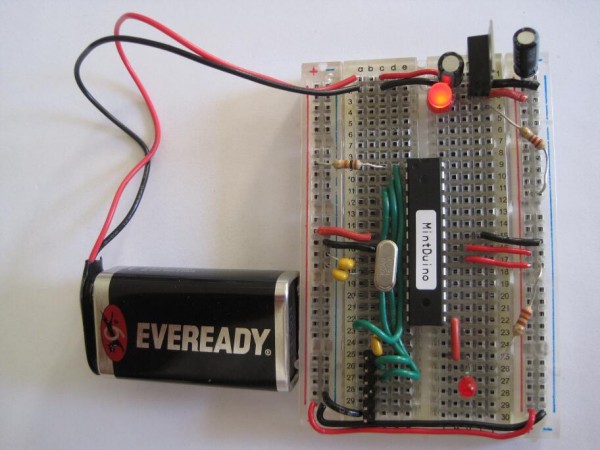
On the far left is a basic off the shelf dollar store tap light. Next to it are two others I had previously modified to work as game / timer buzzers. 2 The last picture is the wiring diagram, except that I wired the ATTiny chip to the positive wire coming from the button switch. Whenever I hit the button, it will toggle the circuit on and off.
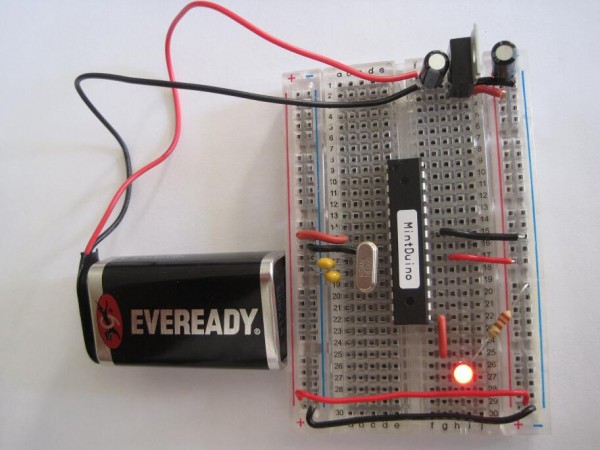
Using some parts from my electronics bin3, I cobbled together a prototype on a breadboard that would do the following when the button was hit:
- Turn orange for 1 minute and beep 3 times in the last 3 seconds
- Beep once more and turn green for 12 minutes, then fade from yellow through orange over the last 3 minutes
- Flash red and beep three times after 15 minutes had lapsed (12 minutes of green and 3 minutes of color fading)
- Turn off, go to a low power mode, and then wake up long enough to flash blue every 8 seconds
- After 5 minutes, it would flash green and beep twice
- Then keep doing this 8 second blue flash and green light plus beep every 5 minutes
You’re probably wondering – what’s with all these timers and lights and beeps? Here’s how I use them:
- Place and slap the button to get going
- I put my phone on my desk and the timer right on top of my phone. It’s a big 4″ diameter timer and covers the phone pretty well. I can’t pick up my phone without seeing this timer ticking down. This is a huge difference between a phone app and a physical thing standing between me and my phone. There are some web browser based apps – but these don’t really work for me. Either I have to keep that window open and on top or … I’ll forget it exists. This timer is right there, front and center, on my desk and lit up no matter where my desktop might take me.
- Plus, it’s actually a little therapeutic to slap the tap light. Pushbutton switches like this are built to take a bit of abuse and the physical action of hitting the light is a lot of fun.
- Orange for 1 minute
- This is the replacement for the “maintain / update a list.” Instead of having to fuss with a list, I’ve dumped myself directly into work. I’m suddenly racing the clock for 60 seconds to write all the things I want to try and accomplish in the next 15 minutes. Maybe it’s a few emails, make some phone calls, or write / edit a document. After 57 seconds, the buzzer will beep three times to let me know that the 15 minute timer is about to start.
- Or, if you already have a particular task to work on, you could use this time to follow a process like Steven Kotler’s suggestions on tactical transitions to a a flow state4. His three step process is:
- Anchor your body
- Practice box breathing.5 You could box breathe 3 times in one minute and have a few second left over to psych yourself up.
- Focus your mind
- Write down one clear goal.
- Trigger your ritual
- Recite a mantra, perform a gesture, start a “work” playlist
- Anchor your body
- Green for 15 minutes
- It’s go time! Whatever I wrote down, now I’m in a race to work on those things – and those things only. I can’t let new emails, calls, etc, distract me – that buzzer is going off in 15 minutes. As the timer closes in on 15 minutes, with just 3 minutes to go, it turns yellow and fades to orange. If I look up / down and see this, I know I’m in the home stretch and I’ve got to start moving fast to wrap things up.
- Red alert!
- Once the 15 minutes is up the light flashes red and beeps to let me know I’m off the hook. Now, if I’ve already hit peak productivity, I could keep going. If I got sidetracked, it’s an alert for me to restart the timer and get back to it.
- Blue flashes, 5 minute green flash and beeps
- These blue flashes happen once every 8 seconds6 just to keep the timer present in my vision so it doesn’t just appear into the mess on my desk.
- If I finished out the 15 minute block of work time and I don’t stop the timer, the 5 minute timer is my reminder to return to my desk, reset the timer, and get going again.
- If I ended up working past my 15 minute block of work time, the 5 minute beeps still give me a sense of how much time has passed.7
- Importantly – if I get distracted by a sidequest, one of the beeps every 5 minutes is bound to catch my attention and remind me I’m supposed to restart the timer and get back to work.
So… does it work? For me, yes! Here’s why:
- The hardest part of getting started is getting started. My tendency is to want to collect all the stuff I’d need, get real comfy, make a list, look up some documents, etc. This system short circuits all that. I just need to be able to slap the big button sitting on top of my phone. If I can manage that, I get 60 seconds to collect myself and then it’s time to rock and roll. That’s enough time to take some deep breaths, start a playlist, or just sit quietly before I get started.
- It covers up my biggest distraction. Unlike an app on the phone or my desktop computer, I can literally cover up my phone with this big damn button. I won’t see any notifications and if I want to pick up my phone, I have to actually look at and ouch the button – which is itself a reminder to get back to work.
- It plays into a sense of play, urgency, and my own overdeveloped sense of competitiveness. I enjoy hitting the timer to turn it on – and I want to beat that 15 minute timer.
- The 5 minute timer acts like a built in break timer. If I can get through 15 minutes of work, I can goof off, write a blog post, and without doing anything else that 5 minute timer can bring me back.
- It includes a “failsafe” to bring me back to the timer if I get distracted by a sidequest. If I miss the 15 minute timer, there’s another 5 minute timer around the corner. Even between timers, there’s an intermittent flash of blue light to grab my attention.
The only meaningful “downside” to this timer button for me is there’s no pause button. However, this isn’t exactly bad. It helps me really hone in on what’s important and what’s interesting. If a family member asks me for something or a call comes in, I just need to weigh the benefit of addressing the intrusion against having to restart the timer. And realistically, if I pause the timer, I’m going to need some time to drop back into “flow” anyhow.
Sticky Note Timer- Ah, just what I need! A new project!
- Sticky Note Timer, parts arrived!
- Seeed Studio XIAO ESP32C3 and a small sticky note display
- Brainstorming More E-Ink Stuff
- Smol Fonts for E-Ink Displays
- Tap Light Focus Timer System
- Fermenting? Festering? [↩]
- The older ones would flash orange a few times to alert you the game was going to start, turn green, fade from yellow to red, then flash red and buzz after 15 seconds. [↩]
- I used an ATTiny45 because I had one, but it’s not much more expensive to use an Adafruit Trinket, a buzzer, a RGB/neopixel LED, and some wire. In a subsequent version, I also used a small prototyping board like the Adafruit Perma Proto Boards [↩]
- It’s the second slide [↩]
- TLDR: Breathe in slowly through the nose for 4 seconds, hold for 4 seconds, breathe out slowly through the mouth for 4 seconds, hold for 4 seconds, repeat [↩]
- Because that’s the longest the little microchip can do between “deep sleep” to conserve battery life [↩]
- I may adjust the program so the first five minutes is 1 beep, second five minutes is two beeps, etc [↩]