I just had OpenSCAD die on me. It’s probably my fault for running a version from 2024 – but it’s been super stable and … why mess with a thing that works? Fortunately, OpenSCAD replied to my toot saying “@makerblock Check the “Backup Path” folder, e.g. on Linux that is at $HOME/.local/share/OpenSCAD/backups/”
However, having a program crash isn’t always that bad. Yes, it’s a hassle. But, I often find that the new version ends up being built / recreated in a fraction of the time and and more streamlined. In this case, I was working on a revision of my stamp eraser carving grips. The code for new version ended up cleaner and the final model was better looking as well.
The first attempt took a really long time and turned out terribly. After a few days break, and some mental distance from the project, I returned with some new ideas and inspiration.
Here was my new approach and plan:
The Stamp
Go Slow. Proceeding slowly and methodically is always a good idea with sharp instruments. I went fairly slowly the first time, but this time I would be even more methodical.
Cutting. Rather than using the carving blades for the QR code features, I switched to using a craft knife. It was just too hard to cut precise lines with a V or U shaped blade, managing not just the direction and speed of the cut – but the depth as well – for both sides of the blade. The craft blade let me focus on just one side at a time. I used the blade to cut at about a 45 degree angle along one side, then other side.
Don’t Cut Too Much. I used calipers to measure the pixels cut into my first attempt as well as the stamped result. I discovered \the stamp pixels were very slightly larger than their rubber counterparts. This tells me it would be better to cut too little rubber – and cut more later if necessary.
Removing Scraps. Rather than sticking my big old fingers into the eraser or trying to pop it out with the blade, I used a pair of 3D printed tweezers to pluck them out.
The QR Code
Optimize the QR Code. There are several ways to optimize a QR code for eraser / stamp carving. 1. I used as many of these methods as I could:
“Pixel” Size.
As you add more information into a QR code, the QR code generator will need to use more black and white units2 to encode the information. After some tinkering it seems like the smallest QR code that can be generated is 441 total pixels, 21 wide by 21 tall. The absolute largest QR code I could generate looks like one of those “magic eye” posters. I didn’t even try to count how many pixels wide this thing was. It’s 9,216 pixels, 96 wide by 96 tall.
This slideshow requires JavaScript.
I was having a hard time carving a stamp 21 pixels wide into a 24.5 mm3 wide eraser, so the idea of carving more than 21 lines into an eraser by hand seemed not feasible. The very next step up from the 21×21 grid would be a 25×25 grid, so I knew I had to find a way to limit the data, find the best error correction, and find a way to cut these small pixels and thin features.
Proper Error Correction.
QR Codes have built in “error correction” that allows the user’s scanning device to scan information from a partially formed, damaged, or obscured code. These settings range from L (low), M (medium), Q (quality), and H (high quality) able to error correct from up to 7%, 15%, 25%, and 30% damage respectively. Lowering the error correction allows you to create a smaller QR Code, but it will also be less robust.
I fiddled with these settings a lot to find the maximum amount of data I could put into a QR code while still retaining a maximum size of 21×21 pixels. I was able to encode about 16 characters in a L, 13 characters in a M, 10 characters in a Q, 6 characters in a H. The code stores numeral easier and requires more pixels to store letters and special characters.
My first attempt used an error correction level of L, but was basically unusable as there must have been more than 7% distortion. This time, I decided to try for a very high level of error correction with the Q setting for 25%.
Reducing Data. This is where I used some tricks you may, or may not, be able to replicate.
URL Shortener. A TinyURL link to my Instagram page requires 29 characters. Looking above, this would immediately suggest a 21×21 pixel QR code would not be possible.
Trimming a Link. After some fiddling, I realized that as long as the data encoded looked like a URL (as in some characters separated by a “.”), the QR code scanner would interpret it as a link. This means we can skip the “http://” and “https://”, saving 7-8 characters! Unfortunately, this still doesn’t let me encode the shortest URL that TinyURL could give me which requires 20 characters after discarding the “http” stuff.
Maybe Just a Domain? Maybe you just wanted to point someone to your website and not a big long link, shortened with a URL shortener. Let’s work the numbers backwards. Most commonly used domains end with “.com”, “.org”, “.biz” – with 4 characters each. Using the information above, this means we could use a domain name with up to 12 characters for an L encoded QR code, 9 for an M, 6 for a Q, and just 2 for an H. While it would be easy to find a 12 character domain, you’re stuck with only a 7% margin for your error correction. A domain with 6 to 9 characters for Q and M would allow for 25% and 15% error correction. You can still find 6 character “.com” domain, but… they’re unlikely to be very memorable. This isn’t necessarily a problem. You might be able to find a good short domain with an unmemorable name, but forwards the user to your real website. The problem, of course, is that no one is going to want to click on that link.
How About a custom URL Shortener? It’s still possible to purchase a short URL, but they’re pricey. I happened to buy a good one several years ago and have hung on tightly to it. I slapped a YOURLS install on it, and have been using it ever since. Using my own URL shortener means I can keep the URL down to just 9 characters – including the TLD!
Okay, back to carving. I grabbed my headphones, put on some music, and took it very slowly – a little under two hours. Here’s some progress photos:
This slideshow requires JavaScript.
Here’s how it looked (with some additional shots to show the original design overlaid):
This slideshow requires JavaScript.
I stamped this design 9 times – and all 9 were more or less easily scannable. The neat thing about this design is that it points to a URL shortener I own, so not only is it about as tiny as possible, but I can change the destination if I ever needed – without having to spend two hours recarving an eraser stamp!
I thought it would be neat to try cutting a QR code stamp. (Skip to the end to see the one time I was able to get the stamp to work)
Getting the pattern ready for carving
The obvious problem is this would require an incredibly detailed and precise approach to carving. To get the smallest QR code that can still contain a URL, it would be limited to 16 characters, the lowest error correction (7%) rate, and would still have 21×21 pixels (441 total). After a little testing, I realized the code needs a little white space around the QR code to read properly. This means 23×23 pixels all carved into a less than 1″ square area. I know from the design of the eraser carving station that the eraser is 24.5 mm wide… so each pixel is roughly 1mm square.
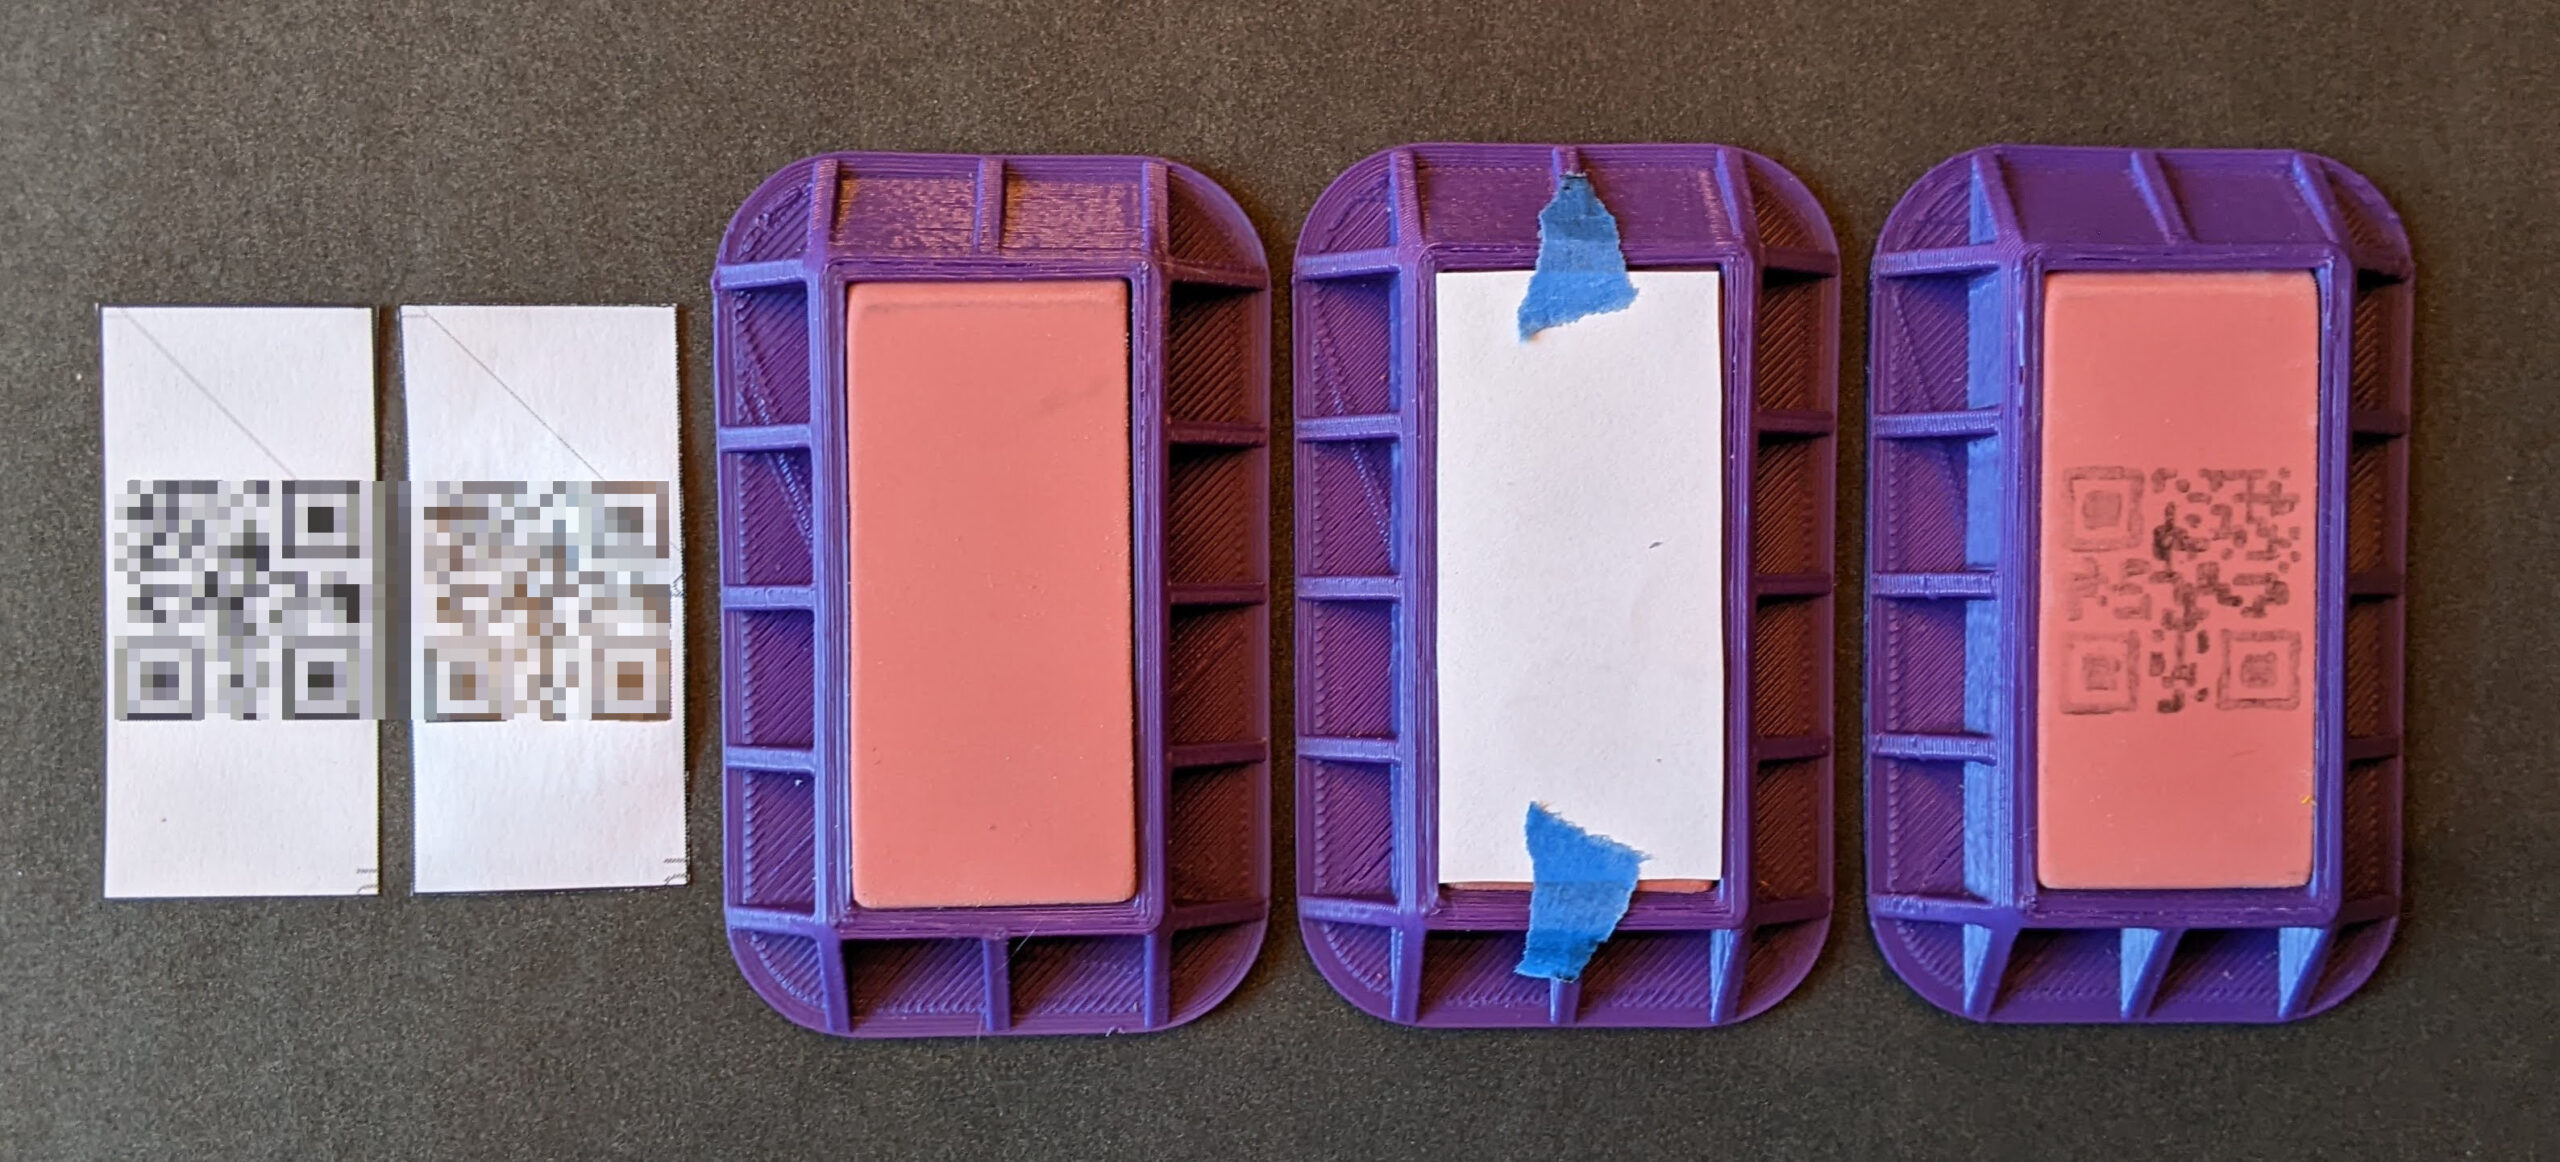
I tried several things that definitely did not work well:
Printing the design in one of my templates, trimmed, colored in with a pencil, taped in place, then rubbed onto the eraser to transfer the design.
This didn’t really work very well since the pencil trace to rubbing process introduces a lot of error. I tested this by trying to scan the reversed drawing on the eraser. Didn’t work at all.
The 1mm wide pixels would have been a nightmare to cut with even the smallest carving blade, so I switched to my craft blade. The blade is so sharp and incisions so thin, that many times it was difficult to see where or whether I had made a cut. Once I switched from a vertical cut to a 45 degree angle, it seemed to get a little bit easier and cleaner.
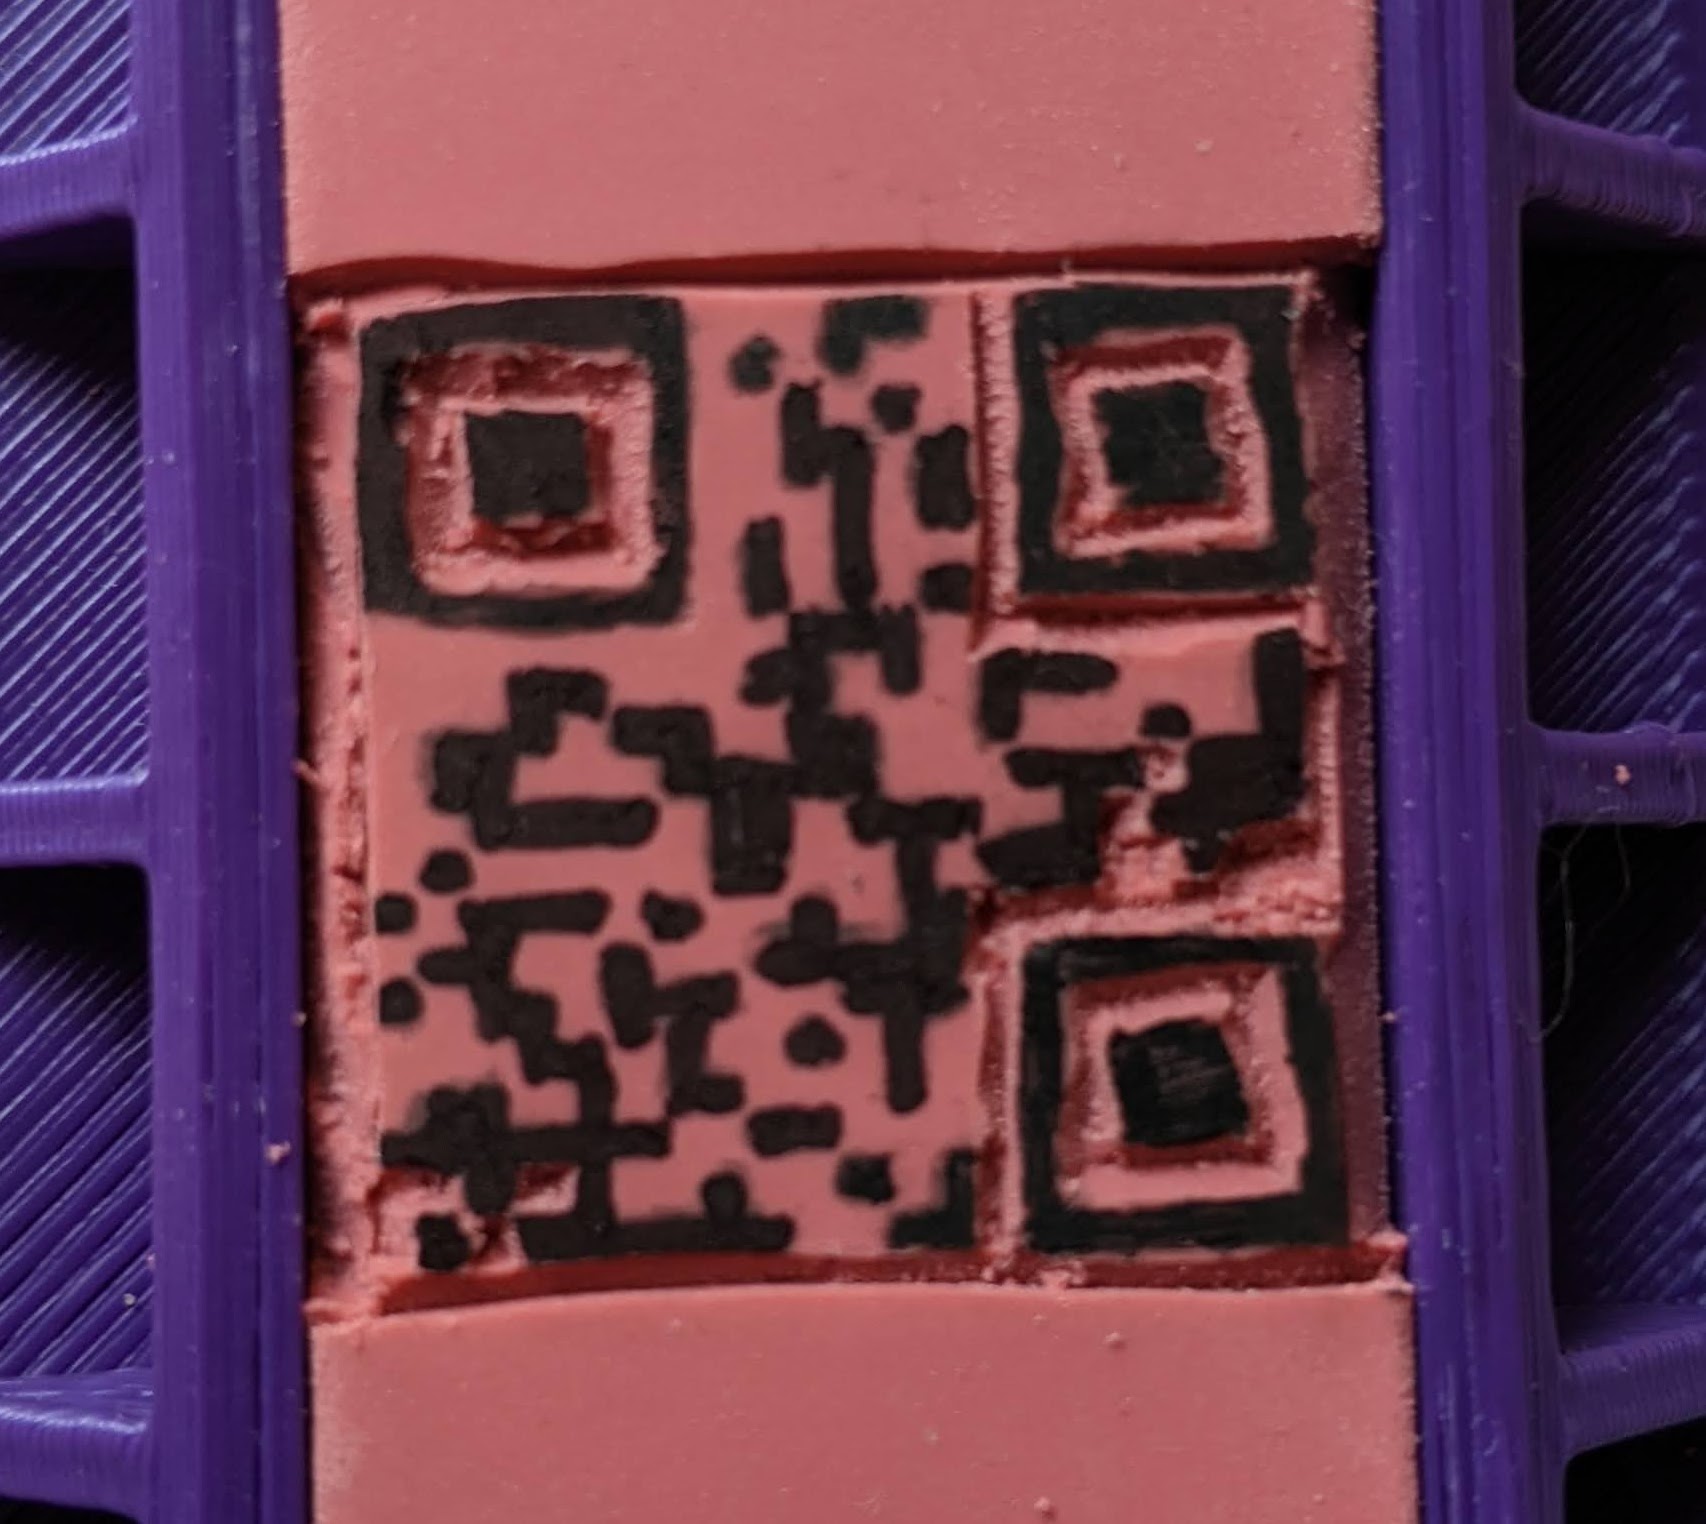
After I was about a quarter done I tried using a fine tip sharpie to color in the pixels. After a lot of hassle, I could get this to scan, so I kept going.
The darkened pattern was still a bit messy and my cutting wasn’t significantly better.
I flipped the eraser over and tried a new tactic. I taped a template to the eraser and tried to cut the design through the paper. This didn’t work well because when I cut very small pixels out of the design, the paper quickly lost cohesion and then became useless.
Finally I pulled up a large picture of the QR code on my laptop and tried to keep to the design as best I could. It wasn’t pretty – but I was done.
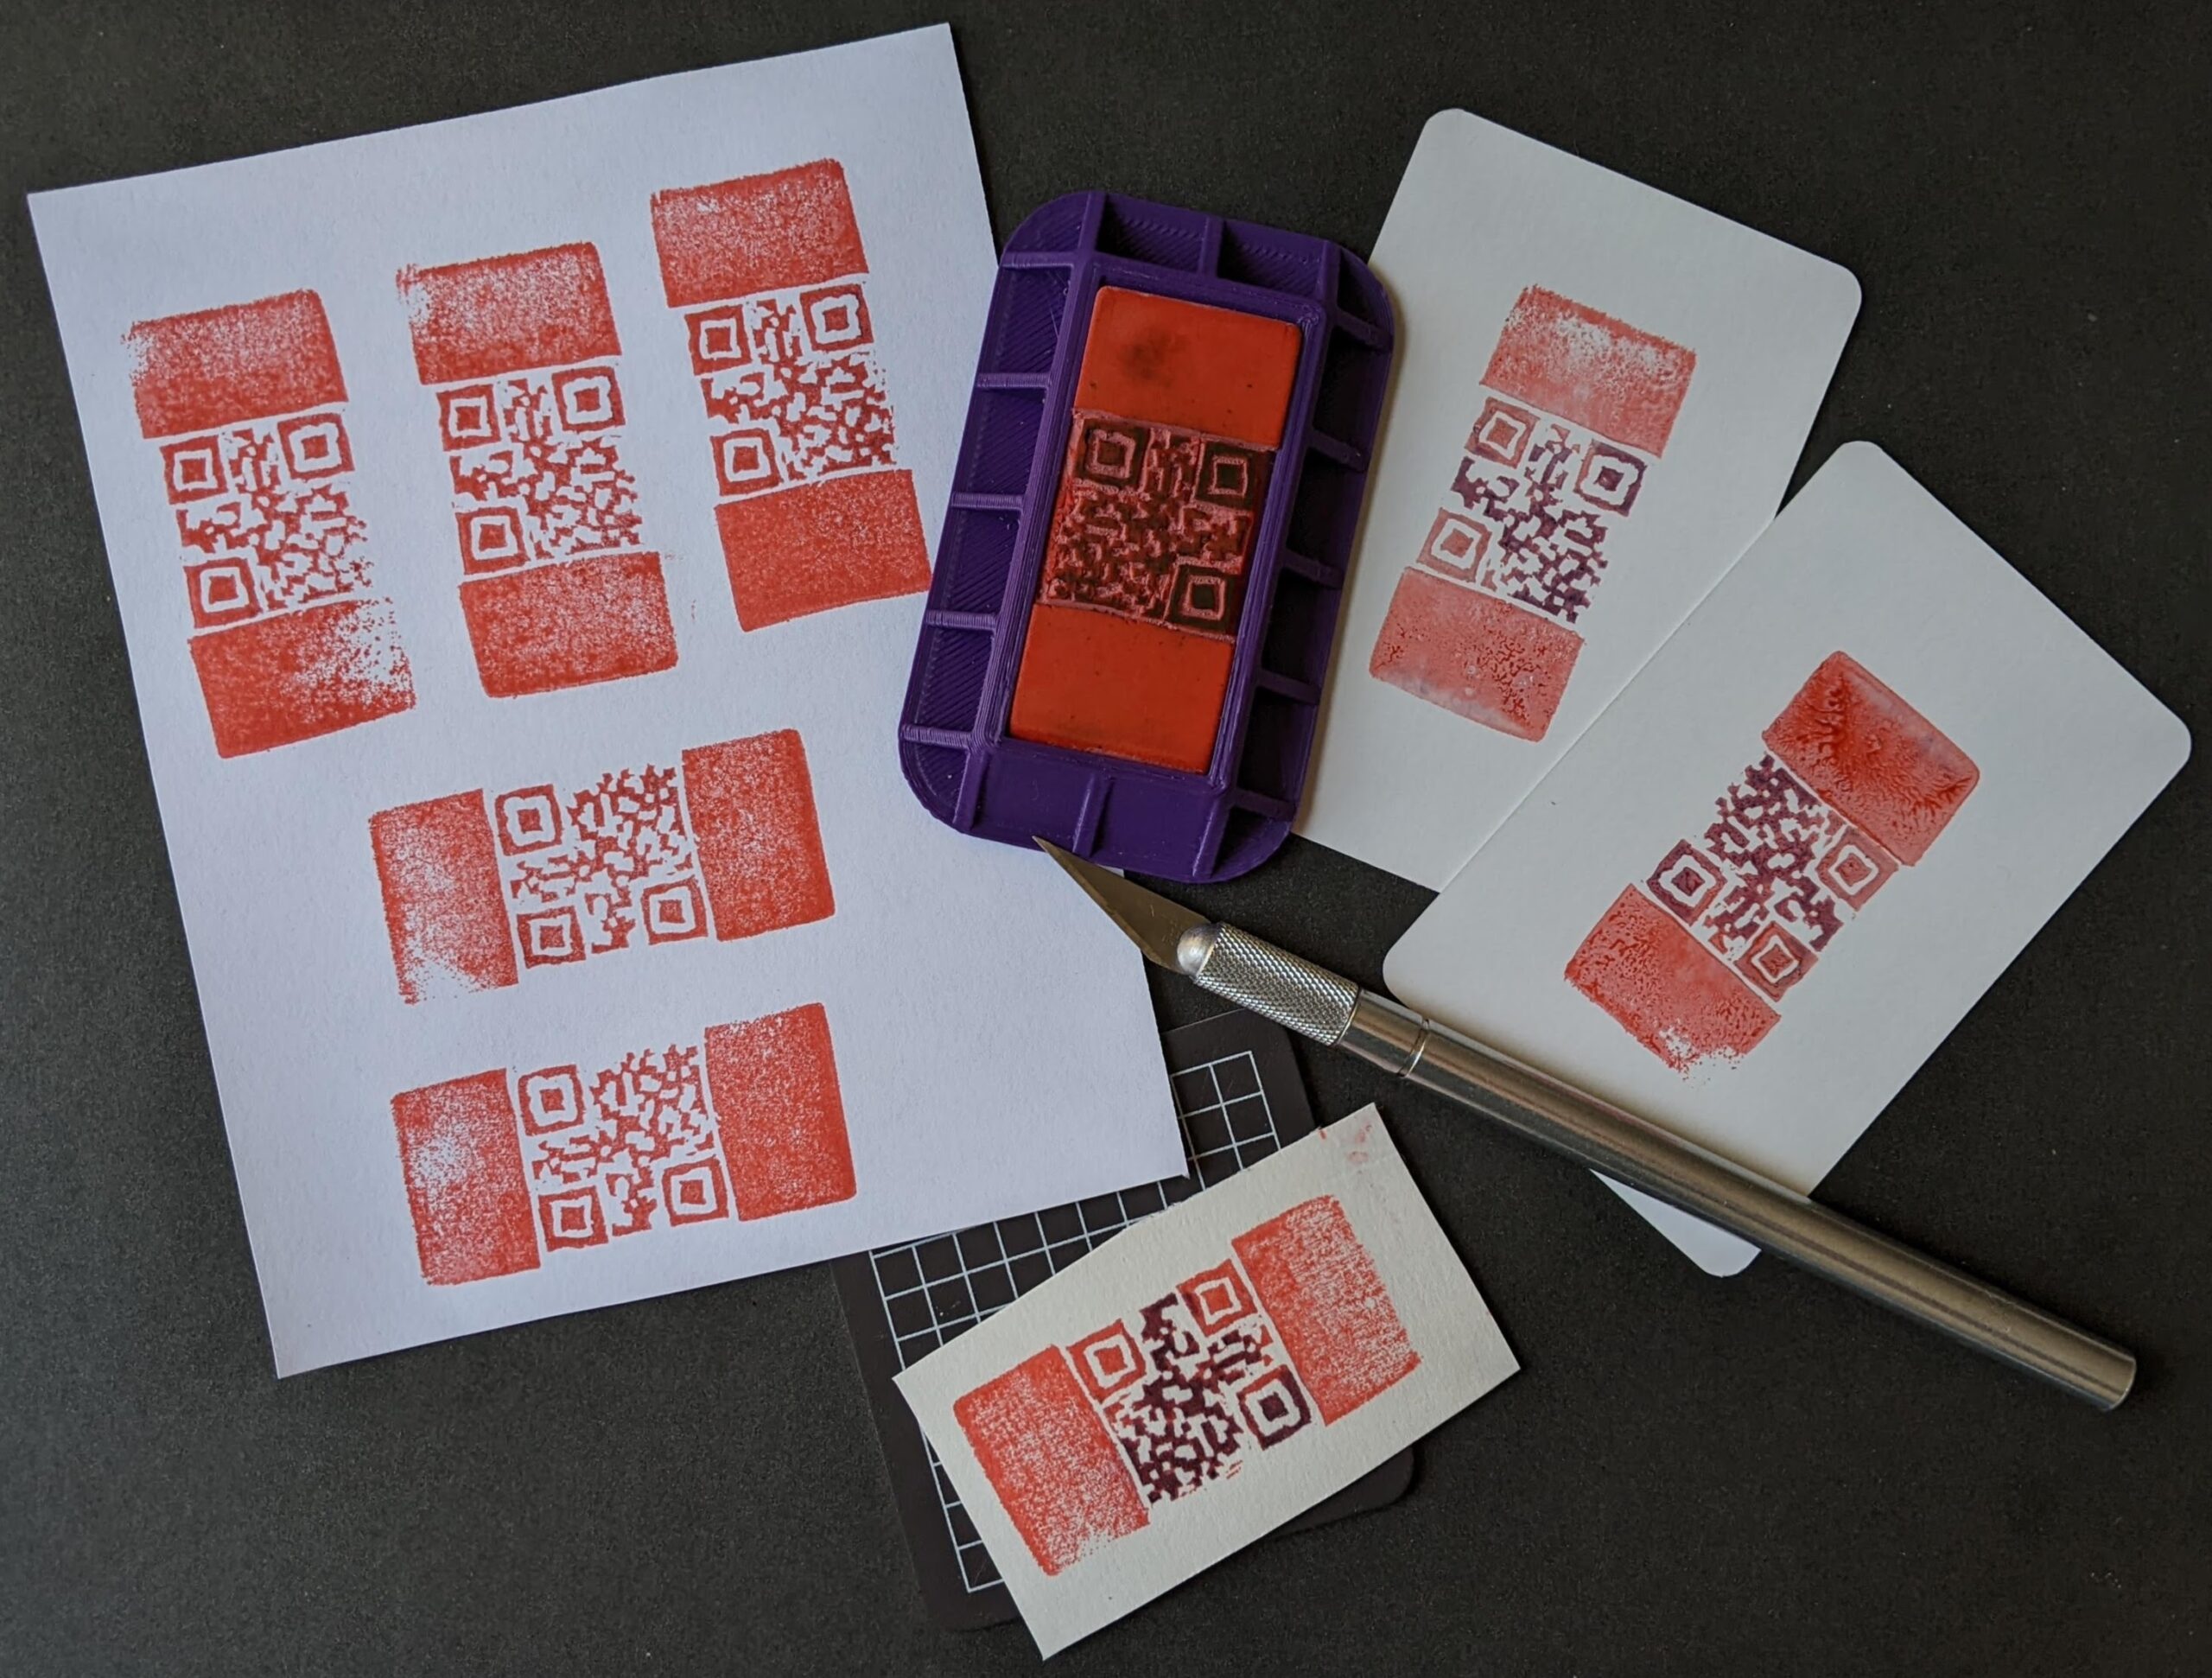
The results were less than stellar. The leftover ink from the sharpie discolored the inkpad a little and got transferred onto the first few stamp impressions. Out of a dozen different impressions, only one could be scanned by my phone.
Darkened with a sharpie, partially carved
If I tried this again (and, let’s be honest, I probably will) I would use the template / pencil transfer method just to place “landmarks” and then refer back to the large display on the laptop.
Stamp, stamp, stamp
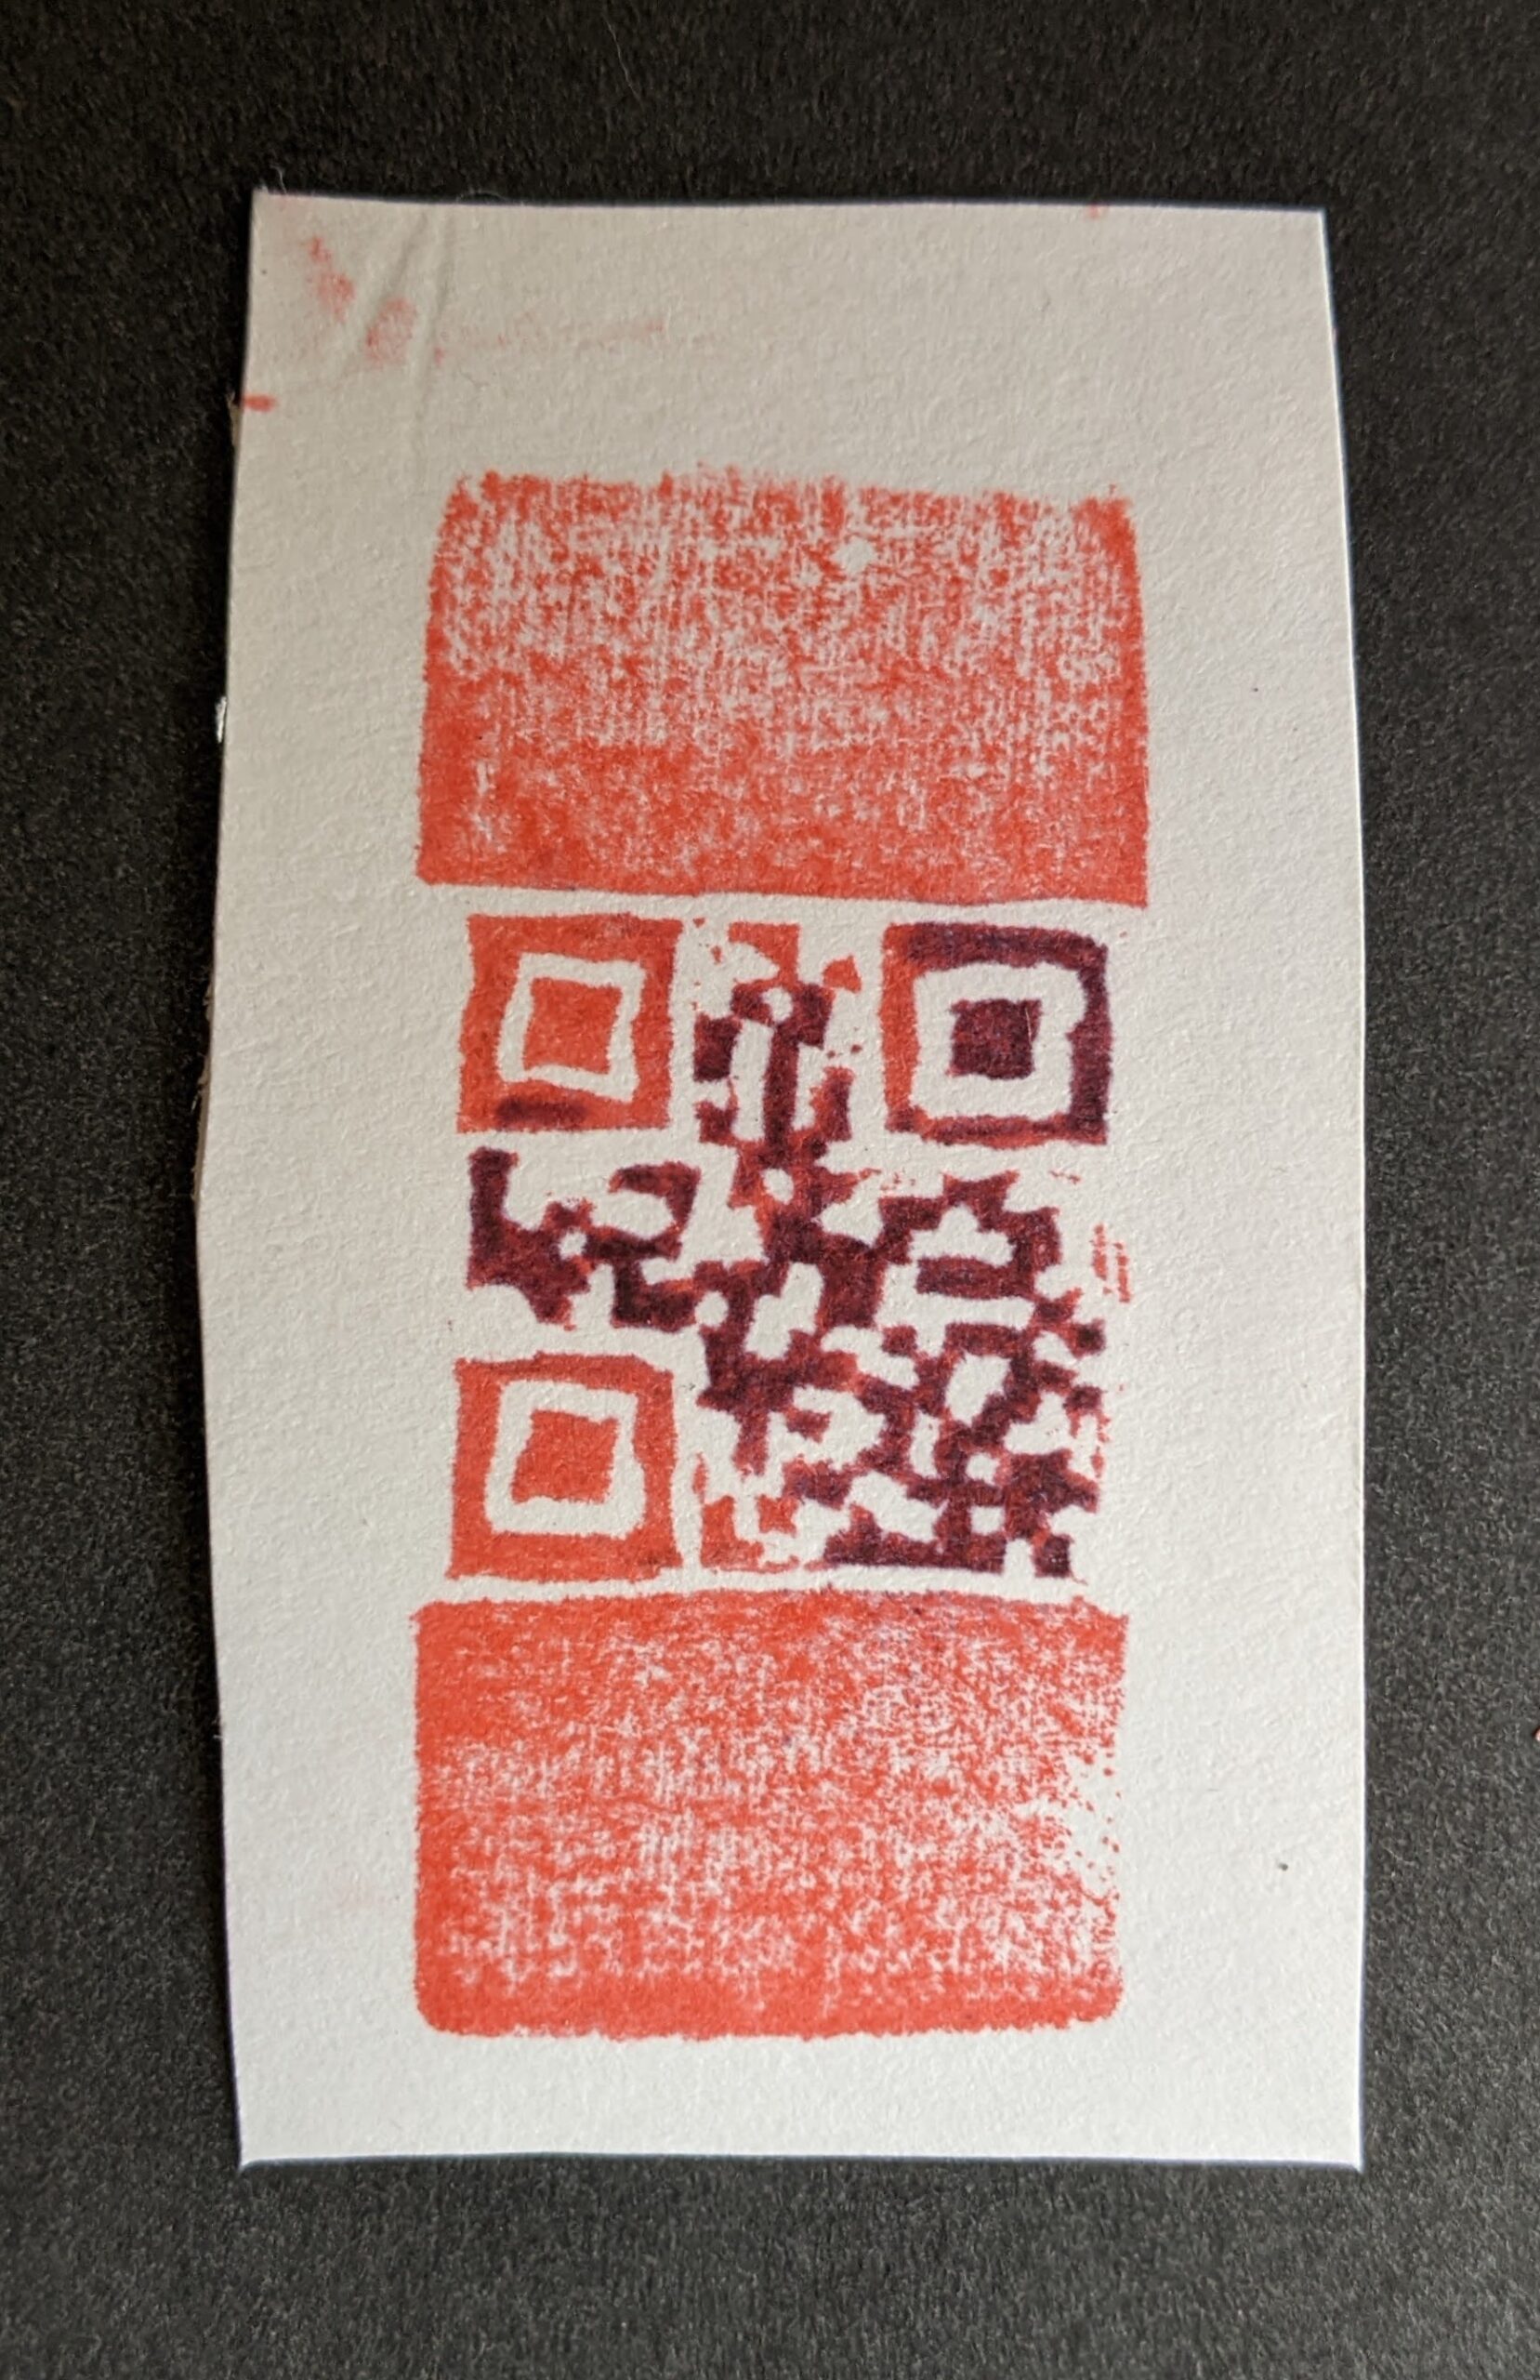
Lastly, I was able to get just one impression that could be scanned:
One single scannable stamp impression
The reason the bit of paper is a little oddly shaped is that I had stamped onto a piece of scrap cardstock. I’d stamped on other pieces of paper, cards, and even on that same piece of cardstock. This was the one time it worked.
I recently stumbled across the world of fantastically charming mini prints and carved erasers by Serena Rios McRae aka Cactus Clouds Art. This short Instagram post provides an excellent overview of her process.
These looked like so much fun, I bought a pile of cheap pink erasers off Amazon, repurposed an old set of stamp carvers we had lying around (I had done some linoleum block printing back in high school and my wife had a small stamp making kit from years before), and gave it a shot. The kids had a great time with this while I fretted about whether they were going to jab their fingers and how many bandaids I’d have to have handy.
After their first stamp, I hacked together a 3D printed holder. Despite measuring the erasers carefully, it was too long and really, too big for what it needed to be. Here you can see version 01 taped to a piece of mahogany wood left over from my ukulele project.
This slideshow requires JavaScript.
There were several problems with this first attempt. The holder was a little too long, so the eraser would shift back and forth. It was also much bigger than necessary. I designed it with those large fins on the side to make it easy to tape down, but it really wasn’t necessary and just made rotating the eraser holder a little more unwieldy. While my kids were carving things using this holder, I went to work printing a few accessories.
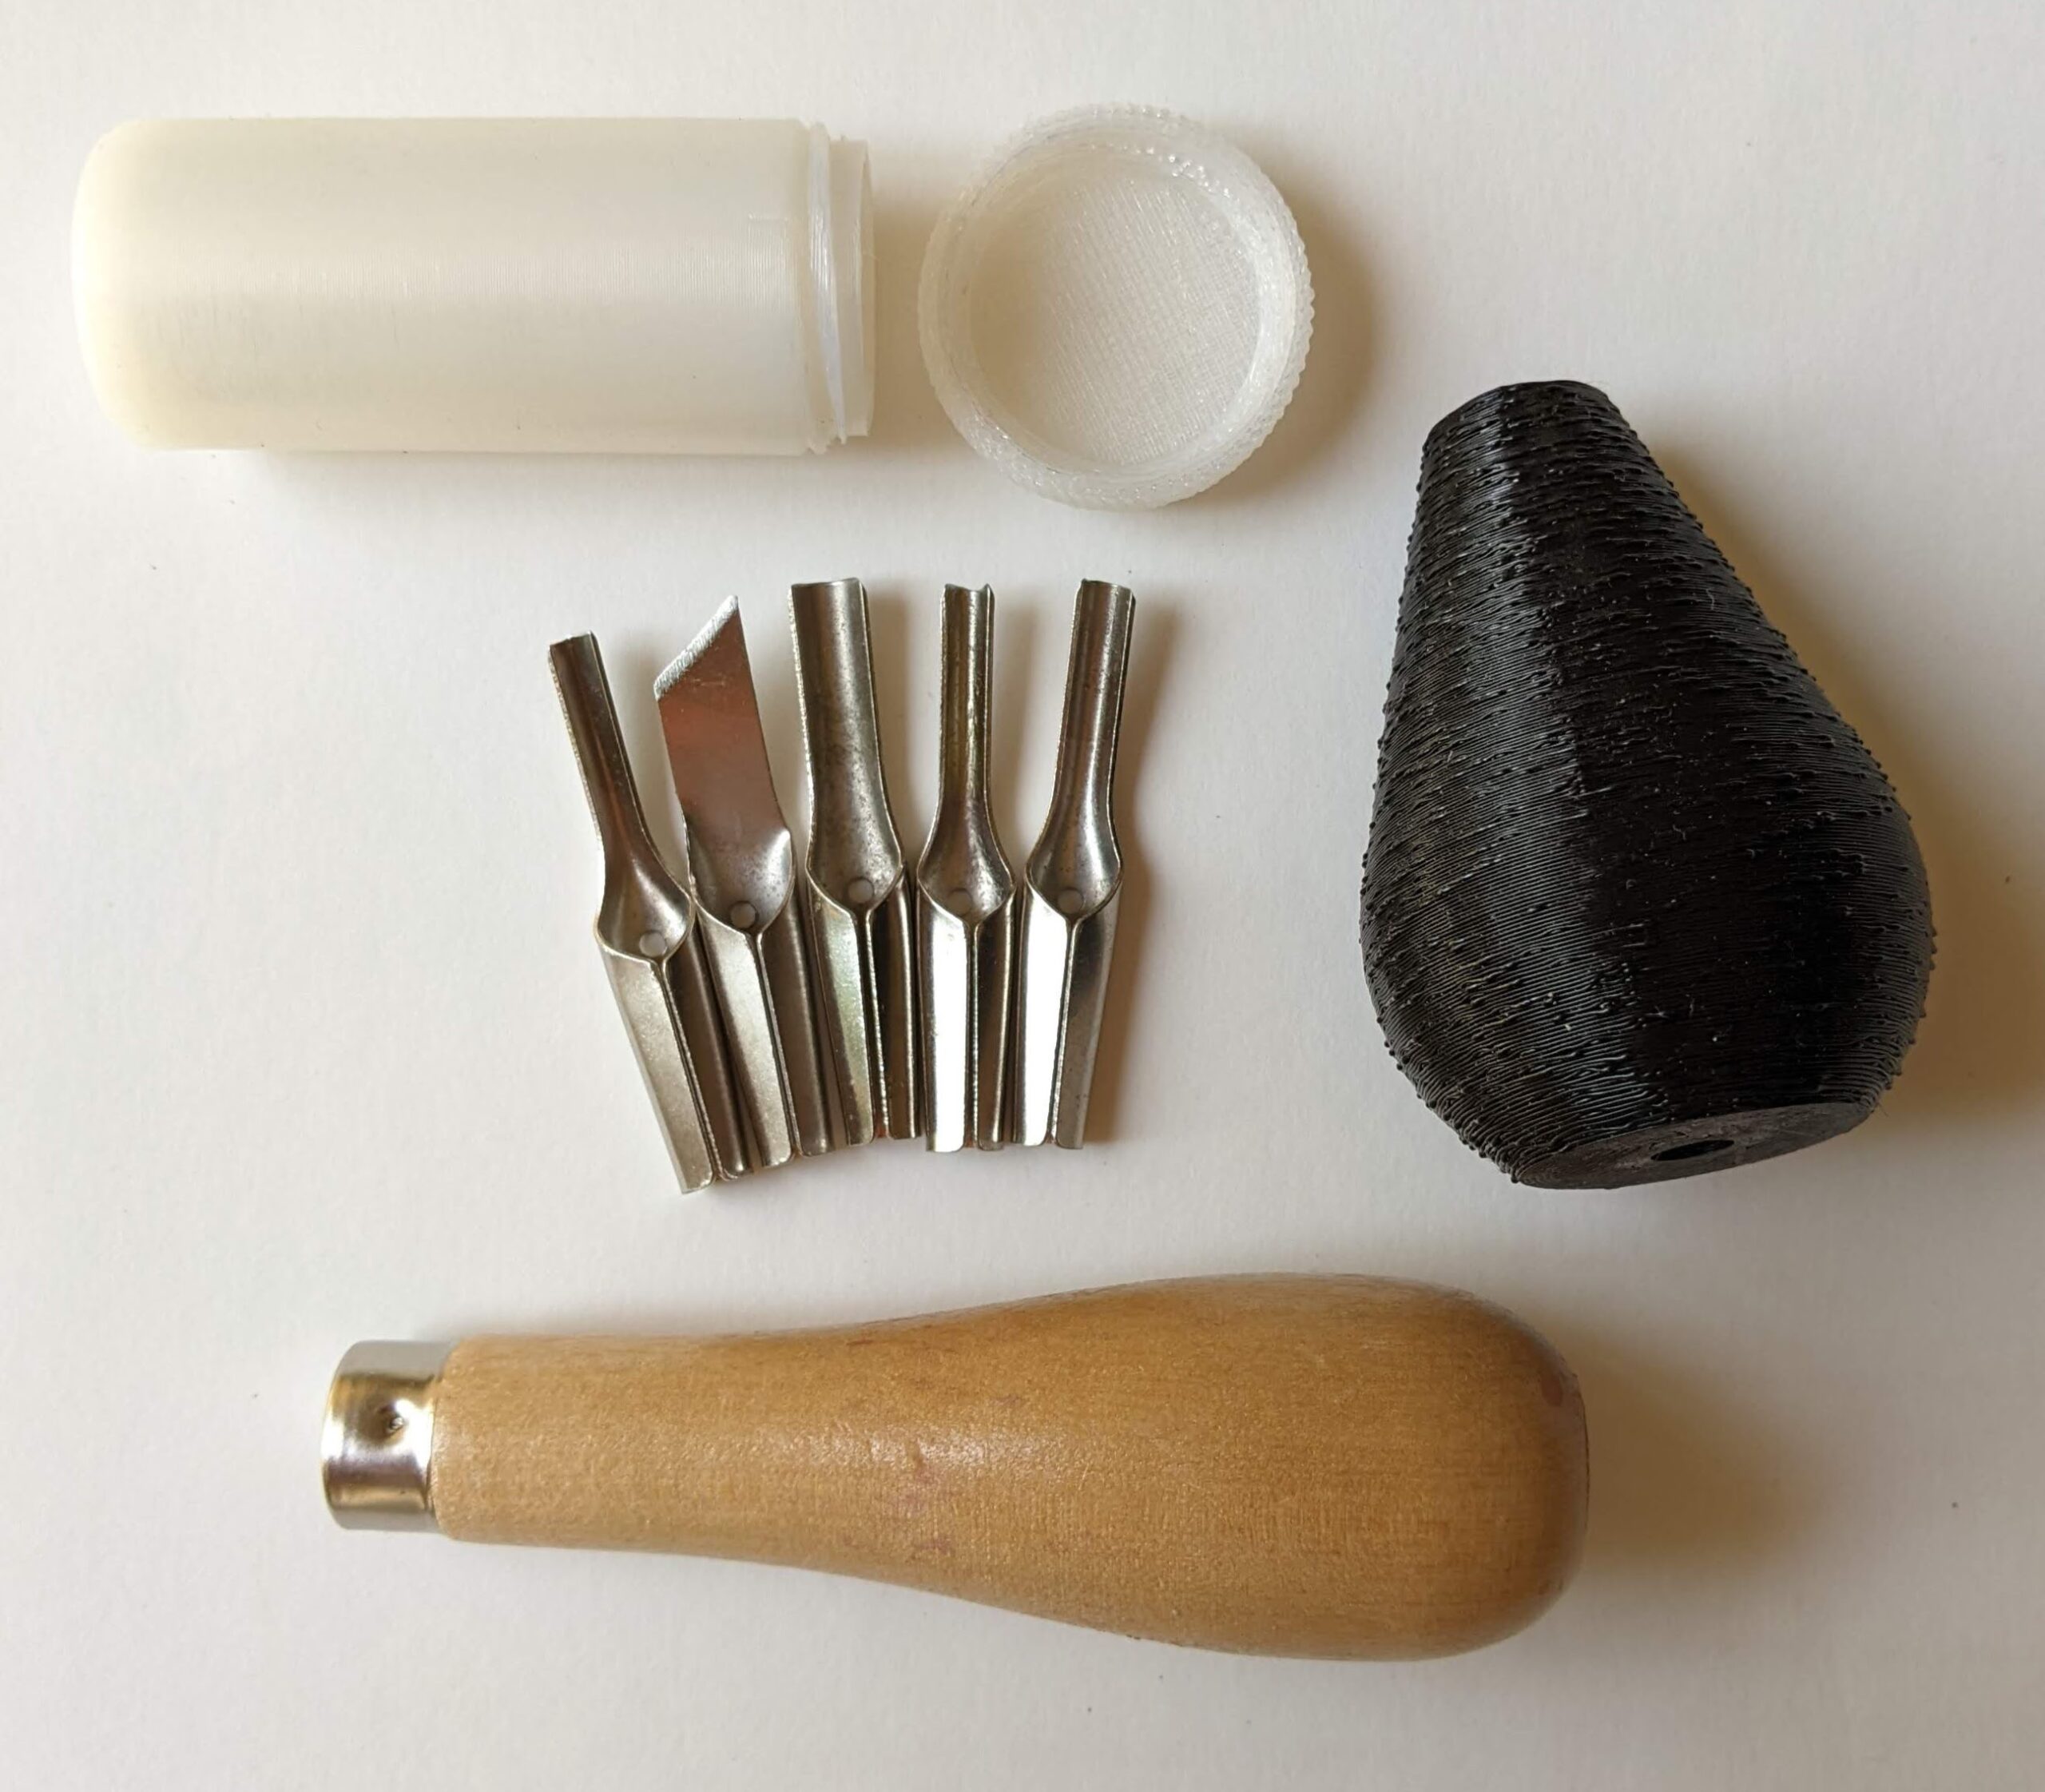
3D printed screw top blade container, extra blade handle
The blades came in a little plastic baggie, so I printed a bespoke screw top container for them so they can be stored securely. I also printed another blade handle so that two people could carve stamps at the same time – one using the original wooden holder and the other using the printed holder.
The next version was more compact and had dimples on the edges which I hoped would make it easier to hold. I also added some little ridges inside so the eraser wouldn’t fall through. Here they are:
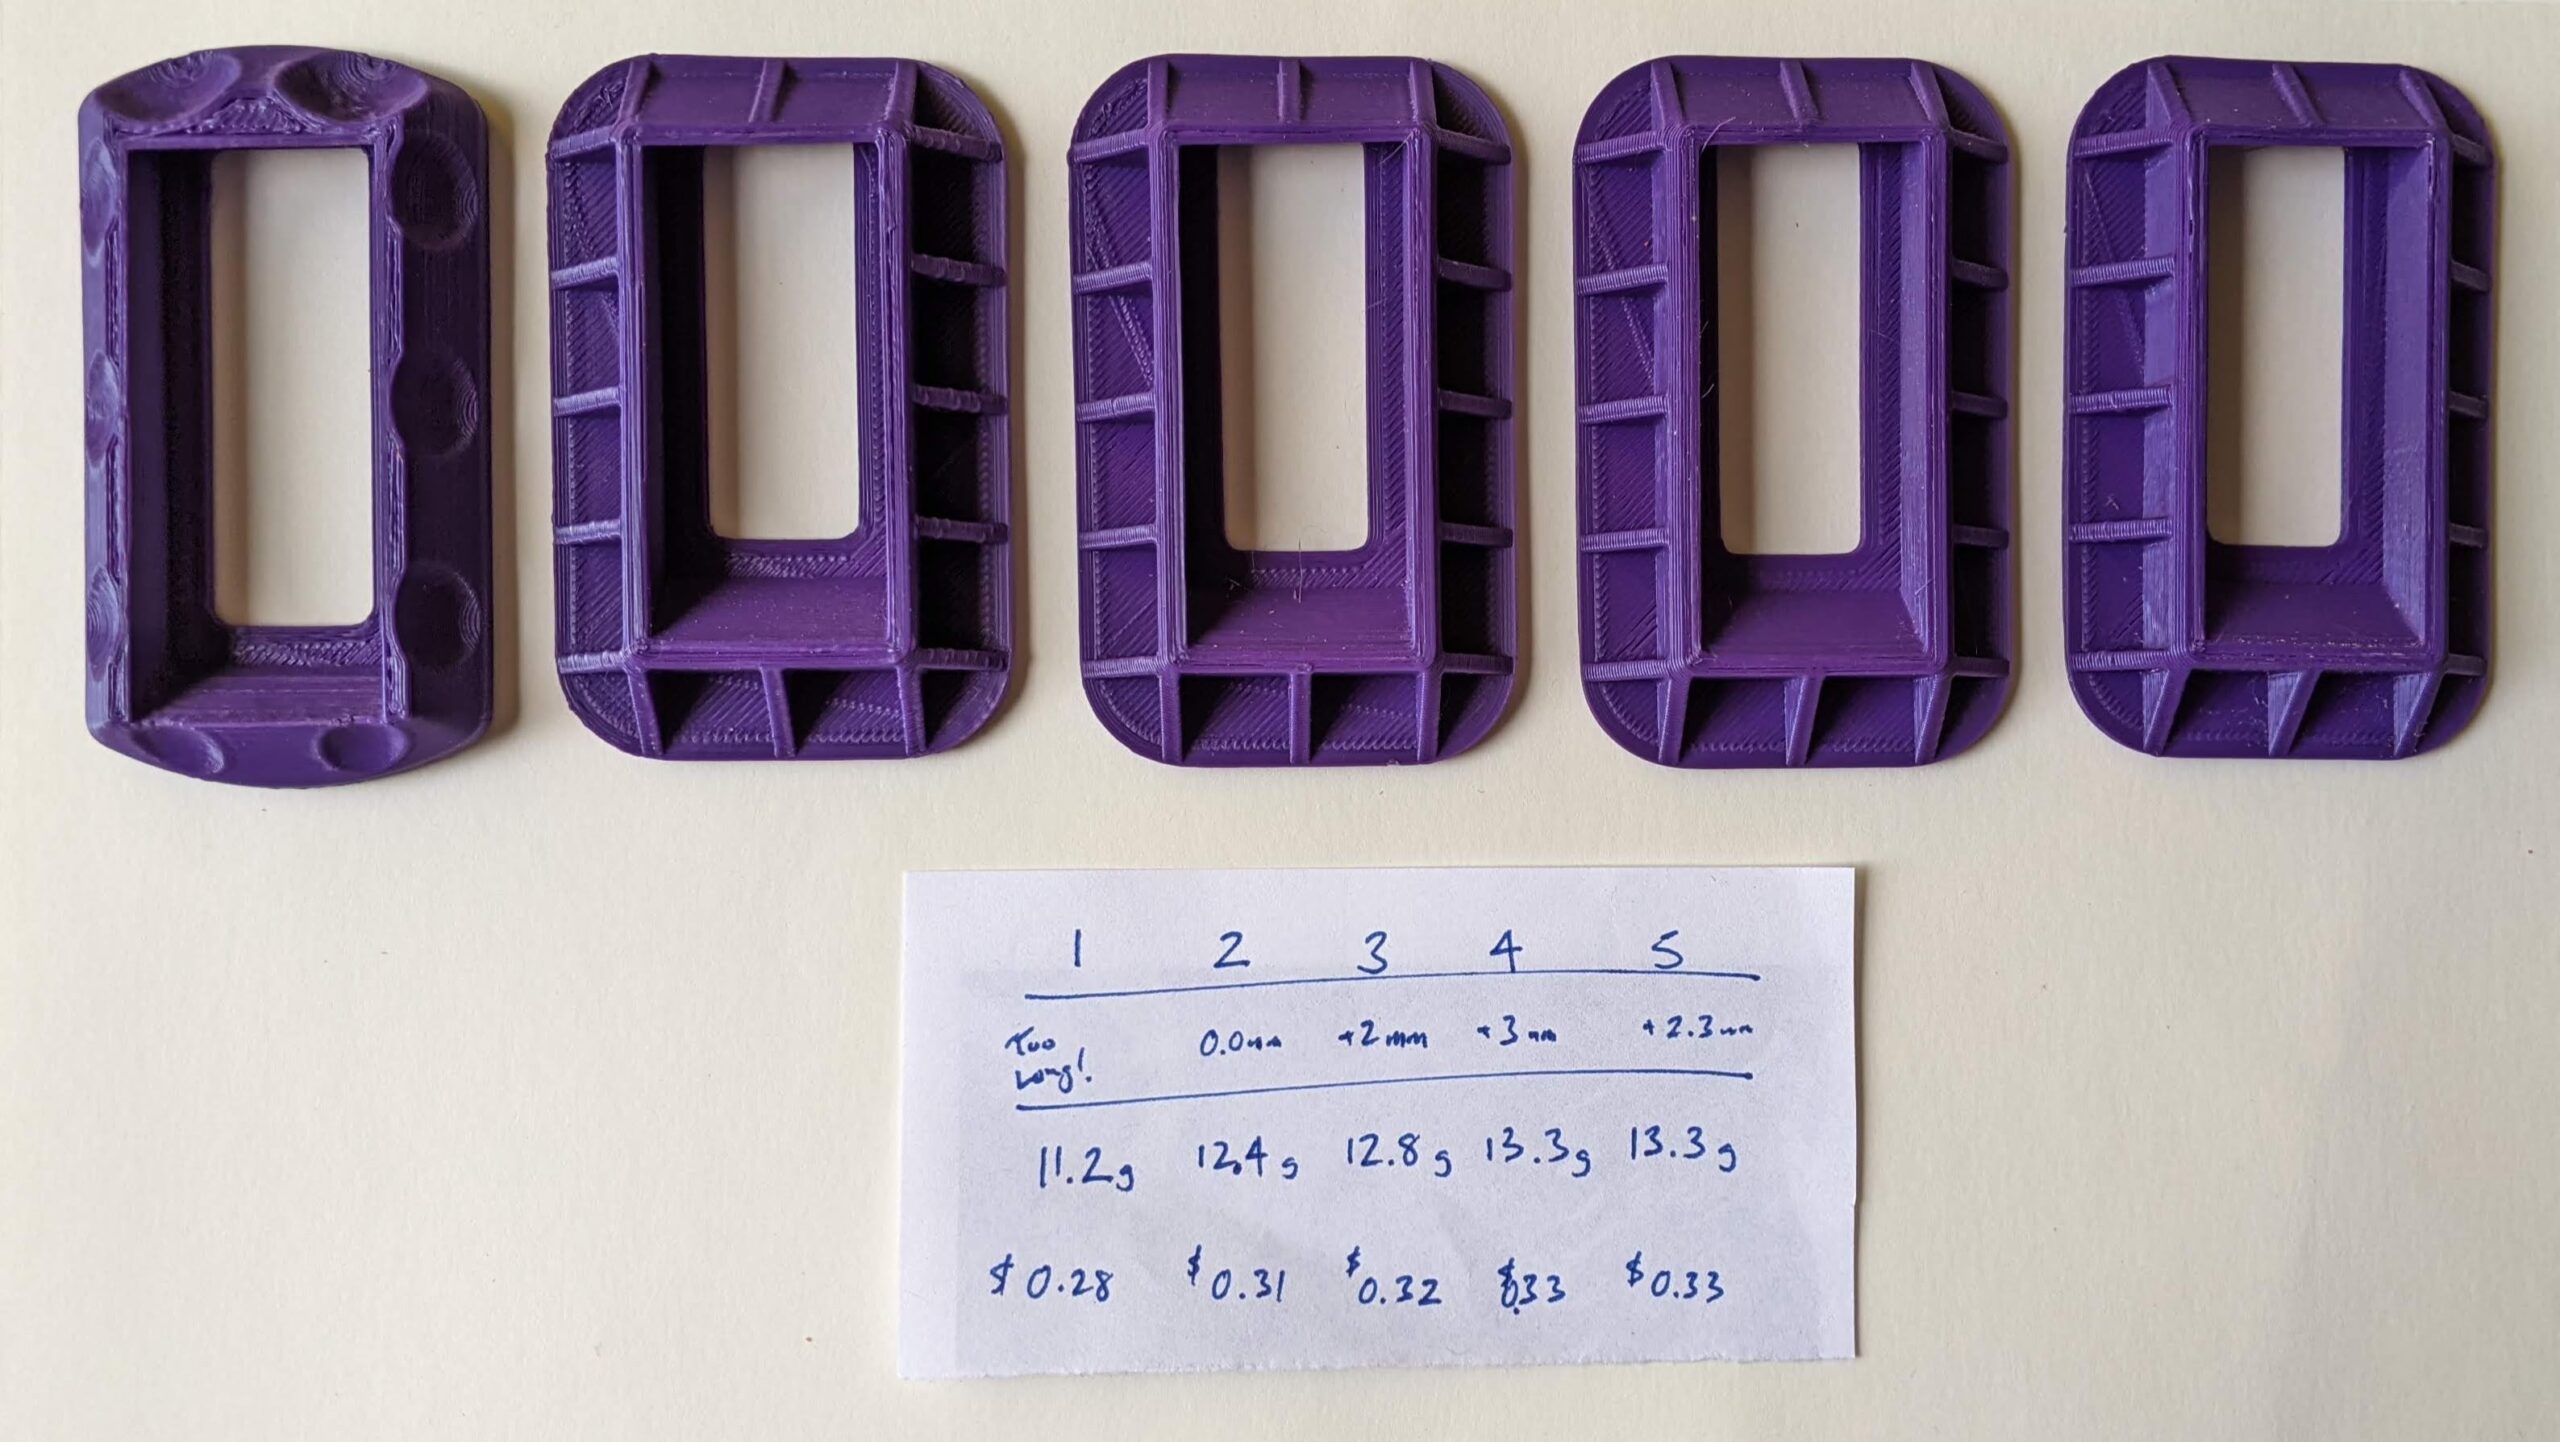
Eraser holders for carving, versions 1, 2, 3, 4, and 5
The dimples didn’t work. They weren’t deep enough and my hand couldn’t really grip it very well to keep it from moving while I was carving. The area for the eraser was a little too long. Versions 2-5 involved tuning the length just right. Each one takes about an hour to print and used about $0.30 of plastic. The final result fit the erasers like a glove. They nestle in the holder perfectly and are easy to poke out using the little hole. Admittedly, they might only fit the specific cheap erasers I found.
Here’s my process:
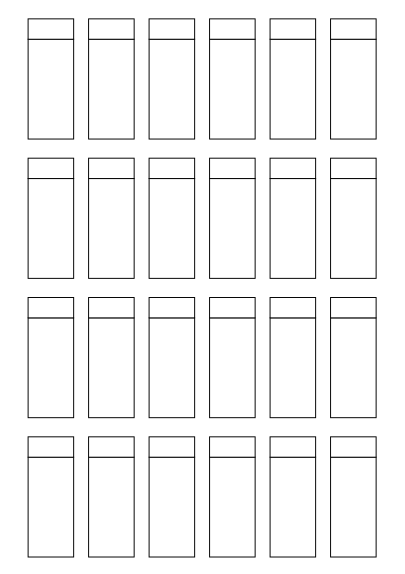
I created a page of eraser templates, which match the length and width of the large and small edges. Of course, the long section matches the long side of the eraser – but the shorter section only matches the short side of the eraser if you tip it over.
Eraser templates
I got to use several iterations of the eraser holder for this next section:
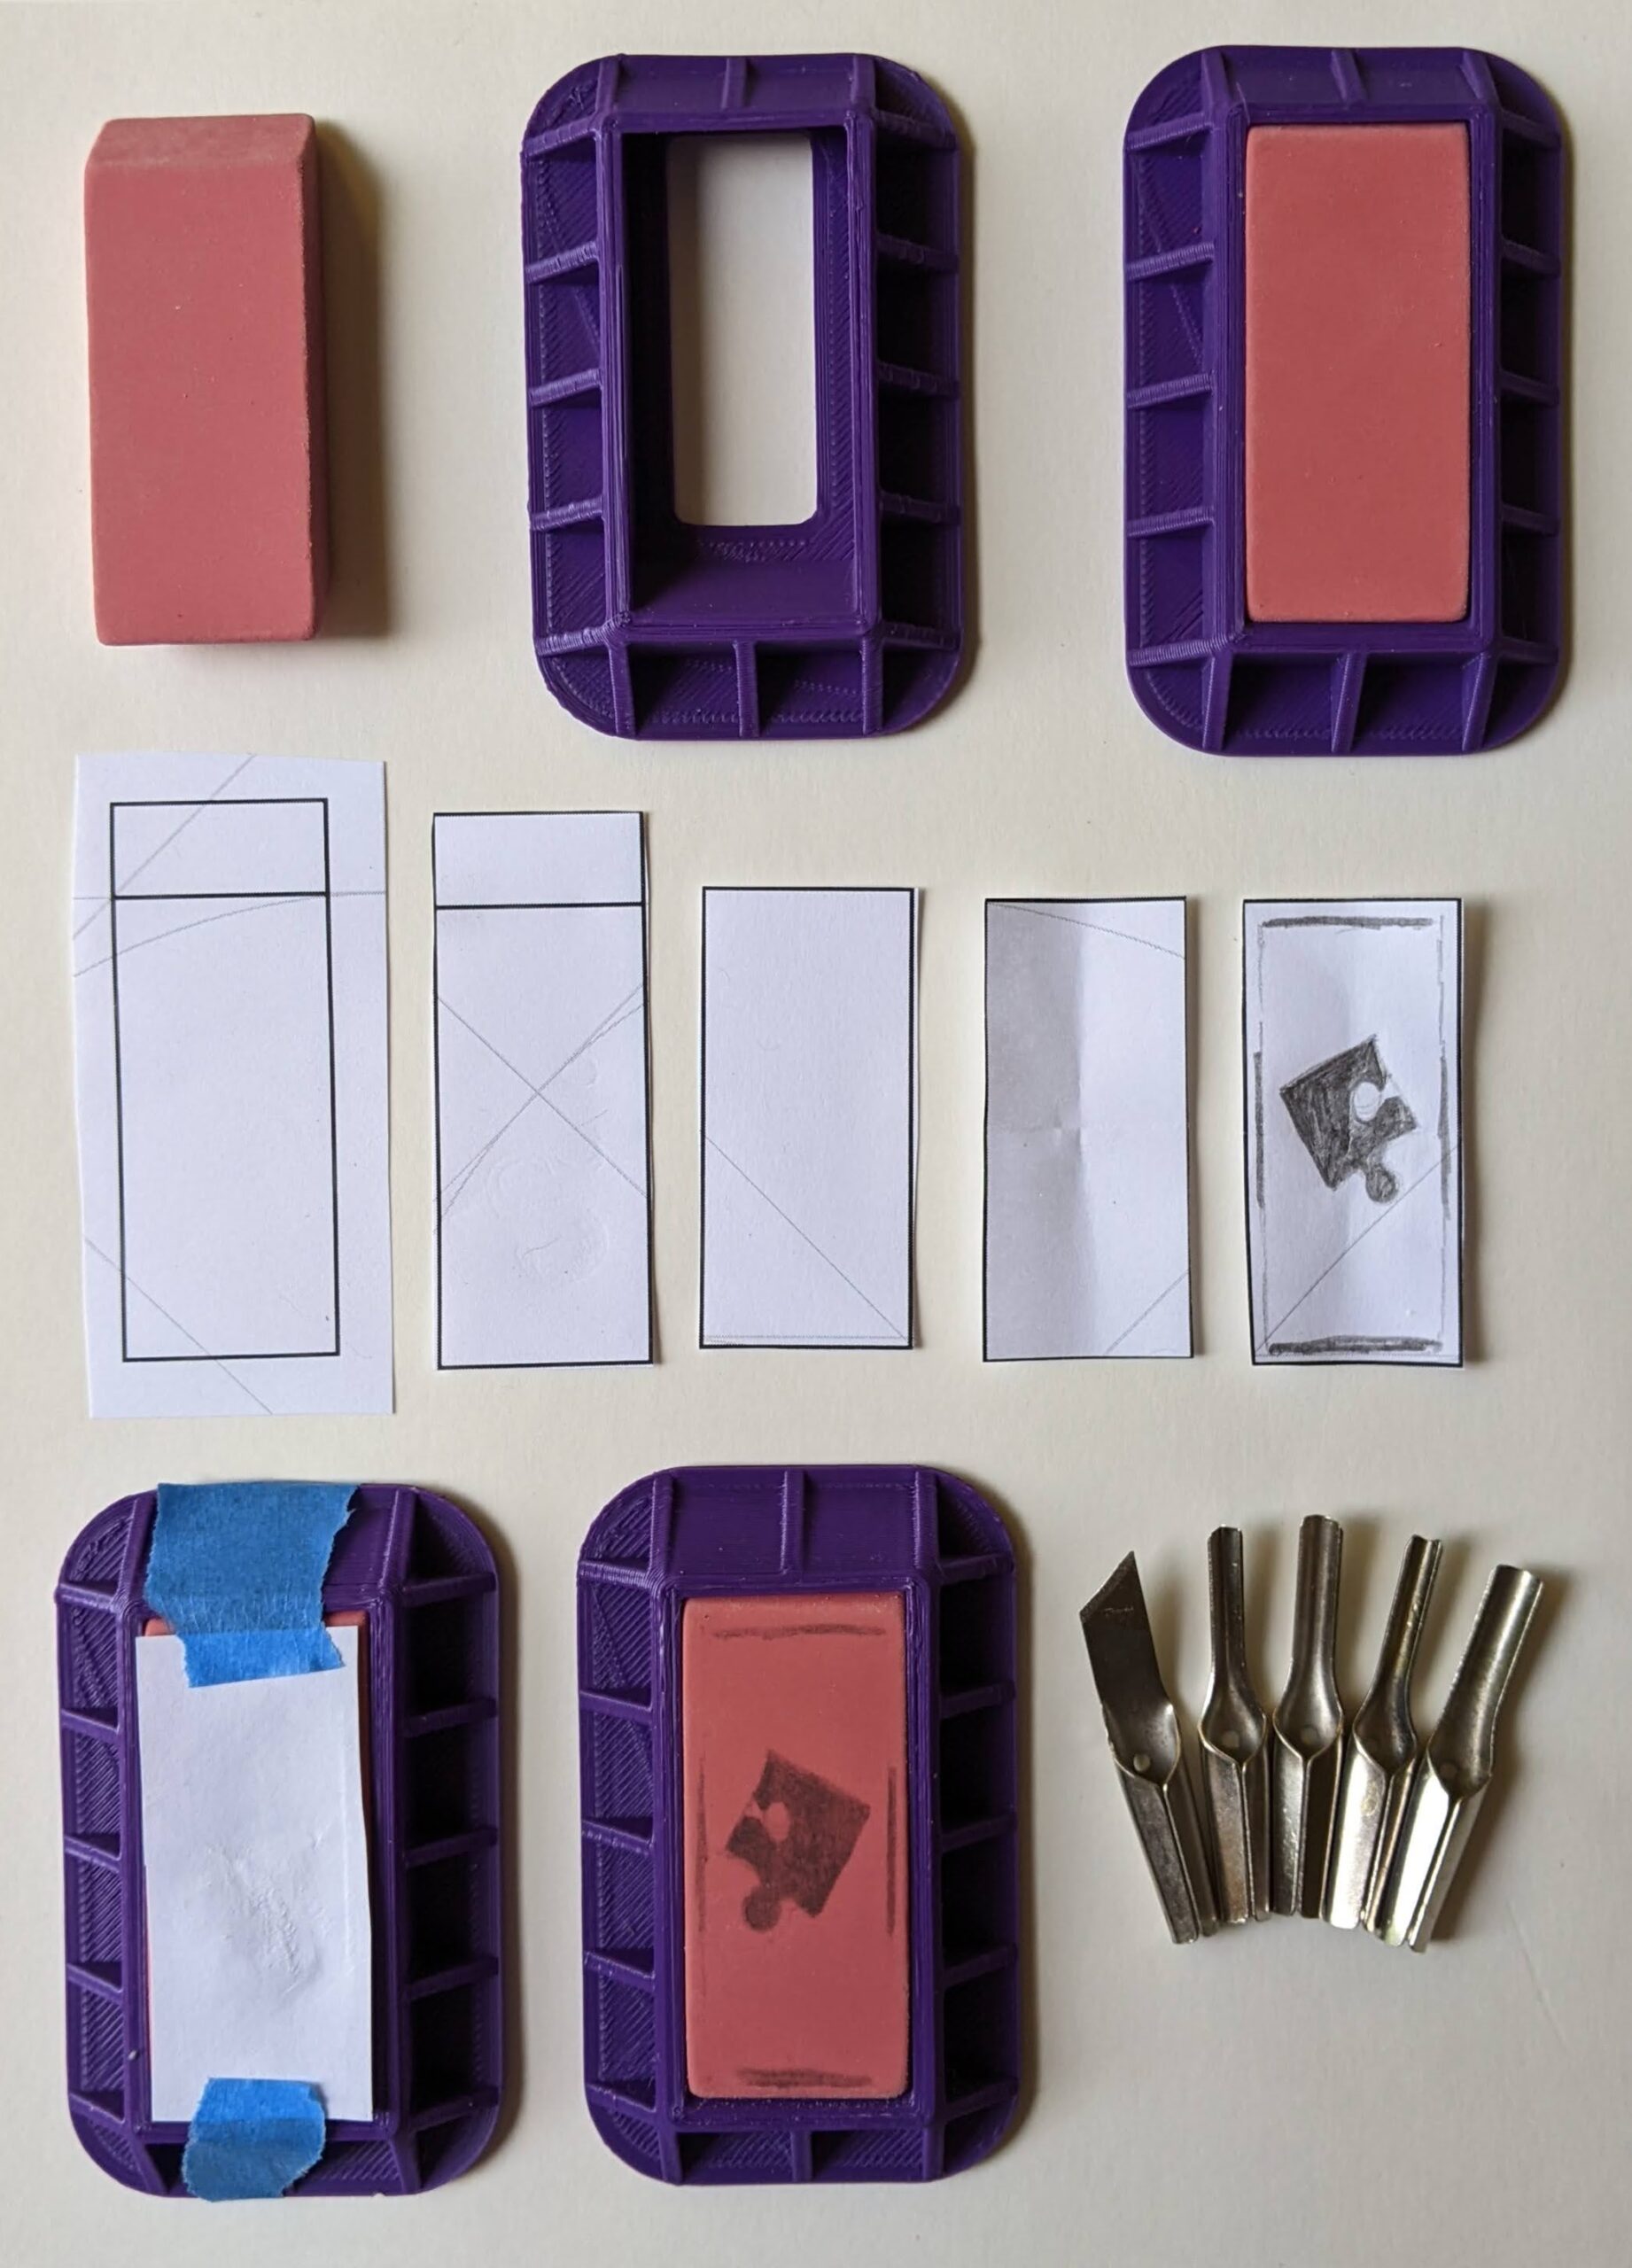
All the pieces, laid out nice and orderly
The process is pretty easy. Put the eraser in the eraser holder – it should slip right in, drop in snugly, and lie flush with the top edge of the plastic holder. After cutting out a paper strip, it’s trimmed to size, creased to locate the central point, and a pencil drawing (drawn as I’d like to see it printed). This is taped upside down onto the eraser, rubbed along the back (a coin would work very well, but I just used one of the extra eraser holders), and the design is neatly transferred to the eraser. The neat thing about this process is that I could design something in Inkscape, print it into the template, and color it in with the pencil for transferring to the eraser.
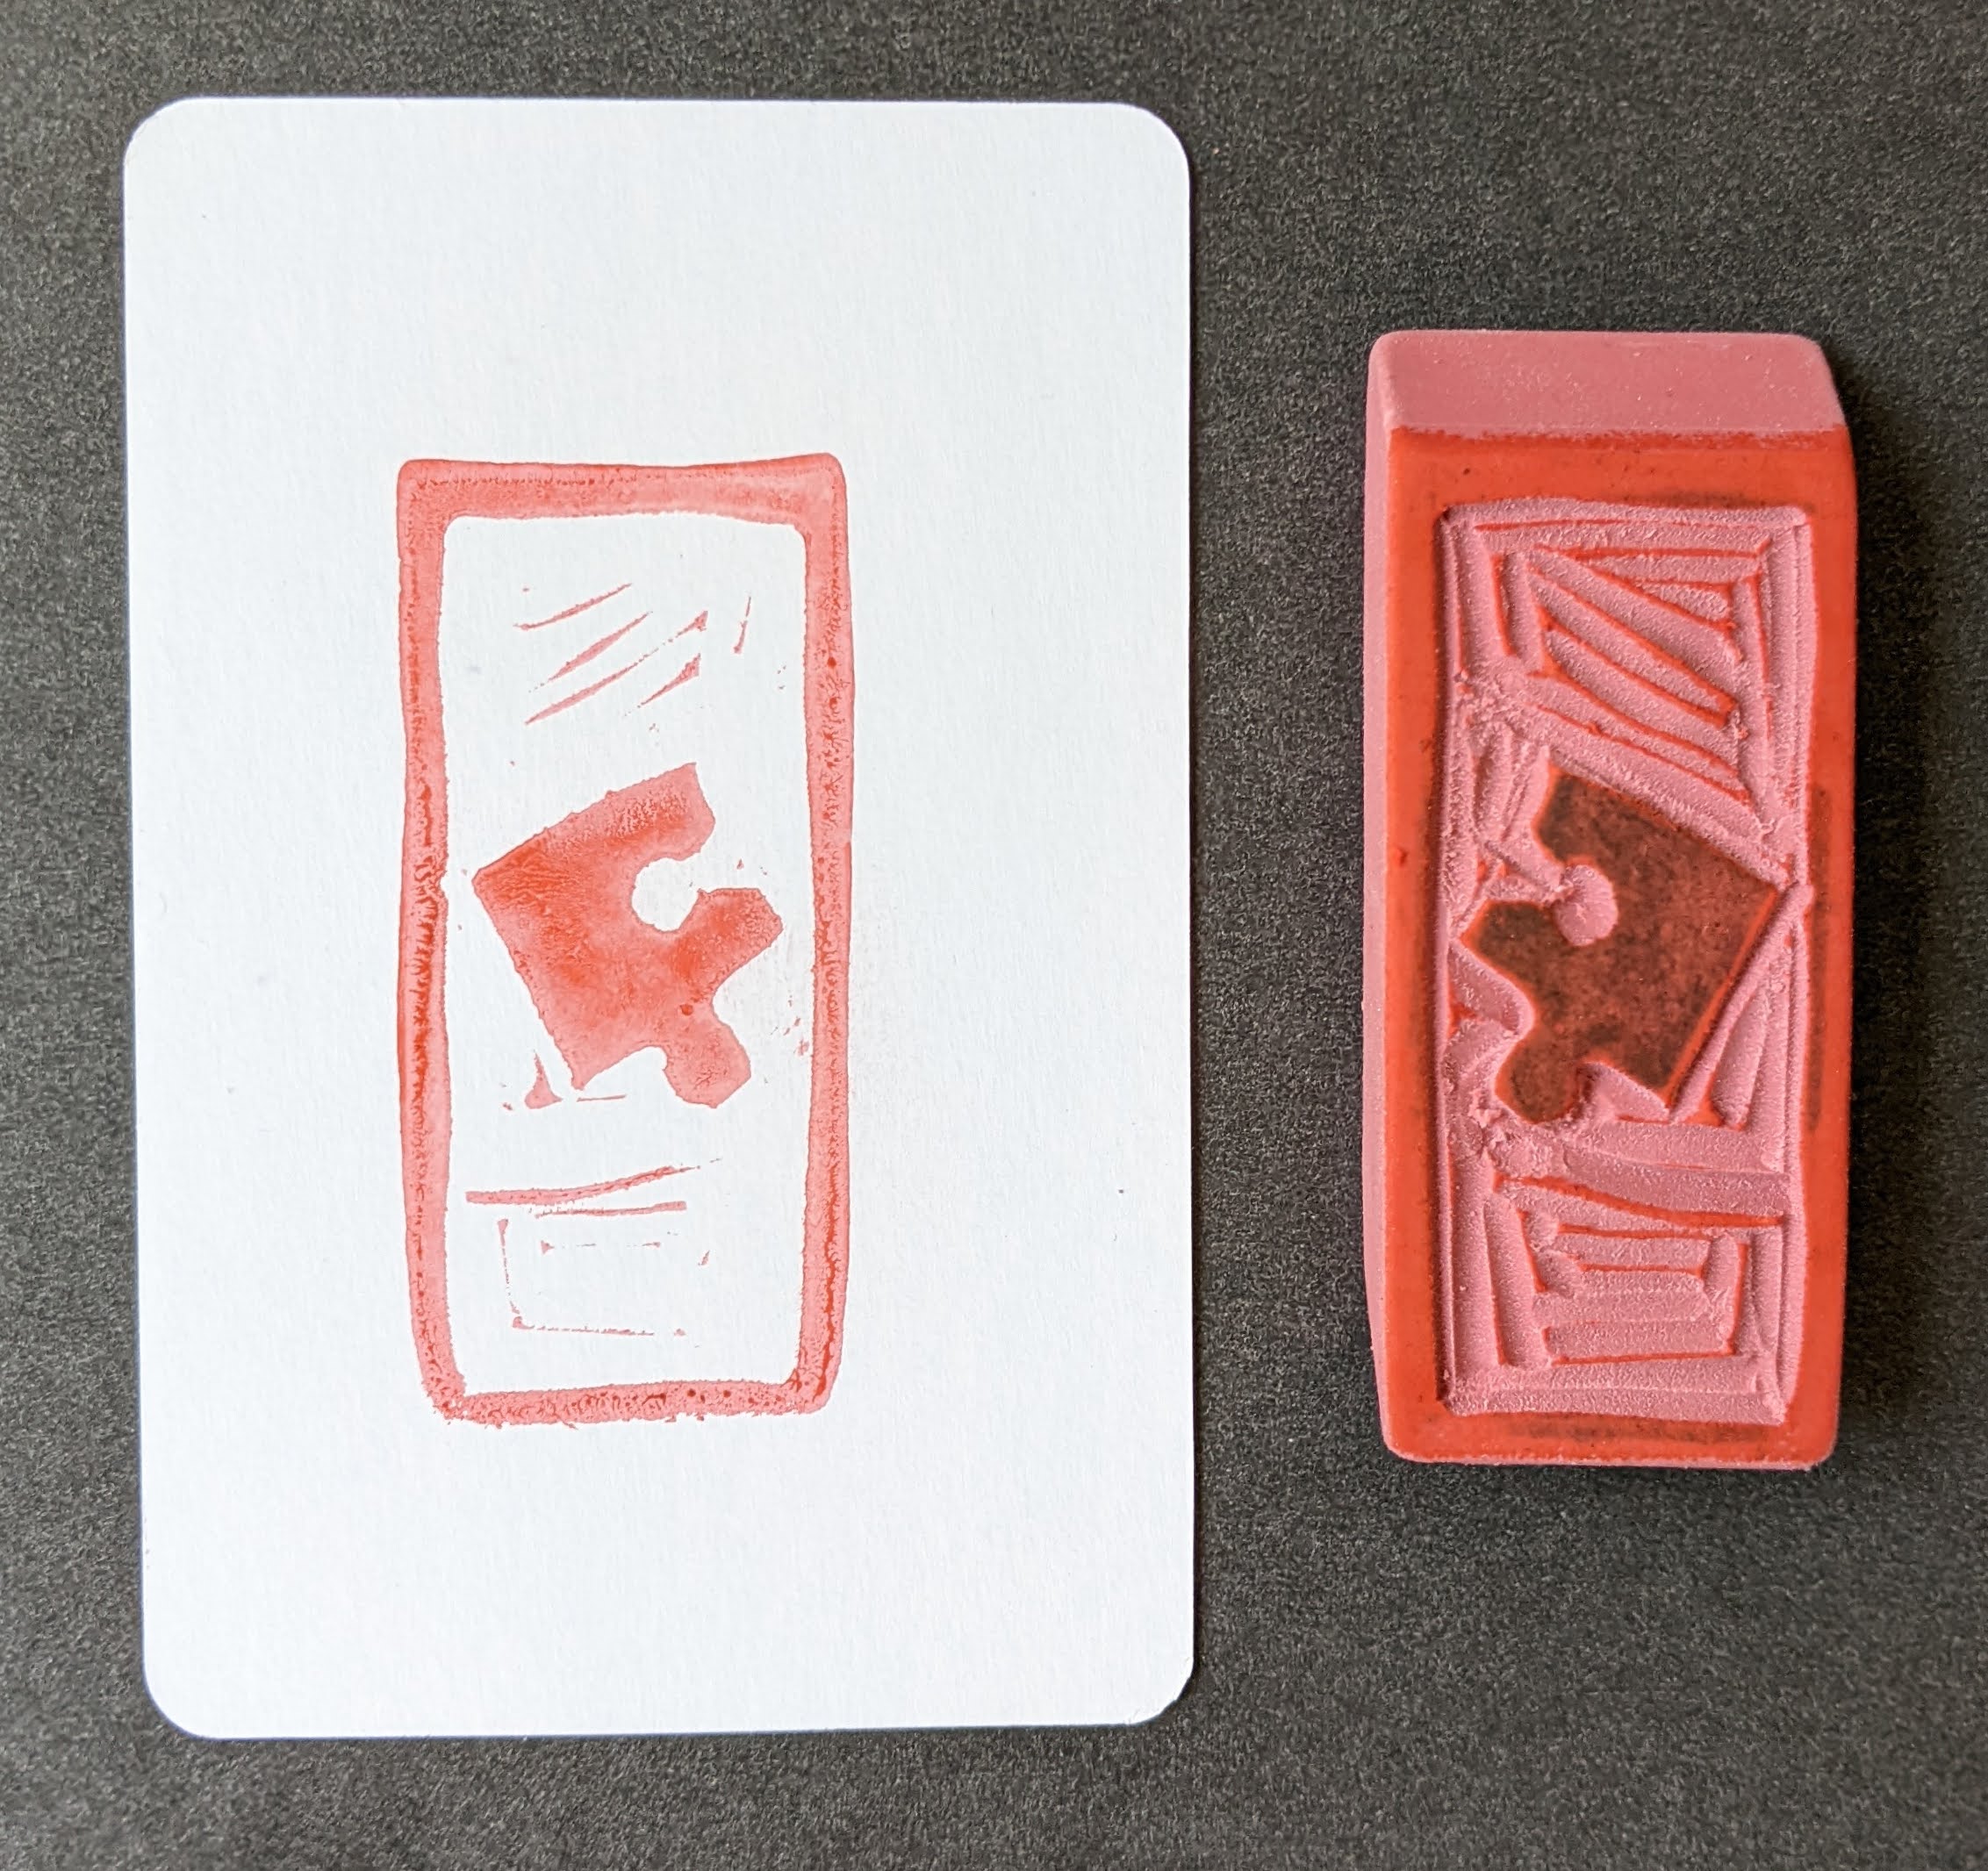
Lastly, let’s see the result!
Eraser stamp!
As you can see, the final stamped result matches the orientation of the little drawing. I just wish I’d saved the little scrap of paper with the original drawing on it! The eraser holder was a joy to use and the final result looks every bit as great as I was hoping.
If I keep making these, I’ll probably want to upgrade my setup to include Serena’s recommended stamp pad and sharpener (you’ll see them linked in Serena’s Amazon link above). I’d like to design something to make easy to hold the eraser, center it, and make a clean even stamp, but don’t have a great idea for one yet. I’ll keep pondering this and maybe whip something up this weekend.