
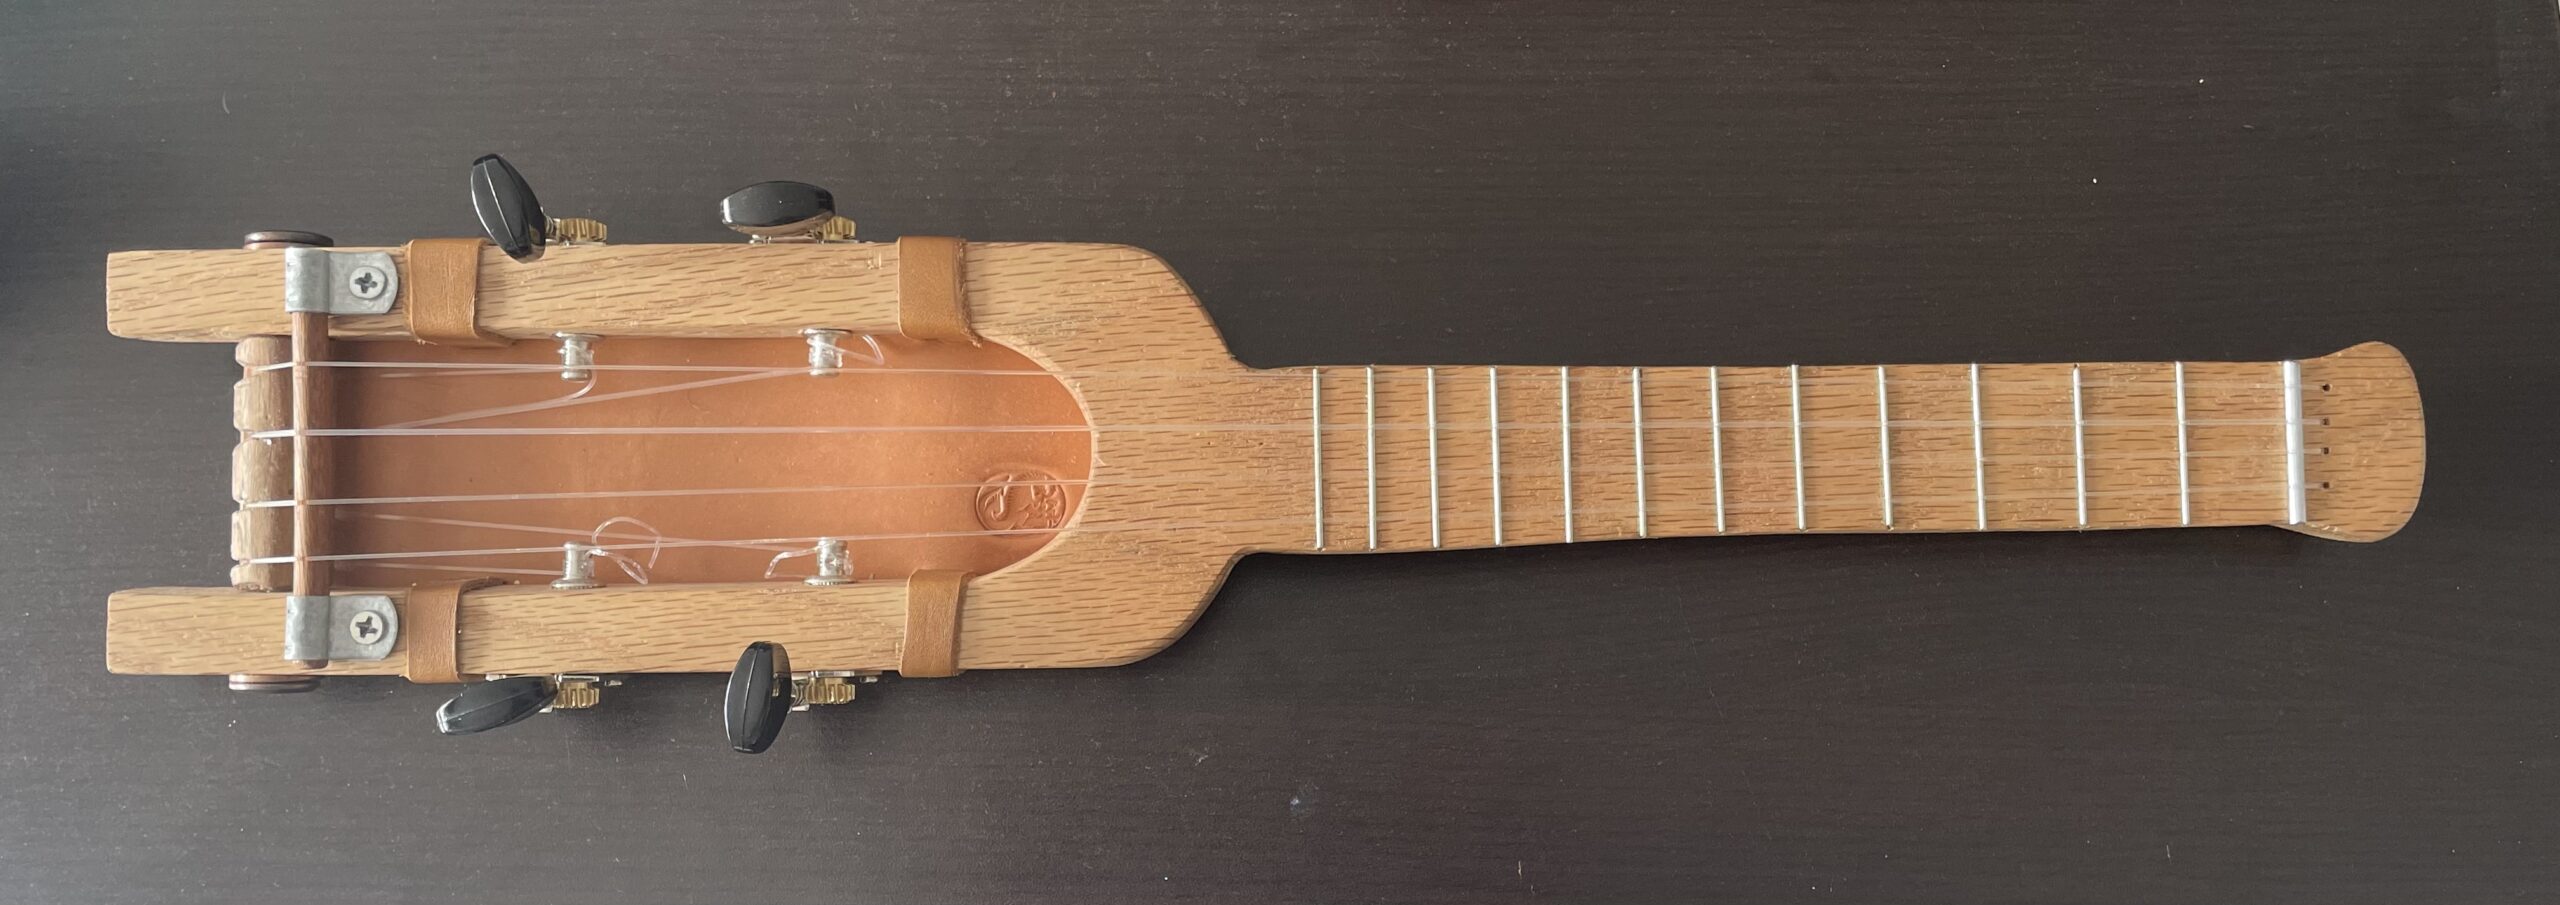
Hi folks—this is Tim, I came to know MakerBlock through my attempts at making a travel ukulele too. So here’s a guest post postmortem (guest postmortem?) about my most recent build! For some background, this is my second travel uke build. My first was an early pandemic project, but I accidentally used some wood that was way too soft, and was very limited in my tool access (including living in a small apartment with neighbors who didn’t take kindly to craft projects). For this second attempt, I’ve sourced better materials, which was a big help. Unlike MakerBlock, I don’t have access to a 3D printer, but what I do have is some basic power tools—jigsaw, sander, drill and the like—courtesy of the very handy Ryobi One interchangeable battery system. Also, I’m lucky to live close to a number of hardware/gardening stores, so I was able to spend a long time wandering up and down the small parts drawers looking for a random thing that would work well.
I’m also a hobby leatherworker, and you’ll see in some of these photos a leather backing I made for the ukulele. I’m not sure how much extra volume it gets me, but it’s light, easy enough to travel with, and I can just take it on and off if I want. It definitely doesn’t hurt.
This is less of a blow-by-blow, and more just a series of notes and thoughts to help people avoid issues that I’ve faced, and to give hints along the way.
Wood:
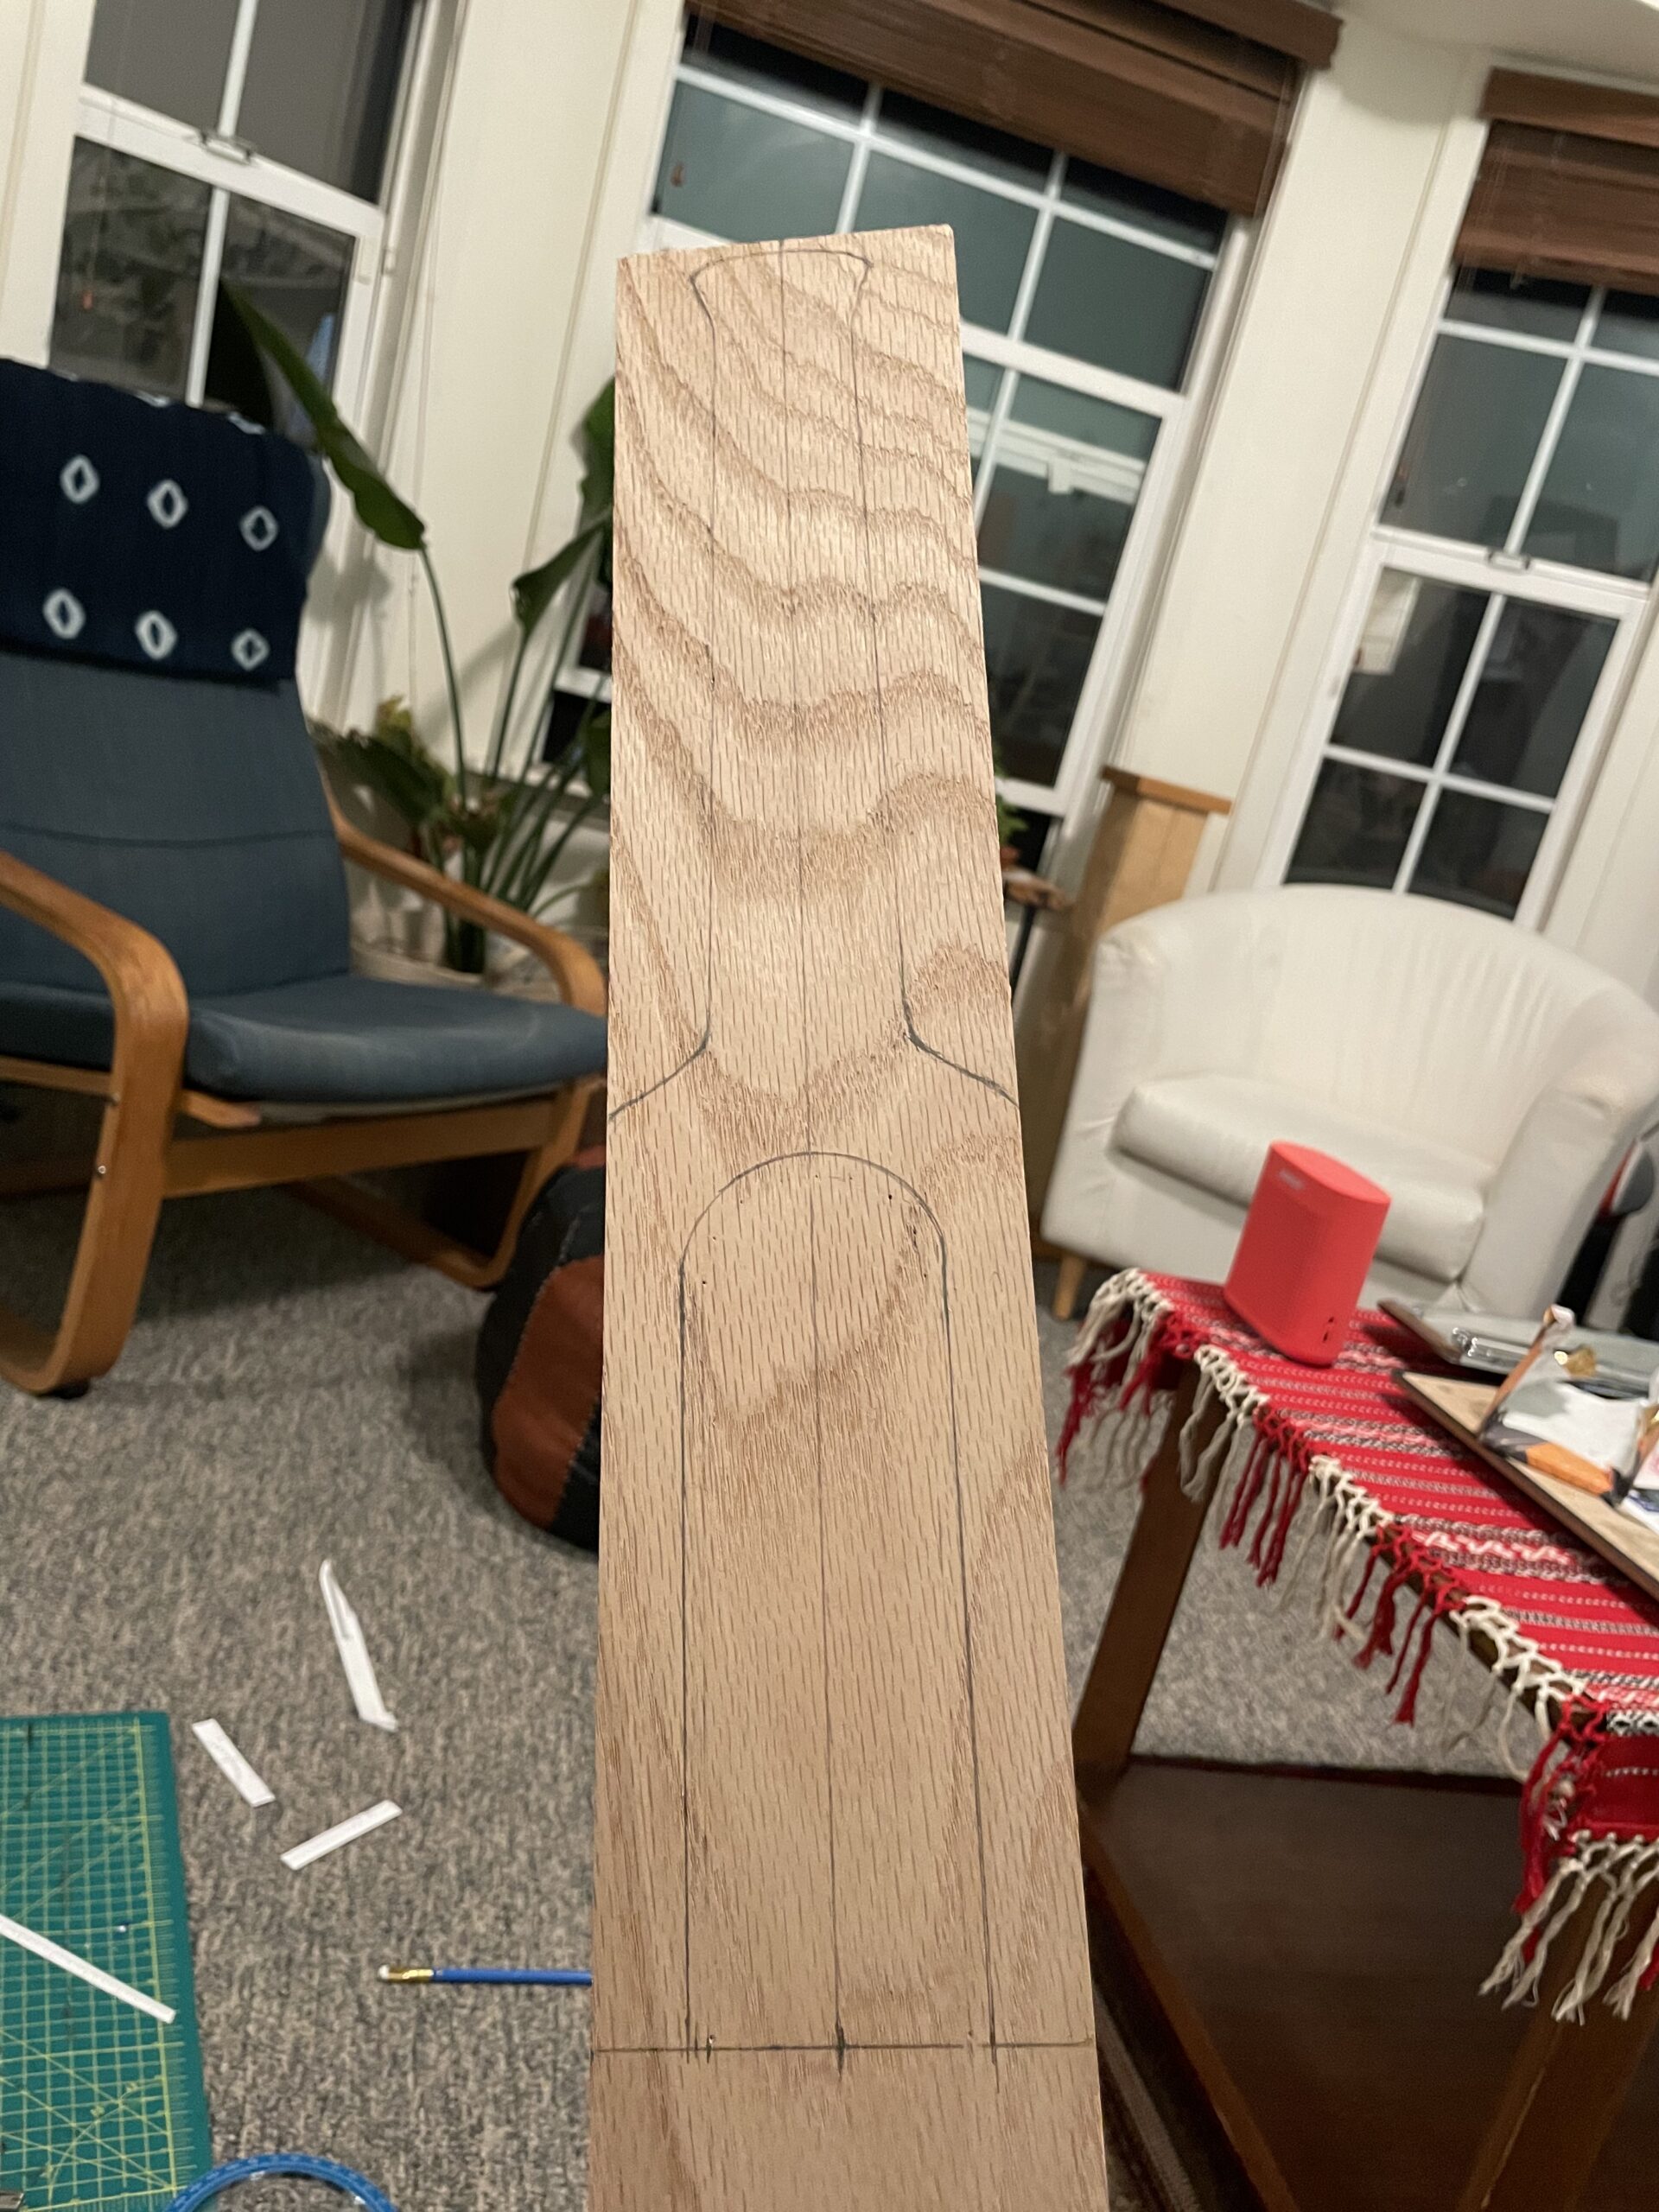
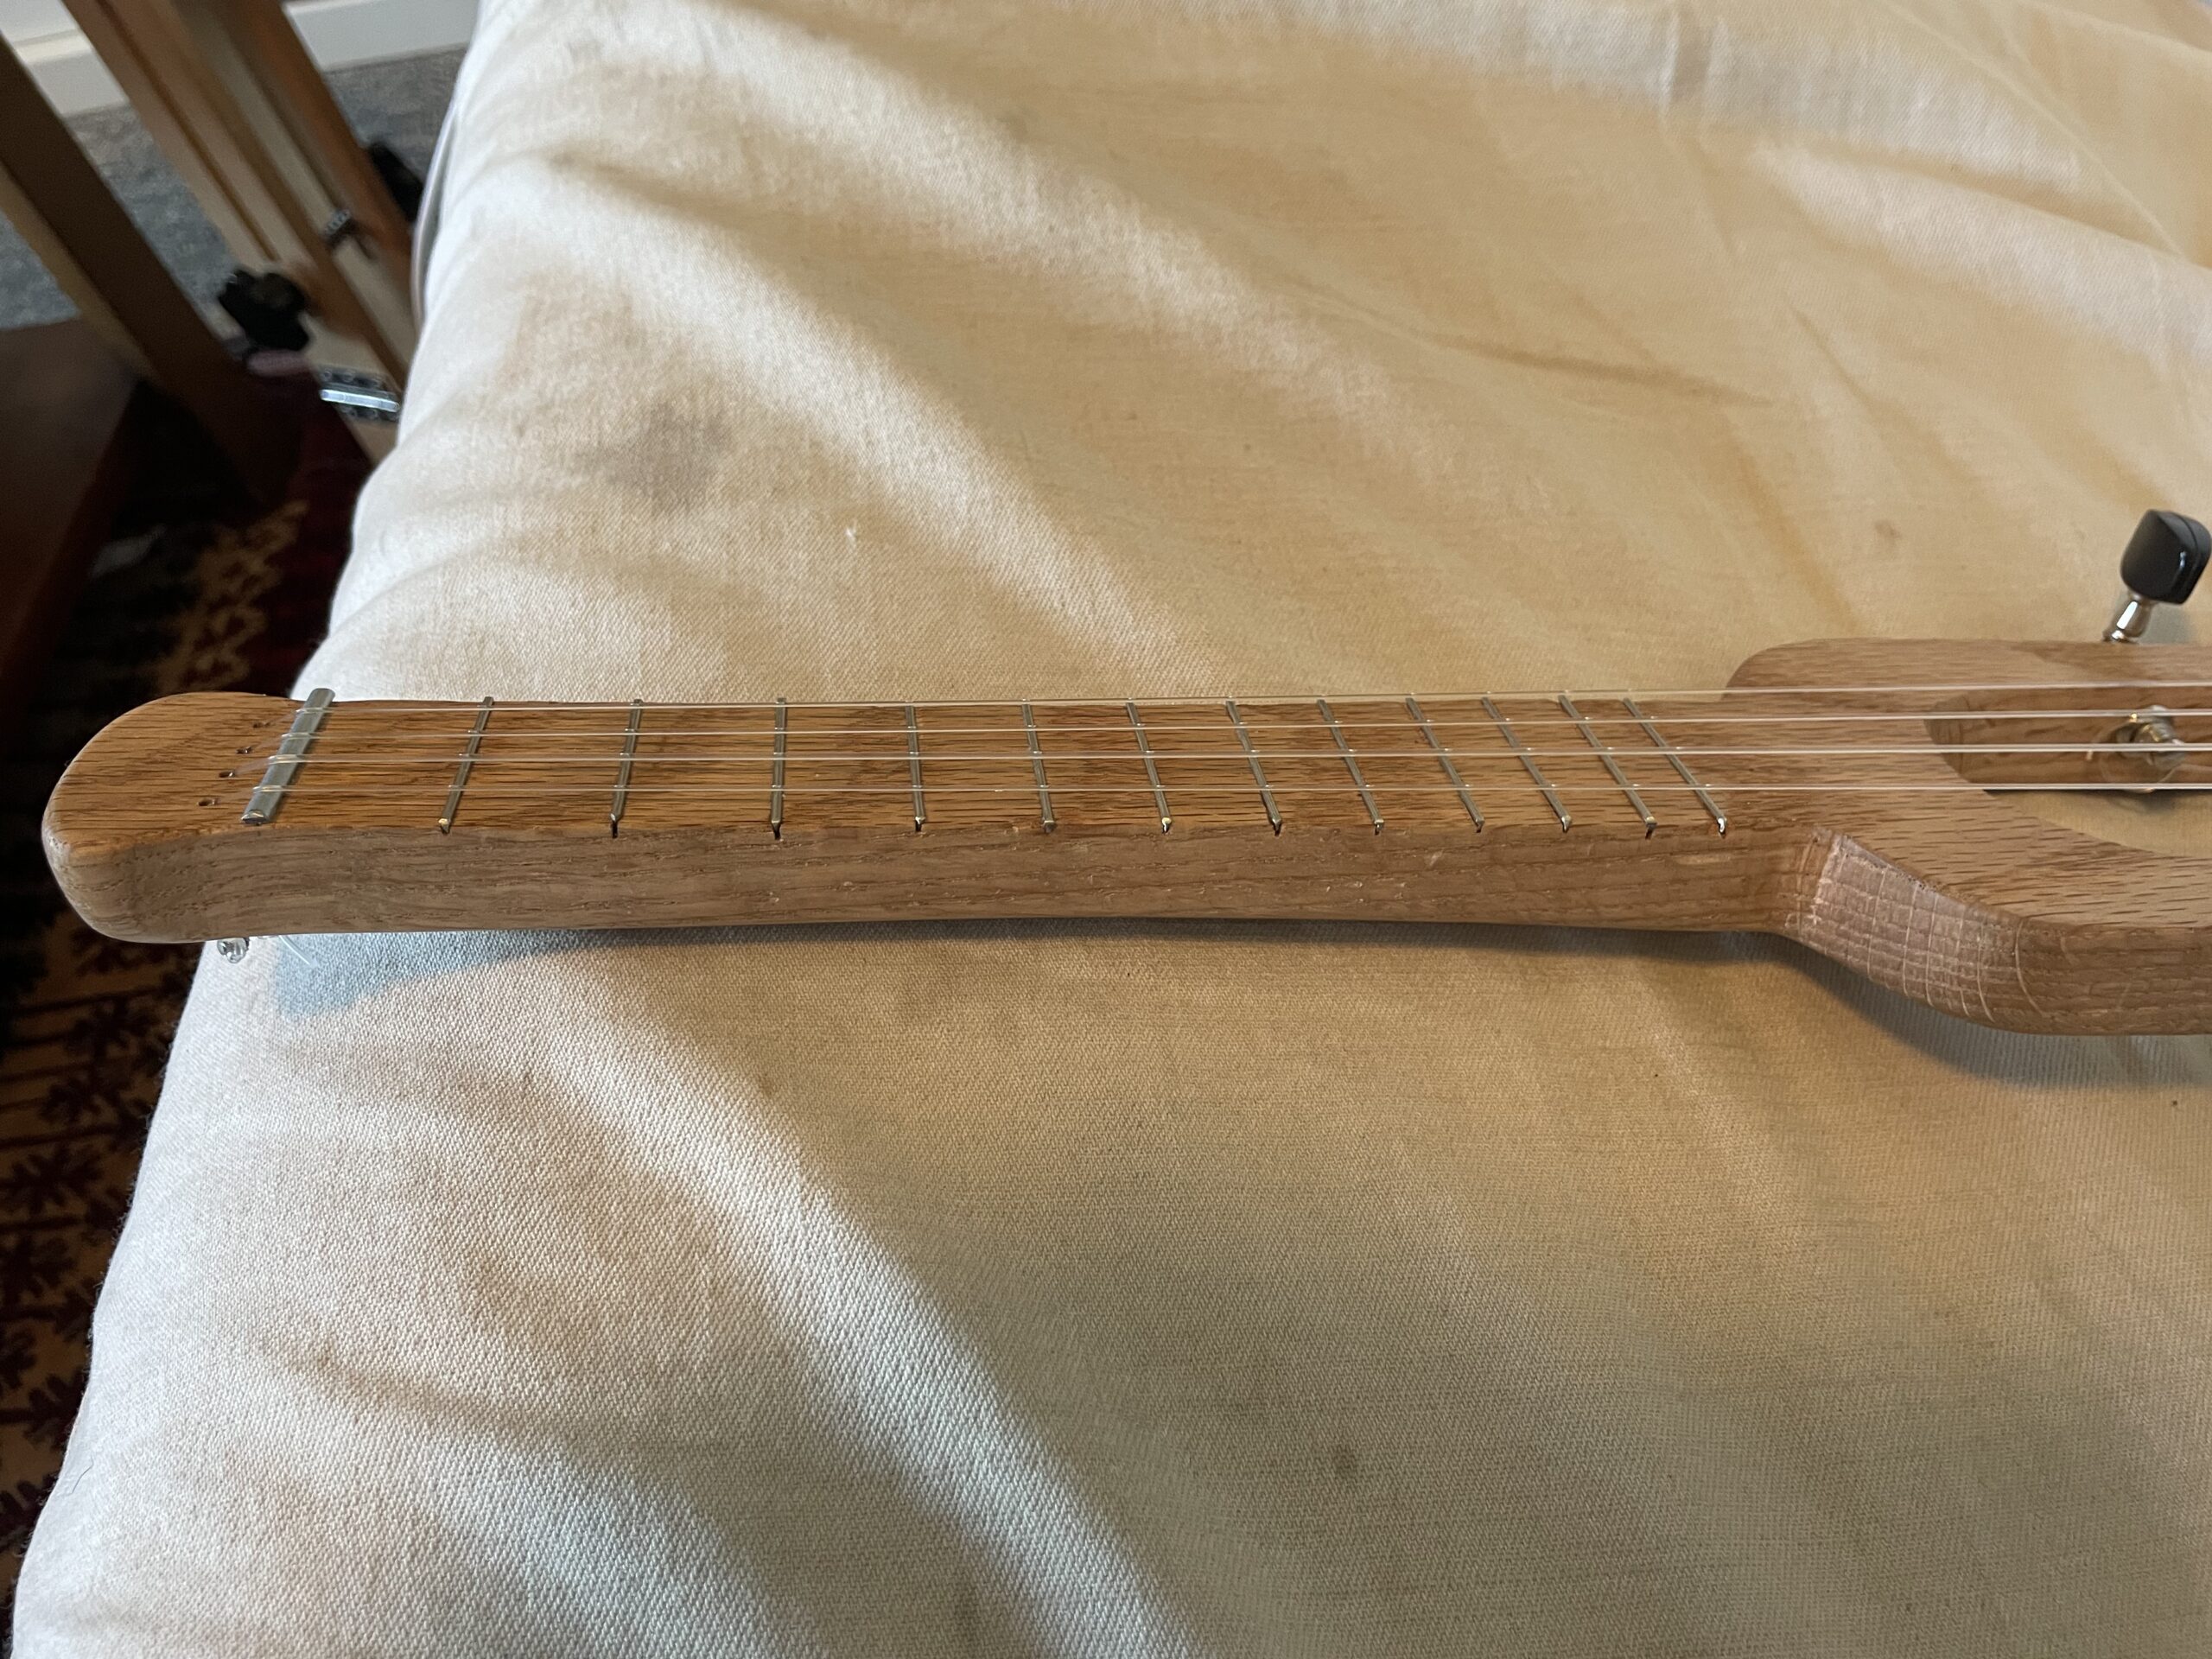
The standard dimensions of these travel ukulele plans are nicely suited to 1×4 pieces of wood (which are more like 3/4×3.5” when you measure them). I kept mine at full width, and for the second time in my experience it led to problems with the tuners, but more on that in a sec. I bought a piece of decently affordable hardwood from my local lumber store, and cut it down to shape using a jigsaw, and sanded it to bejeezus using both a rotary sander and by hand. It came out fantastically smooth in the end, and I finished it with butcher block oil, which looks lovely. The hint about dampening it for an extra sanding step was fantastic on really getting it to feel smooth.

Hardware supplies:
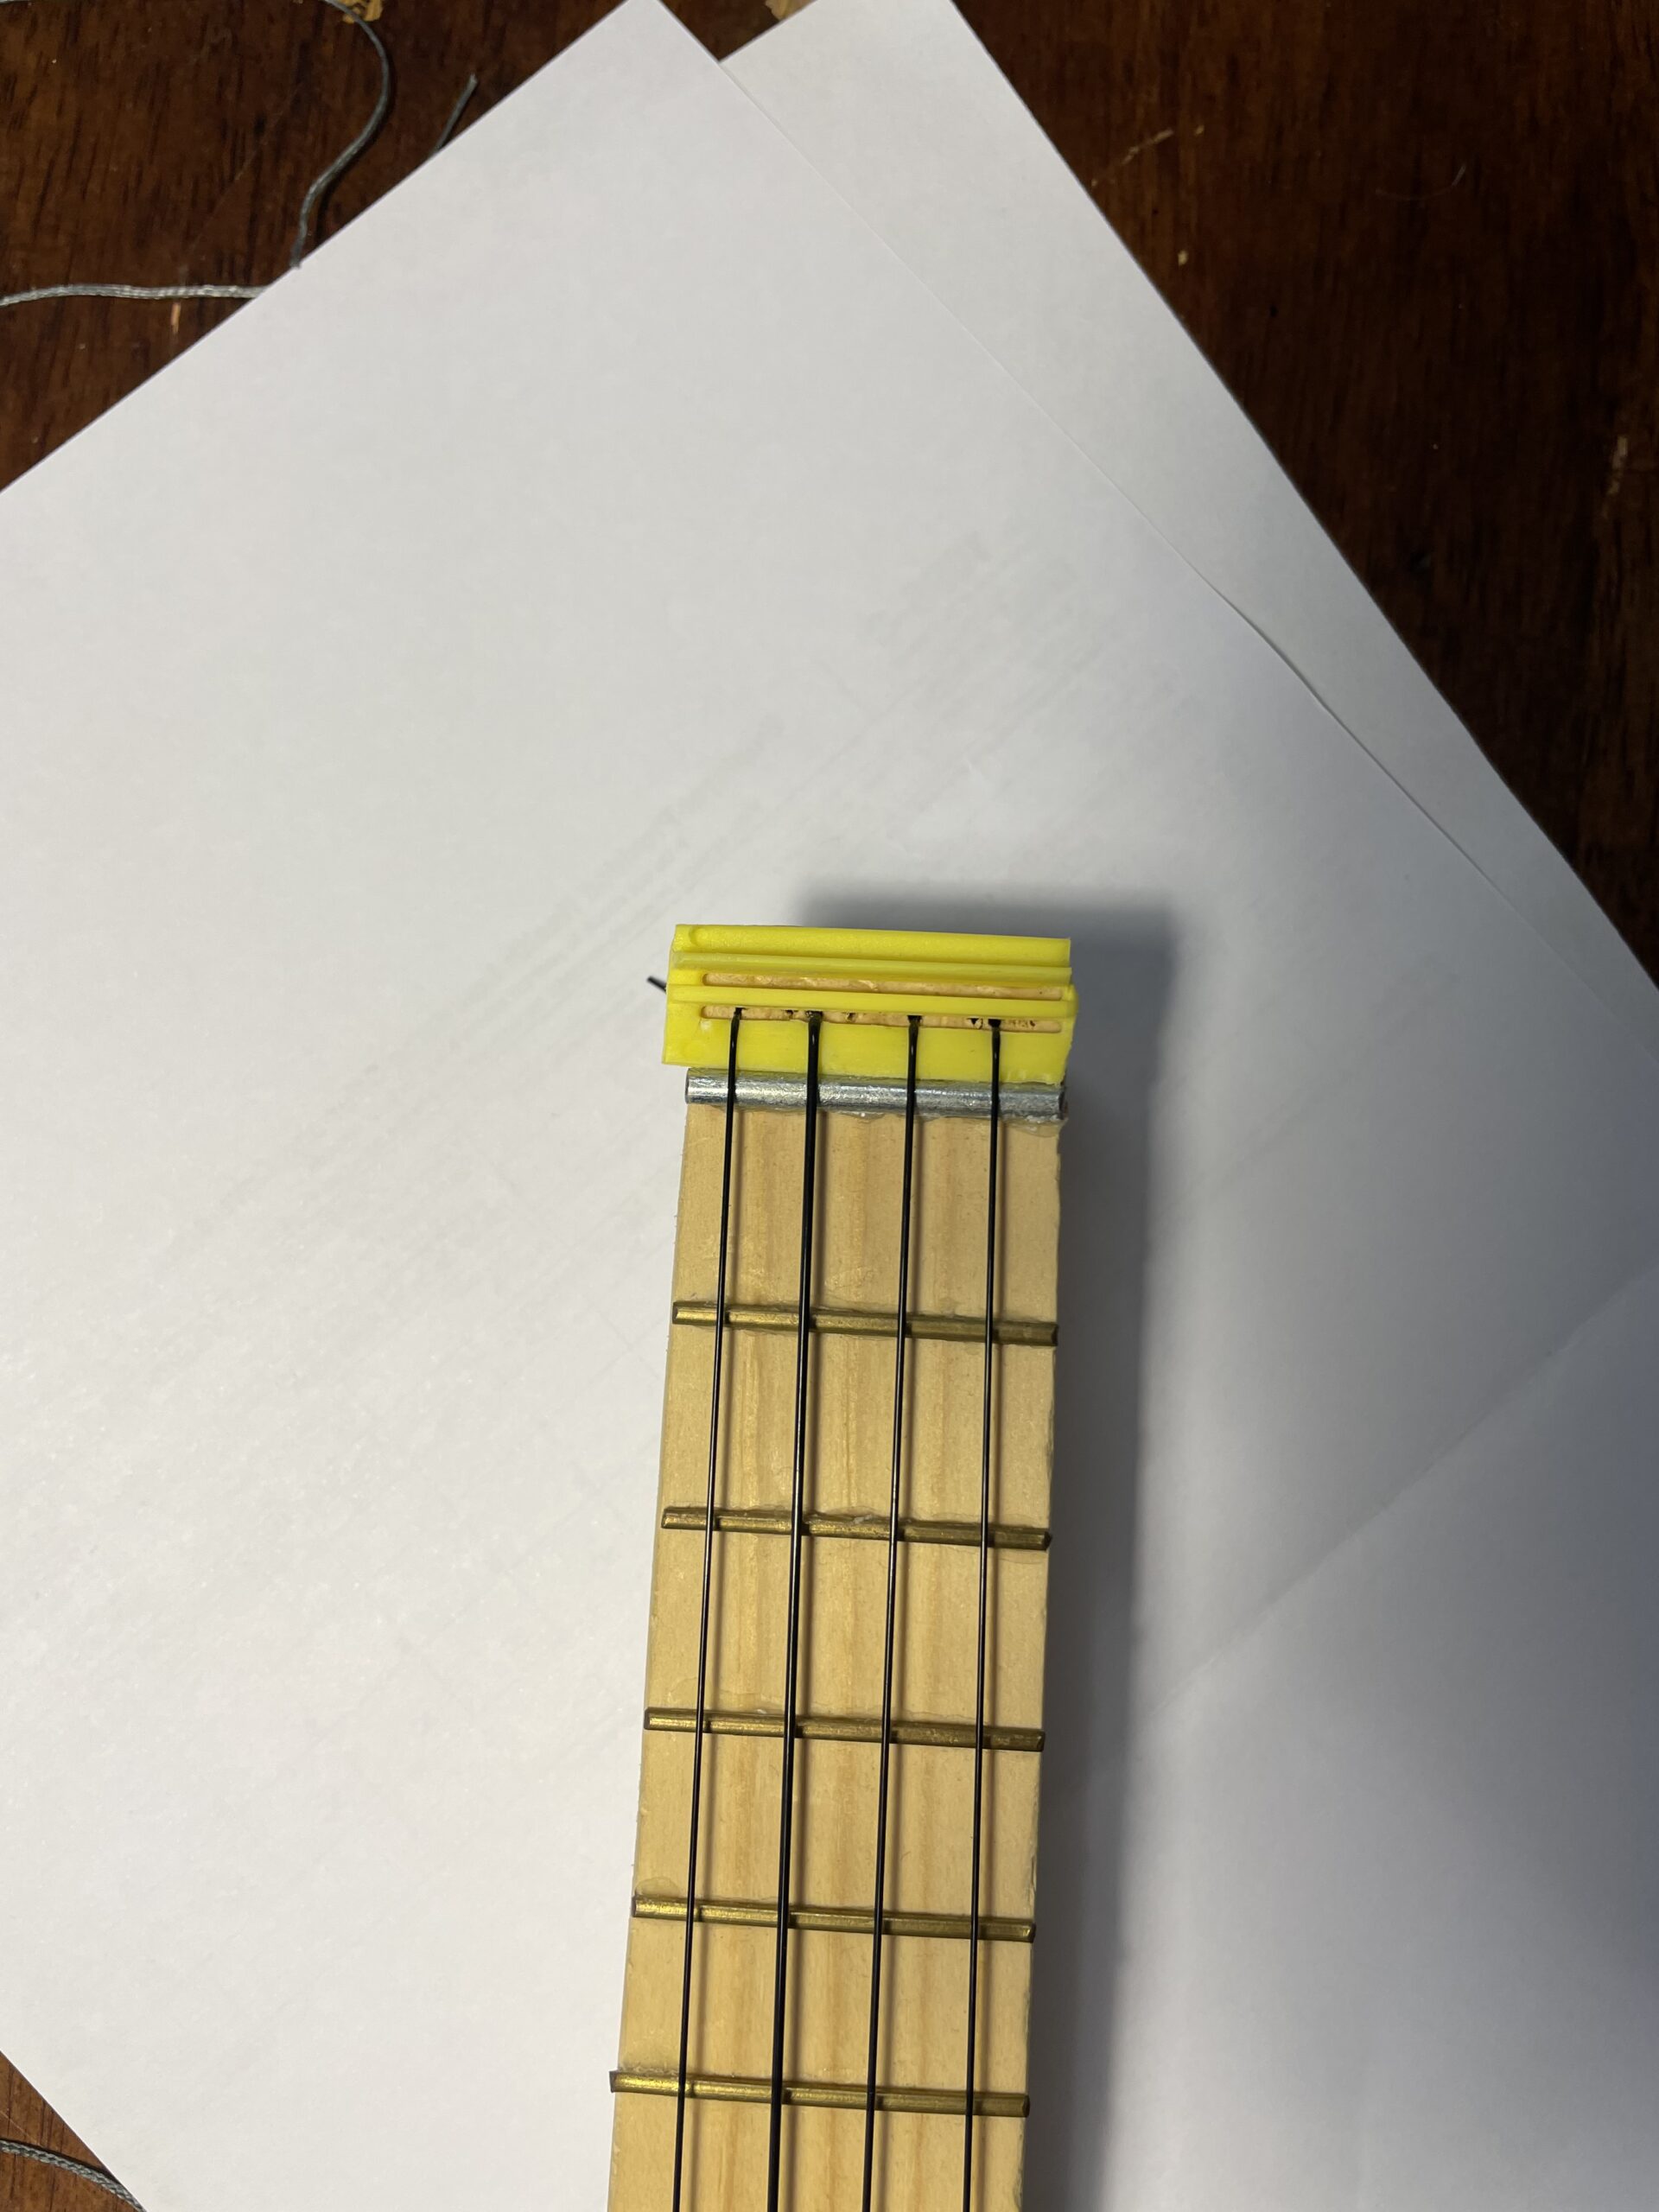
I used a large cotter pint pin for the zero fret, but for the other frets I cut small slits with a coping saw, and put in fret wire. It was pretty affordable on Amazon (though I try not to buy from them if I can avoid it), and I could cut it to size and very gently tap it into place with a tiny rubber mallet I already had. However, with my little hand saw, it was hard to get the cuts to a consistent depth, so they’re a bit all over the place. One or two of the frets fell out, and I had to give them a bit of wood glue to keep em in place.

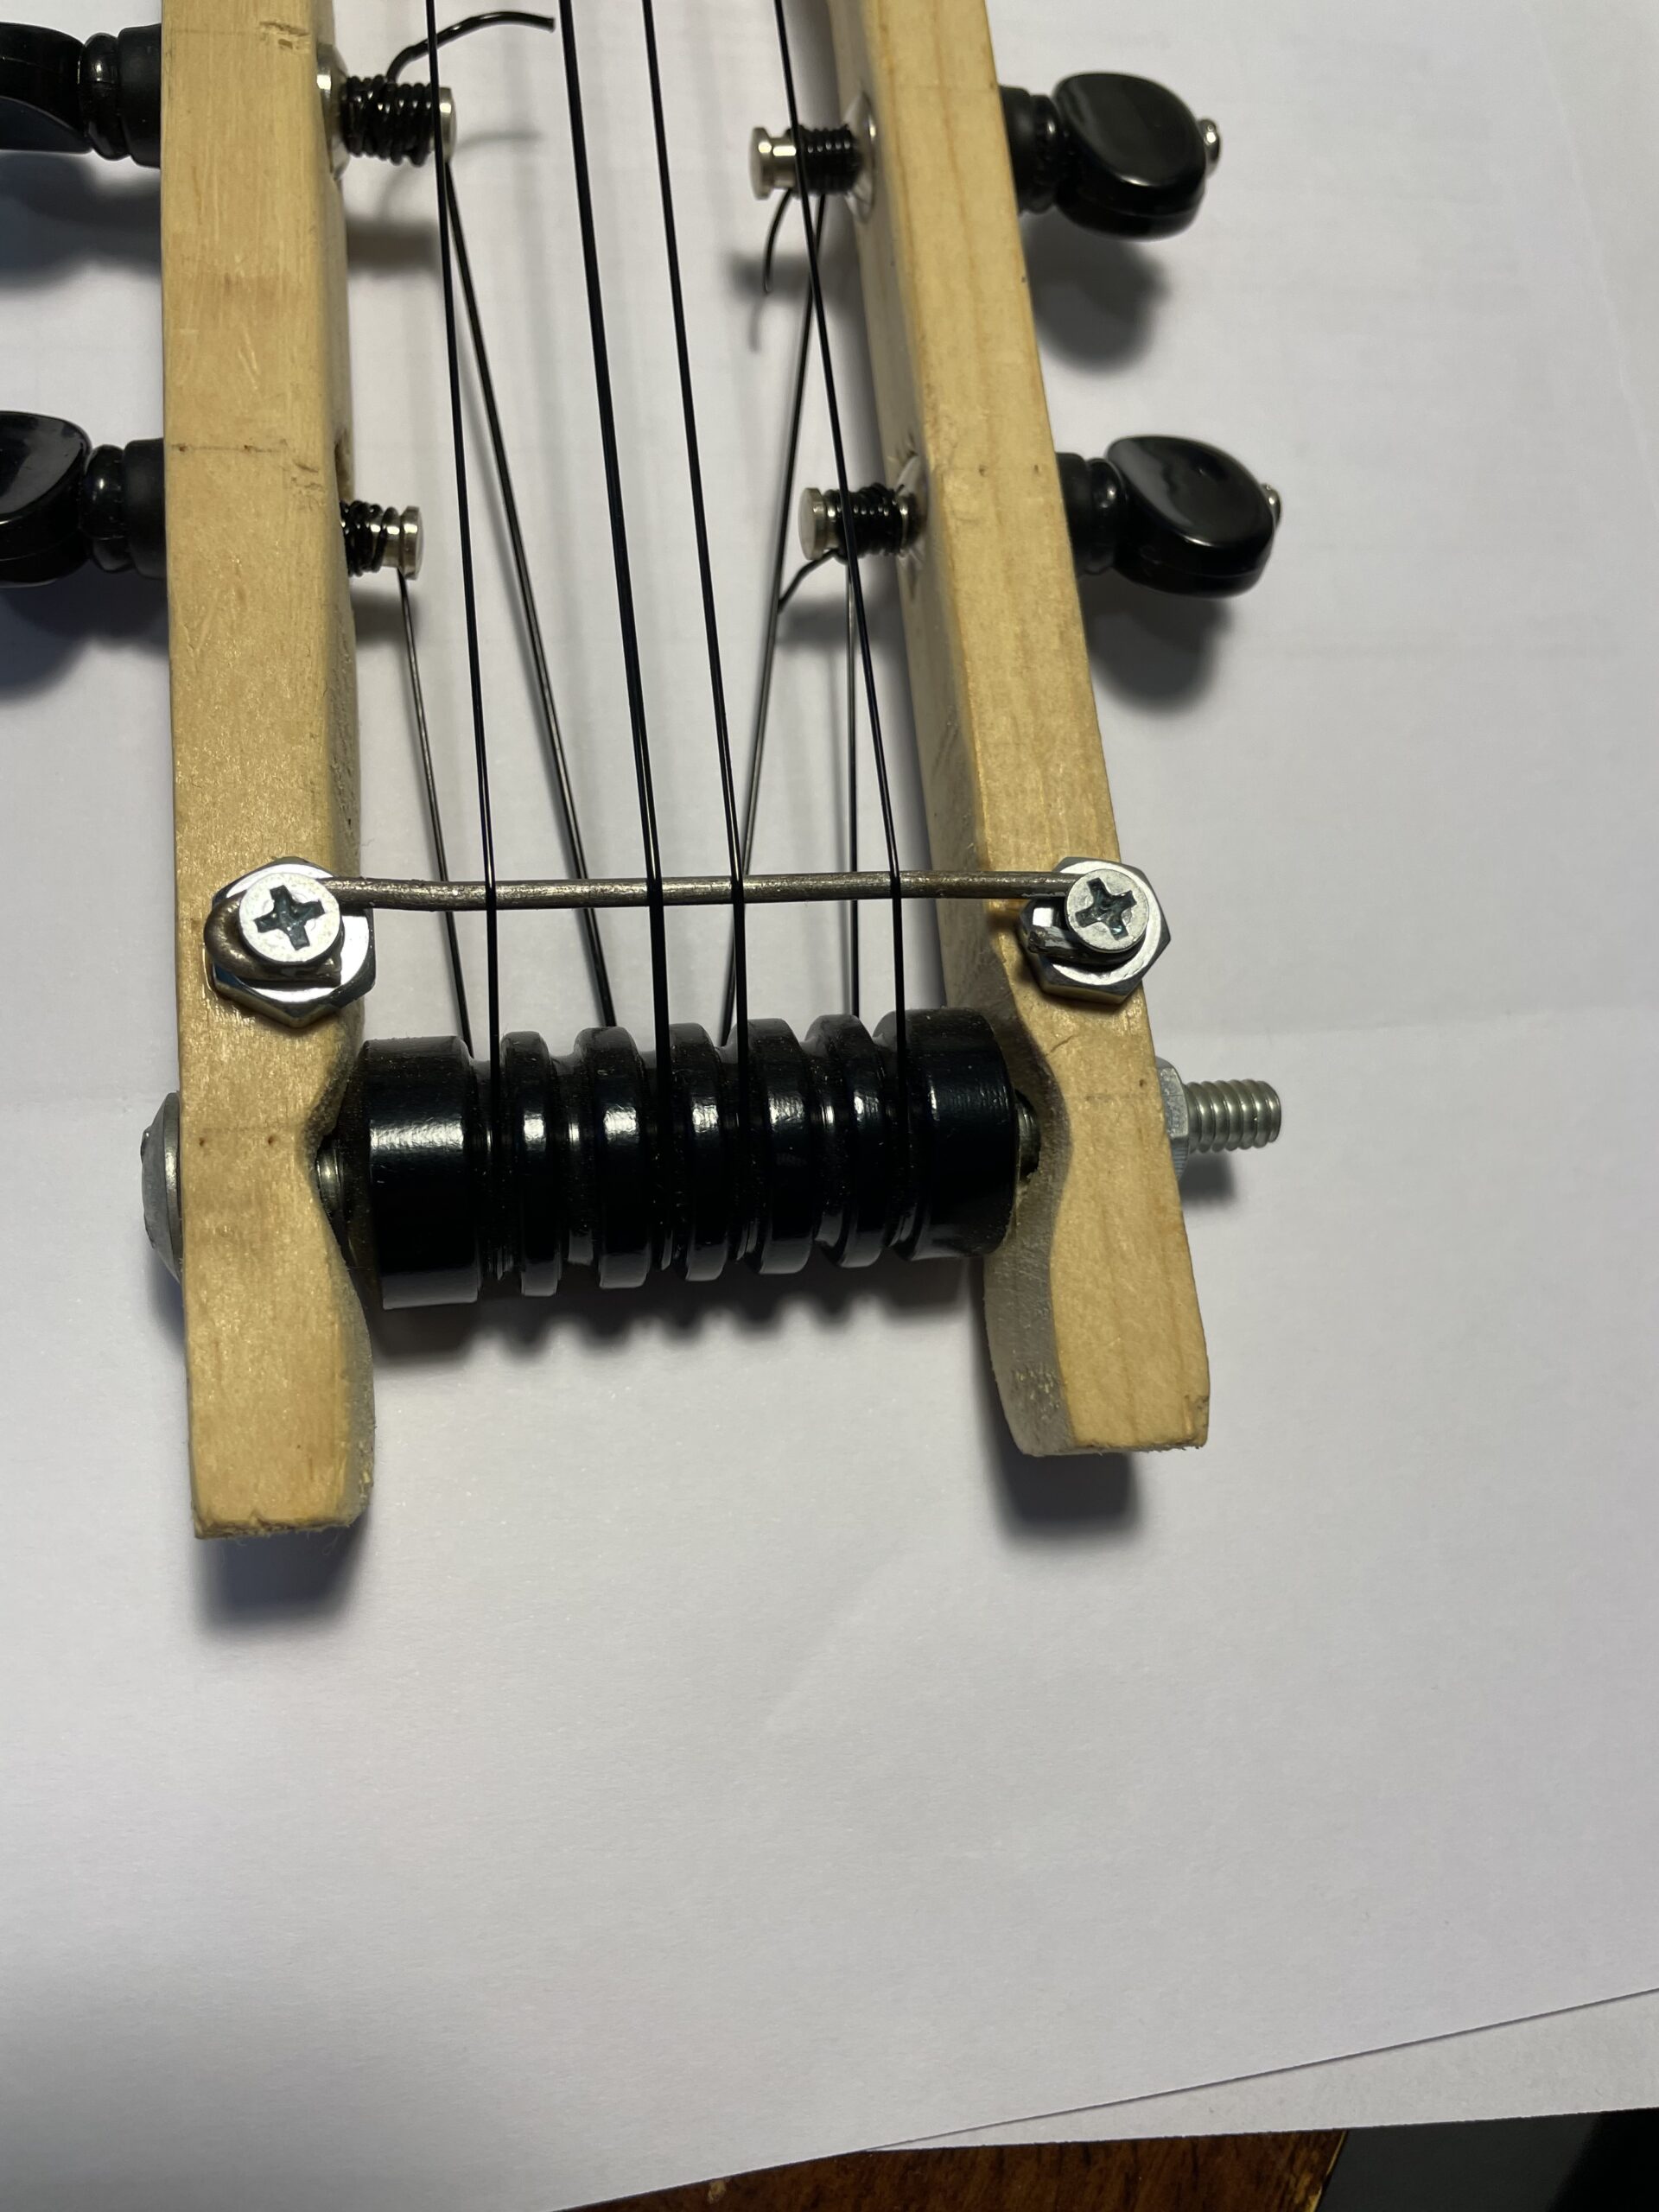
The rod for the bridge was oddly difficult to find. I searched through multiple hardware stores, and couldn’t find any straight, appropriately sized, metal rods. What I eventually did was get a long metal bolt, and used a jigsaw to cut off the head. This worked, but ended up being super buzzy and weird sounding, I think my strings reverberated against it oddly. So instead I used a measure of hardwood dowel, which I love the look of, but is bowing a little under the pressure of the strings. The little brackets were also a nightmare to track down, I eventually found appropriately sized one in the hardware store in the lawnmower engine parts of the bits and bobs aisles, of all places.
For the turnaround, I didn’t like the look of making one from washers (one of the methods recommended in the various Circuit and Strings blogposts) and all the tattoo machine grips (another similar rec) didn’t have 4 slots so wouldn’t spread out symmetrically. Instead, I ended up using a hunk of a dead branch from our backyard that I more or less cut down to size, and then drilled a hole through the middle of. I was able to put cuts in it for the strings, and then waxed it a bit with paraffin wax to give them a little lubrication. However, even so, wood definitely has more friction than using metal or plastic, so sometimes the tuning is fiddly as the strings don’t adjust as finely as I would like. For the post, I used furniture bolts, with washers to adjust spacing as needed. The nice thing about furniture bolts is that they come in a bunch of lengths, and use allen keys on both ends, so can screw in really tight. Though the end for receiving the length of the bolt is wider by necessity, so requires a slightly larger hole.
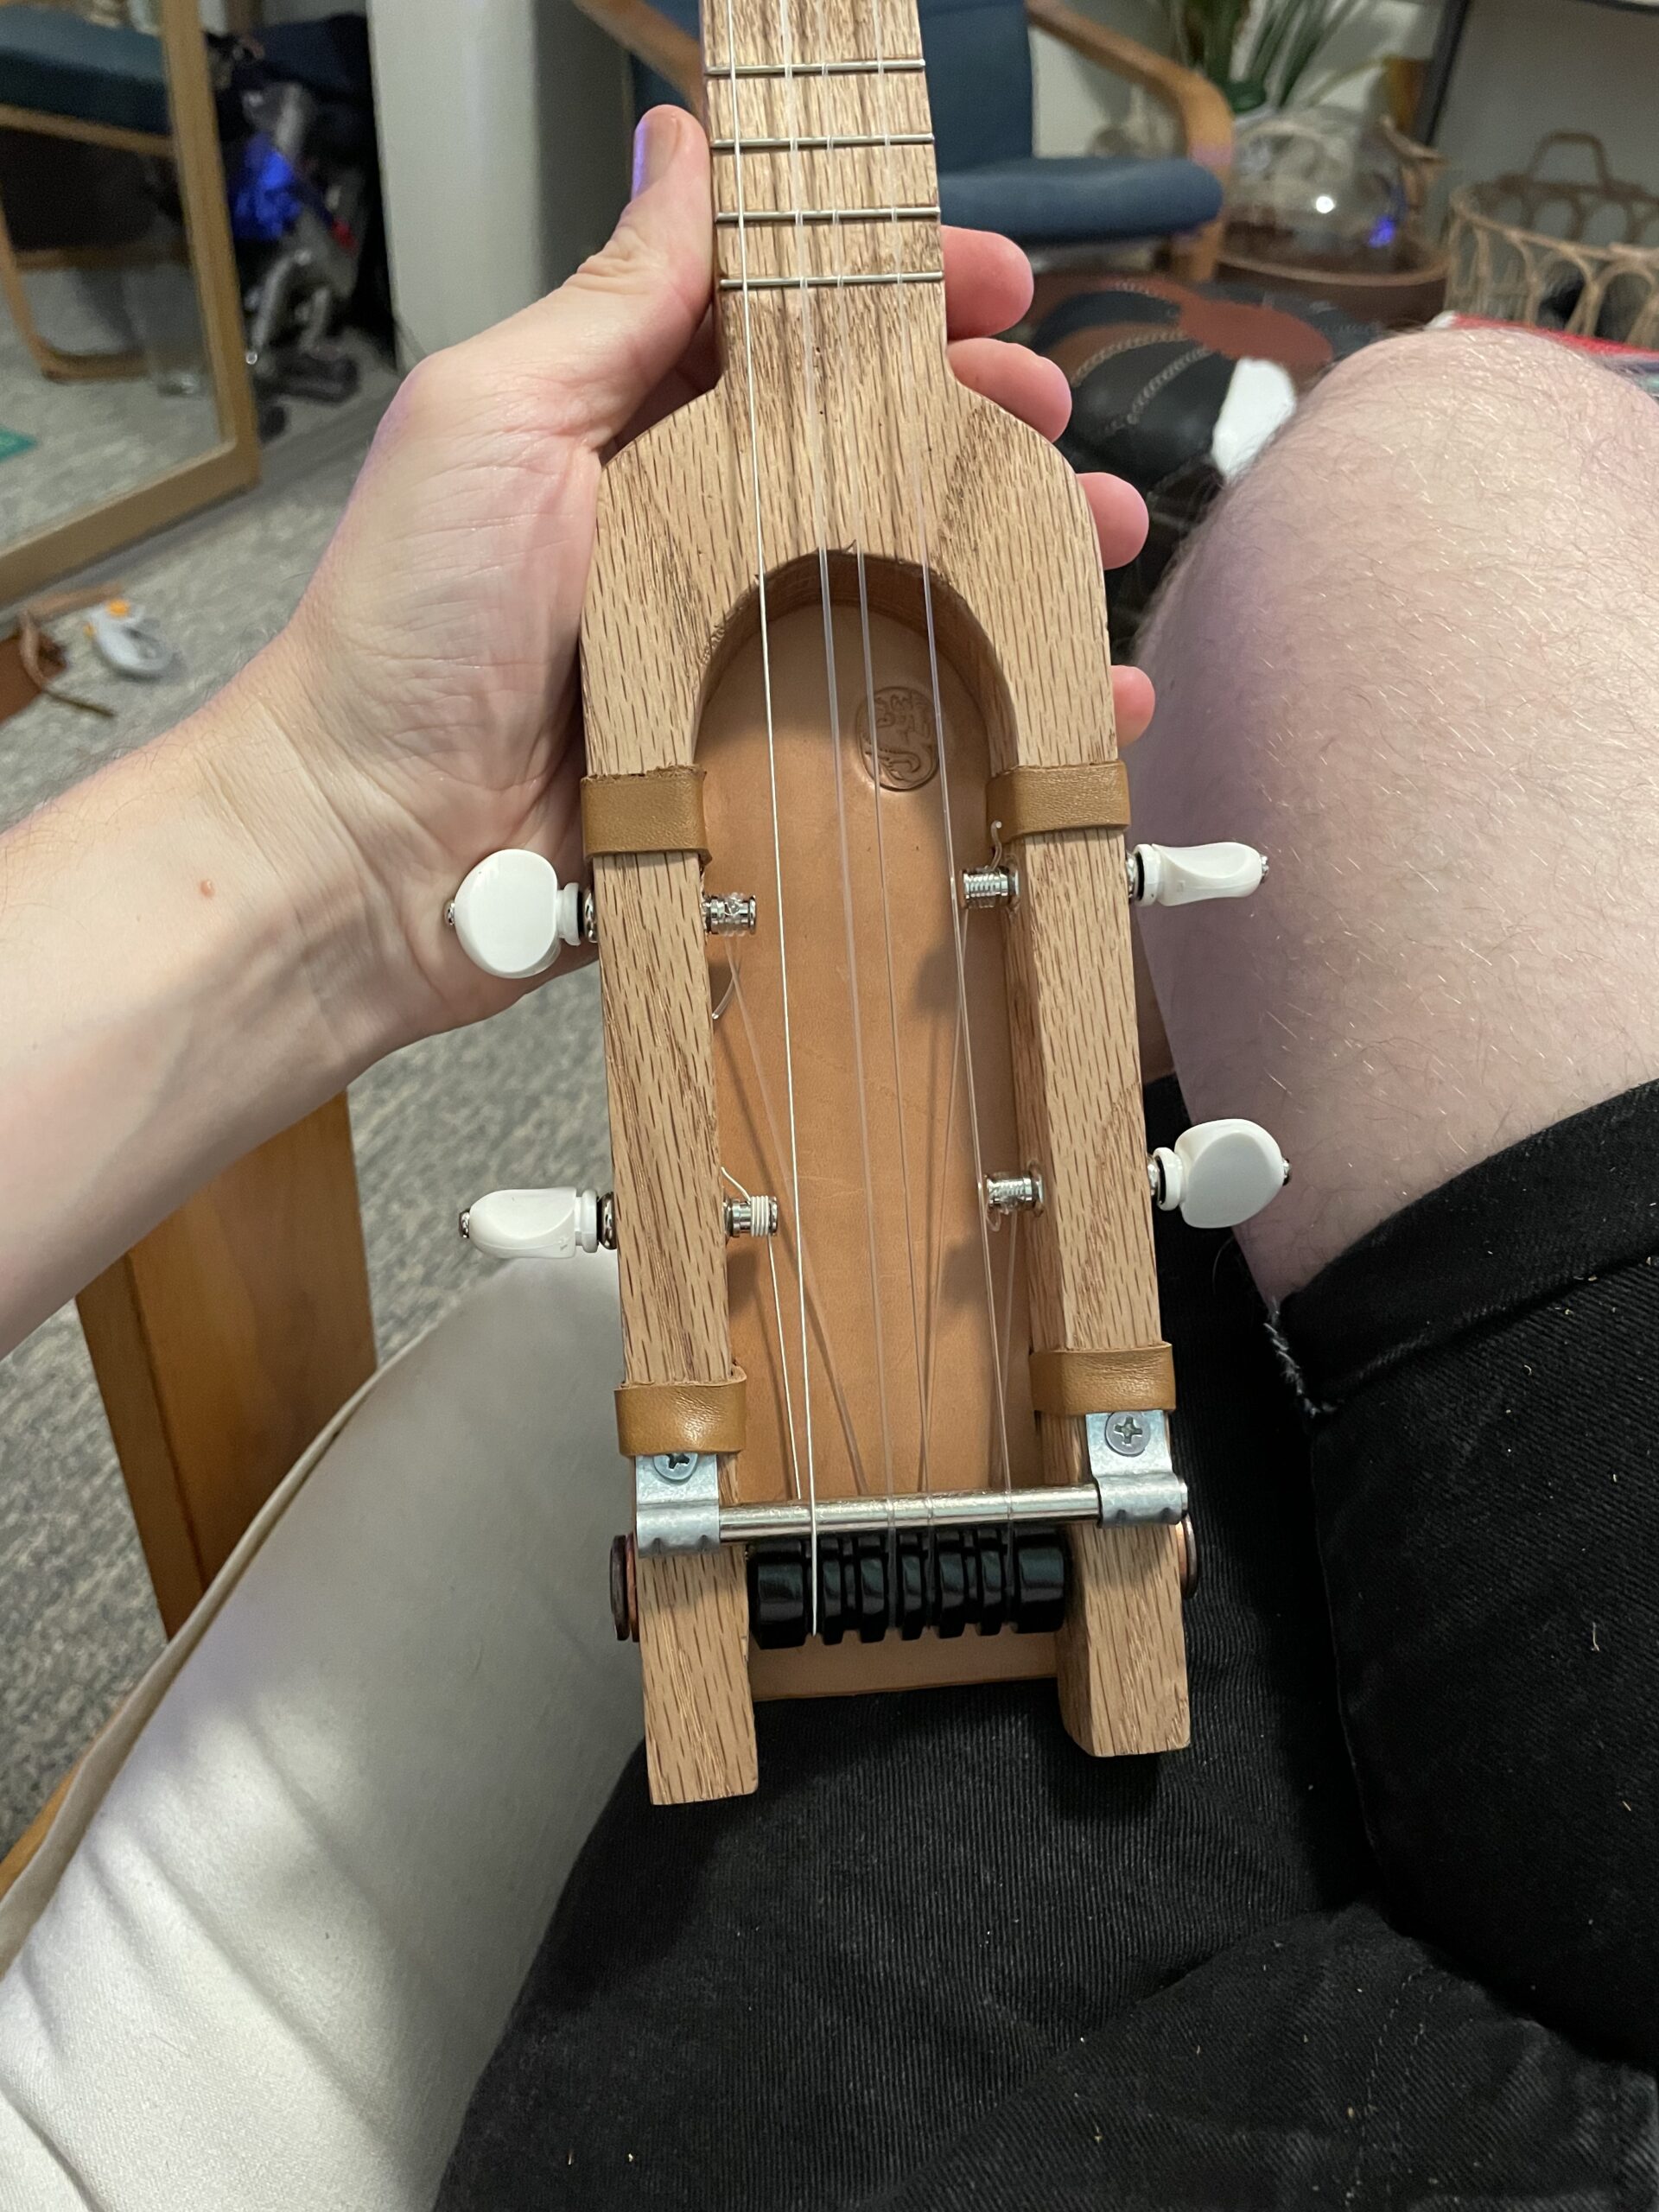
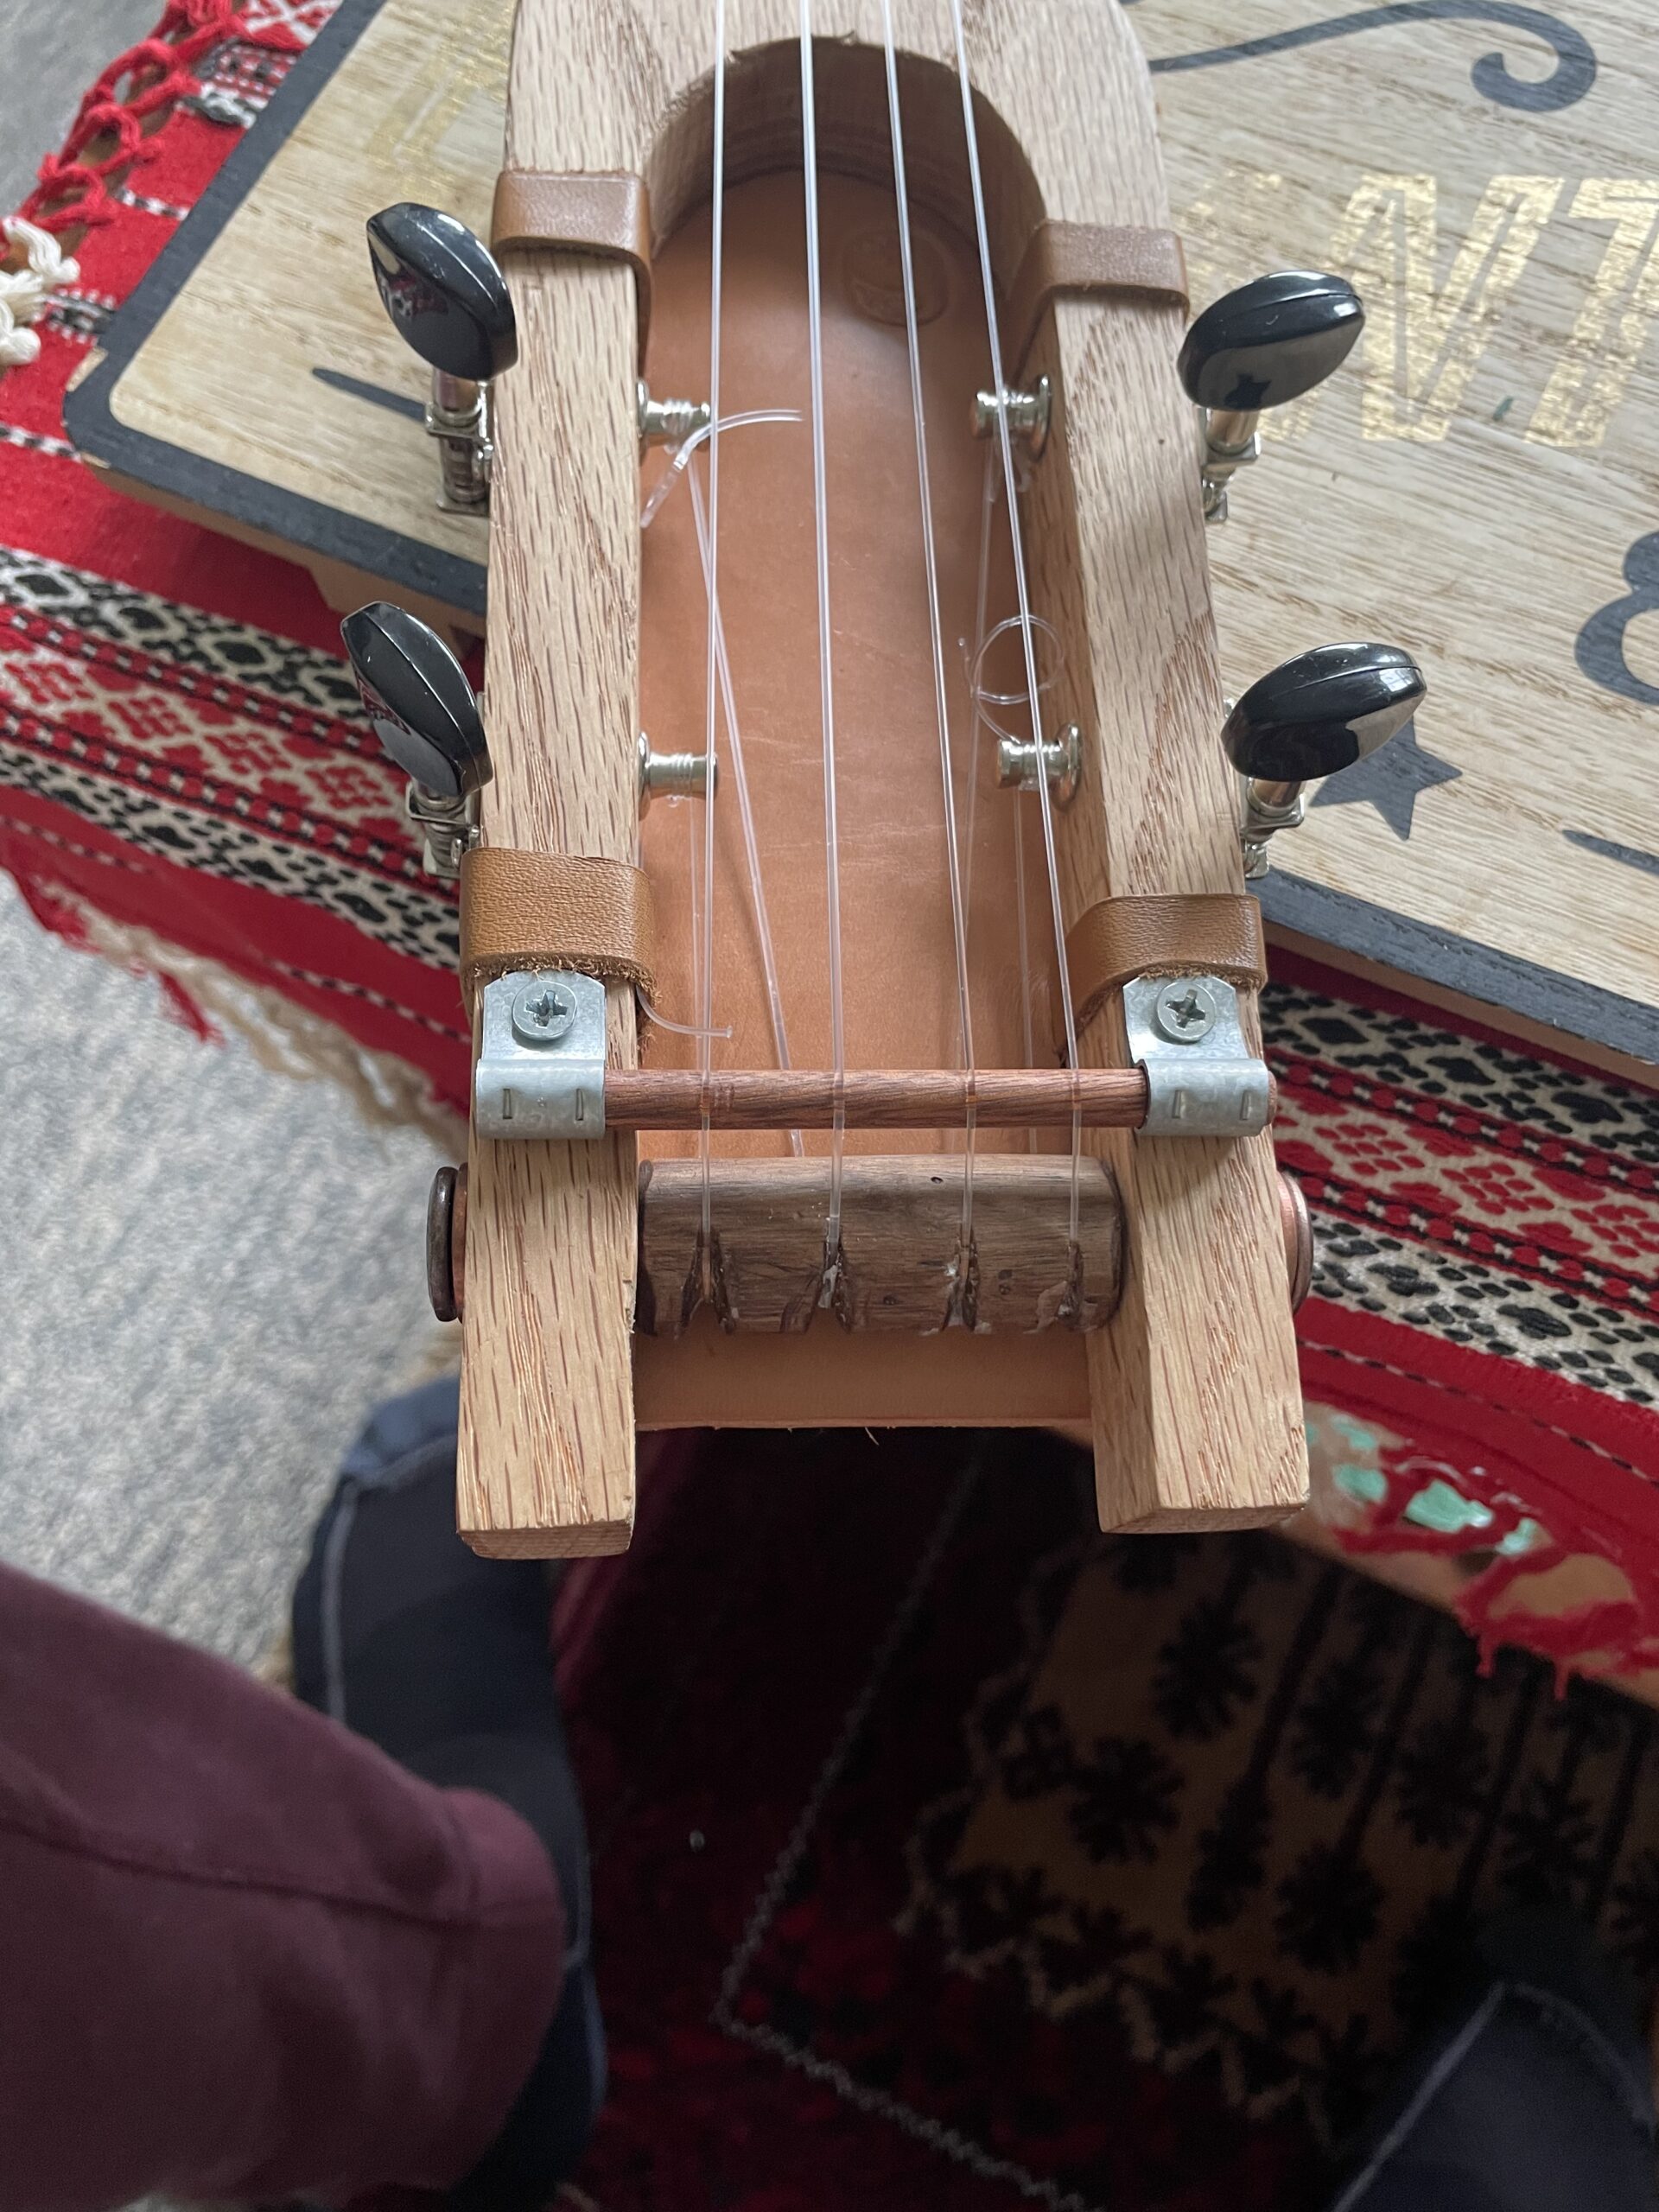
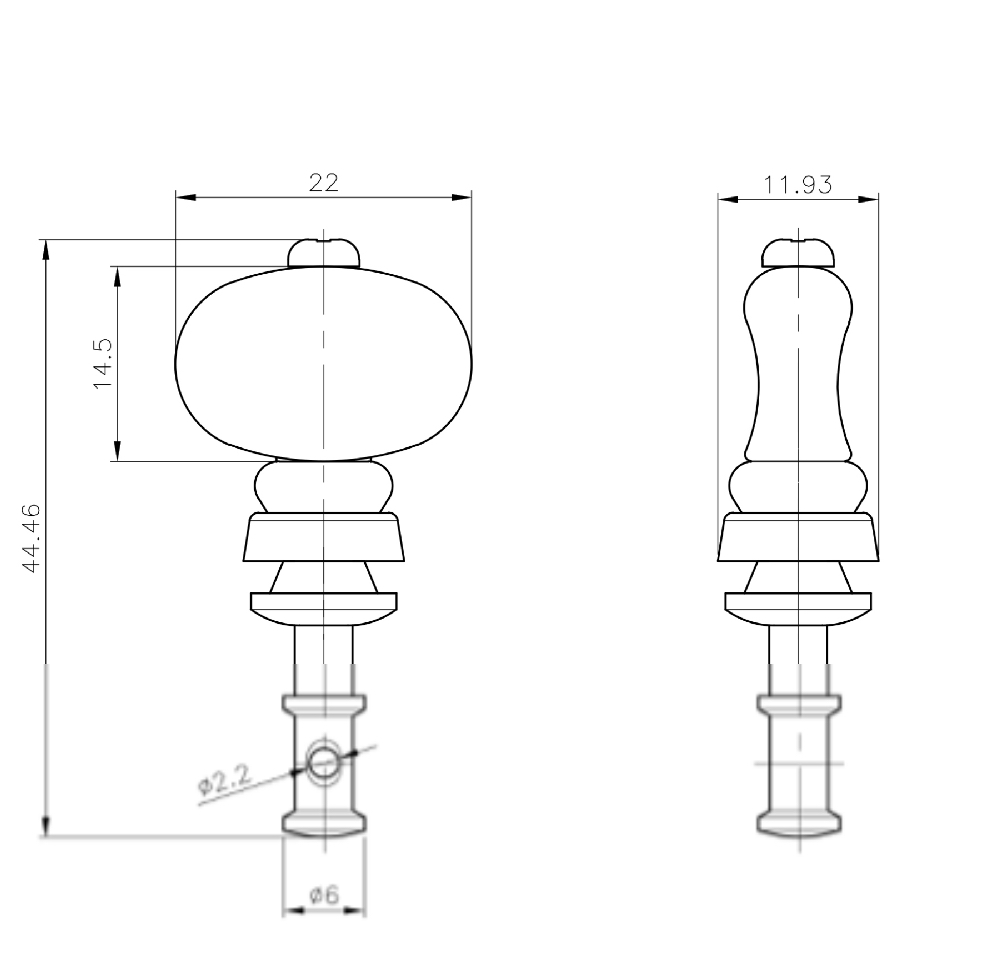
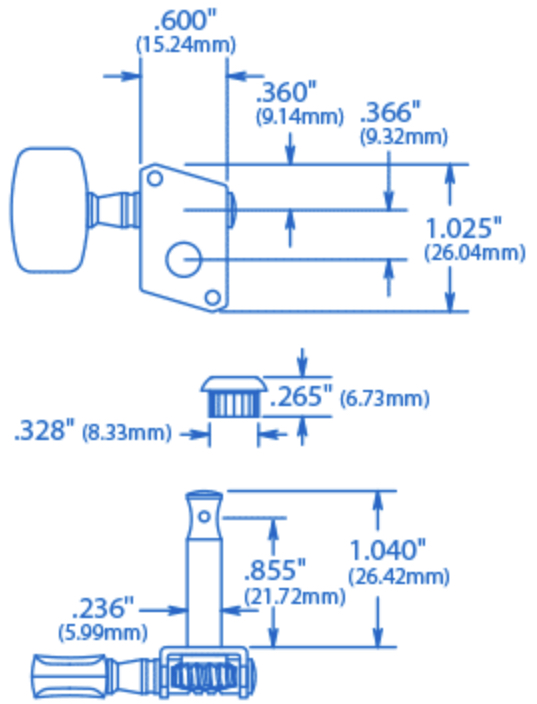
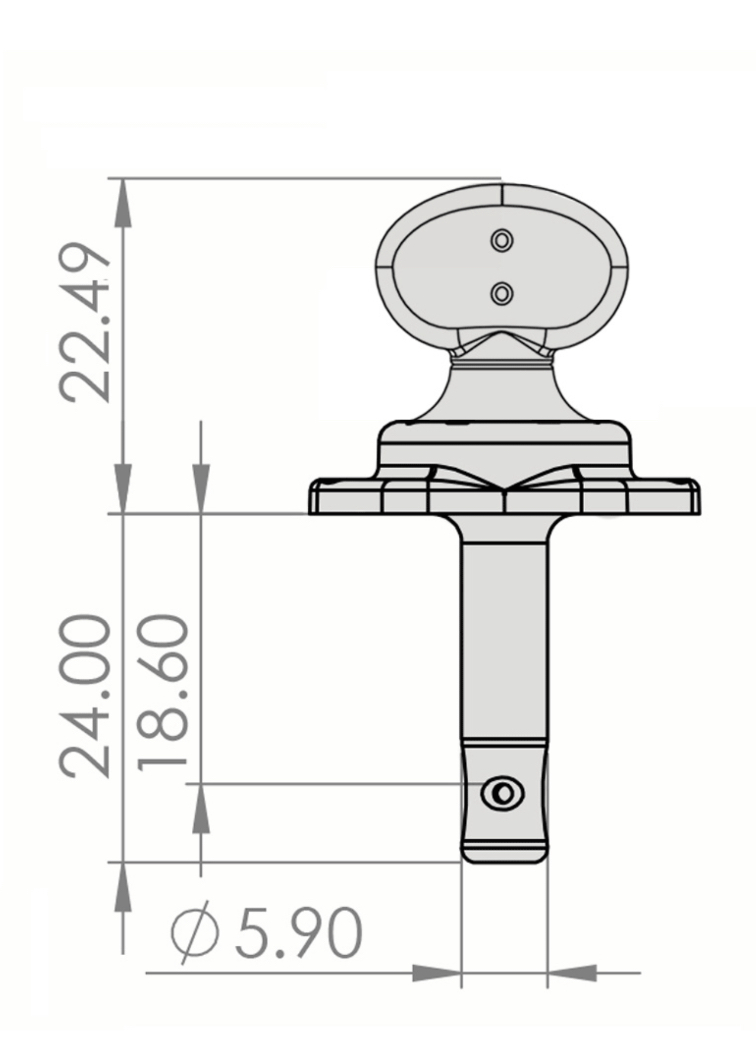
The tuners. Aye. Truly the bane of my existence. The biggest issue in the planning phases was in that printing off and designing the overall shape, I made the branches of the uke too thick. I was using these cheapos . Most ukulele tuning machines/pegs/whatever aren’t designed to go through a 3/4” wide piece of wood (which I learned after purchasing multiples that didn’t work). Short of countersinking the holes from the inside of the uke (which I definitely didn’t have the tools to do) I was forced to make some really heavy modifications. With friction tuners, I found that I could take them apart, and extend the posts by matching the bolts with a longer version that I found in the hardware store (I think the long, super thin, very tight thread bolts are called gun or gunsmith screws or something bizarre?) However, it still worked poorly, the strings pulled the tuners out of shape, and it went out of tune almost instantly—the friction from tuner-on-wood was simply too little grip to hold the necessary tension. While I prefer the way the friction tuners look on these travel ukes, I swapped them for these tuners for guitars—which have much longer posts. However, getting them to fit was a kludge due to hole-diameter issues, which I eventually fixed with a rasp and some elbow grease. Opened the holes slightly, forced the collars of the new tuners in place, and used wood glue and clamps to make sure they’d stay there.
What I did find in my research is that many of the companies have specs available on their websites that tell you exactly how long the posts are, and how big of a hole they need. Compare below my original cheapos vs the ones I ended up with vs those cool GraphTech ones.
One of the most useful tool I found was this fretboard creator that lets you specify how many strings you want, and at what tuning, and it’ll generate a proper, printable chart for you to use to place the frets and turnaround and whatnot. Or you can use the tables it generates to measure them by hand. (I used this info to generate the necessary size and number of frets)
Things I wish I’d done differently:
Here’s the thing: the shape of the ukulele can be incredibly flexible. You can just freehand a design to your own tastes. What I would do would be to actually make a significantly wider neck, to give more space between the strings, so my enormous uncoordinated hands don’t feel so damn cramped. Using the tool above, I would also make sure that I space the strings accurately, and have a decent amount of space in from the edge of the neck to the 1st and 4th strings. And I would make the “arms” of the ukulele more like 0.5 inches thick to make the tuners fit more easily. I would also countersink the strings at the head of the uke, because it looks better and is less scratchy.
About half way through the project I bought a couple of jigs, including a self centering one for drilling. I wish I’d had that from the start. It would make for holes that are perfectly straight and exactly in the center of the wood, which would be a definite improvement over me marking it with a pencil and then the drill wandering off of alignment. They cost less than $20, come in all sorts of wild shapes, and they’re pretty neat.
In the meantime, I have the ukulele, and it’s mine, and I made it. Does it sound good? No. Am I good at playing it? Also no. But! I’m currently traveling for 7 weeks, and I brought it along to futz with, and it’s a really fun thing to travel with. I was able to unstring it completely in transit, and restringing and tuning only took probably 10 minutes. Since it’s made from a single piece of hardwood, it’s pretty damn durable. It’s so quiet that it won’t bug anyone around me when I practice (blessing or curse, depending on your take). And if something terrible happens to it? Well, all the more reason to make another one.