Maker Faire 2026 Project Post Mortem

As time grew close to Maker Faire, we had to sharpen / tighten our goals.  We always try to improve some part of our projects and change things up.  This year, we worked on the more “cosplay” elements and left the more electronic and technical aspects largely alone.

  • ED-E Companion Robot
    • Dexter built an entirely new body for ED-E from a milk jug, 3D printed parts, foam mats, and model magic.  In retrospect, an HDPE milk jug is so smooth and adhesive resistant that it may not have been the best choice.  The paint flaked off in some small places and the 3D printed internal structures didn’t stay in place as desired, but everything held together quite well over the course of the entire weekend.
    • ED-E used to be built into a small 3D printed enclosure, about the size of a baseball, which was limiting for power supply and other mechanical abilities.  This year we mounted him on a PVC pipe, but quickly learned the end needed to be padded otherwise the constant shock of hitting the ground would slowly scramble his brains.
    • I think an entirely 3D printed case is very doable for next year, would take pain much better, permit easier access to his brain, better placement for LED’s and a speaker.  He would probably benefit from using separate ESP32’s for the brain and the PIP-Boy to communicate wirelessly, so that the robot could be easily untethered from the arm.
    • Another issue with the robot was simply carrying the thing over the day.  The robot and PVC aren’t that heavy, but over time lugging it around, even using it as a walking stick takes its toll.  The temporary fix at Maker Faire was to tape a bunch of foam to the bottom of the PVC pipe.  One possible fix would be to design a TPU cap to go over the bottom of the pipe, to cushion the impact of the pipe on the ground – and help reduce the impact on the robot components.  One idea is to add a wheel or caster to the base and another idea would be to put the whole robot on an IV pole.  Putting the pole on a single caster/wheel could be problematic if we needed to set the robot down – unless the wheel had a retractable kickstand or retractable wheel.  An IV pole might work well, but sourcing one might be an issue. 1
  • Vault Dweller
    • I pivoted my project from being solely about a shoulder mounted robot to being more of a “vault dweller with companion robot.”  I designed our PIP-Boys from the ground up, making several changes from other designs out there for aesthetic and practical reasons, while keeping the essential look.  Although I didn’t get around to adding yellow accents to my blue jumpsuit, I was recognized throughout Maker Faire and called out as a “vault dweller” probably due to the icon combination of the jumpsuit and PIP-Boy.
    • My PIP-Boy included the e-ink display I had originally purchased for use in a kind of digital to-do list, but disconnected from a microcontroller.  I’m looking forward to building in additional features to the device, adding a power supply, microcontroller, buttons, and lights to bring it to life.
    • I normally take a sling backpack with me when I’m out for a day trip or running some errands.  However, after the first two days I skipped it entirely since my jumpsuit had ample pockets and storage.  The various vault suits out there don’t seem to include pockets, but that’s just silly.  Ideally, for aesthetics the vault suit would feature some leather / faux leather (possibly weathered craft foam) pads at the elbows and knees as well as a brown / dark brown leather belt with pockets / pouches for stuff.

I’d really like to get a working set of buttons and microcontroller working in my PIP-Boy to be able to change the display.  There’s probably room in the PIP-Boy for a battery pack, some wires going to various LED’s2 , possibly a small servo, potentially a little laser3 , and maybe a little spring loaded projectile launcher.

I couldn’t be happier with how the PIP-Boys turned out.  My 3D designs really came together.  The cuff parts were just craft foam / floor mats and fit reasonably well.  They had a tendency to slip or rotate on the arms a little, but not to a problematic extent.  The 3D printed parts stayed affixed to the painted foam cuffs well enough.  Both were instantly recognizable as PIP-Boys by lots of people.  I think with some sanding, wet sanding, and a blast from a heat gun, they’d look even better.  I’m really looking forward to sprucing these up.

  1. I don’t mind paying ~$10 for a used one, but not interested in picking up a brand new one for $40-400.  I did find one on Craigslist, but the seller hasn’t replied after several hours.  After this afternoon, I’ll be a lot less immediately interested since we probably won’t be suiting up again for another year. [↩]
  2. I have a great spot for the 5mm NeoPixels I bought years ago [↩]
  3. Because, why not!?! [↩]

Maker Faire 2026 Roundup

I’ve broken this year’s Maker Faire roundup into two sections – those things that were totally new to me – and those projects and friends I was fortunate enough to see again.

  • Fred Zyda’s Harmonograph
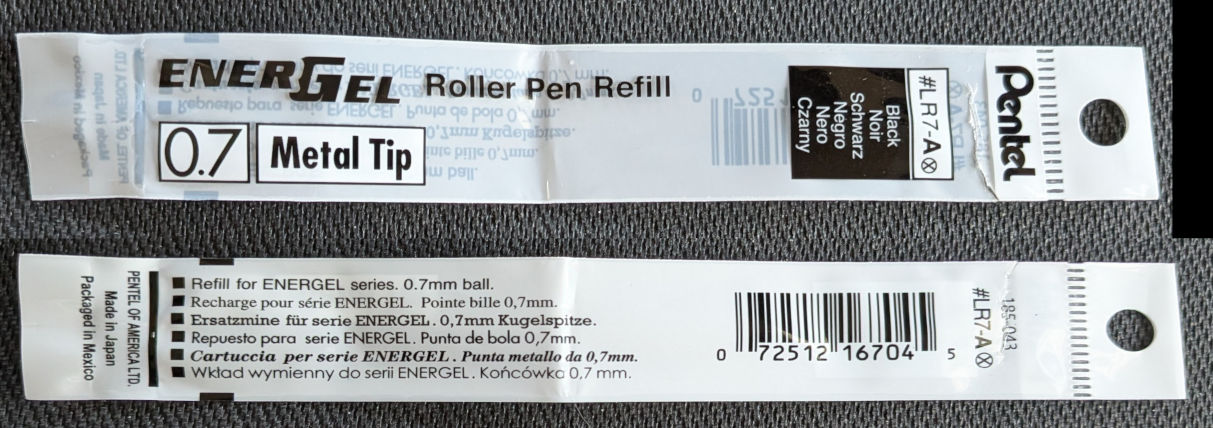
    • Fred and Eleanor made a harmonograph to draw Lissajous figures based on designs by Karl Sims.  Karl also published a tutorial on Make Magazine a few years back.  This is one of those projects which doesn’t look like much on paper – but when it’s in front of you is downright mesmerizing.  One of the things I love about Maker Faire is meeting people who have exhaustively searched for the perfect parts for their project.  Here, Fred bought up pretty much every kind of pen possible before settling on the Pentel Energel Pro Permanent Gel Pen 0.7 mm – the key being not just a smooth motion, but a pen that could draw swiftly enough to keep up with the machine.

      Pentel EnerGel Pen Refill 0.7 Metal Tip (#LR7-A)
  • Maclean’s super accurate Apollo space suit
    • Maclean‘s Apollo spacesuit was a marvel of hyper accurate multi-mode making using machined parts, FDM and resin 3D printing, vacuum forming, sewing, and electronics.  he also brought his Ghostbusters proton pack!
  • El Pulpo Magnifico
    • The photographs and videos of this metal monstrosity simply do not do it justice.  Their DJ spun some crazy tunes on Saturday night and their FJ1 were blowing the lid off the evening with huge bursts of flames while Makers ate, partied, and danced all around under a moonlit night.
  • Generate Labs in the UnityPoint Health St. Luke’s Hospital
    • The booth for Generate Labs is what making and helping people is all about.  Makers and medical professionals work together to come up with ways to quickly and cost effectively solve real world problems and help out individual patients in ways that might otherwise be completely impossible.  I was touched by their stories of helping a child with cerebral palsy play his favorite Taylor Swift songs, someone else play their favorite video games by building a prosthetic that would otherwise have been $70k, building life size physical representations of the human circulatory system so medical professionals could visualize how implantations are placed, special prosthetics so that a baby born with differences could learn to crawl.  Even though their facility gives these devices away for free, I have no doubt they’re actually saving the facility tens of thousands of dollars by being able to print color coded test tube trays and repair their microscope equipment.2
  • Udder Mayhem / Ankle Chomper
    • These two video games were both clearly passion projects.  Future gaming consoles may never have teat or foot interfaces, but these were both incredibly fun games and super enthusiastic teams.
  • Baba Yaga’s Hut
    • While the hut was made of cardboard, paint, a little PVC, and a couple towels3, it was beautifully executed.
  • East Bay Maker’s Club
    • This group had a laptop connected to an LLM, which pulled an image, which was turned into a simple vector drawing, then printed out using a 1980’s plotter.  While LLM use tastes like the opposite of making, it was less a critical component of their project and more about enabling a kind of pictionary telephone-game between booth visitors.
  • University of Wyoming’s UWIN Makerspace
    • This university’s pitch was quite compelling – a four year university that is less expensive for out-of-state residents than it is for a local California community college, with no less than four separate makerspaces.
  • Lumotron is an LED lit 3D geometric sculpture
    • One of my favorite things to do at Maker Faire is basically sprint from booth to booth, learning everything I can about what people are doing and how they overcame challenges.  Adrian took great care with his Lumotron to orient the 3D pieces to minimize any tell-tale appearance of 3D printing artifacts – and used some interesting mathematic applications4 to run a single sided LED strip through the entire sculpture in such a path that it created essentially a double-sided strip throughout.  Plus, he built his own javascript tools for planning it all.  Sometimes I like having a thing… but so much more often, I just feels so much more satisfying to understand how a thing came to be.
  • Kitiki, the open source e-ink laptop
    • I reached out to Ravi before Maker Faire because I was so interested in his project.  If you’re not using a laptop to watch videos, there’s no real reason for a big power-hungry screen when a simple low power e-ink display could help a device last for days or weeks.  He also hooked us up with a some foam for ED-E’s PVC pipe!  Thanks bud!
  • Chris Mora‘s life size Iron Giant
    • Chris spoke passionately about building a life-size 50 foot tall Iron Giant out of steel.  It took some serious love and determination just to do the head – and I have no doubt he’ll be able to build the entire rest of the robot.
  • Justin’s slick EDC utility knife designs
    • These were really nice looking metal EDC utility knives; thin, a smooth bistable movement, and it made use of easily disposable and replaceable utility blades.  If I was a knife carrying kinda guy, I’d probably want one.
  • Dipstick
    • I like to peruse the Maker Faire website before the event starts, scoping out all the things I’d be interested in seeing.  Dipstick caught my eye because it was a fun solution to a very niche issue (wanting to see clearly into shallow water) with some fun pictures.  It’s basically a flexible digital underwater periscope and was an interesting combination of electronics, 3D printing, and plumbing.  The father and daughter duo were enthusiastic and engaging as they explained how they made it.  They purchased pretty much every kind of digital endoscope before finding – and then having built – the exact kind of waterproof one they needed for the project!
  • Famous After Death / Warren Hart
    • Warren creates block prints using 3D printed versions of his digital designs – but also drawings / paintings over trading cards and pages from old books.  Most years I don’t buy anything at Maker Faire besides food and drink – but this year I bought one of Warren’s pieces because every time I looked at it I just laughed.
  • Pop It
      • The booth was so mobbed that I only got a chance to watch it in action.  The project was a cross between a carnival game and Simon.  You and three competitors slap one of the four colored buttons matching the colored lights as they flash beneath your balloon.
  • One Servo Robot
    • When I first saw this page on the Maker Faire website, I thought “So what?  A single servo in a ball wiggling?”  When I saw it in real life… I realized Fangwei was able to actually control the approximate direction of the sphere just through wiggling that one motor!  In a delicate balance of the placement of the electronics and felt feet mixed with shaking the servo in a particular way to one side or the other and some careful calibration – he was able to actually move the robot in a desired location.
  • Rubber Band Helicopters
    • I didn’t get a chance to actually build one of these, but I watched the videos on their Maker Faire page – and got to see several in action.  They’re so simple, so fun to watch, and open themselves to lots of design and exploration by adjusting the paper fins.
  • Story Lamp
    • This is another exhibit that almost doesn’t make sense until you see it.  Kids make drawings on transparencies, these are folded and joined into a ring of four panels, then placed on a rotating mechanism with a light source and then behind a diffuser.  The result is a dreamy kind of pantomime repeating visual story.
  • World’s Largest Mechanical Pencil
    • Bob’s building a youtube channel and documenting his wild builds, including this fully functional giant mechanical pencil.
  • SnackNotes
    • Brain at SnackNotes had a LOT of different little projects to show off in their small booth.  He had zoetropes, a DIY whiteboard etch-a-sketch, squishy blob puppets, and lots more – and was happy to share everything about their projects.

We also got to see some friends and favorite familiar projects from prior years:

  • Stephan and his DynaMandala
  • The entire Scare Makers crew!
  • Miles and the entire crew from Raptor House FX
  • Lauren from Dustworks / Sepia Lux the cuttlefish car
  • Tim from Inventopia and his Struder and world’s largest functional Gameboy
  • Sander / CaliforniaSTEAM‘s incredible capacitor powered earrings
  • Ray and his 3D printed, resin coated dragon scale tumblers
  • Crashspace and their ‘zines, kaleidoscopes, and other assorted projects5
  • Crappy Happy Robots are always a delight
  • BayLUG, Bay Droid Builders, and Dalek Fax
    • No trip to Maker Faire would be complete without a visit to the Lego area, checking out the droids, and hearing a dalek scream at people
  • Devising Delights‘ inflatables were just as delightful as always
  • I don’t think I’ve seen Paul Nosa at Maker Faire for some time – but it was great to see his sewing artistry on display.
  • Melty Cube.  Daniel’s “melty cube” has to be seen in person to be believed.  As the staff spins and changes colors, you realize each face is slightly different, causing them to become animated before your very eyes.
  • Clever Clocks.  I saw these clocks for the first time in 2025 and was mesmerized by their seeming simplicity and abstract beauty.  Every single one of their clocks is clearly a work of art.  What I love about these timepieces is that when you don’t need to know the time, every one of them is lovely kinetic sculpture.
  • High Altitude Balloons and Maker Buoys
    • The balloon and buoy projects are not at all affiliated with one another – but I love how they’re both ways that regular people could accessibly explore the entire planet.
  • Dickinson Glass
    • We’ve bought several pieces from the Dickinsons over the years and love checking in with them each time we come to Maker Faire.  His work is beautiful and it’s mesmerizing to watch him craft something out of a blob of glass and flame.
  • Mr. Ray’s Worm Circus
    • Worms, comedy, and magic.  :)  I’d first seen Mr. Ray in Rocklin, but delighted he recognized us from last year!
  • Shawn Thorsson’s props and costumes / T&A
    • As with so many makers, everyone at the entire booth is absolutely overjoyed about sharing what they made, how they made it, how they overcame challenges – plus they have some hilarious Hollywood stories as well.
  • Stephen Ng’s Games
    • I first saw Stephen‘s word games at last year’s Maker Faire.  This description won’t do it justice, but it’s kind of like a combination of Banangrams/Scrabble and Tetris, where you build words using big physical blocks and LED displays, while new letters drop down a screen.
  • Run! The Card Game
    • We first saw Run! at the Rocklin Maker Faire and bought their game.  It’s simple and fun game we play regularly.  Plus, they did all their own art. 6
  • Sync Tank
    • I’d seen Sync Tank in years prior, but didn’t get a chance to stop by their booth again.  However, since I haven’t typed up my notes from prior years, it seemed appropriate to add it in now.  Chase built a way to watch and monitor his fish underwater.  If you love fish and fishtanks, but are bummed you can’t have them with you all the time, this is the project for you.
  • Laser Maze
    • I last checked out the laser maze about two years prior and didn’t get a chance to go back this year.  If you ever get a chance, it’s incredibly fun to try and make your way past these lasers in time to beat the clock.
  1. Flame Jockey?! [↩]
  2. Instead of the full replacement cost necessitated by the manufacturer! [↩]
  3. to distribute the weight of the house on the PVC pipes [↩]
  4. I wish I could remember what it was… [↩]
  5. Like the wearable wifi sensor! [↩]
  6. There were more than one booth from other makers that were largely indistinguishable from AI image / AI 3D model + printing / AI vision / AI API calls [↩]

Brother SA129 Free Motion Quilting Foot

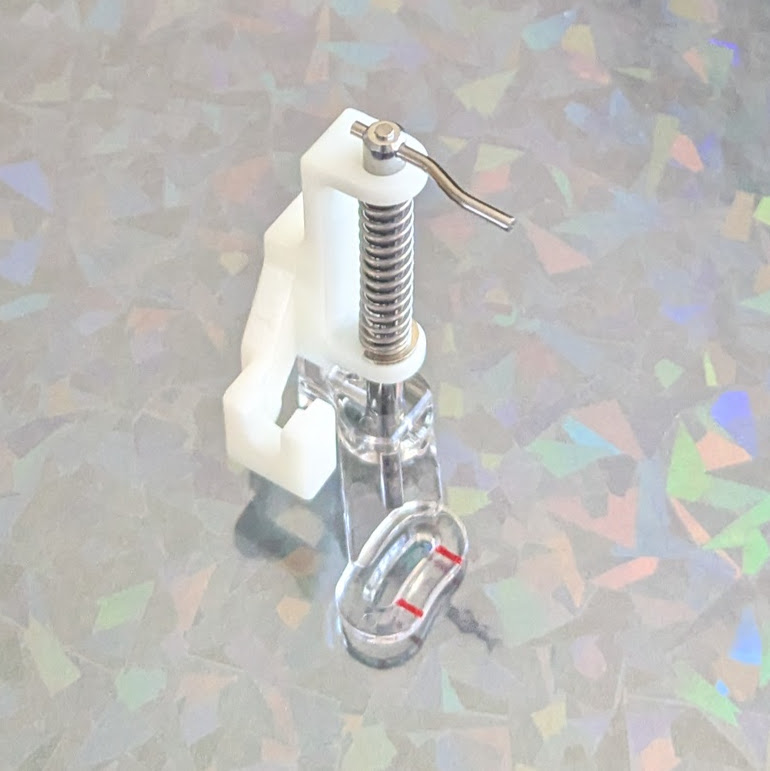
Brother Free Motion Presser / Quilting Foot SA129Apparently I already have one!  This is technically the third Brother sewing machine I’ve owned.  My first was my Mom’s hand-me-down, which worked for years, then stopped working and was too expensive to fix.  :(  The second one was also a Brother, that one was fairly inexpensive, but strangely enough some of the rubber wheels inside literally melted into goo.  I 3D printed a new one of these wheels, but ended up making everything worse and… once again it was too expensive to repair.  I donated both to Goodwill a long time ago in the hopes someone more capable will find and fix them.

In any case, one or more of these sewing machines came with the above free motion foot!  On the Brother website it’s listed as the SA129 for $60 and doesn’t indicate it’s compatible with my Brother XM3700.  The Brother part elsewhere for only $40 and does indicate it’s compatible with my machine. 1 You can find this exact part available for sale on ebay for under $15, which seems like a pretty great deal.  Edit:  Ugh, it looks like Amazon has Temu knockoffs for as little as $6, shipped overnight?!2

This little device reminds me of Paul Nosa‘s work with a drawings using a solar powered sewing machine.  We’ve seen him at Maker Faire several times – and it’s always a treat to watch him in action.  I’m not positive he’s using a free motion / quilting foot for his machine – but it makes sense that’s what he was doing.

The good news is that I don’t have to find this part or wait for it to be shipped.  The “bad” news is that I no longer have any excuse for not making something with it!

  1. And, I mean, why wouldn’t it be, really?  I can’t imagine Brother would make this one sewing machine not compatible for some reason.  That’d be just mean. [↩]
  2. It’s such a simple part, that one of these would work.  I’m just torn by my severe dislike for Bezos/Amazon [↩]

Going for a Record

I’ll go months and not post anything on this blog – and then post a ton as I work through a project or just need to get something off my chest.  There’s usually an uptick around the time Maker Faire applications are opened and most years I have a few dozen posts with the notable exception of 2020.1

Publishing my old blog posts might get me in striking distance of a personal best from February of 2010 of 106 posts. 2  They weren’t all bangers.  Here’s the last one from that month – a haiku:

Clear PLA sits
Mendel languishes alone
Plastruder hates corn

MakerBlock – 02/28/2010

Beating 106 blog posts this month seems entirely possible.  Even if I try to beat my record and fail, I’m already way ahead of my usual blog post count.  MakerFaire is coming up, the kids are out of school, and, as always, I’m working on a bunch of random projects.  Right now I’m at 28 posts for the month of June 2026.  I’ve got 20 more days in the month to go, 293 unpublished draft posts of varying degree and quality, fresh page in my notebook, a strong internet connection, a quarter tank of gas, and a credit card.

Let’s fucking go.

  1. Just the one!  I can’t imagine what was going on in the world back then… [↩]
  2. With so many posts during that month, it’s almost unbelievable that 8 of my unpublished posts were from February 2010! [↩]

Building a Cardboard Cutter Table With Cardboard

I hadn’t heard of a cardboard table saw before seeing the Chomp Saw at Maker Faire and Kickstarter several years ago. 1  During their run on Shark Tank they disclosed it took $73.81 to make each one.2

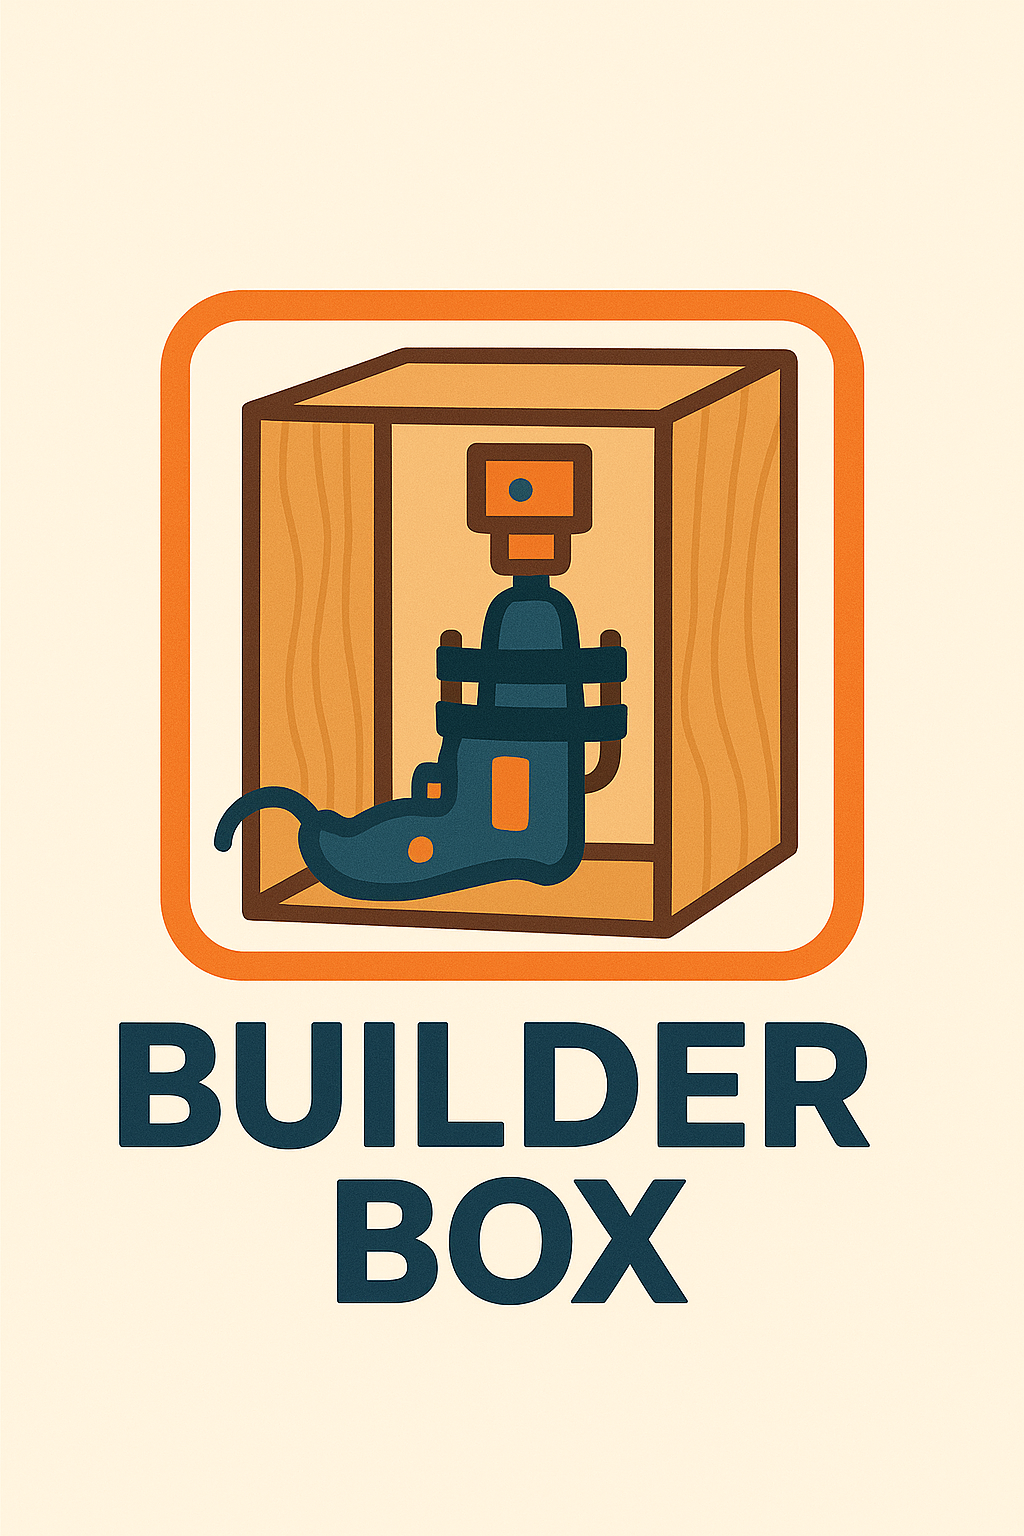
When I originally saw the ChompSaw, I had no idea how the thing worked and assumed it was some kind of custom made invention.  It wasn’t until much later I learned it was basically a drill + a sheet metal nibbler + plastic box.  A maker named Alejandro Leguizamo entered something called the “Builder Box” for the Rocklin Maker Faire in 2025.  The description was “Experience the Builder Box! The Builder Box is a power drill accessory which cuts various materials, like cardboard, fabric, and plastic, in a safe manner, perfect for young makers. Test prototypes, share your thoughts, and be part of its evolution.” but I wasn’t sure what it was or how it worked since the only picture was a kind of a logo.  I reached out to the maker and it turned out that he couldn’t make it to the event that year, but he explained the project was, as suggested above, a drill + sheet metal nibbler + a box.  Suddenly, the logo made sense!

Builder Box Logo

Once I knew what I was looking at, it instantly became easier to find more resources.  I found piles of nibblers / sheet metal nibblers for sale online for ~$30-40, several pictures and an unlisted video from ChompShop, and two Instructables,3  One of the instructables indicated you could use a foot peddle to act as a variable speed controller for the drill.  While an interesting idea, I’m not certain the additional incremental benefit is worth the complexity.  The ChopmSaw is able to operate at a single speed, so why not this?  While an on/off toggle switch is obviously helpful, I’m not going to go out of my way to add this for my own simple prototype/home use.  The unlisted maintenance video shows the ChompSaw’s disassembly showing a motor, a nibbler end, bits of wire and such, in a plastic housing, with a fan and tray for catching the cardboard bits – exactly as one would expect.

This slideshow requires JavaScript.

Before I go on, a word about their work station.  I got to see one of these at Woodland’s Square One makerspace and thought it was fantastic.  It’s cheap, lightweight, sturdy, and attractive.  I’m not sure where someone would get the cardboard for these tables, but ChompShop has a guide on building the workstation and an accompanying video.  While I would love to have the plans to be able to make one, it’s child sized, would need to be scaled for adult use, and at that point, I really might as well design my own.

I’m reminded of a a guy who invented a simple and attractive business card that turned into a cell phone stand.  He went on to create a cardboard furniture / homegoods design studio called “Out of the Box.”4  Like many other people, we accumulate a lot of cardboard.  It sure would be great to have plans to draw out designs on cardboard, chop them up with a drill + nibbler, and then fold into furniture.

My understanding of the Gingery lathe is that as you build the device, the portions you’ve built help you build the next pieces.  How cool would it be to pick up a nibbler and cheap drill, slap them together, start slicing up parts to make simple mount, then use that to keep building up into a workstation, then desk, then cardboard workshop?

In any case, given the entire project could be basically put together with:

  • Cheap drill (Harbor Freight has some for less than $20)
  • Nibbler attachment ($30-$40 at the hardware store or online)
  • 3D printed part to clamp drill in place
  • Box of some kind
  • Zip ties to hold drill and clamp in place and hold the drill trigger down or at a certain speed
  • Extension cord or power strip to turn the drill on and off

Now, I could put my regular corded drill into this, but for an extra $20 I could also have a small dedicated cardboard cutting worktable which seems like a fair investment to me.

Making a Makerspace
  1. Tool Recommendations for Making a Makerspace
  2. Makerspace: Just a few more things for the shopping list
  3. Building a Cardboard Cutter Table With Cardboard
  4. Makerspace Addenda – Homegoods edition
  5. More Maker Tools
  6. 3D Printer Pens for Makerspaces
  1. Unfortunately, the Maker Faire website regularly wipes out maker entry pages, so I can’t easily link back to the 2023 entry as I would much prefer. [↩]
  2. It’s unclear whether this is the per unit cost from their Chinese factories, to just build a unit, or actual landed cost.  I’m guessing landed from their manufacturer. [↩]
  3. Those instructables posted about 9 years ago and 3 years ago, respectively. [↩]
  4. Though, possibly renamed to Creative Cardboard Company now? [↩]

Makerspace: Just a few more things for the shopping list

Is there a word for the feeling when you place an online order and the moment you hit “Purchase” you realize there was something else you wanted and now it’s too late?  No?  Um…  me neither.

Since publishing a large blog post about my wishlist / shopping list for building a makerspace two days ago I’ve got two new things to add to the list.  I wonder how best to maintain this list.  While a wiki would be the best for maintaining evolving content, the tone of my posts tend to be a mix of useful things and nonsense and I’d have to heavily edit / format the content.  Maybe one day I’ll get organized and create a page on this site that’s something of a shopping list with links back to the rambling posts.

  1. Low Rider CNC.

    1. My buddy Andrew suggested the Low Rider CNC belongs on this list.  I haven’t done a deep dive on this yet, but just checking out the main documentation pages, it looks amazing.  While a full table sized CNC can run $7-10k, this Low Rider CNC appears to be community supported, open source, and designed for people to build themselves for ~$100 in hardware and electronic parts, plus  3 kilos of 3D printed parts, zip ties, conduit/rails, router, table, and wood.  An affiliate appears to sell partially assembled and fully built options from $900 – $1,500, which appears to include shipping.
  2. Hot Foam Cutter.

    1. I was reminded these existed after seeing this Mastodon post from Concretedog about his 4D CNC hot foam cutter.  However, it’s possible to build a hot foam cutter with little more than some nichrome wire, a battery, and some random stuff.
    2. While I don’t have a ton of uses for a hot foam cutter…  but I did purchase some nichrome wire two years ago specifically to make one of these for … reasons I no longer recall.  I made the purchase some time in October 2024, so it couldn’t have have been for Maker Faire and likely not for Halloween…
    3. A little extra research brought me back down a rabbit hole to rediscover why I started thinking about hot wire foam cutting.
    4. At Maker Faire 2023 I was excited to see Robert van de Walle’s “composite structures with low VOC materials” 2023 Maker Faire project.  The project showed off how he would avoid the use of fiberglass and resins in favor of laminated paper using glue over an insulation foam structure.

      This slideshow requires JavaScript.

    5. Robert also has an interesting tutorial about using Harbor Freight floor mats for making inexpensive, lightweight, and flexible structures using contact cement instead of expensive pink insulation boards.  Robert’s video was in turn inspired by Evil Ted Smith‘s video demonstrating how to copy forms into inexpensive foam mats by covering the object in aluminum foil, that in duck tape, taking the coverings off, cutting them into flat shapes with “darts” for alignment and to allow the formation of curves, cutting these out of foam, heat forming, applying contact cement, then reassembling.  Both of these videos had previously sent me down a rabbit hole of looking into making “poor man’s fiberglass” to make a foamie using cloth and wood glue over a lightweight structure.  And, more recently Nighthawkinlight’s videos about making strong lightweight structures with what amounted to lumber made from cardboard, covered in a water proofing coating.  I remember watching a video about biomimicry and how the how the toucan’s beak can be both strong and lightweight because it is essentially a lightweight, nearly hollow, sparse structure wrapped in a tight hard shell of keratin.
    6. Anyhow, I think I was researching these things after Maker Faire because of how miserable it was to cut sheets of foam with a craft knife which then lead to soooo much sanding.  I figured in the future I could design something that would let me create almost a small hot wire cutter to consistently and easily cut shapes and beveled edges into foam.

Sometimes I want to add an update only to discover that I never published a blog post about a thing I wanted to link back to.  I guess it’s time to dust off my pictures from 2024 leading up to Maker Faire to share information about how we made my kiddo’s Fallout inspired combat armor from Harbor Freight floor mats.

With the magic of time travel, I’ve now created that post and can now link to it.  :)  Share and enjoy.

Making a Makerspace
  1. Tool Recommendations for Making a Makerspace
  2. Makerspace: Just a few more things for the shopping list
  3. Building a Cardboard Cutter Table With Cardboard
  4. Makerspace Addenda – Homegoods edition
  5. More Maker Tools
  6. 3D Printer Pens for Makerspaces

Making Cosplay Armor from Foam Mats

This post has been a long time coming.  My kiddo and I made Fallout inspired combat armor out of Harbor Freight floor mats.  We’ve now brought these to Maker Faire 2024 and 2025.  They’re only $13 for about 16 square feet of 1/2 inch thick sheets of material which was enough for a front and back panel plus enough to do it all again.

I’ll update the photos below with pictures of the finished1 armor.  However, below is what it looked like part way through the construction process.  We added some 3D printed parts to allow the front and back “plates” to be kept together with some seat belt looking nylon webbing.

This slideshow requires JavaScript.

The very short version of the build guide, for our first simple builds with these mats, would be:

  1. Make patterns on paper or cardboard
  2. Trace and/or cut out of foam using a utility / craft knife you don’t care about because the foam will dull the knife quickly
  3. Bevel/shape/sand as needed
  4. Using gloves, apply a thin layer of contact cement to one piece of foam and the other piece where it’s supposed to go.  Let it dry.  Then, carefully place one piece upon the other – because the moment the two pieces are joined the contact cement will bond instantly making adjustments2 impossible.
  5. Bevel/shape/sand/paint as needed
  6. If making weathered armor / metallic features, consider using a silver pen or paint to dry brush on the silver color

I tend to take pictures as I build things out of an ambition to turn them into a blog post at some point.  So, hopefully these pictures give a sense of how the build went:

This slideshow requires JavaScript.

These were easy enough to create as the entire design was basically just bit flat planks of material.  Making more complicated / curved features would probably best be done by using a heat gun to soften and shape or cutting the curved features into flat panels with “darts” / wedges cut out so that when they’re glued together and the form built up, it will take on a curved shape.

The tutorial videos from Robert van de Walle and Evil Ted Smith are absolutely worth watching.  The short version would be that when copying another form, you could cover it with aluminum foil, that in duck tape, draw in lines for what could be fairly flat sections, including registration marks, cut the duck tape into flattened sections with “darts” as necessary, trace onto and cut out from foam, heat-shape as necessary, apply and allow contact cement to dry, assemble.  Some stills from ETS’s videos might be helpful:

This slideshow requires JavaScript.

These stills won’t do the full videos justice, so you should go watch those.  Robert’s point with his short 3 minute video was basically that these materials are incredibly inexpensive, able to build up huge shapes quickly, and look great.  I’d agree on all counts.

  1. Nothing is ever finished. [↩]
  2. Nearly [↩]

Tool Recommendations for Making a Makerspace

I’m extremely fortunate that my city’s utilities are not only provided through the city as an alternative to the incredibly poorly run PG&E system, but they have a STEAM oriented “exploration center” to entertain and educate about science, conservation, and environmentalism.  The people who work there put on workshops about all kinds of things and are incredibly helpful, friendly, and enthusiastic.  Right now they’re in the process of converting a section of their building into a makerspace and I couldn’t be more stoked.

If you are one of those “Just show me the recipe, I don’t need your life story” types, you can skim the table of contents to see what I’d recommend for various home/makerspaces at different levels/price points.  If you don’t mind a short walk, I’ve got a few related things you might not hate reading.

I’m fortunate that we have been able to put together some of the basic tools for something of a “home makerspace.”  Even so, I’m super psyched about there being a makerspace within biking distance of my house.  It’s got me thinking – how would I build out a makerspace?  I think my design philosophy would be “tools before tech.”  I do have a vinyl cutter, but before that I cut things by hand with an exacto knife.1 I have a laser cutter, but before that I cut things with a hacksaw.  I have a 3D printer, but before that I would just cludge stuff together.

If going to Maker Faire has taught me anything, it’s that you don’t need high tech gadgets to make incredible things – you’ve just got to be resourceful and scrappy.  Then again, if you’ve got a budget… well, sometimes it’s nice to be able learn new skills, try out new machines, explore new possibilities, and make things easier/faster/with less waste.

I like the process of making things with my hands.  It was a point of pride that my ukulele was almost 100% made with hand tools.2  But, as much as I like making things with my hands, many times I am less invested in the journey than I am in acquiring the thing I’m making or just making it as polished / easy to make as possible.  I like making my own heat transfer vinyl t-shirts, but cutting out a very simple SVG design by hand would be 30-45 minutes of concentrated painstaking effort versus 2 minutes of craft cutter time.

One of the reasons for putting together this list is because too often I see slick marketing convince schools/classrooms/makerspaces/libraries to buy expensive, less useful, or hyper-niche products.

I thought to search up some other maker space tool lists after I was mostly done with this list.  I found these two links to be fairly reasonable.  The others ones I found seemed to be more about trying to sell stuff to libraries and schools, going for flashy things, rather than things that are actually likely to be useful.

  1. Maker Tool Philosophy

    1. I tend to avoid Unitaskers, large, expensive Tools

      1. These have just the one use

        I tend to follow the 80/20 Pareto Principle3 and avoid unitaskers, especially when they’re bulky or expensive.  The formulation of this rule I prefer is that you can typically get 80% of the results you want for 20% of the cost and effort.4 I don’t want something I use once a year taking up space in my life.  If the tool is expensive, it has be able to save me sufficient time / energy / resources versus making by other means.  If the tool is bulky or expensive, I’m probably better off just renting access to the tool or outsourcing when needed.5  It’s not just about the cost of the tool – it’s also the opportunity cost in terms of space and other equipment.  An embroidery machine is 2-10x the cost of a sewing machine and requires 2-4x the space.

    2. Support Local Makerspaces

      1. Woodland Public Library – and their SquareOne makerspace

        Your local library may have a makerspace.  They might only have a sewing machine, 3D printer, and vinyl cutter, but using their services will help them keep or get new funding.  If you’re in California and have a valid state issued ID, you can get a library card at any state library.  One of the best, most organized, and most well equipped makerspaces I’ve ever visited is hidden up in Woodland, CA.

      2. If you don’t have a local library with a makerspace, your local community college probably has a kick-ass fablab/makerspace with every tool imaginable for the cost of a single unit class.  I haven’t checked, but I suspect it could be  even a remote-only semester long class, you could take it in anything, and they probably don’t have any kind of academic requirement that you do well to use the makerspace.  While getting a student spot at a local college may not be feasible, many of these makerspaces will sell passes or conduct workshops.  It is absolutely worth your time to visit and find out.
      3. Inventopia in Davis, CA

        Did you know your local college almost certainly has some kind of maker-incubator within a stone’s throw?  They’re generally people who just love making stuff and helping others, will train you to use their machines, have wide access times, and reasonable monthly fees for makers and co-working.  If it’s local, check out my friends over at Inventopia in Davis, CA.

    3. Before Buying:  Borrow, Experiment, Make Do, Build

      1. I highly recommend experimenting or testing out a tool before making a big investment.  Before getting a vinyl cutter, I cut heat transfer vinyl using a craft knife.  If I hated the hobby or result, I would have been out some time and a few ruined t-shirts.  Since I enjoyed it, it was worth investing in an inexpensive machine.
      2. If I can do without a much more expensive option by making the tool / equipment or making do without, I will.  I can’t justify buying a Chomp Saw for cardboard crafts for $300 when I could build one for about $30.  Similarly, I can’t just justify $1-2k for a vacuum former when I can build a small one for $40 or a big one for not a lot more.  Thus, I’ll probably never get an embroidery machine, if I can make do with the attachment below.
  2. Basic Home Repair Tools and Equipment.

    1. While you could go with Harbor Freight for some these things, but if you plan on keeping them for any length of time, just get something good.  If interested in a short anecdote, check this footnote.6 I’m not knocking Harbor Freight either.  They have super inexpensive and serviceable rubber gloves, foam knee pads, and foam floor mats that have lots of uses.  I just wouldn’t go with Harbor Freight for tools that would get frequent use.  Honestly, buying lunch for a neighbor who would loan you a specific tool is a better investment in friendship, community, money, without taking up any storage space.7
    2. Hand saw, hacksaw, hacksaw blades, coping saw, coping saw blades.
    3. Utility knife, razor blades.
    4. Hammer, wrenches, screwdrivers, hex wrenches.
    5. Wire cutters, wire strippers, pliers.
    6. Measuring tape, yard / meter sticks.
    7. Vise, duck tape, electrical tape, wood glue, zip ties, machine oil, WD-40.
    8. Needles, threads, old clothing, scraps of fabric.
  3. Basic School / Craft Art Supplies.

    1. Regular batteries (9V, AAA, AA) and coin cell batteries.
    2. Crayons, color pencils.  I’d probably not keep markers on hand – they just go dry too quickly.
    3. Pipe cleaners, googly eyes, craft foam, construction paper, paints (probably tempera then acrylic), paint brushes.
    4. So much cardboard.
    5. Scissors.
    6. Masking tape, blue painter’s tape, scotch tape, white glue, glue sticks.
  4. Basic STEM / STEAM Stuff

    1. Once you’ve got some basic tools and willing to get your hands dirty, you’re pretty much set.  Research, experimenting, hardware stores, thrifting, and even dumpster diving can get you a lot of what you need to build many things.  However, if you’re going to lean into more “STEAM” kinds of activities…  a drawer full of microcontrollers, components, chips, wires, components, motors, magnets, and even broken things goes a long way.
    2. For basic STEAM educational kits, I highly recommend my friends over at BrownDogGadgets.  My local library / utility system uses their kits all the time , the kits are always well put together, well documented, and they’re always a hit.  Their various solar powered, wearables, maker tape, and MicroBit kits are great.
    3. After some intro-level electronics, it makes sense to spend a few dozen dollars to pick up piles of LED’s8 , coin cell battery holders, and conductive thread and you’re basically into making wearables. 9
    4. A few words about conductive metallic tape.  You can find copper tape anywhere online, but it might not have conductive adhesive unless you buy it from a retailer you trust.10 While, aluminum tape is incredibly inexpensive and works reasonably well, only comes in huge wide strips since it’s designed for HVAC and home repair situations, is not available with conductive adhesives, and you can’t solder to it.  It’s big enough that I think you could probably design an entire circuit board into a wide strip of this tape.  If you’re working with kids and want to make things easy on them, the BrownDogGadgets “Maker Tape” is reasonably priced, easy to tear by hand, has conductive adhesive, and since it is made with nylon can take tons of flexing abuse which could fatigue a metallic tape.  Maker Tape is only slightly more expensive than copper tape, but worth keeping on hand, especially for wearables/crafting/teaching environments.  None of these will break the bank, all have good applications,  and there are some interesting ways to combine them, so its worth having all three on hand.
    5. For mid-level programming with drag-and-drop programs and then easy to use MicroPython/CircuitPython, I would highly recommend the Adafruit Circuit Playground ecosystem.  You basically cannot get a more beginner friendly, feature rich, easy to use system with this many sensors11 and output devices12 and communication possibilities13 for as little as a single Circuit Playground for $25.
    6. For those ready to graduate to things made with very small microcontroller chips, breadboards, and the ATTiny ecosystem, I really like my SparkFun Tiny AVR programmer.  I still build very small things with it (simple timers and buzzers, mostly), but I can see why it’s discontinued.  A small underpowered ATTiny85 will run about $2, can be a little bit of a hassle to program, only carries 8k of space, and will require fiddly wiring/soldering and additional components to be useful.  The original Raspberry Pi Pico starts at $4, has tons of input/output pins broken out, power regulator, built-in USB connector, and 2MB of space. You’ll still need to solder things to it in order to make it do stuff, but 250x the space, more RAM and processing power, for $2 extra is a great deal.  I’ve played with the WeMos D1 Mini ESP8266, but not gotten it to do a whole lot.  For roughly $2 in small lot orders, you can get something that requires a little more tinkering but has 4MB of space and built-in wifi.
    7. I guess what I’m saying is that as technology improves, wifi/bluetooth added into smaller spaces, with more features, for less money – lots of makers will naturally end up with a drawer full of microcontrollers they’d be happy to donate to a good cause.
  5. Basic Tech Tools

    1. These tools are things pretty much everyone could use, pretty much anyone could justify, and you could probably find at your local library or neighborhood.
    2. Laminator.  $35-$50

      1. I have an Amazon Basics laminator.  It’s fine.  It takes a little while to heat up, has only two settings, and will sometimes crumple small laminating items.  That said, it was incredibly inexpensive 9 years ago and is still working.  Laminating sheets and small card sized pouches are very inexpensive.
    3. Laser printer.  $180

      1. I will only buy Brother laser printers.  Inkjets are a scam and I will never go back.  A Brother laser printer is a workhorse that will print, scan, fax, and sip toner.
    4. Sewing machine.  $200+

      1. If I was starting out, I’d probably get whatever Singer or Brother sewing machine CostCo had at the time.  I’m not an avid sewist, but I can make or mend a few things.  If it can do a zigzag stitch, straight line, and handle a few folds of material, that’s all I’d need.
      2. Again, I’m not an avid sewist, but there are certain things that are so inexpensive and such a huge benefit, that their addition is a no-brainer.
      3. Extra bobbins, thread, and needles.  A pack of 20 bobbins will probably be less than $5, just make sure they fit your machine.  Get white, black, and perhaps a few other colors of thread.  I like Gutterman nylon upholstery thread for tougher applications like bags and cotton thread for clothing.  Bigger needles for tougher / thicker materials, thinner for more delicate materials, and replace them when they “feel” like they’re not sharp any more.
      4. “Free motion presser foot”

        1. A “free motion presser foot” or “free motion sewing foot” or “free motion quilting foot.”  I don’t have an embroidery machine, think they’re super neat, wouldn’t mind learning how to use one, and, if I’m being honest, might use one perhaps once a year.  However, I’m not going to spend $500-$7500 on one.  A “free motion presser foot” attachment for your sewing machine, this very short Instagram video by @Riskthrift, and different colored thread are all you need to get probably +95% of the utility of an embroidery machine for about $10.
    5. Vinyl cutter.  $85+

      1. This isn’t an endorsement, but I bought a Monoprice craft cutter.  I’ve been using it to make heat transfer vinyl t-shirts.  It’s slightly finnicky, I’m not crazy about the software, but it works.  This model is usually $250, but it goes on sale all the time, and I snapped it up when it hit $80.  I’ve used it to cut heat transfer and sticker vinyl as well as cardstock for game boxes and it’s handled everything quite well.
      2. I haven’t used a CriCut, but for a little bit more than what I spent you can get something everyone is familiar with.
    6. A wet/dry “buckethead” Shop Vacuum.  $40

      1. Specifically, this particular “Buckethead” shop vac that attaches to any standard 5 gallon bucket.  You can get buckets anywhere from free14 , to recycled15 , to free-ish16 , to inexpensive.  The attachment used to be $25, but is now $37.  Even so, you really can’t beat the price.
      2. And, as an added bonus, for the price of scrap wood or a few wooden dowels and some 3D printed parts, it can perform double-duty as a vacuum former!
  6. Home Maker Tools

    1. FDM / FFF 3D Printer.  $500-$2,000

      1. A word about 3D printers.

        1. It’s hard to go to a farmer’s market or craft fairs without seeing buckets of 3D printed knickknacks, dragons, keychains, etc.  Yes, they can be a great way to churn out trinkets, but printing nonsense you downloaded off the internet is just the beginning.
        2. Access to a 3D printer is a complete game changer.  The true strength of a 3D printer is in making it possible to build nearly anything you can design, irrespective of your tool set or skill level.  Come up with some designs, iterate, and invent a new tool or product that solves a real problem.  Build and give away prosthetic parts to help those in need or parts for PPE during a pandemic.  Save millions of dollars replacing broken or worn parts with functional replicas for pennies.  Use the parts to build other tools or robots to help solve other problems.  I don’t think I’m exaggerating when I say that a sufficiently motivated person could save lives, iterate and invent, build a business, conduct scientific and/or medical research.  Sure, people are selling Deadpool-dragon-keychains and Nerf gun parts.  But, those hobbyists/entrepreneurs are the ones helping bring down the barriers and prices on equipment and supplies for everyone.
      2. Type:  FDM > Resin.

        1. Resin printers are neat, tend to have small build volumes, incredibly high resolution, but use toxic chemicals with toxic fumes and require more toxic chemicals to clean.  I don’t want these in my home, let alone use them.
        2. I’ll stick to “FDM” or “FFF” (Fused deposition modeling or fused filament fabrication).  They do produce VOC’s, particulates, and fumes when in use, and caution should always be taken, but they’ll just be easier to deal with overall.  Filament is ubiquitous and inexpensive in a variety of colors.  I stay away from glow in the dark because the strontium used to make it glow is very abrasive and will chew up a print nozzle quickly.  White plastic filament made with titanium oxide has the same problem.  I tend to print in gray/silver/black/colors most of the time anyhow.
      3. Features.  Slicer agnostic, enclosure, toolheads.

        1. The slicer is the software used to “slice” a 3D model into thin layers the 3D printer can lay down with molten plastic, one at a time.  Some 3D printers will only accept models sliced by their software, their servers, their app, or their machine.  These machines sometimes come with built-in cameras, print failure detection, automatic time lapse photos, remote  job start-stop.  While this can make them easier to use, they’re all different ways in which it can be misused or crippled later.  I would stay away from any 3D printer that uses proprietary or cloud upload software.  It’s just too easy for a 3D printer company to decide to brick their machines.  A printer that accepts GCode and makes plastic things is all you need.  In fact, a printer that requires an app is a significant downside for me.
        2. If I were purchasing for a makerspace, I would probably go for a printer with an enclosed build area over multiple print heads/tool heads.  If I was getting one today for personal use, I’d opt for multiple material tool heads over an enclosure.
        3. I’m a fan of the Prusa printers, I own one, but when working on a tight budget, it’s really hard to argue with a Flashforge for ~1`/3 the price.  If times were tight, I’d go with a Flashforge, Snapmaker, or one of the various vowel heavy alternatives that require a little more tinkering and elbow grease.  If I had the budget for it or if I had to maintain a frequently used machine, I would (and have!) go with a Prusa.
    2. Plywood CNC Cutter.  $600

      1. I don’t have one yet – but I would personally start with a MaslowCNC for cutting full size sheets of plywood.   I’ve met Bar Smith a few times at Maker Faire, supported at least one of his MaslowCNC Kickstarters, followed their forums,
      2. These can be used to make huge displays, furniture, benches and desks, signage, and piles more things.  It takes a fair bit of space to set these up, even in the vertical orientation like the original MaslowCNC and even more floorspace to use it in the current horizontal setup system, but when not in use the entire system would fit into a small-ish moving box.
  7. Industrial Fabrication Tools.

    1. These last two items would be fantastic to have – but
    2. CNC Mill.  $5,000 – $7,500

      1. I don’t have a table router-based CNC cutter – or the space to really even keep one, but I’ve heard good things about the X-Carve.  A table CNC takes up a considerable amount of space, will need a vacuum attachment,  filtering, exhaust, etc.  I’m not ready for that kind of commitment.
    3. Laser Cutter.  $7500+

      1. I have a woefully underutilized Glowforge.  I pledged their pseudo-crowdfunding-preorder, so I got it an early model for a lot cheaper than their current $7k price tag.  (I’m not counting their cheaper laser diode line)  Unless I had a very strong intended business use case, I probably wouldn’t buy a laser cutter today.  They’re big, loud, require major venting / fume extraction, and I could probably cut whatever I needed for a few projects at a local makerspace.
  8. Things I wouldn’t buy

    1. While working on this blog post, I initially searched to see what kinds of tools other people recommended for budding makerspaces.  I was kind of horrified at the listicles like “5 makerspace must haves” and such, usually linking to their very own store.
    2. Sphero.  They’re cute and kids could program them.  I remember one of my kids’ teachers being extremely excited about getting a few Spheros for the kids to work with.  I just think there are better and more cost effective ways to get kids into programming than a $200 rolling robot.  If I had to teach coding to kids, I would absolutely start with the Adafruit CircuitPlayground mentioned above.
    3. Any Robot Kits.  This isn’t just about the Sphero – I’d be wary of any robot kits.  If the robot kit were something inexpensive you drop a microcontroller brain into, then maybe it would have a place in a classroom or makerspace.  Robot kits don’t really have to be very expensive.  If you have a 3D printer, two motors, and a drawer full of stuff, you could probably make a robot that does stuff for about $20/student.
    4. A single servo and basic microcontroller platform can do so much.  Back during the pandemic the Exploratorium held a “MicroBitVirtualConcert” and my youngest built this little monocle top hat cat robot with a Circuit Playground and a single servo.
    5. MakerBot or Ultimaker 3D printers.  I loved MakerBot for what it was back in the day – a scrappy start up that made open source 3D printers you could build and, above all, maintain yourself.  I like to think I’m still friends with the founders of these companies.  And, while I still love MakerBot for blazing the trail and clearing the way for other 3D printers, the current offerings are high on marketing and bear little resemblance to their open source roots.  Honestly, I haven’t kept up with Ultimaker once they were acquired by Stratasys.  Until that point they were still an open source darling and I still think their Cura slicing software is top notch.  While the MakerBot website was scrubbed of open source resources long ago, the Ultimaker website still has these various things still available.  I haven’t been able to confirm whether the Ultimaker is still open source, but given the purchase by Stratasys, I’m guessing it is not.  If I’m not buying an open source machine, I’d go with something way cheaper that doesn’t require a ton of bloatware, apps, server based slicing, or proprietary slicing software.
    6. ChompSaw.  Now, I can’t justify $300 for a machine that can be built from scrap plus a small $30 part and $20 power drill that can be used as a drill whenever not used in the project.  That said, if I were trying to furnish a makerspace and just wanted an off-the-shelf solution, the ChompSaw has a dust collection pan and has safety testing certifications

What did I miss? What did I get wrong?

Making a Makerspace
  1. Tool Recommendations for Making a Makerspace
  2. Makerspace: Just a few more things for the shopping list
  3. Building a Cardboard Cutter Table With Cardboard
  4. Makerspace Addenda – Homegoods edition
  5. More Maker Tools
  6. 3D Printer Pens for Makerspaces
  1. By candle light. [↩]
  2. I drilled the holes for the tuning pegs with an electric drill, but then designed/3D printed a hand drill to help finish it. [↩]
  3. I didn’t realize until recently the original Pareto principle was about how 80% of the land in Italy was owned by 20% of the citizens. [↩]
  4. Actually, I aim for 85% results for 15% effort. [↩]
  5. I’ll never buy an RV for $50-200k and then pay to insure/store/maintain, when I could for a few thousand dollars whenever I wanted.  Which will also be never. [↩]
  6. Many years ago my dad gave me his trusty utility knife.  It was already old by the time he gave me this Stanley brand knife.  Around the time we moved I had visited an Ace Hardware and saw they had a $1 bargain bin utility knife that looked very much like my own, so I picked it up to have an extra one on hand in a different area of the house.  Like my trust knife, this one had an internal area where it could store extra blades – so that’s where I put some blades.  You’re probably wondering – how bad could this utility knife be?  The handle had a slight gap in it where one of the extra blades stuck out very slightly – by probably half a millimeter.  It was never enough that it ever broke the skin but always enough to poke me and I hated it.  If you’re going to use something more than a few times, get something good that will last you.  Don’t cheap out and get a piece of crap that will scratch you. [↩]
  7. A word about hardware store bargain bins.  I don’t know this to be true, but I strongly suspect the various Home Depot and Ace Hardware bargain bins are essentially sourced from the same cheap and/or low quality sources pitched to the store buyers at the most recent convention or the same Temu/AliExpress sources we can buy from.  My additional suspicion is that this is basically the entirety of Harbor Freight’s stock comes almost exclusively from these kinds of sources. [↩]
  8. Different colors, sizes, shapes, and types – from single color, flashing colors, and “smart” / NeoPixel LED’s [↩]
  9. A note about conductive thread: I like the BrownDogGadgets.com brand.  It wasn’t brittle, was easy to thread, and has seemed to hold up in my projects.  I’ve heard other threads are less easy to work with or tend to break. [↩]
  10. For me, that would be BrownDogGadgets or Adafruit [↩]
  11. Touch, temperature, light, accelerometer [↩]
  12. LED’s, buzzers [↩]
  13. Some versions have IR emitter/detectors and some have Bluetooth capabilities [↩]
  14. Talk to your local bakeries and ask for their buckets.  You’ll have to wash it out, but they’ll be free [↩]
  15. Laundry detergent or pool chemicals [↩]
  16. Harbor Freight frequently has coupons for free/cheap buckets [↩]

QR Codes and Avatars

Not me at all

I’m not really big on social media, especially Facebook.  While I used Twitter for a long time, I pretty much abandoned it after their re-brand.  For a variety of reasons, mostly privacy related, I actively avoid associating my online moniker with my real name or photographs of myself.  Plus, I can be a lot more candid here where a comment won’t have to be associated with my work persona. 1  Anyhow, instead of using my real name and birthday, I fed Facebook the above photograph and use a totally different birthday and other information.  Later on, I used a very small version of this photograph as my “avatar,” but that changed when Bre drew a super cool secret agent looking version of my avatar for use on the MakerBot blog.

Anyhow, I was thinking about the “evolution” of my online avatar recently and some other projects when I remembered I’d seen some cool instances of people distorting a QR code in such a way that it appeared to be an image of something – but the contrasting light and dark patterns would be interpreted as a QR code.  I found a website (QRBTF) that will automate most of the process for you.

This isn’t the first time I’ve played with QR codes.  One of the first was waaaay back in the day.  Thingiverse has over 7 million “things” uploaded to the site as of right now.  But, Thing #5000 was this gem by yours truly.

Where was I?

MakerBlock’s Avatar QR Code of MakerBlock’s Blog

The process is … fiddly, even with lots of nice dials and buttons to adjust the image.  I don’t think I’ll keep this as the last version of this QR / avatar.  There needs to be either way higher error correction, larger QR code, or lower resolution, or higher contrast or… something to make scanning the image more reliable.

Anyhow, the reason why I’m even messing with this at all is so that when our projects are (hopefully!!!) accepted to Maker Faire, I can put this on my “maker badge” as a way for people who know me by my pseudonym / avatar to recognize me and for everyone else to be able to scan it and check out my website with more information about our projects.

Here’s another variation with some modifications:

This latest version required some post-processing:

  1. Trial and error to position the original image and then see how it looked when turned into a QR code.  Obviously, this also involved tinkering with the brightness and contrast settings.  I kept the error correction at maximum throughout.
  2. I downloaded the image in SVG format which was kinda messy.  Every black or white pixel was a separate element.  I laid a rounded corner set of squares over the four alignment blocks, obscuring the sharp corners usually associated with QR codes.  Then, I duplicated the central figure, and in the copy above I deleted the four alignment blocks and the figured, then made all the black speckled pixels slightly larger – to make it easier to read at small sizes.
  3. Centered the QR code on the white background, then rotated it 45 degrees for a diamond shape.

This version scans much more reliably and faster than any prior version.  I’m fairly happy with this result and will allow myself to fall down the rabbit hole of my next project… Or prior project.  Projects.0

Thermal Sticker Printer
  1. QR Codes and Avatars
  2. Sticker Printer
  3. Thermal QR Code Sticker Success!
  1. While my work-name and work-face are the same as my real name and real face, that’s just the professional responsible adult I pretend to be in order to pay the bills. [↩]

Prepping for Maker Faire Bay Area 2024

It’s always a whirlwind heading into Maker Faire.  This year is no exception.  This past weekend we got things mostly ready for the Rocklin Maker Faire.  All of our robots were functional, which was really great.  A quick update to document progress and also act like a to-do list of sorts:

  • MakerKnit’s companion robot
    • My wife has knit her octopus
    • I’ve installed the Adafruit QtPy, NeoPixels, and touch sensors connected via BrownDogGadgets conductive thread through the legs
    • It’s been programmed to “blink” the two LED eyes randomly plus a small number of light shows for the body
    • Designed/3D printed several eyes, settling on a nice design that should make the eye animations look good
  • Kim’dael LightningSlayer’s Pendant
    • The youngest’s project has morphed from an LED arm to a CircuitPlayground in a pendant that just plays some notes when she presses buttons.
    • A long extension for the battery pack, using thicker gauge wire wound through the back of stock CircuitPlayground enclosure, is now the “necklace” portion for this project.
  • Dexter Starfighter’s ED-E
  • MakerBlock
    • My robot wasn’t quite ready for Maker Faire last year, but “ready enough” to share.  Last year the little bot was just sitting in a jar I carried around and not really visible to anyone.
    • This year I’ve added feet (entirely cosmetic), changed the battery pack around so it is removeable, swapped out dome diffusers, and am working on new animations/behaviors.
    • I realized that my old LED goggles were… janky.  This was because I had soldered some buttons to one side and then wired them into the Trinket directly, without any resistors.  While it /worked/, it caused some problems whenever I pressed a button.  I pulled the Trinket out and swapped in my new favorite board, the QtPy.
      • I really prefer programming / updating via CircuitPython over Arduino since there’s no pre-compile time and fussy Arduino connections.
      • Besides the programming/uploading, I love the built in RGB, up to 6 capacitive touch sensor, and easy serial communication
      • As an added plus, I soldered on the 2MB flash chip so the project as a ton of space. 1
      • And at almost the same price as a Triket ($0.50 more than the original, $0.50 less than the M0 Trinkets), it’s just easier to swap them into any project I would have previously put a Trinket into
  •  Soldering
    • I’ve really upgraded my soldering experience and it’s made a world of difference.  We moved about a year ago and there’s a space in the house where I can keep a soldering station out and ready to use.  Just having it available is such an upgrade.  I’ve had several handheld / pen style soldering irons over the years and they’re usually pretty terrible.  In fairness, this is also because I’m kinda terrible at soldering.  I had a basic garbage soldering iron from the local hardware store, upgrade one that had a little temperature control from Adafruit, and then upon the recommendation of a friend upgraded a few weeks ago to an X-TRONIC soldering station.
    • I gave my old soldering iron to my neighbor so he could work on a project for his wife.  As I got to finishing up work on the above projects I realized I couldn’t find my pen soldering iron from Adafruit – and that I didn’t want to find it anyhow.  It was fine.  It worked.  But, my soldering iron holder was cheap and flimsy and easy to tip over and the helping hands I had from Adafruit were “okay” for very small projects, but the joints came loose easily and the helping hands kept falling off.  Rather than spend $20 on another soldering iron I would hate, I dropped $70 on the X-TRONIC station which has built in helping hands and soldering iron holder.  Setting aside that it heats up very quickly, has good temperature control, melts solder quickly, and has great helping hands… it has a way to hold the soldering iron in a way that isn’t constantly anxiety inducing. 2
    • Having the soldering station handy has meant I don’t really mind whipping out a quick battery pack extension cable for our projects.  I just need to strip some wires, fire it up, drop some solder, and turn it off again.
    • I may have ruined the first soldering iron tip kinda quickly.  Again, I have no idea what I’m doing.  I would add solder, dip the tip in flux, wipe on sponge, and then do it all again.  This is a terrible process since all it does it add extra contaminants and gunk to the tip, reducing the ability of it to transfer heat effectively.  Instead, after watching a video, I learned I should run it at the lowest temperature appropriate for the solder/joint, just dab the tip in the brass wool to clean it up a little, then maybe wipe on the slightly damp sponge, and absolutely coat the tip in solder before putting it down.

Things left to do!

  • Things to finish
    • I’d really like to finish up the Fallout themed shirt/vest to go with my project
    • A way to attach my wife’s octopus to a purse strap
    • A better way to wear my robot on my shoulder – may use a similar foam paldron
    • A big chunky seat belt looking thing for the strap wearing my robot
    • I’ve got designs for a new bag to wear/carry around Maker Faire, but haven’t sewn them up yet – maybe this week!?!!?
  • Make sure we have
    • Enough batteries, battery packs, etc for our projects
    • USB chargers for our LiPo batteries in goggles
    • Finish my goggles (install battery, update code, possibly change out diffusers
    • Bring a few Maker Coins to give out (I bought 100 of the 5,000 minted, probably never to be minted again…)
    • Ways to show people links to learn more about our projects – probably via QR codes – though I might also use an RFID tag :)

Okay, back to work on… work… so I can get back to making!

  1. Note to self:  It requires a different version of CircuitPython, Haxpress, to make use of the chip storage [↩]
  2. I used to tape the cord of my soldering iron to the table and then place it on the flimsy stand [↩]
Test