Tool Recommendations for Making a Makerspace

I’m extremely fortunate that my city’s utilities are not only provided through the city as an alternative to the incredibly poorly run PG&E system, but they have a STEAM oriented “exploration center” to entertain and educate about science, conservation, and environmentalism.  The people who work there put on workshops about all kinds of things and are incredibly helpful, friendly, and enthusiastic.  Right now they’re in the process of converting a section of their building into a makerspace and I couldn’t be more stoked.

If you are one of those “Just show me the recipe, I don’t need your life story” types, you can skim the table of contents to see what I’d recommend for various home/makerspaces at different levels/price points.  If you don’t mind a short walk, I’ve got a few related things you might not hate reading.

I’m fortunate that we have been able to put together some of the basic tools for something of a “home makerspace.”  Even so, I’m super psyched about there being a makerspace within biking distance of my house.  It’s got me thinking – how would I build out a makerspace?  I think my design philosophy would be “tools before tech.”  I do have a vinyl cutter, but before that I cut things by hand with an exacto knife.1 I have a laser cutter, but before that I cut things with a hacksaw.  I have a 3D printer, but before that I would just cludge stuff together.

If going to Maker Faire has taught me anything, it’s that you don’t need high tech gadgets to make incredible things – you’ve just got to be resourceful and scrappy.  Then again, if you’ve got a budget… well, sometimes it’s nice to be able learn new skills, try out new machines, explore new possibilities, and make things easier/faster/with less waste.

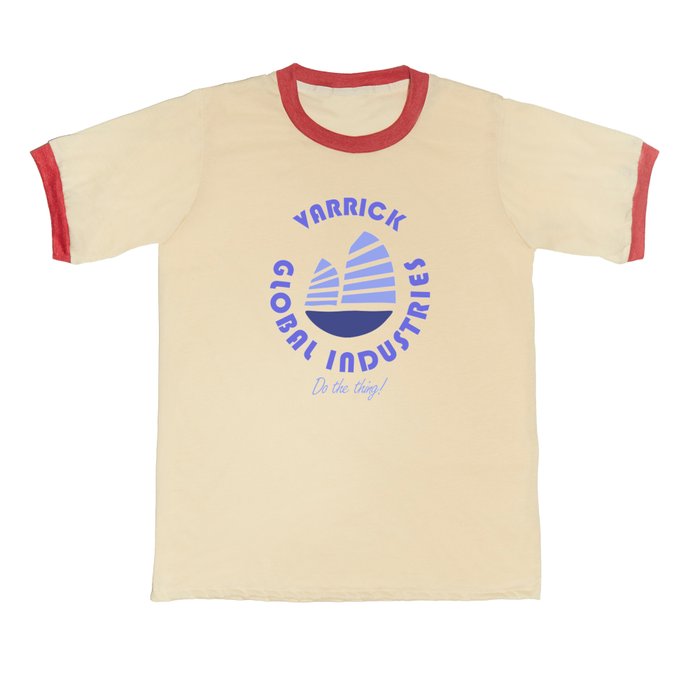
I like the process of making things with my hands.  It was a point of pride that my ukulele was almost 100% made with hand tools.2  But, as much as I like making things with my hands, many times I am less invested in the journey than I am in acquiring the thing I’m making or just making it as polished / easy to make as possible.  I like making my own heat transfer vinyl t-shirts, but cutting out a very simple SVG design by hand would be 30-45 minutes of concentrated painstaking effort versus 2 minutes of craft cutter time.

One of the reasons for putting together this list is because too often I see slick marketing convince schools/classrooms/makerspaces/libraries to buy expensive, less useful, or hyper-niche products.

I thought to search up some other maker space tool lists after I was mostly done with this list.  I found these two links to be fairly reasonable.  The others ones I found seemed to be more about trying to sell stuff to libraries and schools, going for flashy things, rather than things that are actually likely to be useful.

  1. Maker Tool Philosophy

    1. I tend to avoid Unitaskers, large, expensive Tools

      1. These have just the one use

        I tend to follow the 80/20 Pareto Principle3 and avoid unitaskers, especially when they’re bulky or expensive.  The formulation of this rule I prefer is that you can typically get 80% of the results you want for 20% of the cost and effort.4 I don’t want something I use once a year taking up space in my life.  If the tool is expensive, it has be able to save me sufficient time / energy / resources versus making by other means.  If the tool is bulky or expensive, I’m probably better off just renting access to the tool or outsourcing when needed.5  It’s not just about the cost of the tool – it’s also the opportunity cost in terms of space and other equipment.  An embroidery machine is 2-10x the cost of a sewing machine and requires 2-4x the space.

    2. Support Local Makerspaces

      1. Woodland Public Library – and their SquareOne makerspace

        Your local library may have a makerspace.  They might only have a sewing machine, 3D printer, and vinyl cutter, but using their services will help them keep or get new funding.  If you’re in California and have a valid state issued ID, you can get a library card at any state library.  One of the best, most organized, and most well equipped makerspaces I’ve ever visited is hidden up in Woodland, CA.

      2. If you don’t have a local library with a makerspace, your local community college probably has a kick-ass fablab/makerspace with every tool imaginable for the cost of a single unit class.  I haven’t checked, but I suspect it could be  even a remote-only semester long class, you could take it in anything, and they probably don’t have any kind of academic requirement that you do well to use the makerspace.  While getting a student spot at a local college may not be feasible, many of these makerspaces will sell passes or conduct workshops.  It is absolutely worth your time to visit and find out.
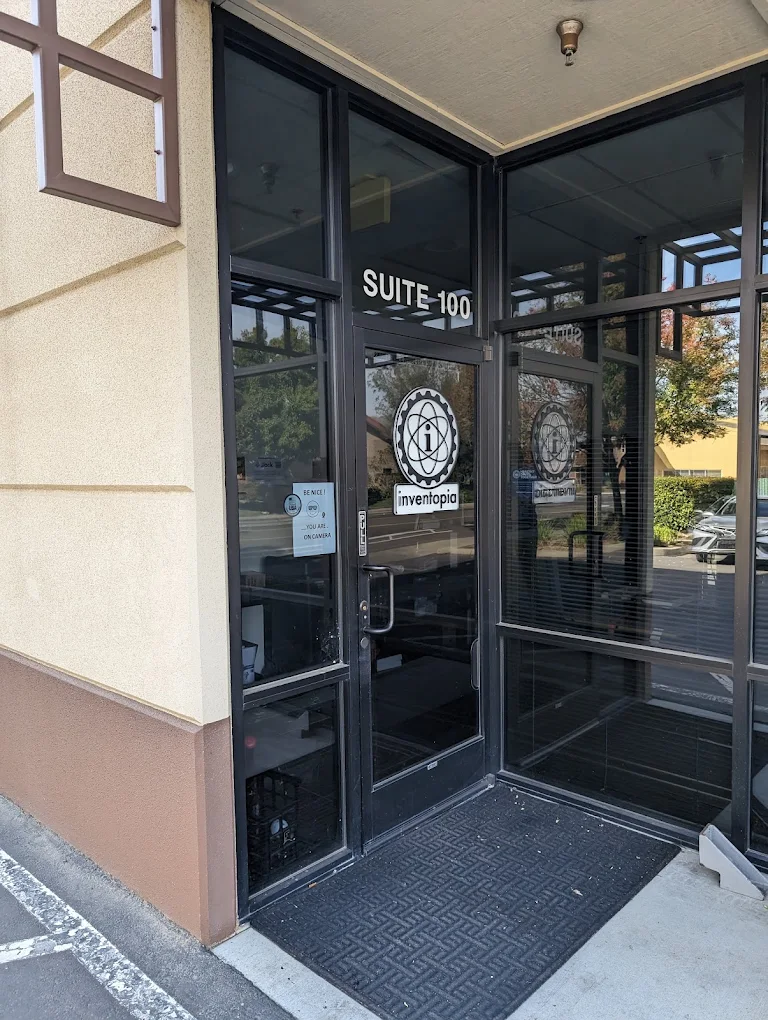
      3. Inventopia in Davis, CA

        Did you know your local college almost certainly has some kind of maker-incubator within a stone’s throw?  They’re generally people who just love making stuff and helping others, will train you to use their machines, have wide access times, and reasonable monthly fees for makers and co-working.  If it’s local, check out my friends over at Inventopia in Davis, CA.

    3. Before Buying:  Borrow, Experiment, Make Do, Build

      1. I highly recommend experimenting or testing out a tool before making a big investment.  Before getting a vinyl cutter, I cut heat transfer vinyl using a craft knife.  If I hated the hobby or result, I would have been out some time and a few ruined t-shirts.  Since I enjoyed it, it was worth investing in an inexpensive machine.
      2. If I can do without a much more expensive option by making the tool / equipment or making do without, I will.  I can’t justify buying a Chomp Saw for cardboard crafts for $300 when I could build one for about $30.  Similarly, I can’t just justify $1-2k for a vacuum former when I can build a small one for $40 or a big one for not a lot more.  Thus, I’ll probably never get an embroidery machine, if I can make do with the attachment below.
  2. Basic Home Repair Tools and Equipment.

    1. While you could go with Harbor Freight for some these things, but if you plan on keeping them for any length of time, just get something good.  If interested in a short anecdote, check this footnote.6 I’m not knocking Harbor Freight either.  They have super inexpensive and serviceable rubber gloves, foam knee pads, and foam floor mats that have lots of uses.  I just wouldn’t go with Harbor Freight for tools that would get frequent use.  Honestly, buying lunch for a neighbor who would loan you a specific tool is a better investment in friendship, community, money, without taking up any storage space.7
    2. Hand saw, hacksaw, hacksaw blades, coping saw, coping saw blades.
    3. Utility knife, razor blades.
    4. Hammer, wrenches, screwdrivers, hex wrenches.
    5. Wire cutters, wire strippers, pliers.
    6. Measuring tape, yard / meter sticks.
    7. Vise, duck tape, electrical tape, wood glue, zip ties, machine oil, WD-40.
    8. Needles, threads, old clothing, scraps of fabric.
  3. Basic School / Craft Art Supplies.

    1. Regular batteries (9V, AAA, AA) and coin cell batteries.
    2. Crayons, color pencils.  I’d probably not keep markers on hand – they just go dry too quickly.
    3. Pipe cleaners, googly eyes, craft foam, construction paper, paints (probably tempera then acrylic), paint brushes.
    4. So much cardboard.
    5. Scissors.
    6. Masking tape, blue painter’s tape, scotch tape, white glue, glue sticks.
  4. Basic STEM / STEAM Stuff

    1. Once you’ve got some basic tools and willing to get your hands dirty, you’re pretty much set.  Research, experimenting, hardware stores, thrifting, and even dumpster diving can get you a lot of what you need to build many things.  However, if you’re going to lean into more “STEAM” kinds of activities…  a drawer full of microcontrollers, components, chips, wires, components, motors, magnets, and even broken things goes a long way.
    2. For basic STEAM educational kits, I highly recommend my friends over at BrownDogGadgets.  My local library / utility system uses their kits all the time , the kits are always well put together, well documented, and they’re always a hit.  Their various solar powered, wearables, maker tape, and MicroBit kits are great.
    3. After some intro-level electronics, it makes sense to spend a few dozen dollars to pick up piles of LED’s8 , coin cell battery holders, and conductive thread and you’re basically into making wearables. 9
    4. A few words about conductive metallic tape.  You can find copper tape anywhere online, but it might not have conductive adhesive unless you buy it from a retailer you trust.10 While, aluminum tape is incredibly inexpensive and works reasonably well, only comes in huge wide strips since it’s designed for HVAC and home repair situations, is not available with conductive adhesives, and you can’t solder to it.  It’s big enough that I think you could probably design an entire circuit board into a wide strip of this tape.  If you’re working with kids and want to make things easy on them, the BrownDogGadgets “Maker Tape” is reasonably priced, easy to tear by hand, has conductive adhesive, and since it is made with nylon can take tons of flexing abuse which could fatigue a metallic tape.  Maker Tape is only slightly more expensive than copper tape, but worth keeping on hand, especially for wearables/crafting/teaching environments.  None of these will break the bank, all have good applications,  and there are some interesting ways to combine them, so its worth having all three on hand.
    5. For mid-level programming with drag-and-drop programs and then easy to use MicroPython/CircuitPython, I would highly recommend the Adafruit Circuit Playground ecosystem.  You basically cannot get a more beginner friendly, feature rich, easy to use system with this many sensors11 and output devices12 and communication possibilities13 for as little as a single Circuit Playground for $25.
    6. For those ready to graduate to things made with very small microcontroller chips, breadboards, and the ATTiny ecosystem, I really like my SparkFun Tiny AVR programmer.  I still build very small things with it (simple timers and buzzers, mostly), but I can see why it’s discontinued.  A small underpowered ATTiny85 will run about $2, can be a little bit of a hassle to program, only carries 8k of space, and will require fiddly wiring/soldering and additional components to be useful.  The original Raspberry Pi Pico starts at $4, has tons of input/output pins broken out, power regulator, built-in USB connector, and 2MB of space. You’ll still need to solder things to it in order to make it do stuff, but 250x the space, more RAM and processing power, for $2 extra is a great deal.  I’ve played with the WeMos D1 Mini ESP8266, but not gotten it to do a whole lot.  For roughly $2 in small lot orders, you can get something that requires a little more tinkering but has 4MB of space and built-in wifi.
    7. I guess what I’m saying is that as technology improves, wifi/bluetooth added into smaller spaces, with more features, for less money – lots of makers will naturally end up with a drawer full of microcontrollers they’d be happy to donate to a good cause.
  5. Basic Tech Tools

    1. These tools are things pretty much everyone could use, pretty much anyone could justify, and you could probably find at your local library or neighborhood.
    2. Laminator.  $35-$50

      1. I have an Amazon Basics laminator.  It’s fine.  It takes a little while to heat up, has only two settings, and will sometimes crumple small laminating items.  That said, it was incredibly inexpensive 9 years ago and is still working.  Laminating sheets and small card sized pouches are very inexpensive.
    3. Laser printer.  $180

      1. I will only buy Brother laser printers.  Inkjets are a scam and I will never go back.  A Brother laser printer is a workhorse that will print, scan, fax, and sip toner.
    4. Sewing machine.  $200+

      1. If I was starting out, I’d probably get whatever Singer or Brother sewing machine CostCo had at the time.  I’m not an avid sewist, but I can make or mend a few things.  If it can do a zigzag stitch, straight line, and handle a few folds of material, that’s all I’d need.
      2. Again, I’m not an avid sewist, but there are certain things that are so inexpensive and such a huge benefit, that their addition is a no-brainer.
      3. Extra bobbins, thread, and needles.  A pack of 20 bobbins will probably be less than $5, just make sure they fit your machine.  Get white, black, and perhaps a few other colors of thread.  I like Gutterman nylon upholstery thread for tougher applications like bags and cotton thread for clothing.  Bigger needles for tougher / thicker materials, thinner for more delicate materials, and replace them when they “feel” like they’re not sharp any more.
      4. “Free motion presser foot”

        1. A “free motion presser foot” or “free motion sewing foot” or “free motion quilting foot.”  I don’t have an embroidery machine, think they’re super neat, wouldn’t mind learning how to use one, and, if I’m being honest, might use one perhaps once a year.  However, I’m not going to spend $500-$7500 on one.  A “free motion presser foot” attachment for your sewing machine, this very short Instagram video by @Riskthrift, and different colored thread are all you need to get probably +95% of the utility of an embroidery machine for about $10.
    5. Vinyl cutter.  $85+

      1. This isn’t an endorsement, but I bought a Monoprice craft cutter.  I’ve been using it to make heat transfer vinyl t-shirts.  It’s slightly finnicky, I’m not crazy about the software, but it works.  This model is usually $250, but it goes on sale all the time, and I snapped it up when it hit $80.  I’ve used it to cut heat transfer and sticker vinyl as well as cardstock for game boxes and it’s handled everything quite well.
      2. I haven’t used a CriCut, but for a little bit more than what I spent you can get something everyone is familiar with.
    6. A wet/dry “buckethead” Shop Vacuum.  $40

      1. Specifically, this particular “Buckethead” shop vac that attaches to any standard 5 gallon bucket.  You can get buckets anywhere from free14 , to recycled15 , to free-ish16 , to inexpensive.  The attachment used to be $25, but is now $37.  Even so, you really can’t beat the price.
      2. And, as an added bonus, for the price of scrap wood or a few wooden dowels and some 3D printed parts, it can perform double-duty as a vacuum former!
  6. Home Maker Tools

    1. FDM / FFF 3D Printer.  $500-$2,000

      1. A word about 3D printers.

        1. It’s hard to go to a farmer’s market or craft fairs without seeing buckets of 3D printed knickknacks, dragons, keychains, etc.  Yes, they can be a great way to churn out trinkets, but printing nonsense you downloaded off the internet is just the beginning.
        2. Access to a 3D printer is a complete game changer.  The true strength of a 3D printer is in making it possible to build nearly anything you can design, irrespective of your tool set or skill level.  Come up with some designs, iterate, and invent a new tool or product that solves a real problem.  Build and give away prosthetic parts to help those in need or parts for PPE during a pandemicSave millions of dollars replacing broken or worn parts with functional replicas for pennies.  Use the parts to build other tools or robots to help solve other problems.  I don’t think I’m exaggerating when I say that a sufficiently motivated person could save lives, iterate and invent, build a business, conduct scientific and/or medical research.  Sure, people are selling Deadpool-dragon-keychains and Nerf gun parts.  But, those hobbyists/entrepreneurs are the ones helping bring down the barriers and prices on equipment and supplies for everyone.
      2. Type:  FDM > Resin.

        1. Resin printers are neat, tend to have small build volumes, incredibly high resolution, but use toxic chemicals with toxic fumes and require more toxic chemicals to clean.  I don’t want these in my home, let alone use them.
        2. I’ll stick to “FDM” or “FFF” (Fused deposition modeling or fused filament fabrication).  They do produce VOC’s, particulates, and fumes when in use, and caution should always be taken, but they’ll just be easier to deal with overall.  Filament is ubiquitous and inexpensive in a variety of colors.  I stay away from glow in the dark because the strontium used to make it glow is very abrasive and will chew up a print nozzle quickly.  White plastic filament made with titanium oxide has the same problem.  I tend to print in gray/silver/black/colors most of the time anyhow.
      3. Features.  Slicer agnostic, enclosure, toolheads.

        1. The slicer is the software used to “slice” a 3D model into thin layers the 3D printer can lay down with molten plastic, one at a time.  Some 3D printers will only accept models sliced by their software, their servers, their app, or their machine.  These machines sometimes come with built-in cameras, print failure detection, automatic time lapse photos, remote  job start-stop.  While this can make them easier to use, they’re all different ways in which it can be misused or crippled later.  I would stay away from any 3D printer that uses proprietary or cloud upload software.  It’s just too easy for a 3D printer company to decide to brick their machines.  A printer that accepts GCode and makes plastic things is all you need.  In fact, a printer that requires an app is a significant downside for me.
        2. If I were purchasing for a makerspace, I would probably go for a printer with an enclosed build area over multiple print heads/tool heads.  If I was getting one today for personal use, I’d opt for multiple material tool heads over an enclosure.
        3. I’m a fan of the Prusa printers, I own one, but when working on a tight budget, it’s really hard to argue with a Flashforge for ~1`/3 the price.  If times were tight, I’d go with a Flashforge, Snapmaker, or one of the various vowel heavy alternatives that require a little more tinkering and elbow grease.  If I had the budget for it or if I had to maintain a frequently used machine, I would (and have!) go with a Prusa.
    2. Plywood CNC Cutter.  $600

      1. I don’t have one yet – but I would personally start with a MaslowCNC for cutting full size sheets of plywood.   I’ve met Bar Smith a few times at Maker Faire, supported at least one of his MaslowCNC Kickstarters, followed their forums,
      2. These can be used to make huge displays, furniture, benches and desks, signage, and piles more things.  It takes a fair bit of space to set these up, even in the vertical orientation like the original MaslowCNC and even more floorspace to use it in the current horizontal setup system, but when not in use the entire system would fit into a small-ish moving box.
  7. Industrial Fabrication Tools.

    1. These last two items would be fantastic to have – but
    2. CNC Mill.  $5,000 – $7,500

      1. I don’t have a table router-based CNC cutter – or the space to really even keep one, but I’ve heard good things about the X-Carve.  A table CNC takes up a considerable amount of space, will need a vacuum attachment,  filtering, exhaust, etc.  I’m not ready for that kind of commitment.
    3. Laser Cutter.  $7500+

      1. I have a woefully underutilized Glowforge.  I pledged their pseudo-crowdfunding-preorder, so I got it an early model for a lot cheaper than their current $7k price tag.  (I’m not counting their cheaper laser diode line)  Unless I had a very strong intended business use case, I probably wouldn’t buy a laser cutter today.  They’re big, loud, require major venting / fume extraction, and I could probably cut whatever I needed for a few projects at a local makerspace.
  8. Things I wouldn’t buy

    1. While working on this blog post, I initially searched to see what kinds of tools other people recommended for budding makerspaces.  I was kind of horrified at the listicles like “5 makerspace must haves” and such, usually linking to their very own store.
    2. Sphero.  They’re cute and kids could program them.  I remember one of my kids’ teachers being extremely excited about getting a few Spheros for the kids to work with.  I just think there are better and more cost effective ways to get kids into programming than a $200 rolling robot.  If I had to teach coding to kids, I would absolutely start with the Adafruit CircuitPlayground mentioned above.
    3. Any Robot Kits.  This isn’t just about the Sphero – I’d be wary of any robot kits.  If the robot kit were something inexpensive you drop a microcontroller brain into, then maybe it would have a place in a classroom or makerspace.  Robot kits don’t really have to be very expensive.  If you have a 3D printer, two motors, and a drawer full of stuff, you could probably make a robot that does stuff for about $20/student.
    4. A single servo and basic microcontroller platform can do so much.  Back during the pandemic the Exploratorium held a “MicroBitVirtualConcert” and my youngest built this little monocle top hat cat robot with a Circuit Playground and a single servo.
    5. MakerBot or Ultimaker 3D printers.  I loved MakerBot for what it was back in the day – a scrappy start up that made open source 3D printers you could build and, above all, maintain yourself.  I like to think I’m still friends with the founders of these companies.  And, while I still love MakerBot for blazing the trail and clearing the way for other 3D printers, the current offerings are high on marketing and bear little resemblance to their open source roots.  Honestly, I haven’t kept up with Ultimaker once they were acquired by Stratasys.  Until that point they were still an open source darling and I still think their Cura slicing software is top notch.  While the MakerBot website was scrubbed of open source resources long ago, the Ultimaker website still has these various things still available.  I haven’t been able to confirm whether the Ultimaker is still open source, but given the purchase by Stratasys, I’m guessing it is not.  If I’m not buying an open source machine, I’d go with something way cheaper that doesn’t require a ton of bloatware, apps, server based slicing, or proprietary slicing software.
    6. ChompSaw.  Now, I can’t justify $300 for a machine that can be built from scrap plus a small $30 part and $20 power drill that can be used as a drill whenever not used in the project.  That said, if I were trying to furnish a makerspace and just wanted an off-the-shelf solution, the ChompSaw has a dust collection pan and has safety testing certifications

What did I miss? What did I get wrong?

Making a Makerspace
  1. Tool Recommendations for Making a Makerspace
  2. Makerspace: Just a few more things for the shopping list
  3. Building a Cardboard Cutter Table With Cardboard
  4. Makerspace Addenda – Homegoods edition
  5. More Maker Tools
  6. 3D Printer Pens for Makerspaces
  1. By candle light. []
  2. I drilled the holes for the tuning pegs with an electric drill, but then designed/3D printed a hand drill to help finish it. []
  3. I didn’t realize until recently the original Pareto principle was about how 80% of the land in Italy was owned by 20% of the citizens. []
  4. Actually, I aim for 85% results for 15% effort. []
  5. I’ll never buy an RV for $50-200k and then pay to insure/store/maintain, when I could for a few thousand dollars whenever I wanted.  Which will also be never. []
  6. Many years ago my dad gave me his trusty utility knife.  It was already old by the time he gave me this Stanley brand knife.  Around the time we moved I had visited an Ace Hardware and saw they had a $1 bargain bin utility knife that looked very much like my own, so I picked it up to have an extra one on hand in a different area of the house.  Like my trust knife, this one had an internal area where it could store extra blades – so that’s where I put some blades.  You’re probably wondering – how bad could this utility knife be?  The handle had a slight gap in it where one of the extra blades stuck out very slightly – by probably half a millimeter.  It was never enough that it ever broke the skin but always enough to poke me and I hated it.  If you’re going to use something more than a few times, get something good that will last you.  Don’t cheap out and get a piece of crap that will scratch you. []
  7. A word about hardware store bargain bins.  I don’t know this to be true, but I strongly suspect the various Home Depot and Ace Hardware bargain bins are essentially sourced from the same cheap and/or low quality sources pitched to the store buyers at the most recent convention or the same Temu/AliExpress sources we can buy from.  My additional suspicion is that this is basically the entirety of Harbor Freight’s stock comes almost exclusively from these kinds of sources. []
  8. Different colors, sizes, shapes, and types – from single color, flashing colors, and “smart” / NeoPixel LED’s []
  9. A note about conductive thread: I like the BrownDogGadgets.com brand.  It wasn’t brittle, was easy to thread, and has seemed to hold up in my projects.  I’ve heard other threads are less easy to work with or tend to break. []
  10. For me, that would be BrownDogGadgets or Adafruit []
  11. Touch, temperature, light, accelerometer []
  12. LED’s, buzzers []
  13. Some versions have IR emitter/detectors and some have Bluetooth capabilities []
  14. Talk to your local bakeries and ask for their buckets.  You’ll have to wash it out, but they’ll be free []
  15. Laundry detergent or pool chemicals []
  16. Harbor Freight frequently has coupons for free/cheap buckets []

Adventures with a (Cheap) Vinyl Cutter

I don’t have any affiliate links to shill, but I really like Monoprice.  They sold cheap re-branded 3D printers, decent office equipment, and sometimes they will have an absolutely ridiculous deal on one of their products.  I’d say, overall, the quality is “pretty good” across the board and when you can find a deal on something, it’s an easy decision.  I picked up an extra Monoprice Mini Delta 3D printer because it was so cheap, I could use it for parts and not feel bad.1  I’ve been happy with their egg cooker, USB hubs, HDMI cables, various random testers.  The other day I saw they had a sale on their “MakerCraft Mini Craft Cutter” for $80, when it’s normally $230, with free shipping and had to buy it.  If you missed out, I’d highly recommend signing up for their newsletter.  About twice a year they have some deal that’s just bananas.

It’s been sitting off in a corner for nearly two months while I’ve been distracted by Maker Faire preparations and work, but tonight I gave it a shot.  I’d say, like most other MonoPrice things, it’s “pretty good.”  The included software “Sure Cuts A Lot Pro 5” is not very intuitive, the documentation on the machine and software is pretty lacking, and the tutorials aren’t very helpful either.

Even so, with some futzing around I was able to run a test cut and mostly get another design cut out.  Pictures later.

Here are some of the things I learned:

  • After you drop the blade into the machine, be sure the carriage and move all the way back and forth.  It’s very easy to have it protrude upwards very slightly, causing a horrible clacking / grinding noise.
  • I’m not sure if it’s me, the way I loaded the sticky back cutting mat, or some combination, but the large design I cut out was  off the piece of vinyl by about 1″.  I would recommend making sure your piece of vinyl is about as big as the 8×10 cutting mat.  I am not sure, but I suspect the “vertical” direction has a lot more variability than the “horizontal” direction.

I tried to cut things several times without success.  I tried a lot of different ways to get it going, so I don’t know what got me cutting.  At first the machine would beep at be intermittently, and then regularly.  I have no idea what caused that to happen – or why it stopped.

After the machine registration / cutting mat homing procedure, which sounded about as much as you would expect a small plotter to sound, it was surprisingly quiet.  I’ve never used a craft or vinyl cutter before, so I guess I had just built it up in my head.

I’m going to try cutting some more things tomorrow and look forward to posting some more progress.

I’ve cut several medium complexity designs out of HTV and it was incredibly tedious.  I tossed a very complicated design into this craft cutter and it quietly ripped it out like a champ.  For $80 shipped, I would easily recommend this device to anyone who wanted to experiment with a craft cutter and wasn’t afraid to spend some time tinkering with software and settings.

  1. And, later, I had to! []

Heat Transfer Vinyl T-Shirts Without a Craft Cutter (2023)

Saturday, October 21
Zone 2 – Make: Demo Stage
2:30 pm – 3:00 pm
Let’s goooooooooooooooooooo!

Heat Transfer Vinyl T-Shirts (Without a Craft Cutter)
  1. Heat Transfer Vinyl T-Shirts – Without A Vinyl Cutter
  2. Heat Transfer Vinyl T-Shirts – Without A Vinyl Cutter, Part II
  3. Heat Transfer Vinyl T-Shirts Without a Craft Cutter (2023)

Heat Transfer Vinyl T-Shirts – Without A Vinyl Cutter, Part II

I recently posted my method for making DIY heat transfer vinyl t-shirts without a craft / vinyl cutter.  I used the process to make an Avatar: The Last Airbender themed t-shirt, then a set of four Fallout themed t-shirts for the entire family.  After that I designed, cut, and ironed several more t-shirts. (You’ll see me refer to ironing the design several times, but each time I ironed the vinyl through a piece of parchment paper, to protect the design from scorching and the iron from being marred by melted plastic)

I learned a few more things along the way and thought I’d share these newb-mistakes and pro-tips.

But first, how about some pictures?!

This slideshow requires JavaScript.

  1. Cutting Designs
    1. Just be careful and go slow.
  2. Design Size
    1. I tend to make designs that are no more than about 6″ wide.  This has seemed to be a really good size to show off a cool design, but also fits neatly in the center of an 8.5″x11″ piece of standard printer paper.  You could make something a lot larger, but for all of my designs, this has worked out really well.
  3. Preparing Designs
    1. I forgot to take a picture of it, but it helps to draw an X and Y axis into your drawing.  The purpose of this is to help orient your design at the center of the fabric.  After I had cut out the design entirely, I then used the craft knife to cut triangles into the protective layer pointing towards the center of the XY axis center of the design.  Then, once this was done I could draw the XY axis lines on the protective layer.
    2. I used a yard stick to estimate the center line of the shirt, which I could then align with the XY axis lines on the design itself.
  4. Position Your Design
    1. After looking at various other t-shirts, I decided they tended to look best when the top of the design was about 3″ lower than the bottom of the “V” in my v-neck shirts.
    2. Once I had the shirt on the ironing board, I also put pieces of masking tape with a pen line on the ironing board to help me position and orient the yard stick repeatedly.
  5. Heat / Press
    1. Unlike my first attempt, I made sure to really push hard on the iron.  The idea is that you’re not just melting the vinyl adhesive, but actually melting it into the fabric.  If your iron isn’t hot enough, you’re not ironing long enough, or you’re not pressing hard enough, it won’t actually melt into the fabric.
    2. When you’ve melted it properly, you should see an almost… bubbly texture underneath the protective coating.  Then, once the vinyl is cool and you’ve peeled the coating off, the vinyl should look a little rippled since it is taking on the texture of the underlying fabric.
    3. This slideshow requires JavaScript.

  6. Iron, Cool, Wait, Inspect Vinyl, then Peel
    1. I made this mistake with the arc reactor t-shirt.  As I peeled the protective coating off, in one spot the vinyl got pulled up and in another spot it tore the corner off a sharp trapezoid in the design!  While it is possible I didn’t have the iron hot enough or press hard enough, I think the most likely explanation is that I didn’t wait long enough for the vinyl to cool – so it was still molten enough to be adhering to both the shirt and protective coating, causing the design to be damaged and torn.
  7. Peeling Direction
    1. If your design includes very thin or sharp little pieces (such as the pointy trapezoids in the Iron Man arc reactor), consider changing the direction of the protective coating peeling to avoid peeling towards a sharp point.  These little points have so little surface area they can easily stay stuck to the coating and get pulled off the shirt, ruining all your hard work.
  8. Repairing Mistakes
    1. The problem with making a mistake with heat transfer vinyl is that if you make a serious mistake to your design or application, you may have ruined a shirt.  (I would 100% wear a comfortable shirt even if the design wasn’t perfect.)  However, a little mistake doesn’t have to be the end of the world.  I made two mistakes on my arc reactor t-shirt, that I was able to fix well enough that they probably wouldn’t be obvious to the casual observer.

      Yellow arrows show where the design pulled up and wrinkled slightly. The red arrows point to where the design tore and was repaired.
      Yellow arrows show where the design pulled up and wrinkled slightly. The red arrows point to where the design tore and was repaired.
    2. The design of the arc reactor is about 3″ across, to give you a sense of the scale and size of the mistakes.  You can see two slight wrinkles in the vinyl, pointed out by the yellow arrows.  The red arrows points to where you can barely make out what appear to be wrinkles – but show where the design was torn and repaired.
    3. I didn’t find any really good way to fix the wrinkles, other than to really iron those areas very very hard.  It mostly pressed the wrinkles flat and they’re barely noticeable on the shirt.  Between the shimmery / reflective quality of the vinyl and uneven way a shirt would hang on a non-rectilinear organic body or form and the size of the wrinkles on the small design, it’s almost imperceptible.
    4. The torn design was initially quite heartbreaking.  By the time I had worked on this shirt, I had already created five other shirts without any kind of mistake.  It just so happened I either incompletely cut the design out (I don’t think so) or was a little impatient as I peeled the design (probably), and tore a pretty big piece off of the end of the right side trapezoid pointed out by the red arrow.  I tried to use my craft knife to peel the tip of the trapezoid off the protective coating, but it wasn’t working and I ended up mangling it beyond repair.  After stewing a bit, I figured I would simply cut out a new trapezoid piece and iron down over the torn piece.  I made sure to cut the new piece very slightly larger (we’re talking probably only 0.5 mm in each direction) and position it carefully over the damaged section, before ironing it down very firmly, waiting for it to cool down all the way, peeling the coating, then ironing it again.  Once again, I think the damaged portions wouldn’t be noticeable to most observers.

I would guesstimate a 5-foot long and 12″ wide roll of heat transfer vinyl could comfortably make 10-15 good sized designs and as much as 20 if you’re very careful.  Let’s say you can only make about 14 designs out of a roll, to be on the conservative side.  At about $7 for a basic color roll, this about $0.50 worth of vinyl per shirt.  My wife bought me several 2-pack blank v-neck shirts in assorted colors for about $14 per pack.  Ignoring the cost of my time (it’s a hobby, remember!) this is only about $7.50 per custom shirt.  I think this could make a really cool and inexpensive project for a class, letting all the kids make their own designs (by cutting the vinyl with scissors instead of craft knives, if they’re young) or to create a set of team shirts for a field trip or club.

Not only has this been a very fun and inexpensive hobby, I end up with a great looking custom t-shirt at the end that will probably last years.

I’ve got several more designs I’m working on and look forward to a few more updates.

Heat Transfer Vinyl T-Shirts (Without a Craft Cutter)
  1. Heat Transfer Vinyl T-Shirts – Without A Vinyl Cutter
  2. Heat Transfer Vinyl T-Shirts – Without A Vinyl Cutter, Part II
  3. Heat Transfer Vinyl T-Shirts Without a Craft Cutter (2023)

Heat Transfer Vinyl T-Shirts – Without A Vinyl Cutter

I’m going to commit the sin of a thousand online recipe websites and give you a bit of backstory before I get to the method.  If you don’t like fun, feel free to skip the first few paragraphs.

I recently watched Avatar: The Last Airbender and Avatar: The Legend of Korra with my kids. 1  Both shows were fantastic, but one particular character from A:TLOK was my absolute favorite. Varrick Iknik Blackstone is a fast talking, sometimes erratic, flamboyant industrialist / inventor voiced by John Michael Higgins.  Imagine a cross between Tony Stark and Zaphod Beeblebrox.2

Psst... Do the thing!
Psst… Do the thing!

You can find a few t-shirts out there which feature Varrick’s catchphrase3 and logo for Varrick Global Industries… but they all seem to suffer from at least one flaw.  They all appear to depict the logo mirror flipped with the big sail on the right hand side. I think I know why too.  An artist under the username of RogerBernstein on DeviantArt posted a very large, high quality version of the Varrick Global Industries logo in 2017, which just so happened to be mirror flipped.  His image has the distinction of being one of the first Google Image search results for “Varrick Industries Logo.”  I’m thinking people swiped his work, perhaps altered it a little bit, and then slapped it on t-shirts.  I mean… just look at this…

This doesn't look right
This doesn’t look right

Why am I so sure these logos are mirror flipped?  I paused TLOK during scenes in Season 2 – 4 when you can see Varrick’s yacht, near a plane, on a plane, on a jacket, and near some jewelry.  Now, I’m not even close to the kind of cosplayer / propmaker who has the patience, concentration, or dedication who can recreate their favorites props with meticulous planning, research, measuring, and endless revisions.  Even so, I’d at least like my designs to face the same direction as the show.  There are lots of other pictures showing this orientation, but this was the easiest one to locate.

The logo is partially visible on the yacht to the right side of the image

Anyhow, with the help of GIMP, Inkscape, the pause button, and my trusty laser printer, I created my own design for the Varrick Global Industries logo – ready to put on a t-shirt.

  1. Basics
    1. Creating a design with “heat transfer vinyl” is reasonably straight forward.  The heat transfer vinyl is a thin sheet of vinyl stuck to a sheet of clear plastic with a mild adhesive.  You cut away what you don’t want, leaving the mirror of your design still stuck to the clear plastic, turn it over on a piece of fabric, and melt / fuse the design onto the fabric with heat.
    2. With access to a craft cutter ($250 – $1,000) and a heat press ($100 – $300), you could automate a lot of cutting work (but you’d still have to manually pull the excess vinyl out of the design) and have really fine control over the heat (if that was important to you), but none of that is actually necessary.  While these things might be helpful if you creating designs all the time, you don’t really need much more than some heat transfer vinyl and stuff you already have (a way to cut it, an iron, and some fabric).
  2. Materials
    1. Heat transfer vinyl.
      1. Also known / marketed as “HTV,” you’ll probably want to look for “stretch” or “stretchable” heat transfer vinyl if you intend to putting it on wearables like a t-shirt or similar.  If you’re not putting it on a wearable, you could probably get away with non-stretchable HTV.
      2. As this was my first such attempt, I went with some relatively cheap stuff that was only $9 for 5-6 feet worth of material.  I bought two rolls – one was a blue-purple metallic “chameleon” and the other was a dark silver-gray reflective.  Under normal indoor light conditions both look fantastic.  In brighter light they’ll look… well… brilliant.
      3. Pro Tip:  If your HTV came in a roll and packed in a box, consider keeping the box.  I normally discard boxes, but this way I can stack the rolls easily without having them roll away.
    2. Craft knife & Cutting Mat.  You may not be using a vinyl cutter, but you’ll still need a cutter.  If your design was very simple or you wanted to live dangerously and freehand it, you could probably get away with just using scissors.  We have an old medium size (12″ x 18″) cutting (possibly self-healing?!) mat which works well for most of our purposes.  These days they’re relatively cheap and definitely worth springing for a 2′ x 3′ model.
    3. Printer paper or Sharpie.  I created my design on the computer and printed it out (mirror flipped), then taped it to the HTV, then taped that down on the cutting mat.  If you wanted to just freehand your designs, you could just freehand the design directly on the HTV first.
    4. Tape.  Masking or blue painter’s tape.  The HTV arrived rolled up pretty tightly, so it definitely wanted to roll up while I was working.  The tape kept everything down and in place while I worked.
    5. Iron.  The HTV I purchased recommended applying heat for 5-15 seconds at 300 – 330 °F.  Our iron doesn’t list the temperatures – just the settings for different materials.  I ended up using the “Wool” setting based upon 30 seconds worth of internet research and going to Wikipedia.  The Wikipedia article suggested wool, silk, and polyester would all result in about 300 °F temperatures.  While I can’t vouch for the actual temperatures, the wool setting worked really well for me.
    6. Ironing Board.  I suppose an ironing board isn’t strictly necessary.  But, it sure was nice to have a big, flat, soft, narrow surface to lay my shirt on in order to iron it flat.  You could probably get away with putting down a blanket on a board or some sheets on top of some cardboard or a table.  However, if you already own an iron, chances are you’ve got access to an ironing board.
    7. Parchment Paper.  I used parchment paper because it’s cheap, plentiful, and non-stick.  It’s also slightly translucent, which makes it great for making sure everything is positioned properly and visually seeing when the design is starting to melt into place.  I’m sure there are lots of other nonstick options, but this worked well enough that it would definitely be my go-to in the future.
    8. Optional:
      1. Yardstick.  This is helpful in finding the center line for the t-shirt when you’re ready to apply the design.  It’s helpful, but not necessary.  Since you’re just using it as a straight edge, you could make do with just a long piece of straight cardboard.
      2. Specialty Tools.  You can buy specialty tools for “weeding” heat transfer vinyl, special tools for centering designs on shirts, and special heat pressers to apply vinyl.  For a few shirts now and then, I don’t think any of these are necessary.
  3. Process.
    1. A Note On Double-Checking.  As the old saying goes, measure twice and cut once.  While there are very few “mission critical” steps to this process, there are a few points where it makes a lot of sense to spend the time to legitimately completely check and then double-check something.
      1. Double-Check the Vinyl.  Depending upon the type of HTV you get, it might have two or three layers.
        1. Two Layers.  If it is two layers, there will be a thick clear/clear-ish protective plastic coating and the vinyl.  The side of the vinyl facing the protective coating is the part that will appear on the outside of your fabric and the side without the protective coating is the part that will melt and adhere to your fabric.
        2. Three Layers.  When there three layers, the vinyl will be sandwiched between the thick clear protective plastic coating and (at least in my case) a blue film on the back.  Again, the side of the vinyl facing the protective coating is the part that will appear on the outside of your fabric and the side with the thin film is the part that will melt and adhere to your fabric.
      2. I would recommend checking your HTV by cutting a thin corner off and peeling it to see how many layers you have.  I was alerted to this two/three layer issue by reading a lot of reviews.  My chameleon blue-purple vinyl had three layers and the dark gray reflective only had two.  You could probably remove it before you started cutting out your design, but you’ll definitely need to remove the film layer before ironing.
      3. Pro-Tip:  I would also recommend labeling the box your HTV is in with “two-layer” or “three-layer” to help yourself remember which kind you have when you come back to make a new design next time.
    2. Double-Check the Design.
      1. For most applications, you’ll want to mirror-flip your design.  You can do this in the graphics design program of your choice, probably using some printer settings.
      2. Pro-Tips:
        1. If you’re trying to create a vinyl pattern from some photograph, magazine page, or similar, you might want to photocopy it and then trace the design onto the back of sheet it’s printed on using a lightbox.
        2. Unless you’re creating a multi-layer process, consider making your entire design two-tone black and white.  When it comes time to cut out your design, this will make it a lot easier for you to remember which parts should be cut away and removed.
        3. You’ll be removing lots of areas from the vinyl in a later step.  There’s no harm to your design if you “over-cut” into these areas.  Overcutting allows you to ensure you’re definitely separating sections of the design from the parts that will be discarded.  I would recommend actually drawing in these “over-cut” spots into the design, either as part of the design process or manually with a pen after the design has been printed out.
        4. I like to add the word “reversed” to the design, so I’ll remember to actually mirror flip it.
        5. Since most anything I’ll be creating will fit on a t-shirt, I like to make my designs fit into a standard 8.5″x11″ sheet of paper.  I created a template to do this which has several guidelines and a border 1/4″ all the way around the sheet to make sure the design can be printed within the printer’s margins.
    3. Apply the Design.  As suggested above, you could cut out your design with scissors or perhaps even built it out of scraps of vinyl.  If you wanted to create lettering or follow a very precise pattern, I’d definitely suggest designing on a computer, printing it out (reversed), then taping the design to the vinyl so it doesn’t shift as you cut it, and taping the vinyl to the cutting mat so that doesn’t shift as you cut.
    4. Cut the Design.
      1. I used a craft knife and went slow, using steady medium-hard pressure to cut out the design.  When I wasn’t sure I had cleanly cut all the way through the vinyl, I went back and cut that area again.  Having done this a few more times since I started the blog post, I can say that I didn’t need to cut this hard – and could have used a medium pressure.  More than this and the clear plastic layer gets cut or scored.  This isn’t a problem, but it doesn’t lay flat quite as well any more.
      2. As you cut, be mindful of the areas you’ll be removing that you can “over-cut” into and those areas of your design where you won’t want any knicks and cuts.
      3. I made a point of “over-cutting” the critical pieces, especially at corners, because I did not want to chance the vinyl tearing as I removed the excess pieces.  A single section tearing or stretching would basically ruin the entire design and require starting over.
      4. I had to be sure I was cutting through the printer paper and cleanly through the vinyl, even at the risk of gouging the protective layer.  I was very surprised the protective layer held up as well as it did.  It was clearly scored where I had cut into it, but except for some very small parts, I never cut all the way through it.
      5. Once your design is cut out, use scissors to cut the entire area out of the vinyl roll.  I like leaving a 1/4″ allowance everywhere just so I know the scissors aren’t going to affect my design.
      6. Pro-Tip:  Before you start cutting, it might help to take a moment to plan out your cuts, draw in the areas for “over-cutting,” and even to make sure to darken in those areas that will be getting cut out to help keep things clear while you’re cutting.
    5. “Weed” the Vinyl.
      1. “Weeding” the vinyl is the process of pulling out all the vinyl pieces you’ve cut out that aren’t part of the design.  While there are lots of cheap weeding tool options for sale online for $5-10, I just used the point of my craft blade to pick these little pieces out.  I suppose it might help to have tweezers, a pushpin, a paperclip, or a toothpick, but the craft knife worked perfectly for me.
      2. I’d recommend going slowly, especially at corners, and making sure the parts getting removed are fully cut free from the design elements that are staying.
    6. Iron Fabric.  Definitely take the time to iron your fabric flat.  It would be a shame to discover a wrinkle on the underside of your t-shirt because the design was warped only after the vinyl was fused to the fabric.
    7. Orient the Vinyl.
      1. Once my pattern is cut and weeded, it’s ready to be placed on the t-shirt.  You can buy patterns, templates, and devices for centering a design on a t-shirt, but these seem unnecessary if you’re willing to simply be careful.  Heck, even if you had these specialty tools, you’d still need to be careful.
      2. I made sure my t-shirt was flat and centered on the ironing board, there were no wrinkles in the fabric, the amount of the shirt hanging on the left and right sides were about equal, and then used a yardstick to estimate the center line of the shirt running from the tag down.
      3. I put the design about four inches down from the neck in my shirt after looking at the designs on other t-shirts I had purchased.
      4. If you chose to cut out your design so there was a little extra room all the way around it, the empty clear protective plastic layer will still be “tacky” and help keep the design in place.
      5. Pro-Tips:
        1. It wouldn’t hurt to double-check that you’ve got the exposed vinyl side facing the fabric.  You definitely don’t want it melting against the parchment paper or your iron.
        2. One of the nice things about printing the design with guide marks and registration marks was that it made it a little easier to orient the design neatly on the shirt.  I printed a second copy of the design, then placed it on the shirt – then put the vinyl design down on the shirt underneath the paper.
        3. Before you place the vinyl on the fabric, take a moment to double check there are no stray pieces of weeded / discard vinyl stuck to the protective layer.  They’ll be impossible to remove once you’ve started ironing.
    8. Cover with Parchment Paper.
      1. My design was only about a 6″ diameter circle, so I only needed a piece of parchment paper slightly larger than this.  Since the parchment paper isn’t really consumed by this process, I went ahead and got a big square of it so I can reuse it on other shirts.
      2. The parchment paper I’m using is slightly translucent, which made it easy to ensure the design hadn’t shifted and so I could make a few last second adjustments.
    9. Iron The Vinyl.
      1. Obviously, read and follow the directions for your specific heat transfer vinyl.  The vinyl I purchased recommended 300 – 330 °F for 5 to 15 seconds.  I don’t have a fancy iron, so I heated the iron to the “wool” setting (estimated to be 300 °F) and ran the iron over the parchment paper, pressing firmly, in a small circular pattern for about 15 seconds in each area.  I kept the iron moving so as not to scorch any part of the design, the shirt, or the parchment paper.
      2. Pro-Tips:
        1. It never hurts to do a few test pieces.  I tried ironing both kinds of HTV onto an old undershirt to make sure the heat settings worked, I understood which sides needed to face against the fabric, how I would remove the backing once it had been ironed, and how it all worked.
        2. Having now done this a few times since I started the blog post, I would recommend putting something rigid or semi-rigid under the shirt.  The first time I ironed the design, it looked great – but came out slightly wrinkly in the wash.  I re-ironed it using really heavy pressure and the same shirt has held up in the wash ever since.
    10. Remove Backing.
      1. The instructions for my vinyl told me to “hot peel” the backing.  I took this to mean that I should carefully remove the clear protective coating from the heat fused vinyl.  There were a few small spots where it looked like the vinyl wanted to come up a little bit, but the backing came up cleanly everywhere.
    11. Cover and Iron Again.
      1. Since there were a few small spots where it looked like the vinyl might have come up slightly as I was removing the backing, I put the parchment paper back down and ran the iron around the entire design for about 5 seconds in each spot.
    12. Don’t Wash for 24 Hours.
      1. My instructions say to wait 24 hours before washing the garment.  I spent a while on this design, so I wasn’t about to chance it by throwing the shirt in the wash.
    13. Iron Again (Optional).
      1. After I washed the first shirt I made, the design appeared to have buckled slightly.  After a second ironing, it has stood up to repeated washings without a problem.

This slideshow requires JavaScript.

Heat Transfer Vinyl T-Shirts (Without a Craft Cutter)
  1. Heat Transfer Vinyl T-Shirts – Without A Vinyl Cutter
  2. Heat Transfer Vinyl T-Shirts – Without A Vinyl Cutter, Part II
  3. Heat Transfer Vinyl T-Shirts Without a Craft Cutter (2023)
  1. I’m going to reference these shows and their contents a lot.  I don’t own their intellectual property, they do, I just wanted to make a fun t-shirt for myself. []
  2. Those who know, know. []
  3. Do the thing! []
Test