Spacexula to the rescue!

One of only two photos on Flickr that came up with the search term "Spacexula"

One of only two photos on Flickr that came up with the search term “Spacexula”

My friend Spacexula just sent in this AWESOME suggestion on how to display 1000 origami cranes in a durable pleasing way.1 2 I’m going to give you a link to his website and blog, but before you click, know that the top post on his site today is very NSFW.3 Spacexula suggests:

Cast all the cranes into a clear block of resin.

http://www.amazon.com/Entropy-Resins-11CLR008-Casting-Gallon/dp/B007NTU89E/ref=sr_1_1?s=industrial&ie=UTF8&qid=1367347089&sr=1-1&keywords=clear+casting+resin+gallon

Can be picked up locally for around $20 a gallon.

If you suspend them all on fishing line stringers you could likely fit them all in a single concrete casting tube

http://www.homedepot.com/p/SAKRETE-8-in-x-48-in-Concrete-Form-Tube-65470075/100321209

I freaking LOVE this idea.  The only thing I would need to test first is whether the resin would stick to the cardboard form creating a cloudy cardboard layer on the outside of the resin tower.  That said, I love love love this idea and feel quite committed to it already.

Default Series Title
  1. I should mention, this is not the first time I’ve blogged with the title, “Spacexula to the rescue!“ []
  2. Photo courtesy of John Abella []
  3. Okay, you asked for it…  Don’t blame me. []

It’s still extruding…

Spacexula is selling his RepRap on ebay.

It’s one thing to buy a kit and it’s another thing altogether to buy a fully assembled fully operational machine.  This machine was built and operated by one of the most vocal RepRap champions and prolific RepRap bloggers around.  So, it’s not insignificant that this machine comes backed his promise of helping you getting this machine running.  If I recall correctly, his last machine sold for a little over $1400.  At the time of this post, this RepRap Prusa Mendel one is going for $510.00.

Also, here’s my favorite video from Spacexula:

An honorary Duggar

Nophead’s Mendel1 has produced 15 sets of Mendel parts, and is hard at work on it’s 16th!!!  My understanding is that it would take about 60 hours to print a full set of Mendel parts.  I have to admire anyone who prints up Mendel/Mini-Mendel parts because of the amount of dedication it would take to do so.  After spending 90 hours2 printing something, I don’t know that I could part with it.

My point is that we really have guys like Nophead, Spacexula, and Cyrozap3 to thank for cranking out parts and pushing replication forward.

I hereby bestow upon you gentlemen the Duggar medal of continuous replication.

  1. I don’t know if he’s named it yet – so I’ll call it Anna until he corrects me. []
  2. I’m just assuming it would take me 50% longer since I don’t know what I’m doing… []
  3. Dude, I realized yesterday I’ve been misspelling your name.  I’ll go back through and fix that – sorry! []

Spacexula to the rescue!

This poor guy gal known as “noobcake” had gotten so frustrated with his her MakerBot CupCake CNC that he she was getting ready to either strip it for parts to start work on a RepRap or just sell the entire thing on eBay at a loss.  It read like most of his her problems were coming from improper Skeinforge calibration.  Anyhow, that made me very sad.

And then I scrolled down.  Spacexula helped noobcake get his her Skeinforge calibrated and MakerBot printing reliably.  That’s really really fantastic, man.  Kudos.

Edit:  Apparently I have as much difficulty telling girls from guys online as in real life.  Sorry noobcake.  My bad.

Mendel FAIL

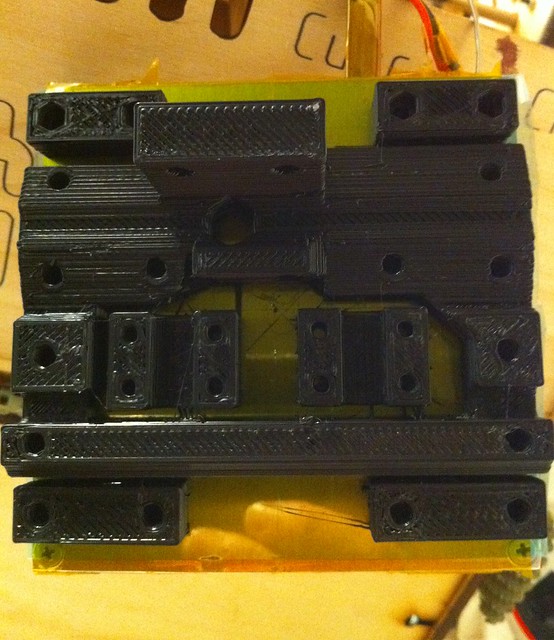
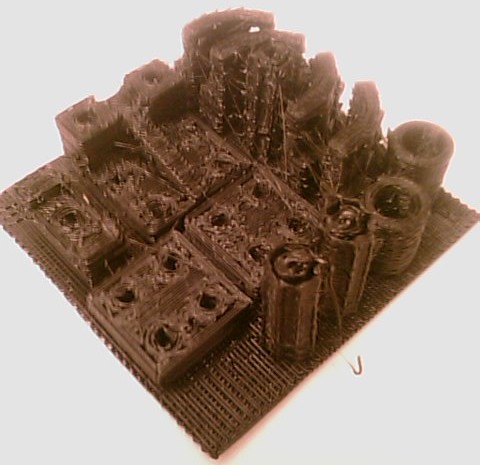
I can’t find my camera, so my camera phone will have to do. Here was my second attempt at printing Spacexula‘s Mendel production STL files.  Don’t even ask about the first attempt.

RepRap Mendel FAIL

RepRap Mendel FAIL

Spacexula offered some advice on how to fix this.  I have the Stretch feature turned on so that I can (hopefully) print better small circular features without the parts getting all globby.  He suggested turning Stretch off and just drilling out the holes if needs be.  Wise words from a man cranking out Mendel sets.

Unfortunately, I won’t have time to spent printing up parts until the weekend.  :/

These parts are not unusable.  Of the 13 parts on the sheet, I think five are probably perfectly serviceable.  The tall toothed gears are the most miserable parts – they are swayed and the teeth are basically intermittent bumps.  This has been one of my least successful completed prints in a long time.

Anyone want some Mendel parts?  Drop me a line.

It’s not just me!

See!  Spacexula has discovered the hard way she’s a wicked temperamental woman!

Shattered acrylic plastruder…  Yikes!  I printed up one of Zaggo’s Prinstruders – but it appears to be optimized for an early MakerBot Batch 5 with large/small dinos.  If I wanted to use my printstruder I would need to pick up some of the extra parts required and essentially print up a small dino.1  However, I think I’d like to start replacing parts out of my MakerBot with printed parts so that I can keep the originals as backups.  However, I have a feeling a prinstruder out of ABS is going to be much more robust/resilient than the layered acrylic plastruder.  What do I need?

  • 2x 626 ball bearings.
  • 4x M4 bolts, 60mm long
  • 4x M4 nuts (optionally two of them as wingnuts)
  • 1x M6 bolt (30mm long)
  • 1x M6 nut
  • 3x M3 bolts (30mm long)
  • 3x+ M6 washers
  • 3x+M3 washers
  • 4x M4 washers

In addition to these parts, I’ll also need to measure my ‘bot for a small dino equivalent.  Since my extruder barrel is out of commission and the plastruder is just lying on the platform, this is as good a time as any to measure it up.

  1. Shopping list below []

Plastic oozing into threads – is that the end of my insulator?

I don’t know, but I’m about to find out.

I’ve managed to clear out the PTFE insulator pretty well.  I pulled the entire heater out of the extruder, turned up the heat a little, held the barrel lightly in plyers, and unscrewed the PTFE without a problem, and then turned the heat off.  I then used a precision flathead screwdriver to follow the threads, popping/chipping the plastic out as I followed I went.  However, I don’t know to what extent the threads are still intact.  Since the PLA oozed into the threads, I have to think they’re messed up to some extent.

As for the barrel, I used a drill bit with the unsharp end wrapped in a rubber band.  I rotated the bit using the rubber band as a grip to drill out the plastic.  It actually worked really well for clearing out the barrel right to where I can see the barrel entering the nozzle.  The inside is reasonably clean, but I still can’t put a filament into it freely.

I also had to take a precision screwdriver and follow along the threads on the barrel to chip out plastic.  This went reasonably quickly.  Once I was done the nut was able to screw on and off freely.

Now I’m left with a slightly discolored PTFE and a mostly clean barrel.  I’ve got a spare PTFE insulator, but I’m hoping this one is salvageable.  It still has threads and the barrel will screw in nicely.

Rick and Spacexula have suggested I use a torch to heat up the nozzle and let the plastic burn/fall out.  But, this is a trick for another day with proper safety equipment.

Oh, and before I forget, Spacexula suggested keeping a ruined PTFE barrier to slice into insulating washers.  I’m hoping I might be able to re-use the PTFE insulator, but this is certainly my backup plan.