What would one of my blog posts look like, if it didn’t involve wild digressions? The saying, “Everyone has a plan until they get punched in the mouth” is attributed to Mike Tyson, speaking of the impending fight with Evander Holyfield.1
I’ll post some pictures, but suffice it to say very little has gone according to plan. :)
Travel Uke Design
I got started by putting together a pattern based on Dan Hulbert’s designs. A few notes about how I put it together:
Designs
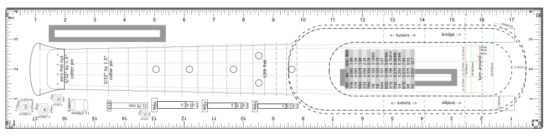
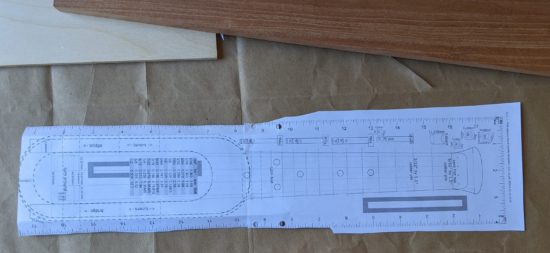
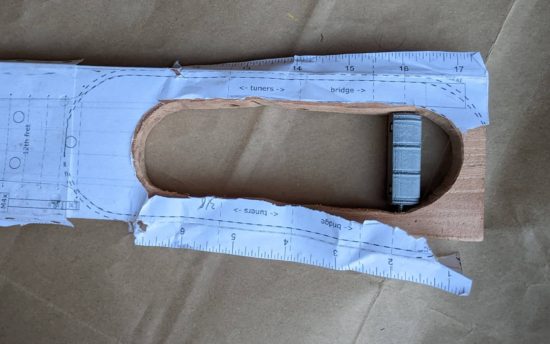
I started with Dan’s designs, specifically the “backpacker travel ukulele,” added a rounded base similar to his concert sized “travel ukulele,” and then added a number of annotations. I wanted to have a way to visualize the size of the bolts, hardware, etc. I also added a grid showing the various drill bits, keyed to the various hardware.
Process
I created the above described design in Inkscape, using different layers for different aspects of the design.
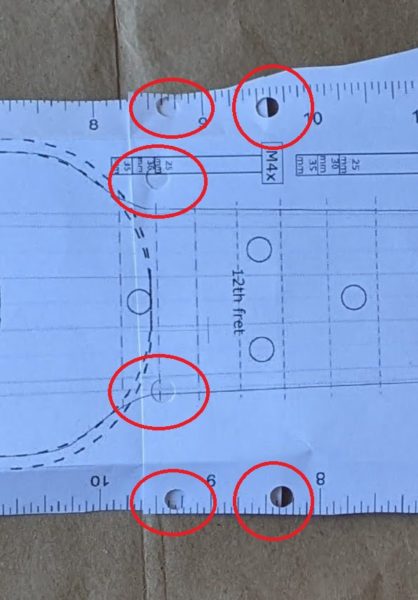
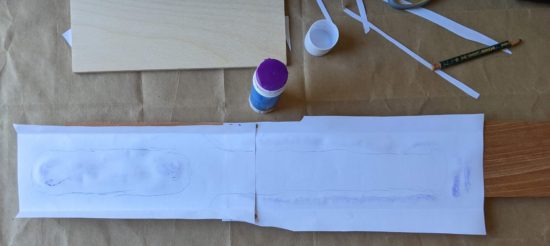
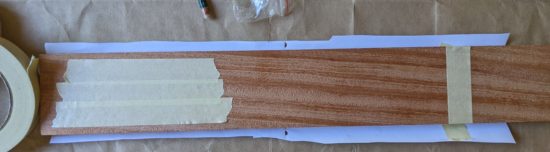
Printed the design on two sheets of paper, lined them up, and glued them together. I used a hole punch in the top sheet, to help line them up easily. I made sure to put the hole punches through parts with lots of detail, but nothing critical to the pattern.
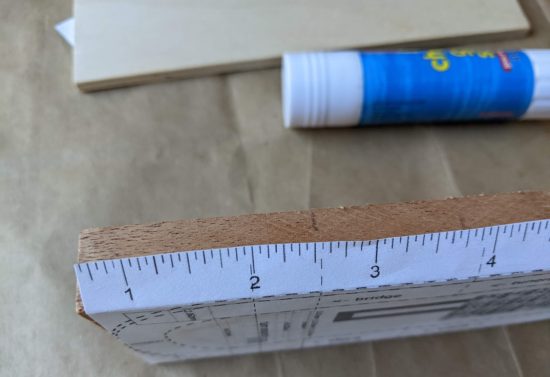
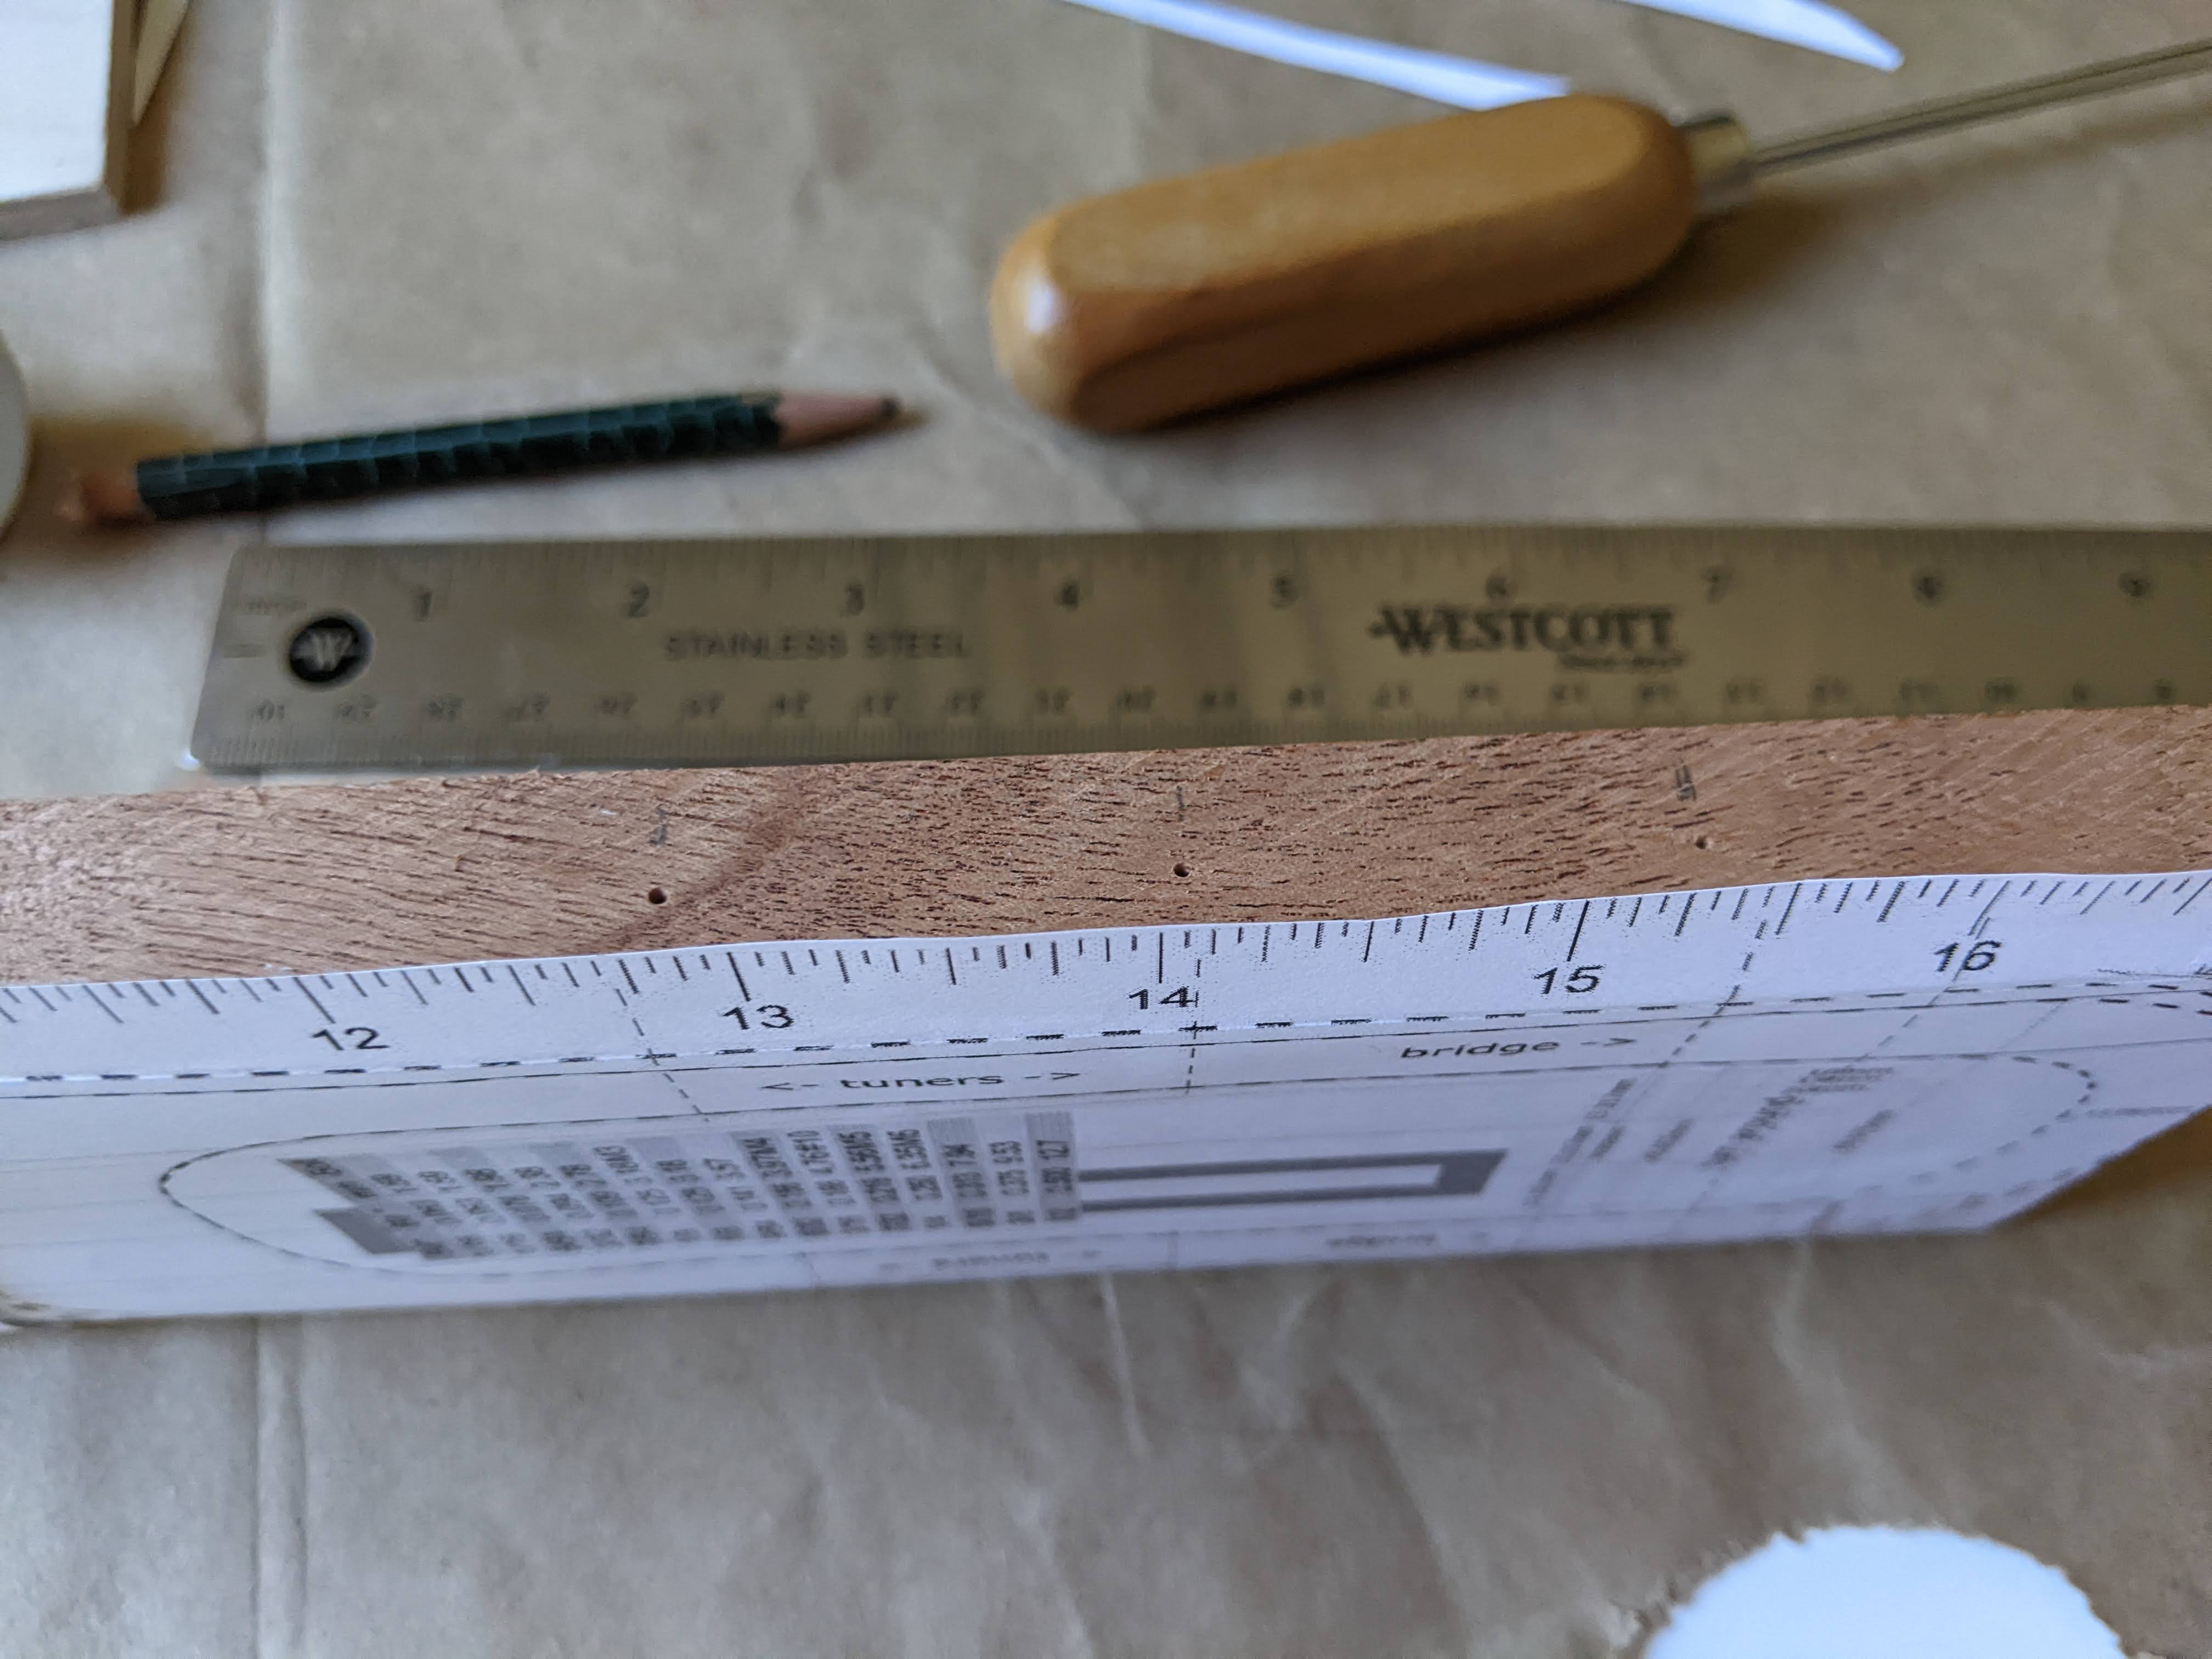
There are rulers on every side of the diagram, and a 100mm wide gray box, because the first several times I printed it out the scaling was all wrong.
I’m not sure why the scaling was wrong – it could have been somewhere in the conversion process from SVG to PDF to a two-page PDF. In the end, I just measured the box, found it was too small, scaled up the next print, and it was close enough to 100mm that it was fine with me.
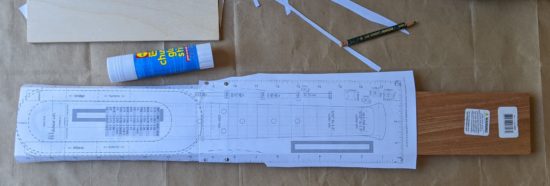
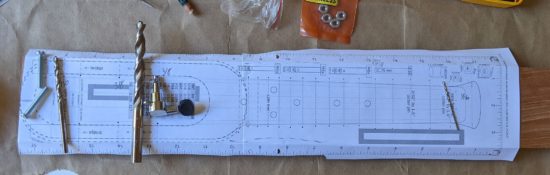
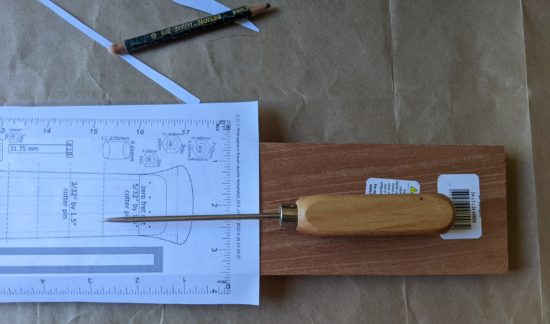
I picked up the wood (a 3/4″ x 3″ x 24″ mahogany plank from Rockler Woodworking), hardware from Home Depot (I’m pretty sure they lost money shipping me a 4′ long steel bar), and 3D printed the turn around.
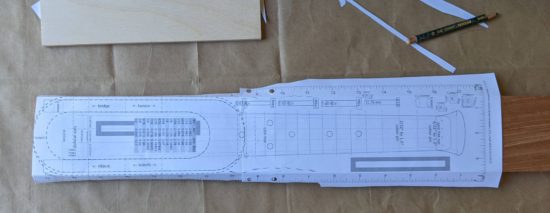
I used a pencil to trace the reverse side of the design. This way, I would be sure not to put glue in any of the areas that would touch the final design. I then applied glue and glued the pattern to the wood using a glue stick.
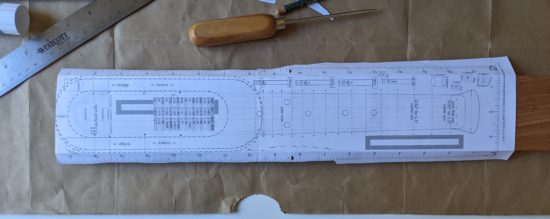
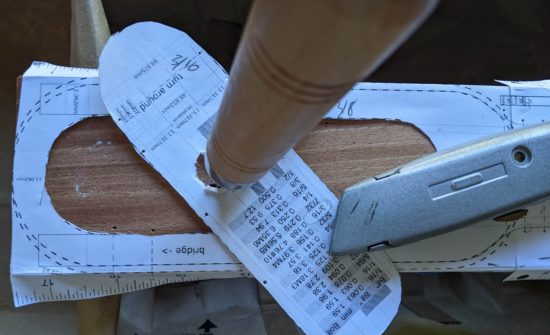
I used a utility blade to cut out the center “sound hole” paper outline, making it easy to cut out the center.
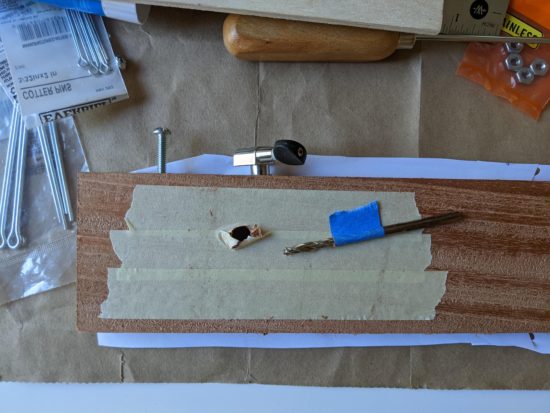
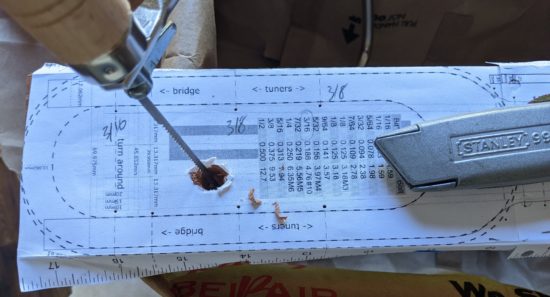
Used an awl to poke holes through the pattern where the strings go above the zero fret, on either side of the frets (so I could draw a line on the wood between these indentations for the fret locations), and other locations where I needed to drill holes.
Taped the bottom of the wood, so that holes drilled and saw cuts wouldn’t cause the wood to splinter. I really should have taped the top too, but I’m learning!
Drilled a hole in the “sound hole” to put saw blade through.
I don’t have a scroll saw, router, drill press, or CNC – any of which would have made the rest of the process a snap. Instead, I bought a coping saw and cut part of the sound hole out.
Snapped the blade. Bought some new blades. Cut the rest of the sound hole out, snapping another blade in the process.
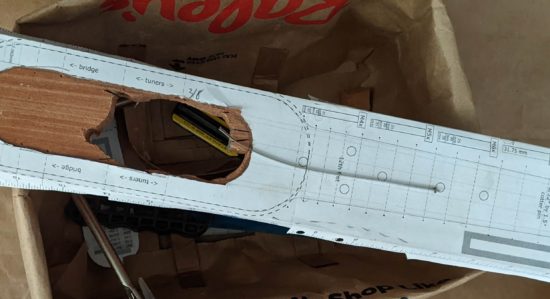
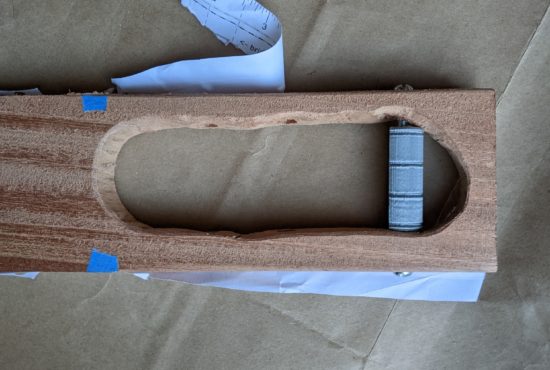
I installed the turn around – which looks like it is going to work well.
Hole punches through the top pattern allow the sheets to be aligned properly
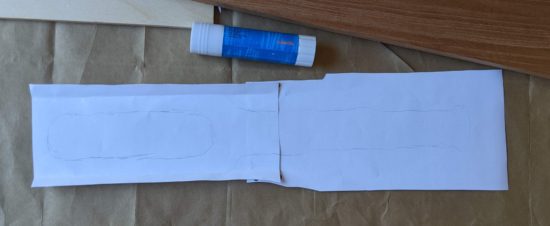
Paper lined up on the board
Drawing on the reverse of the pattern
Glue in just the areas not touching the design
Glue!
Poking holes through the pattern
Taping the bottom of the plank
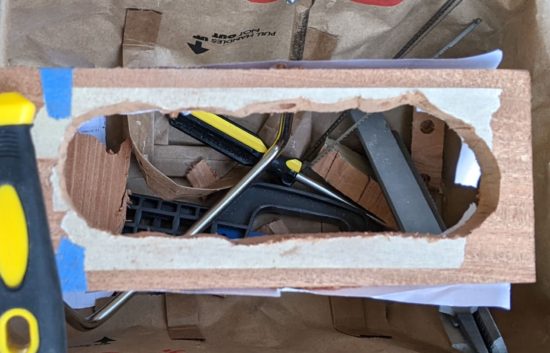
Hole through the center, for the coping saw blade
Drill bits and hardware
Coping saw blade through the hole
Center pattern cut out with utility knife
Awl ready!
Marking spots for the awl holes
Marking the wood for the holes to be drilled
Partially cut, broken coping saw blade
Cut out, tape still on
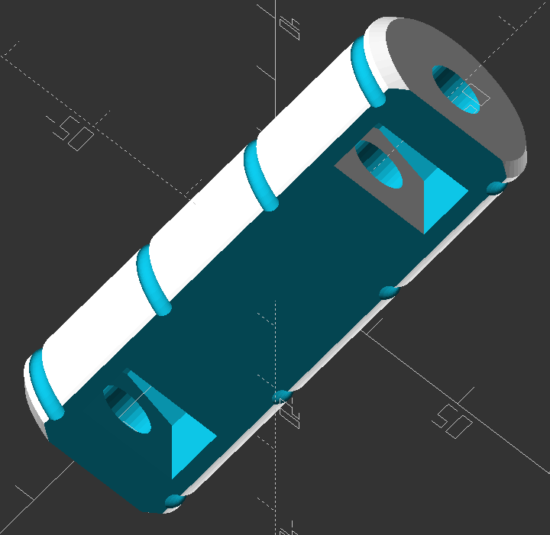
Render of 3D printable turn around
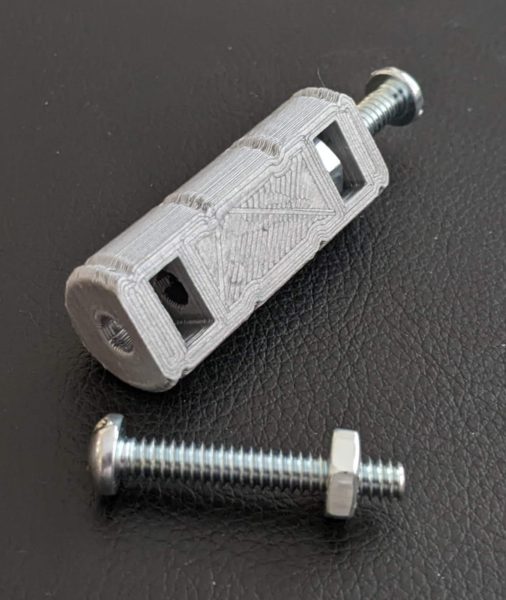
Printed turnaround with captive nuts and hardware
Masking tape removed, filed down somewhat, turnaround installed
Turnaround installed and rotated so the captive nuts are out of view
Top view
The result is … wildly uneven.
Improvements
As with any project, I find that as I am going through the first iteration2 I discover a few ways to improve the existing plans. Here are some ideas I had along the way:
Creating the template so that I can fold the left and right sides down and they will indicate the precise location for the tuners and turn around holes.
Including dotted lines from the widest part of the design all the way up – so I can be sure the pattern is straight all the way up the plank of wood.
Create a cross hair pattern for the places where I need to drill, to make my awl punches through the design more precise.
Add measurements to the gray scale boxes. (Quick tip – the boxes are exactly 100mm long with 0.0mm thick outlines. This prevents them from being draw very slightly too wide).
Tape the top and bottom of the board, as well as sides, before drilling and cutting, to prevent the wood from splitting or splintering.
About two years ago I received a ukulele for Father’s Day and started playing it. It’s an instrument I’ve always been interested in, but nothing I’d ever put any effort into. Thanks go a world-wide pandemic1 I had a little extra time on my hands and figured I’d really give this a shot. Who knows, maybe I’d come out the other side of this pandemic with a new skill? Two years on and I can play several songs, carry a tune, and find it relaxing and enjoyable to play.
Focus + Practice + Time = New Skills
Part of my approach was to see if I could set aside some time every day to devote to learning. I thought back to a TEDx talk by Josh Kaufman entitled, “The first 20 hours — how to learn anything.” Josh outlines his process for learning the ukulele in 20 hours.
The essence of this talk is stuff we’ve heard a hundred times before. Small incremental improvements become big gains over time. Josh cites Malcom Gladwell’s theory that “ten thousand hours is the magic number of greatness” as argued in his book “Outliers” but points out the 10,000 hours is to achieve world-class, expert-level greatness. Josh argues all you really need is twenty hours of focused deliberate practice to be pretty good at something. 2 This is amusingly similar to the Pareto Principle that “for many outcomes, roughly 80% of consequences come from 20% of causes.” This 20% of world-class effort, spread out over time, leads to surprising incremental improvements. 34 But, effort and time isn’t enough – it’s the particular focus. Fenyman’s learning technique is uniquely designed to help identify these features. A gross oversimplification of this method is: write down the steps as if you were explaining it to someone5 , identify gaps6 , organize / simplify and go back to the first step.
My Learning Process
What does all this rambling mean? This website tends to be my sketchbook / journal for projects – especially projects where I am starting from scratch. When learning a new topic or skill, my approach tends to be:
Watched this ukulele tutorial series by “Andy Guitar,” probably dozens of times, while trying to follow along on my ukulele
Found songs using the easiest beginner chords (Am, F, G, C)
Retyped song lyrics, with the chords interspersed, in a way that made sense to me7
Practiced those chords and songs
Found more songs using additional chords (Dm, E7, Em, D, etc) and repeated steps 2-4
Building a DIY Travel Ukulele
But, this post isn’t about playing the ukulele. It’s about building a ukulele. Documenting all of this helps me organize my thoughts, get them out of my brain (since I know I can always return here to find them), and free up my attention to move onto new problems. (Perhaps most importantly, it lets me close dozens of browser tabs.) I’m not sure how I first stumbled across Daniel Hulbert’s YouTube videos and website, but ever since seeing some of his designs, I haven’t been able to shake the idea that I want to build my very own quiet little travel soprano ukulele.
If you’re following along so far, I’d warn you that as I’m writing this I just have a piece of wood with some holes in it and bits of hardware lying around. I would not consider what I have to be a tutorial at all. 8
Existing Tutorials, Resources, Examples
After looking at Daniel’s various designs, I also looked at several travel ukuleles (most inspired by Daniel’s work):
I designed a 3D printable model, but have yet to print it. As I worked on the design, I deconstructed other designs I’d seen, looked at the important parts, including some from Daniel’s templates, and tried to keep the critical components and think about the various design choices he made in building his own instruments. However, I don’t think I ever will try to print this. From a learning perspective, it was an excellent exercise – but I think I’d much rather have a wooden travel uke.
Anatomy Lesson
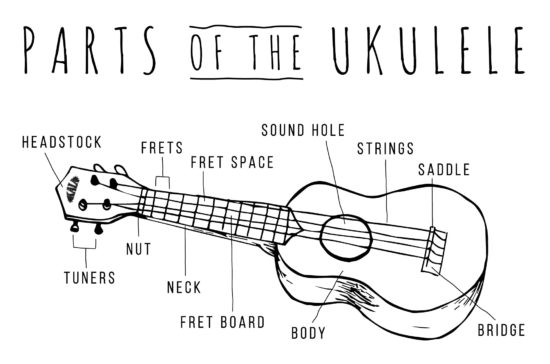
First, a bit of anatomy, swiped borrowed from the Kala website. (I wanted to leave a message letting them know I was borrowing the image, but the post doesn’t allow comments.)
Parts Of The Ukulele – Kala Brand Music Co.
Everything I Know So Far
The following list is a combination of several of Daniel’s blog posts, PDF downloads, and resources he cites. I will try to include the links to those references.
The reason for wanting to use Daniel’s DIY hardware store components instead of fret wire for the frets is because I want to avoid the pitfalls described by Anders Strand in this blog post. If the slots for the fret wire aren’t cut to the same depth, well spaced, inserted to the same depth, and leveled properly, the instrument is likely to sound, to use Ander’s word, like “garbage.” 9 Daniel’s “hand tools” ukulele utilizes pieces of cotter pins super glued to the wood in place of this more exacting process.
(Re)Arrangement / Design Considerations
Most of Daniel’s travel ukuleles use a “zero fret” instead of a “nut” to guide the strings on their way to the tuners. This lets him basically invert the strings, tying the strings above the zero fret where the nut would otherwise be, and place the tuners between the fretboard and the bridge.
Chris Russell’s review of Daniel’s special custom travel ukulele had very few negatives and made a lot of interesting points. The head of the travel ukulele was tapered so as to allow it to be placed into a holder. Extending the head a little would allow it to feel more like a full sized ukulele. Recessing the strings into the head would allow them to be out of the way and less pokey.
Zero fret, frets, bridge
The strings should have a slight incline from the nut (or zero fret) until it reaches the reach the bridge.
Bridge from a 3/16″ tube (aluminum, steel or styrene), about 3″ wide
Fretboard
Of course, there’s no reason you couldn’t just buy a pre-made/slotted/measured fretboard and glue that down instead of messing with clipping cotter pins in half. These are widely available on Amazon, with fretboards, slotted fretboards, and pre-assembled fretboards available over at StewMac.com. If this scratch built ukulele doesn’t pan out, I might give that a try.
I’ve got these cheap ~$10 tuners on hand, but if this travel ukulele works out alright, I would definitely throw down for a set of the ~$30 Graph Tech tuners Daniel uses.
Super Glue
I’ve always had horrible problems with super glue. It always dries completely up before I ever get a chance to use it. Fortunately, my twitter friends came to the rescue and recommended several brands:
Anders recommends against using normal wood in favor of hardwood. While he doesn’t say why, I suspect it is because the strings were biting into the softer wood, causing the holes to widen slightly, and the ukulele to continually go slightly out of tune. He suggests the wood could be sourced from a cutting board, which seems like a pretty neat idea to me.
The turn around could be fashioned from an aluminum tattoo machine grip. Searching for “tattoo machine aluminum grip” on ebay seems to turn up some acceptable variations. The most good looking one appears to be about 2″ wide and a little over 3/4″ in diameter. Ebay links to particular auctions tend to go bad pretty quickly, so without any form of endorsement, I’ll link to the seller here too. (I’ve tried to save the auction page in Archive.org for future reference).
This slideshow requires JavaScript.
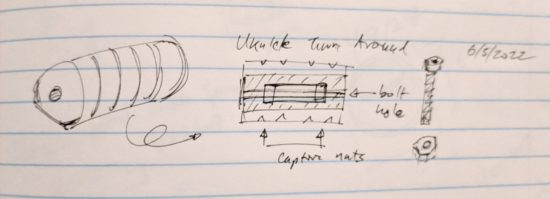
However, since I have a 3D printer, these seem very printable. Anders was kind enough to post his 3D models for the parts of his ukulele. The design of the turn around is pretty simple. I published my own version on Printables.com. The model is little more than a 16mm diameter, 50mm long cylinder with a 5mm bore, some ridges for strings (spaced -17.75, -5.5, 5.5, and 17.75 from the center), and a flattened side to make it easier to print. These measurements came from Anders’ own work. I suspect the diameter, more, and ridge depths are immaterial, while the spacing is a little more important.
The hardware for the turn arounds were a lot harder to track down. Daniel uses these super cool screws that go by an absolutely astonishing array of names. Chicago screws, Chicago bolts, sex screws, posts, binding posts, etc. Depending upon which one you search for, you’ll either find nothing, lumber, metal stakes, random screws/bolts, or something altogether very different. I’d found a truly dizzying array of options from McMaster-Carr, Home Depot, Lowe’s, Amazon, and a few other specialtysites. Fortunately, Daniel was kind enough to point me in the direction of these posts (with a #10-24 coarse thread size) and patiently explain he uses two of these with about 3/4″ of threaded rod between.
There are some really nice looking black oxide posts on Amazon and elsewhere, but they tend to be metric, which then means drilling a metric hole, finding metric threaded rod… Because I like the look of the black oxide coated hardware, I was contemplating using some metric set screws in their place.
I had considered using just one with a longer #10-24 machine screw10 on the other side – then I realized the screw side would be too narrow, creating a tilted turn around. Two posts it is. :) I don’t know the diameter of the post, otherwise I’d list that here. Another possibility is using post extensions.
Sometimes as I’m doing a deep dive on a project, I have an idea for an improvement or a way to do something in a different way from the original. It’s around this point imposter syndrome kicks in and I wonder “Is this actually a terrible idea that was already discarded by others?” I am sure the main point of having a post / threaded rod / post sandwich for the turn around is to ensure there’s a length of metal running through the turn around. It’s probably even more important if the turn around is made of plastic. Then again, what if there was a 3D printed turn around which had two spots for captive nuts and there was space on either side for two long machine screws / bolts? It would probably have most of the strength of a solid piece of metal running all the way through, far easier to source (and in black oxide hardware!), and fairly easy to assemble. Printing in plastic allows such cool options, such as embedded / captive nuts, why not leverage that ability here? A sketch:
Turn around sketch for 3D model, using captive nuts
Ordering
I haven’t ordered all the parts, but it looks like the most likely route is for me to place an order with Home Depot and Amazon for the various parts. I’ll post links if/when I get the full shopping list together.
Tools
Drill and drill bits for the tuners and turn around
Hacksaw to cut out the rough shapes, possibly cut threaded rod if I was using that
Coping saw to cut the interior area out nicely
Nippers (left over from some tilework) to cut the cotter pins
Files and sandpaper for taking the rough edges off the cotter pins and shaping the neck
Process
Create template
Transfer template
Drill holes before cutting out the center, this way the wood in the center won’t splinter
Cut rough shape of ukulele
File, sand, and shape
Glue cotter pins
File, sand, and shape
Add tuners, bridge, and turn around
I guess the next step is getting these ideas off paper11 and ordering some stuff!
He references his research for this figure, but doesn’t mention where it came from. Perhaps it’s in his book? I checked it out from the library, so I’ll let you know. [↩]
I’m trying to find a good place to mention the Japanese word for the process of continuous improvement is “kaizen.” [↩]
Another great distillation of these ideas is that 1% improvement every day for an entire year yields a 37.78 times improvement overall. [↩]