Inkscape Protractor and Rulers

Over the last week I’d tried making a set of small rulers and straight edges I could keep in notebooks of various sizes.  I’ve got a big heavy sketchbook, a thin college rule composition notebook with several DIY augments, and a very small sketchbook about 4″ square.

Just four notebooks
Just four notebooks

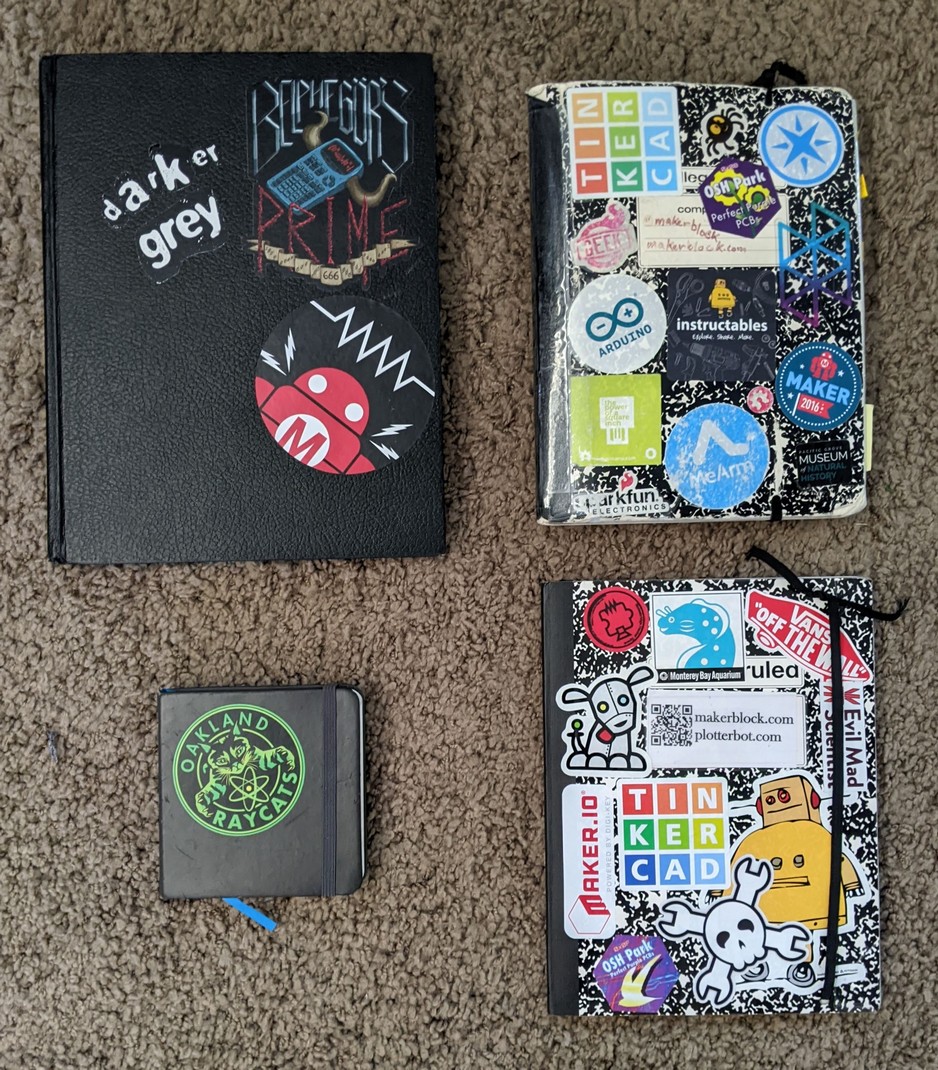
My idea was to make small credit card / ID card sized rulers, print them on paper, and then laminate them to keep in one or more notebooks.  My first attempt a few days ago was serviceable1 – but lacking in aesthetics and functionality. (I’ll show some pictures below…)

This morning I saw a Mastodon post by @concretedog234 demonstrating his use of a homebrew lasercut protractor.

@concretedog's lasercut protractor
@concretedog’s lasercut protractor

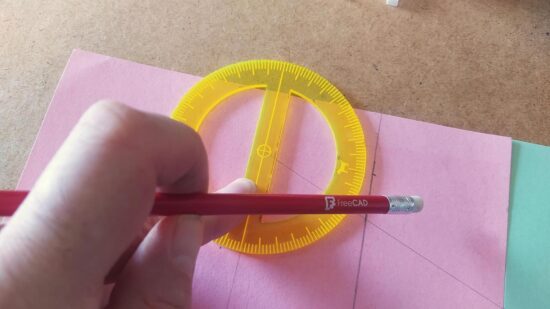
Inspired by @concretedog’s work, I embarked upon building my own in Inkscape, using some printable ruler I found online.  A few design progress pics:

This slideshow requires JavaScript.

The basic process I used was:

  • A few concentric circles for the overall protractor outline and semi-circle cutouts
  • A longer 10 degree increment rotated 18 times (since it was a line at the top and bottom), a medium 5 degree increment rotated 36 times, and a short 1 degree increment rotated 180 times
    • Edit -> Clone -> Create Tiled Clones
      • Symmetry:  P1: simple translation
      • Shift:  make sure the exponent is “0”
      • Rotation:
        • Angle row/column:  0, 5 degrees
        • Rows/columns:  1 x 18
  • Then added the rulers minus the numbers (just looked cleaner)
  • Three clones of the result, printed on paper, cut one out, cut out the semi-circle windows and center, laminated, then cut out the semi-circle windows and center again, ran it through the laminator for good luck

This slideshow requires JavaScript.

In an ideal world, I would also have created the ruler marks using @concretedog’s guide … I just hadn’t seen it until I got around to finishing this project. :)

Small Rulers and Protractors
  1. Inkscape Protractor and Rulers
  2. Prelude to Protractors
  1. built from PrintableRulers.net []
  2. Someone I’ve been following for years and have come to think of as a parasocial friend []
  3. Is following a fellow maker a parasocial relationship if you interact with them? []
  4. Parasocial could be pre-friendship? []

OpenSCAD 3D Printed Spring

OpenSCAD spring design by @rasterweb
“I’m trying to come up with a good way of creating this in OpenSCAD… I have something using a bunch of hull’d cylinders but I’m wondering if there is a better/easier way to do it.” @rasterweb

A friend posted a design pondering whether there was a better way to design an object in OpenSCAD.  As so often happens when I approach a 3D design, one solution pops up in my head… and is immediately discarded as garbage.  That first thought was to create a negative of the interior of the spring, then iterate along the length of a stretched cube.

In the end, I opted for1 creating a flat version of a single “loop”, made from differenced hulled circles, repeated over the number of desired loops, then trimming alternating ends (so it wouldn’t look like a chain).

OpenSCAD spring by MakerBlock

Here’s the OpenSCAD code to produce this spring:2

//  Settings
    $fn = pow(2,6);
//  Spring Dimensions
    springH     = 5;
    springOD    = 10;
    springW     = springOD*2;
    springOR    = springOD/2;
    springTh    = 2;
    springIR    = springOR-springTh;
    loops       = 8;

    spring();

module spring()
    {
    linear_extrude(height=springH, center=false)
    for (i=[0:loops])
        {
        translate([0,(springOD-springTh)*i,0])
            difference()
                {
                spring_loop();
                translate([-springOR+(springW+springOD)*(i%2),0,0]) 
                    square(springOD, center=true);
                }
        }
    }
    
module spring_loop()
    {
    difference()
        {
        hull()
            {
            circle(r=springOR);
            translate([springW,0,0])
                circle(r=springOR);
            }
        hull()
            {
            circle(r=springIR);
            translate([springW,0,0])
                circle(r=springIR);
            }
        }
    }

Some notes about my OpenSCAD style:

  • I like to use OD/ID/OR/IR to mean outer diameter, inner diameter, outer radius, inner radius.
  • I think the “spring_loop” module could be simplified slightly by calling another module which creates each hulled circle, but weighing the additional module code against just retyping a little code I opted for what got it done faster.
  • I like to specify the facets on circular objects right at the top of the file. This way, I can adjust the smoothness of the object by just changing just the exponent part of the $fn system variable.
  • Reasonably parametric. There’s some additional further optimization that could be done in the spring alternate end clipping.

Can’t wait to see what @rasterweb makes with a 3D printed spring!

#OpenSCADClub
  1. OpenSCAD 3D Printed Spring
  2. OpenSCADClub Week 2: Directional Pad
  3. OpenSCAD Render Times
  4. One Simple Trick Can Save You 30 Minutes…
  5. OpenSCAD Club Cookies
  1. And, please forgive the inside-baseball / OpenSCAD-speak []
  2. To display the code above I had to use the WordPress block editor. 🤮 []

First commissioned piece! [Draft 02/22/2010]

[That’s it.  Just the title.  I have no idea what this piece may have been, how much I was paid, or how long it took!  I was just excited that my little 3D printer was making a little bit of money and started to share it with the world…  before sitting in my drafts folder for … more than 15 years]

Drafts Zero - The Lost Blog Posts

  1. The Lost Blog Posts
  2. Plastruder! [Draft 12/25/2009]
  3. UNTITLED [Draft 12/25/2009]
  4. Preparing to print [Draft 12/27/2009]
  5. More prints [Draft 01/04/2010]
  6. Prototype Pricing [Draft 01/19/2010]
  7. MakerBot tuning [Draft 01/20/2010]
  8. Plastic Screw Anchor [Draft 02/02/2010]
  9. Magic [Draft 02/03/2010]
  10. How are you printing with PLA? [Draft 02/16/2010]
  11. Rebuilding my extruder [Draft 02/16/2010]
  12. MY robot [Draft 02/18/2010]
  13. more things i learned [Draft 02/20/2010]
  14. First commissioned piece! [Draft 02/22/2010]
  15. MakerBot: Toy or Tool? [02/25/2010]
  16. Idea for Skeinforge settings… [Draft 03/27/2010]
  17. RepRap and MakerBot alternatives [Draft 04/05/2010]
  18. RepRap Parts for Sale [Draft 04/07/2010]
  19. Where is the Othercutter? [Draft 06/08/2015]

Rebuilding my extruder [Draft 02/16/2010]

[I put down the title and then did nothing.  :)  I suspect the other adjacent draft about printing with PLA was related to the need to re-re-re-build my extruder.  The way extruders were built back then didn’t involve careful machining of custom nozzles and shaped channels for the plastic to flow.  Instead, the PTFE tube went into the extruder and you kinda hoped for the best.  If you had heat creep, didn’t cool down properly, etc, you had to disassemble everything and rebuild it all.  But, such was the course of the hobbyist 3D printer enthusiast in the winter of 2010!]

Drafts Zero - The Lost Blog Posts

  1. The Lost Blog Posts
  2. Plastruder! [Draft 12/25/2009]
  3. UNTITLED [Draft 12/25/2009]
  4. Preparing to print [Draft 12/27/2009]
  5. More prints [Draft 01/04/2010]
  6. Prototype Pricing [Draft 01/19/2010]
  7. MakerBot tuning [Draft 01/20/2010]
  8. Plastic Screw Anchor [Draft 02/02/2010]
  9. Magic [Draft 02/03/2010]
  10. How are you printing with PLA? [Draft 02/16/2010]
  11. Rebuilding my extruder [Draft 02/16/2010]
  12. MY robot [Draft 02/18/2010]
  13. more things i learned [Draft 02/20/2010]
  14. First commissioned piece! [Draft 02/22/2010]
  15. MakerBot: Toy or Tool? [02/25/2010]
  16. Idea for Skeinforge settings… [Draft 03/27/2010]
  17. RepRap and MakerBot alternatives [Draft 04/05/2010]
  18. RepRap Parts for Sale [Draft 04/07/2010]
  19. Where is the Othercutter? [Draft 06/08/2015]

How are you printing with PLA? [Draft 02/16/2010]

[There were two drafts with this title, one empty, and one with the single sentence below unfinished.  Up until about January of 2010 I was printing in ABS which smelled bad and warped like crazy.  But, it did print.  When I started printing with PLA I found it difficult to work with, temperamental, wouldn’t melt or it would and then clog the extruder.  I think at some point I suggested that PLA was only suitable for printing tears.  Obviously, printers, PLA, and my maturity have come a long way since.]

I’d like to know, I really would.

Drafts Zero - The Lost Blog Posts

  1. The Lost Blog Posts
  2. Plastruder! [Draft 12/25/2009]
  3. UNTITLED [Draft 12/25/2009]
  4. Preparing to print [Draft 12/27/2009]
  5. More prints [Draft 01/04/2010]
  6. Prototype Pricing [Draft 01/19/2010]
  7. MakerBot tuning [Draft 01/20/2010]
  8. Plastic Screw Anchor [Draft 02/02/2010]
  9. Magic [Draft 02/03/2010]
  10. How are you printing with PLA? [Draft 02/16/2010]
  11. Rebuilding my extruder [Draft 02/16/2010]
  12. MY robot [Draft 02/18/2010]
  13. more things i learned [Draft 02/20/2010]
  14. First commissioned piece! [Draft 02/22/2010]
  15. MakerBot: Toy or Tool? [02/25/2010]
  16. Idea for Skeinforge settings… [Draft 03/27/2010]
  17. RepRap and MakerBot alternatives [Draft 04/05/2010]
  18. RepRap Parts for Sale [Draft 04/07/2010]
  19. Where is the Othercutter? [Draft 06/08/2015]

The Lost Blog Posts

A sign in front of a desolate wasteland says "YOU ARE LOST"
But at least you’re here

I’ve got a lot of unpublished draft blog posts here.  Like a lot.  At the time I’m writing this post, I’ve got 1,134 published posts and 329 drafts.  This isn’t versions of drafts.  It’s posts that I’ve started and then didn’t publish for some reason or another.  On probably 300 different topics.  Some are, admittedly, little more than a collection of links and indecipherable shorthand texts from a madman.  However, others are filled with research, links, images, code, and were so close to publishing that I can only imagine that something distracted me before I could… squirrel!

The oldest of these dates back to December 2009 and relates to the cutting edge, new to market, MakerBot Cupcake CNC’s plastic extruder, the “plastruder.”  I don’t know that anyone would be interested in this kind of content any more, but I kinda like the idea of “Drafts Zero” and spending about 5-15 minutes dusting off an old draft and just publishing it.1

Let’s see how this goes.

Update:

  1. In just the first few posts, I discovered that I wanted to add some additional comments.  Look for these at the top, in italics and in brackets to provide context.

Drafts Zero - The Lost Blog Posts

  1. The Lost Blog Posts
  2. Plastruder! [Draft 12/25/2009]
  3. UNTITLED [Draft 12/25/2009]
  4. Preparing to print [Draft 12/27/2009]
  5. More prints [Draft 01/04/2010]
  6. Prototype Pricing [Draft 01/19/2010]
  7. MakerBot tuning [Draft 01/20/2010]
  8. Plastic Screw Anchor [Draft 02/02/2010]
  9. Magic [Draft 02/03/2010]
  10. How are you printing with PLA? [Draft 02/16/2010]
  11. Rebuilding my extruder [Draft 02/16/2010]
  12. MY robot [Draft 02/18/2010]
  13. more things i learned [Draft 02/20/2010]
  14. First commissioned piece! [Draft 02/22/2010]
  15. MakerBot: Toy or Tool? [02/25/2010]
  16. Idea for Skeinforge settings… [Draft 03/27/2010]
  17. RepRap and MakerBot alternatives [Draft 04/05/2010]
  18. RepRap Parts for Sale [Draft 04/07/2010]
  19. Where is the Othercutter? [Draft 06/08/2015]

  1. A take on the “Inbox Zero” productivity / organization strategy []

Combining Multiple Video Files

Rather than send me a single set of video files, my client’s vendor sent me… 149 separate MP4 files, ranging from a few seconds to about 11 minutes long.  I have no interest in sorting through dozens of video files, cataloging them individually, and then trying to review them in order.

While I would have thought VLC would have been a good drag-n’-drop way to stitch them all together, the version I had and the newest version available both weren’t letting me save multiple files into a single file.

A bit of googling and I stumbled across an old friend – ffmpeg!  I hadn’t used this program to transcode video since the early days of DIVX, backing up DVD’s back in the late 1990’s / early aughts.

Here’s the process I settled on for my Windows machine:

  • Created a batch file to create a list of the video files (which included spaces, commas, and all kinds of nonsense command line tools hate).  The entire contents of the batch file was:
    • dir *.mp4 /b > list.txt
  • Since I’m using Notepad++, I used the find/replace function to search / replace on “list.txt”:
    • /r/n
    • ‘/r/nfile ‘
  • Even using some find/replace magic, I still needed to adjust the first and last lines, but that wasn’t so bad.
  • Then, the videos which had been named in semi-logical pattern, were not in strictly alphanumeric order.  I re-ordered them in the text list to the order I’d wanted to view them in.
  • I dropped the FFMPEG executable, downloaded from this mirror, into the folder with the video files and list.txt, then made a new batchfile which contained the following:
    • ffmpeg -f concat -safe 0 -i list.txt -c copy combinedfilename.mp4
  • Now, I could have typed this into the command line, but since I wanted to batch certain files together, it was just easier for my purposes to have the batch file.  Plus, now I have the executable and the batch file for future use.

Anyhow, I hope this helps save someone, perhaps even myself, a few minutes of hair pulling and searching.  :)

Night Before Going to Maker Faire

Annnnnnnnnnnd…  my robot which has been working for a solid year is now completely unresponsive.

My wife’s robot is working, Dexter Starfighter’s robot is working, Kim’Dael LightingSlayer’s pendant is working.

And my robot not only doesn’t work, I have spent so much time trying to get it functional that I still don’t have a good way to mount it on my shoulder.

I could cry.

Prepping for Maker Faire Bay Area 2024

It’s always a whirlwind heading into Maker Faire.  This year is no exception.  This past weekend we got things mostly ready for the Rocklin Maker Faire.  All of our robots were functional, which was really great.  A quick update to document progress and also act like a to-do list of sorts:

  • MakerKnit’s companion robot
    • My wife has knit her octopus
    • I’ve installed the Adafruit QtPy, NeoPixels, and touch sensors connected via BrownDogGadgets conductive thread through the legs
    • It’s been programmed to “blink” the two LED eyes randomly plus a small number of light shows for the body
    • Designed/3D printed several eyes, settling on a nice design that should make the eye animations look good
  • Kim’dael LightningSlayer’s Pendant
    • The youngest’s project has morphed from an LED arm to a CircuitPlayground in a pendant that just plays some notes when she presses buttons.
    • A long extension for the battery pack, using thicker gauge wire wound through the back of stock CircuitPlayground enclosure, is now the “necklace” portion for this project.
  • Dexter Starfighter’s ED-E
  • MakerBlock
    • My robot wasn’t quite ready for Maker Faire last year, but “ready enough” to share.  Last year the little bot was just sitting in a jar I carried around and not really visible to anyone.
    • This year I’ve added feet (entirely cosmetic), changed the battery pack around so it is removeable, swapped out dome diffusers, and am working on new animations/behaviors.
    • I realized that my old LED goggles were… janky.  This was because I had soldered some buttons to one side and then wired them into the Trinket directly, without any resistors.  While it /worked/, it caused some problems whenever I pressed a button.  I pulled the Trinket out and swapped in my new favorite board, the QtPy.
      • I really prefer programming / updating via CircuitPython over Arduino since there’s no pre-compile time and fussy Arduino connections.
      • Besides the programming/uploading, I love the built in RGB, up to 6 capacitive touch sensor, and easy serial communication
      • As an added plus, I soldered on the 2MB flash chip so the project as a ton of space. 1
      • And at almost the same price as a Triket ($0.50 more than the original, $0.50 less than the M0 Trinkets), it’s just easier to swap them into any project I would have previously put a Trinket into
  •  Soldering
    • I’ve really upgraded my soldering experience and it’s made a world of difference.  We moved about a year ago and there’s a space in the house where I can keep a soldering station out and ready to use.  Just having it available is such an upgrade.  I’ve had several handheld / pen style soldering irons over the years and they’re usually pretty terrible.  In fairness, this is also because I’m kinda terrible at soldering.  I had a basic garbage soldering iron from the local hardware store, upgrade one that had a little temperature control from Adafruit, and then upon the recommendation of a friend upgraded a few weeks ago to an X-TRONIC soldering station.
    • I gave my old soldering iron to my neighbor so he could work on a project for his wife.  As I got to finishing up work on the above projects I realized I couldn’t find my pen soldering iron from Adafruit – and that I didn’t want to find it anyhow.  It was fine.  It worked.  But, my soldering iron holder was cheap and flimsy and easy to tip over and the helping hands I had from Adafruit were “okay” for very small projects, but the joints came loose easily and the helping hands kept falling off.  Rather than spend $20 on another soldering iron I would hate, I dropped $70 on the X-TRONIC station which has built in helping hands and soldering iron holder.  Setting aside that it heats up very quickly, has good temperature control, melts solder quickly, and has great helping hands… it has a way to hold the soldering iron in a way that isn’t constantly anxiety inducing. 2
    • Having the soldering station handy has meant I don’t really mind whipping out a quick battery pack extension cable for our projects.  I just need to strip some wires, fire it up, drop some solder, and turn it off again.
    • I may have ruined the first soldering iron tip kinda quickly.  Again, I have no idea what I’m doing.  I would add solder, dip the tip in flux, wipe on sponge, and then do it all again.  This is a terrible process since all it does it add extra contaminants and gunk to the tip, reducing the ability of it to transfer heat effectively.  Instead, after watching a video, I learned I should run it at the lowest temperature appropriate for the solder/joint, just dab the tip in the brass wool to clean it up a little, then maybe wipe on the slightly damp sponge, and absolutely coat the tip in solder before putting it down.

Things left to do!

  • Things to finish
    • I’d really like to finish up the Fallout themed shirt/vest to go with my project
    • A way to attach my wife’s octopus to a purse strap
    • A better way to wear my robot on my shoulder – may use a similar foam paldron
    • A big chunky seat belt looking thing for the strap wearing my robot
    • I’ve got designs for a new bag to wear/carry around Maker Faire, but haven’t sewn them up yet – maybe this week!?!!?
  • Make sure we have
    • Enough batteries, battery packs, etc for our projects
    • USB chargers for our LiPo batteries in goggles
    • Finish my goggles (install battery, update code, possibly change out diffusers
    • Bring a few Maker Coins to give out (I bought 100 of the 5,000 minted, probably never to be minted again…)
    • Ways to show people links to learn more about our projects – probably via QR codes – though I might also use an RFID tag :)

Okay, back to work on… work… so I can get back to making!

  1. Note to self:  It requires a different version of CircuitPython, Haxpress, to make use of the chip storage []
  2. I used to tape the cord of my soldering iron to the table and then place it on the flimsy stand []

Review of DriveThruCards.com

TLDR:  The cards from DriveThruCards.com (DTC) arrived yesterday and I couldn’t be happier with the result.  Great customer service, product, and value.

This slideshow requires JavaScript.

  1. Shipping:  Great
    1. 3/19/2024:  I ordered 120 cards around 2 AM PST in California.
    2. 3/19/2024:  The DTC website was updated with the following statuses:  Pending Payment Approval, Paid For, Sent to printer, Confirmed.
    3. 3/24/2024:  I received a shipping confirmation email from DTC in Overland Park, Kansas with a USPS tracking number at about 4:32 PM PST.
    4. 03/25/2024:  The date on the “External Packing Slip” included with the box.
    5. 3/28/2024:  USPS sent me a notification the package arrived around 8:29 AM PST.
    6. This was basically exactly as long as my Reddit lurking had suggested (about 10 days) it would take.

      Order confirmation and status screen
      Order confirmation and status screen
  2. Packaging:  Great
    1. The cards arrived wrapped in a cellophane band, within packing paper, inside a small box (about 5″x5″x3.5″ cube).  This was perfectly fine for these cards.  They have options for tuck boxes and other containers, but I didn’t need or want these for this project.
  3. Card Quality:  Great
    1. Text and images were sharp, legible, and colors rich but slightly darker than what I saw on my computer screen.  By tinkering with Inkscape, I would guesstimate the final card was about 5-10% less bright than what I saw on my screen.  Without comparing the cards directly against a large bright monitor, I don’t think I would have noticed this difference.
    2. When I set the deck down on a flat surface and run my finger over the side of the stack of cards, there’s a very slight variation over a few cards.  It’s barely perceptible and probably totally fine for any kind of card usage or card game except a super precise cut for casino playing cards.
    3. When the cards are viewed edge-on in a stack, you can tell see a faint bit of the card’s edge color.  I grabbed some “Magic: the Gathering” cards and looked at a mix of black and white bordered cards and noticed that even the black border cards seem to look white-ish when viewed edge on.  The slight bit of color here doesn’t bother me at all and for most purposes would be totally irrelevant.
    4. The cards were 2.503″ or 63.57 mm wide and 3.506″ or 89.05 mm tall, or about 0.2% large.  Some variation is to be expected in any order and this miniscule variation would be completely unnoticeable except I used digital calipers to measure them.
    5. The cards, printed on DTC’s “premium stock,” advertised as 11.4 pt (0.0114″) were 0.0115″ or 0.29 mm thick.  Flicking the cards against a table, right next to an actual casino poker card, they felt identical.  (The casino card has a slightly raised texture, but the flex, bounce, and flick of the card stock felt identical).
    6. Card Cut.  This is the one aspect that didn’t come out exactly as I had planned.  Ten of the cards I printed had borders, but they were visibly different widths at each end.  These cards were Premium U.S. Poker sized (2.5″ x 3.5″), the PDF itself was 2.75″ x 3.75″ (to account for the 1/8″ bleed area at each edge).  Unfortunately, I didn’t notice this until after I had used the cards a bit, so I don’t know whether top or the bottom was slightly thinner.  Since these cards are basically dividers, this isn’t a huge deal for me.  However, I’d prefer being able to get them back with an even border all the way around.

      This slideshow requires JavaScript.

  4. Customer Service:  I discussed the responsiveness of the DTC customer service team in the prior post.  They went out of their way to help me with my project – and it really smoothed things for me.

I simply could not be happier with these cards.  I will absolutely be trying them again.

Print On Demand Custom Cards

  1. Custom Cards with DriveThruCards.com
  2. Review of DriveThruCards.com
  3. Designing Custom TCG Cards and Proxies