MakerBots for Teachers

MakerBot Industries is giving away ten MakerBots to ten teachers at any educational level.  Let’s just consider this my entry:

  • Your name
    • Uh.  I’ll stick with “MakerBlock” for now.
  • Your school’s name
    • Sheesh.  These are getting harder.  Okay, how about “MakerBlock.com”?  No?  “MakerBlock U”?
  • The address you’d like the MakerBot sent to if you are chosen
    • Same place as my last order.  ;)
  • A paragraph describing how you would integrate the MakerBot into your curriculum. Include some description of the learning environment and what you teach
    • I would integrate a MakerBot into my curriculum by using it as a demonstration of iterative design, digital fabrication, digital design, invention, and innovation.  The learning environment is the whole freaking internet. 1  I teach digital plastic AWESOME.
  • A lesson plan that you will implement if you get a MakerBot
    1. Pssh.  Just one?  I’ll give you THREE.
    2. You’ve got a MakerBot, a laptop, unlimited plastic and electricity.  You are trapped in a mineshaft.  How do you get out?
    3. You’ve got a MakerBot, a laptop, unlimited plastic and electricity.  You are trapped in a mineshaft with a tiger.  How do you get out?
    4. You’ve got a MakerBot, a laptop, unlimited plastic and electricity.  You are trapped in a mineshaft with a tiger shark.  How do you get out?
  1. Actually, according to Feedburner and Google Analytics, the number is just a few hundred people a day []

It’s that time of year – to frustrate friends and family

So, I’ve got a birthday coming up.  Getting older doesn’t bother me much – it’s really just a number associated with the number of times I’ve traveled around the sun. 1  I will gleefully relate to anyone that I’m easily the luckiest man in the world.  I’ve got a wonderful family, good friends, everyone is healthy, interesting and challenging work, and a fair amount of free time to do with as I wish.  These are the sorts of things that are truly important to me, so by any measure of success I care about, I’ve got it all.

With my birthday approaching, my family starts to ask me about what they can get me for a present.  My usual answer is, “Nothing, let’s just hang out.”  This year, I actually have a list.

As it looks like both MakerGear and MakerBot are out of the magic pixie dust that will let me print in PLA without tears, the rest of my list is as follows:

I’m rather excited about some of these upgrades.  I’m looking forward to a heated build platform for smoother warp free ABS builds.  I’m looking forward to the rainbow pack for some crazy wacky fun. 2  And, I’m looking forward to needed the extra spare parts as infrequently as possible.  :)  Since my last major repair, I’ve been lucky enough to enjoy several months of carefree printing. 3

  1. It also seems to be related to the number of gray hairs that are appearing.  I rather like them, actually. []
  2. Freaking VOLTRON, remember? []
  3. I really hope I didn’t jinx myself []

3x2x1 Rubik’s Cube Production File

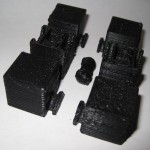
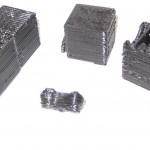
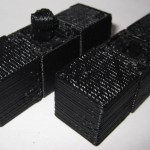
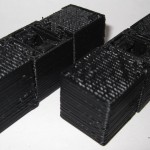
My prior copy of this 3x2x1 Rubik’s Cube was printed a few parts at a time – I’d print one part, test it, print up another, etc.  Last night I was able to use my production file to generate all seven pieces in one go.  It took 1 hour and 45 minutes to complete the print job, but well under three minutes to clear most of the pieces of the raft off the parts and assemble the puzzle.  In order to help people modify and improve upon my design, I’ve upload the original Sketchup files, the STL I used, as well as my own GCode.

Owenscenic on Thingiverse asked,

I am interested in trying your gcode, how did you generate it? How well does it minimize strings between the printed parts? I’ll look at is to see how it starts and the temp…

In case you’re wondering too, the answers are as follows:

  1. I generated the Gcode using my slightly tweaked RepG v18 built-in Skeinforge settings for ABS with a raft, with a build temperature of 220C.
  2. The Gcode does pretty well with minimizing stringing.  However, some of the credit has to go with the part placement in the STL production file as well as the nature of the object.  As soon as you assemble it and start to rotate the parts, most of the remaining strings and little blobbies will pop right off.

Owenscenic, please let me know how your print of this turned out!  Please post a picture!

What’s the cost of printing with a MakerBot?

I’ve wondered for a while about the cost of operating a MakerBot.  Let’s break it down and see what happens:

  • Plastic. According to some calculations on the MakerBot Operators group, the cost of MakerBot ABS is around $0.03 – $0.04 per cubic centimeter based upon a price of $70 for 5 pounds (or 2268 grams) of ABS, a density of 1.2 grams per cubic centimeter. 1  Using the current prices of $81.36 for a 5 pound coil after shipping, I calculate the price of ABS at $0.035 per cubic centimeter.  Since we’re talking about such large numbers, let’s just round on up to $0.04/cc.
  • Time. Skeinforge has been estimating about 85 minutes to print 19 cc of plastic.  This comes to about 4.5 minutes/cc.
  • Electricity. At at $0.20/kWh, a MakerBot probably draws around $0.03 per hour.

Thus,we may estimate the cost of operating a MakerBot in terms of consumption of goods and resources (excluding computer, human, and MakerBot time and wear and tear) as follows, where V is the volume of the extruded object in cubic centimeters or “cc”:

Supposing I wanted to recoup the entire cost of my MakerBot to date and spread it across the entire life of a single 5 pound roll of ABS. 2  Let’s round the cost of the MakerBot, all repairs, and all extra MakerBot related materials up to $1,500.00.  One 5 pound coil would have 1890 cc’s of plastic.  This would come to $0.794 per cc of plastic.  So, I would suggest the cost of buying a MakerBot and printing off an entire coil of plastic would probably end up costing you about $0.85 per cubic centimeter of plastic.

Resource cost of printing a 19cc totally MakerBottable 3x2x1 Rubik’s Cube is $0.80.

Actual pro rated cost of printing a 19cc totally MakerBottable 3x2x1 Rubik’s Cube is $16.15.

Absolute cheapest MakerBot usage I’ve seen anywhere at Metrix:Create for members printing from Thingiverse is $0.30/minute, which would print the totally MakerBottable 3x2x1 Rubik’s Cube for $25.65.

  1. No one has yet quoted me a price on a pint of tears. []
  2. Printing an entire coil would take about 142 hours. []

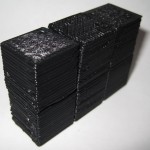
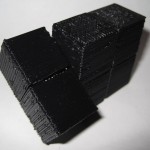
3x2x1 Rubik’s Cube assembly pictures

The design should be pretty intuitive.  However, I went ahead and took some pictures of the assembly anyhow.

As I mentioned in an earlier post, I think this one came out really really well.  :)

Tyvek Sled Kite… from office supplies

Tyvek Office Supply Kite

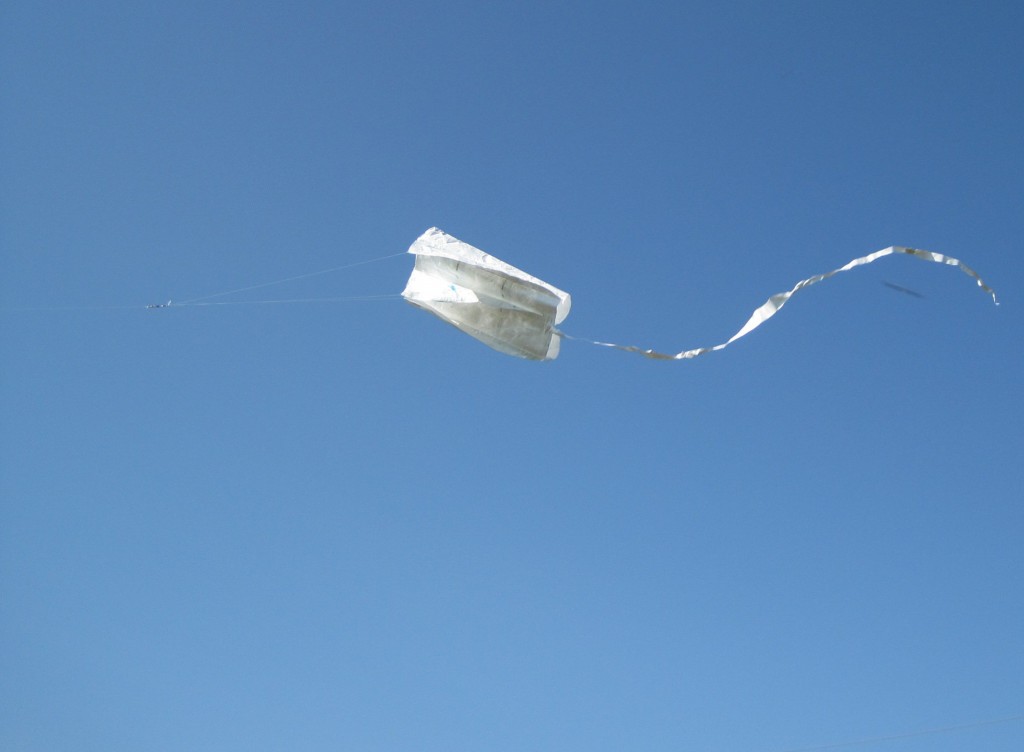
The picture to the right is of a kite that I built several weeks ago and only got around to actually flying this weekend.  It’s basically made out of office supplies.  :)

Originally I just wanted to make the Tyvek sled kite from the Howtoons shown in Craft Magazine, Volume 81  But then I wanted to see how much of the kite I could assemble just using things from the office.  The answer is, basically all of it.

The Howtoons calls for:

  1. A large sheet of Tyvek
  2. Tyvek tape
  3. A washer
  4. Ruler
  5. Scissors

Instead I used:

  1. Tyvek from Tyvek office envelopes, rather than a large sheet or roll of Tyvek house wrap.  My office is sent dozens of these things a day.  It didn’t take long to collect 30 plus.
  2. Clear packing tape.  I used this instead of Tyvek tape.  Tyvek tape would have worked a LOT better, but I have no complaints.
  3. Rather than use a washer, I used a spare keyring.  I had other various office supply bits hanging around in case this didn’t work out.  Paperclips, binder clips, etc.
  4. Yardstick.
  5. Scissors.

Since the envelopes are significantly smaller than the sheet of Tyvek rolls, I had to either make my kite smaller or stitch them together into a larger sheet.  I did both.  I scaled the plans down to about 2/3rds the size from the diagrams and then used packing tape to put them all together.  To get the most surface area out of each envelope, I burst all of the envelopes at the seams and then taped them up.  Once I had a 36″ tall sheet, I started cutting it into the pieces I needed, re-taped it back together as indicated by the diagram, and then set it aside for weeks while I didn’t fly it.  :)

On the day of the launch I made the tail out of strips of leftover envelopes taped together with the gluey bits from some of the envelope flap sealants and more packing tape.  I punched a hole in the three ribs using a pen, ran the line through each of the three ribs, reinforced it with more packing tape…  and launched.

The only non-office supply things used in the construction were:

  • Crayons for coloring the kite (hard to see)
  • The ruler – I don’t have a yardstick at work
  • The kite line, purchased from Amazon

It flew pretty well.

  1. I found a copy of all three pages after googling around a little.  Howtoons: Sled on a Thread pages 1 2, 3 []

3x2x1 Rubik’s Cube – done!

I’m so happy with the way this has turned out.

I’ve made a bunch of changes since the last revision of this printable 3x2x1 Rubik’s Cube puzzle:

  • I’ve totally redesigned the center barbell connector.  I simplified the design, removed the five support struts for each end and replaced it with a single support strut and a flat hexagon in the center of the piece.  The purpose of the hexagon is to give the barbell more contact area with the raft.  One of the earlier drafts didn’t have as many supports or this flat hexagon, and it tore off the build platform partway through the build.
  • I increased the diameter of the tube between the barbells.  This enabled it to print easier, made it a little more sturdy, and decreased the wobbliness of the barbell when everything is assembled.
  • I also shortened the entire barbell by 1mm, so that the entire puzzle is held together more closely.
  • I made the flat semi-circular tabs slightly thinner so they rotate a little more freely.
  • I significantly redesigned, thickened and simplified the two brackets that the barbell snaps into.  It’s been able to easily withstand numerous couplings/decouplings as well as numerous rotations.  With a few rotations, all parts now rotate easily.
  • All of the parts fit together SO much better than my first draft held together with a nut and bolt.
  • There is a slight bit of sideways flex that can occur with the use of the barbell.  It is really minor and it actually seems to help the puzzle be more forgiving as you manipulate it.  I see this more as a benefit than a design flaw.

The was one design choice on which I waffled.  I considered making the center cubes non-identical, with one having half a barbell stick out and with the other having the internal connector you see now.  This would have removed much of the sideways flex – since the barbell would be stationary.  I did not go with this design choice because whether the puzzle used one barbell and two connectors or male/female center cubes, there would always be some flex caused by the use of a connector rather than a static pin.  And, to be honest, I much preferred the symmetry of having everything assembled out of just three unique parts.

I know I’ve mentioned this before, but I really like the idea of a MakerBot printable toy that can be printed in one go and then assembled without tools or any additional hardware.  I also think this would make a great MakerBot print demonstration.

I’ll post some pictures of the parts a little bit later.

3x2x1 totally printable puzzle cube proof of concept success!

I’ve printed up pieces uploaded this morning to Thingiverse, tried them together, broke two pieces, modified them, printed, and fit some together.  I’ve just modified the STL for what I hope is the last time.  However, I have the barbell fit snugly into the center cube.  It rotates relatively freely and does not want to pop out.  (Of course, I’m sure it could/would if I applied enough force).  This leaves the outside cubes.  I modified the semicircular tabs a little and will reprint them later.

The only problem is that it takes about 40 minutes for my machine to print up two cube parts and a barbell, since they’re so solid.

The important thing is that I’ve just been able to print up and assemble the crucial mechanisms for this puzzle.  I think the next iteration may be what I needed.

New 3x2x1 Rubik’s cube design – totally printable!

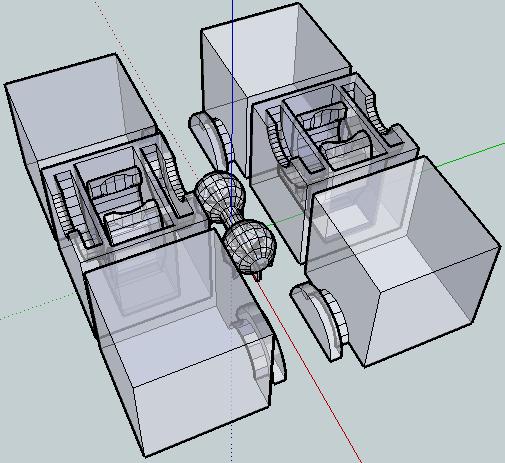
X-Ray view of the 3x2x1 puzzle cube

X-Ray view of the 3x2x1 puzzle cube

This is easily my most intricate digital design for the MakerBot yet.  It’s a 3x2x1 variation on the Rubik’s cube puzzle I had posted earlier.

This version incorporates the prior improvements as well as designing a connector system inspired by R3bbeca‘s beco block connectors.

This has enabled a totally printable toy.  This just makes me happy. 1  The idea that I can crank out a set of these parts, clean them up a little, and just snap the toy together is just amazing.

TomZ‘s original 1x2x3 “friendlier” Rubik’s cube designs were also totally printable – but required a printed pin that was later glued in place.  I like the ideal of all printed parts – but strongly prefer a design that can later be disassembled easily.  And, as I mentioned above – the ability to hand assemble the toy is important to me.

I wasn’t able to recreate R3bbeca’s female connector designs2 so I made a simplified version that should suffice.

The simplified connection mechanism is essentially two plastic fingers that will (hopefully) pinch the barbell into place.  This was made by designing the outline of the gripping “fingers,” creating a horizontal cylindrical hole slightly larger than the intended end of the barbell, then creating a vertical cylindrical hole in the center for the barbell to be inserted through, then a bit of cleanup.

The biggest potential problem is that this design will require a carefully tuned ‘bot.  The center cube pieces have a lot of stuff packed in there – semi-circular slots for the semi-circular tabs, connectors for the barbell, and thin walls separating things.  With those thin walls and interior overhangs, this may be a difficult design to print.

I think Bender is up to the task, but we’ll see in a few hours.  :)  I can’t wait to print this!

For me, having a MakerBot is like waking up to Christmas every morning.

Oh, and before I forget, if you want one of these – leave a comment or send me an e-mail through the Contact page.  Make me an offer.

  1. Perhaps a little prematurely, since I haven’t actually printed this yet… []
  2. I believe I’ve already sufficiently lamented my inability to understand women and their mysterious lady ways. []

MakerBlock Repurpose Design Contest #1!

I really like the Pilot G-2 gel pens. They’re basically all I use at work. Although we buy refills, I still end up with a surplus of the pens.1 The pens, although technically disposable, use a small metal spring as part of the mechanism. While swapping in a refill the other day, I thought it was such a shame that this little spring is destined for a landfill. 2

Thus, I propose a contest!  I think of this as a repurposing and/or recycling contest.  What’s the most awesome MakerBot printable thing you can design that re-uses any of the parts from this pen? 34

How to enter?

  1. To enter upload your designs as an STL and the original design files to Thingiverse
  2. Then leave a comment on this post with a link to your design!

What are the rules?

  1. The design must incorporate one or more parts of the Pilot G-2 gel pen.
  2. Must be MakerBot printable.  So, keep in mind size, time, overhang, and resolution requirements.
  3. It’s under the Creative Commons Attribution Share-Alike license.

What are the prizes?

The prize will be a print of your choice of either anything I’ve designed and posted to Thingiverse (except the Unblended Mendel – I didn’t really design that) or your winning design!

  1. What it really boils down to is that I’m a pen thief. I walk into a room, pick up a pen, start writing something, put it into my pocket without thinking about it, and then walk away. LRR. []
  2. Of course, there are also other little bits that could theoretically be useful. []
  3. Awesome as judged by me, obv. []
  4. FYI, I’ve already thought of the topic for my next Repurpose contest… []