
TheMitch22 downloaded the 3x2x1 Rubik’s cube v4, printed it, and uploaded a video of it working! The cycle is complete.
100% printable, no hardware or tools required. And it looks amazing in red.
TheMitch22 downloaded the 3x2x1 Rubik’s cube v4, printed it, and uploaded a video of it working! The cycle is complete.
100% printable, no hardware or tools required. And it looks amazing in red.
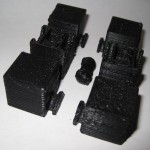
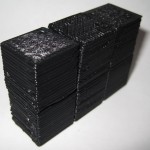
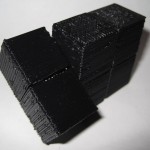
The design should be pretty intuitive. However, I went ahead and took some pictures of the assembly anyhow.
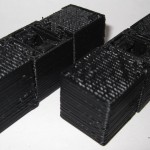
As I mentioned in an earlier post, I think this one came out really really well. :)
I’m so happy with the way this has turned out.
I’ve made a bunch of changes since the last revision of this printable 3x2x1 Rubik’s Cube puzzle:
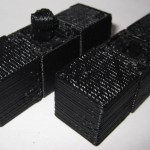
The was one design choice on which I waffled. I considered making the center cubes non-identical, with one having half a barbell stick out and with the other having the internal connector you see now. This would have removed much of the sideways flex – since the barbell would be stationary. I did not go with this design choice because whether the puzzle used one barbell and two connectors or male/female center cubes, there would always be some flex caused by the use of a connector rather than a static pin. And, to be honest, I much preferred the symmetry of having everything assembled out of just three unique parts.
I know I’ve mentioned this before, but I really like the idea of a MakerBot printable toy that can be printed in one go and then assembled without tools or any additional hardware. I also think this would make a great MakerBot print demonstration.
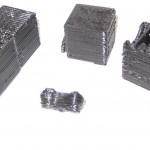
I’ll post some pictures of the parts a little bit later.
I’ve printed up pieces uploaded this morning to Thingiverse, tried them together, broke two pieces, modified them, printed, and fit some together. I’ve just modified the STL for what I hope is the last time. However, I have the barbell fit snugly into the center cube. It rotates relatively freely and does not want to pop out. (Of course, I’m sure it could/would if I applied enough force). This leaves the outside cubes. I modified the semicircular tabs a little and will reprint them later.
The only problem is that it takes about 40 minutes for my machine to print up two cube parts and a barbell, since they’re so solid.
The important thing is that I’ve just been able to print up and assemble the crucial mechanisms for this puzzle. I think the next iteration may be what I needed.

I’ve already posted about how much I like TomZ’s simplified version of a Rubik’s cube. Only problem is that I wasn’t able to encourage my MakerBot to print it. Taking into account some of my ideas, I’ve designed a derivative. It’s 4:45am at the moment – not a good time to have my MakerBot tooting and beeping. ;)
Here’s what I’ve done with this version:
In a future iteration, I hope to change the middle pieces so that all you need to do is snap the two middle pieces together. Also, I’d like to incorporate any design suggestions from people who have tested this version.