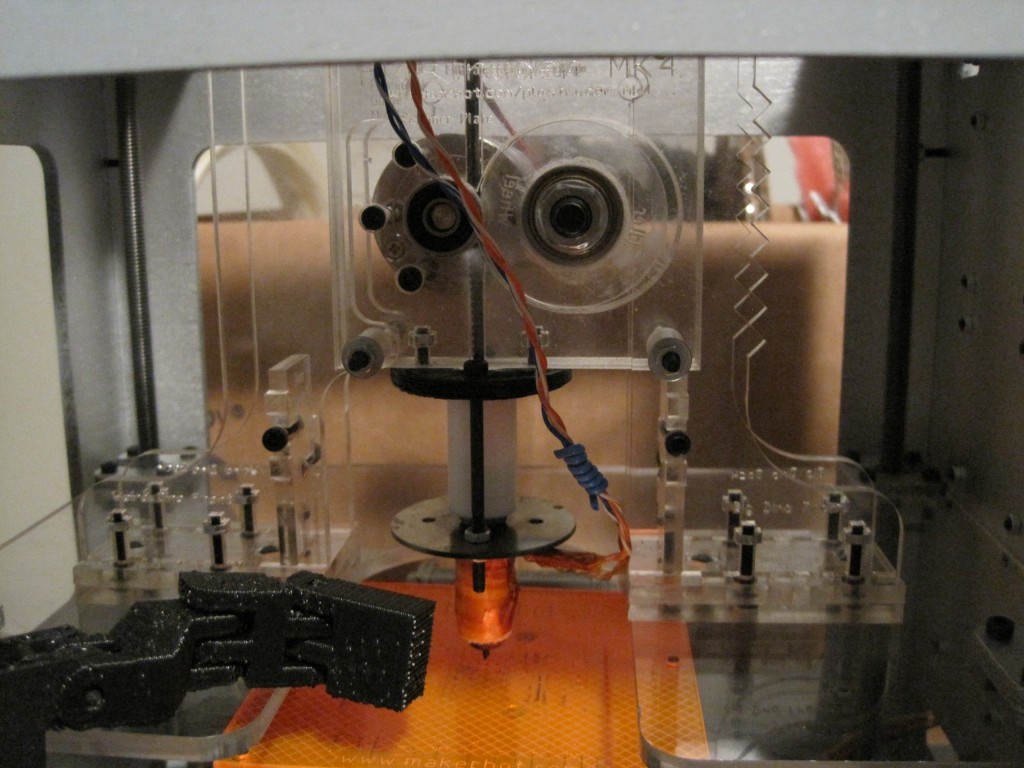
Who needs lasercut acrylic when you have a MakerBot?

Printable extruder and now printable dinos!  I had tried my hand at printable dinos, but I’m not in Zaggo’s league.  While my designs were for printable dinos that could be as a single piece each, his are clearly more elegant and use much less plastic.

What’s interesting about the differences between our designs is that mine were based on trying to replicate the existing dinos in a printable manner.  However, the dinos themselves were designed based upon the constraints of having to design three dimensional parts by layering and fitting lasercut acrylic pieces.  The question I completely failed to answer, and which Zaggo addressed perfectly, is “How would you redesign this object if you only had to be concerned with the constraints of a MakerBot, not a laser cutter?”

If you aren’t constrained by having to assemble lasercut parts, why not print them in such a way that it uses less plastic?  Why not print them on their sides?  Even with a non-heated platform it should be trivial to get the bottom of these dinos flat.  If anything warps it will be the parts that hold up the extruder.  And even then the warp would only serve to keep a tight fit on the extruder by squeezing it together.

If you examine a plastruder you can see the filament and heater assembly are not perfectly centered within the unit.  My guess is that’s  why there are two dinos – one which reaches towards the center.  However, there’s no reason a printruder couldn’t be designed so that the heater assembly was in the middle of the printruder.  If this were the case you could just print up two sets of printable dinos – instead of a left/right or big/weird combo.  Zaggo’s design allows for supporting either a printruder or a layered lasercut acrylic plastruder.

And we’re one step closer to a printable MakerBot!

Printing mendel parts

I’m not even sure I would build a Mendel if I had all the plastic parts.  But for some reason I still want to have all of those parts.  I have no idea why.  :)

I printed up a single spring out of PLA before my extruder got clogged up.  It’s my one and only Mendel piece.

Having this one piece languish next to my MakerBot strikes me as funny.

I think there’s a haiku in there somewhere.

Remounted extruder controller board

Tony’s recent comment to my post about my alternate extruder controller board mount really deserves its own post.  Tony’s comment was:

That’s a pretty logical place for it. Other than needing some more wiring, I wonder why they didn’t design it that way? I wonder if it might introduce some EMI noise?

I’m about 95% sure I know why they designed the extruder mount on the extruder itself rather than the side of the ‘bot.  As designed the entire extruder is completely modular.  You could swap in a brand new extruder assembly in about 30 seconds (four bolts, one ethernet cable).  Heck, if you had a second Z stage and extruder you could probably swap in a new extruder in 15 seconds (one ethernet cable, swap Z stage).  They’ve said from the beginning they wanted their system to be totally modular and hackable – and that it is.

I haven’t noticed any symptoms of EMI noise on my prints.  In fact, I’m getting some really great prints with my current Skienforge settings.  I have a little blobbing and stringing – but I suspect that could be fixed with some attention to oozebane etc.

There are a few really great things about my setup:

  1. More modularity. A totally new extruder (let’s say dedicated to PLA or a different color ABS) would not require a second extruder board.  This means with a printstruder and printed dinos (I’m still refining those designs) you could have a totally modular extruder for about $65 worth of hardware rather than $175 ($125 plastruder kit + $50 extruder controller board).
  2. Visibility. I can easily see what’s going inside the extruder and whether the idler wheel is moving – without lines on the idler wheel.
  3. Less work. It’s one less thing to take off the extruder when I need to do any kind of work on the extruder.  It’s not much time, but it is still a benefit.
  4. Ergonomics. My ‘bot is sitting on a surface about 5 feet off the ground.  Having the motherboard rotated 90 degrees counter clockwise allows me to front-load the SD card.  This is easier for me because of the surface height, but I also had to do it because otherwise the side mounted extruder board would have blocked the SD card slot.  Frankly, I would rotate the motherboard even if the extruder isn’t side-mounted.
  5. Centrality. This keeps all of the electronics all in one spot and makes inter-board cabling slightly easier. 1
  6. Less movement. I doubt moving the extruder board around on the Z stage would ever cause a problem – but it certainly won’t when it is side-mounted.

However, this setup isn’t perfect:

  1. Less modularity. One could argue that having the extruder board side-mounted decreases the modularity of the system.
    1. Counterpoint: That said, if you already have an entire second extruder complete with extruder board, there’s nothing stopping you from swapping it in as easily.
  2. More wires. I now have six wires2 running to the extruder board.  Disconnecting/reconnecting six wires is more work than disconnecting/reconnecting one ethernet cable.
    1. Counterpoint: In just about any circumstance where you are disassembling your extruder you’re going to need to disconnect those six wires anyhow.
    2. Counterpoint: I picked up a six pin male/female connecter set the other day.  Once I clip the wires I can again have a plug-n-play extruder without needing to fiddle with screw based connectors or with the extruder board in the way.
  3. More maintenance. Those same six wires need to be maintained/wrangled instead of one ethernet cable.
    1. Counterpoint: As you can see from the pictures I’m using the little blue twist-ties that came with the ethernet cables to essentially bundle the wires together.  I just wind the twist tie around the bundle and compress it to form a tight coil.  Works really well with several of these placed at intervals.  Clean and still flexible.
  4. Shielding. There is less shielding on the six thing wires versus one large ethernet cable.
    1. Counterpoint: This has not been an issue for me.
  5. EMI noise. I’ve never had problems which I would attribute to EMI noise from wiring, but I suppose it is possible.
  6. More work. It is slightly more work to put the extra holes in the side of the bot to allow the motherboard to be mounted 90 degrees counter-clockwise and mount the extruder board on the side.
    1. Counterpoint: Perhaps 5 minutes of work total?
  7. Z stage blockage. My extruder board is attached by only three bolts because one of them interfered with the Z stage.
    1. Counterpoint: This just isn’t that much of an issue, especially with the extruder board remaining stationary.

Overall, I find the benefits far outweigh any problems that side-mounting the extruder might cause.

  1. But, as you can see from the prior post, not much neater. []
  2. Two each for the thermistor, nichrome, and extruder motor. []

Alternate alternate extruder controller mounting

Tony Buser’s post about his Alternative Extruder Controller Mounting reminded me that I’ve been meaning to show a better picture of my own setup.  I had blogged about it earlier, but not shown a good picture.

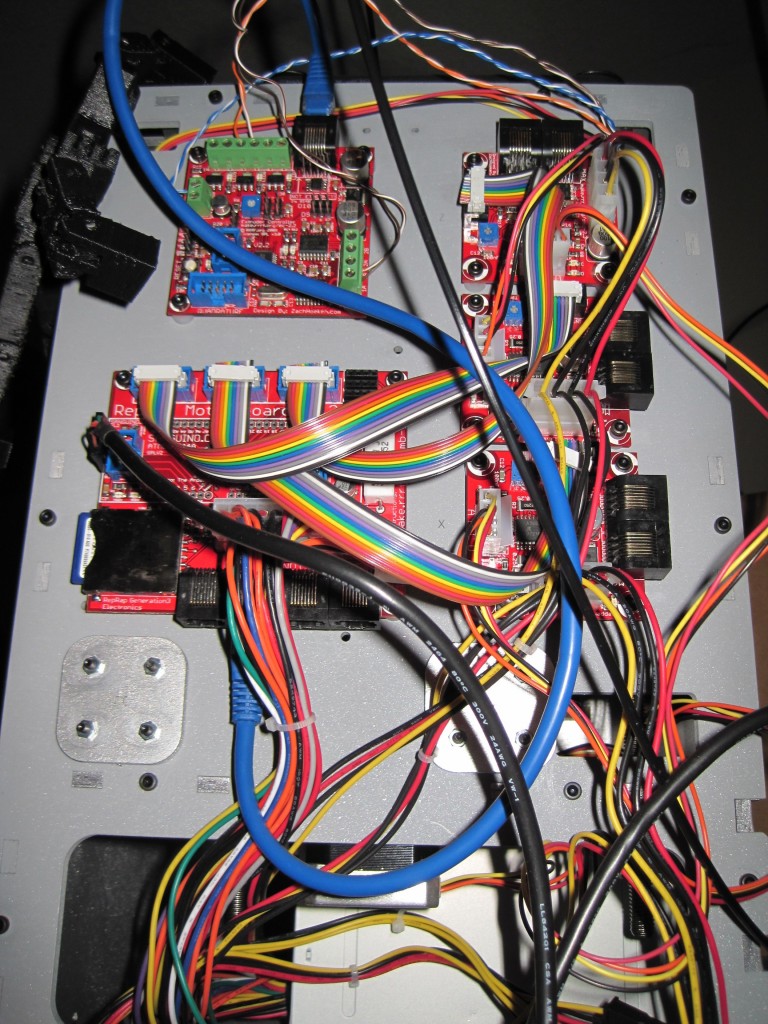
Side mounted extruder board, rotated motherboard

Side mounted extruder board, rotated motherboard

Here you can see where I’ve mounted the extruder board at the top left and how I’ve rotated the motherboard 90 degrees counter clockwise.  This gives me better access to the SD card slot.   If you don’t rotate the motherboard, the SD card slot is blocked by the extruder board.

Totally clear plastruder

Totally clear plastruder

Here you can see Leonardo Robot’s arm and how I’ve run the wires from the extruder motor and heater up to the board.

“Tea” – a retrospective

Tony Buser has posted a set of pictures on his blog showing MakerBot #481 “Tea” from box to building to printing to Mendel parts.

It has a high school graduation montage feel to it – in a good way – like watching your little robot grow up.  When I saw the cracked insulating retainer, cracked idler wheel, and busted extruder I could almost hear the auditorium around me going “oooooohhhh” that that special pain only another RepRap/MakerBot operator has known.

I’m still continually amazed that a box of plastic, metal, and electronic bits has been assembled by my own clumsy fingers to build all of the crazy amazing things I can dream up.

Adventures with PLA temperatures

Kinda rhymes, no?

Given Rick Pollack’s PLA printing success and temperatures at barrel entry rather than nozzle, I should probably start delineating between temperatures at the barrel and nozzle.  If barrel entry temperature is truly a critical factor, then he’s totally right about how going by nozzle temperature is like driving a bus with just the rear view mirrors.

However, this gives me pause.  Everything I’ve read about ABS suggests it may be best to melt it right at the nozzle as quickly as possible.  I’ve found that ABS cools very rapidly too.  PLA on the other hand takes a while to cool (but, then again, I was running my extruder too hot) – with the parts being quite flexible for some time after printing.  If barrel entry temperature is that important, then it seems that PLA must need a longer time to melt.  If this is the case, should the nichrome be wrapped higher on the barrel?  If so, then Rick’s heater cores (which already seem very convenient) are downright brilliant – since you can probably easily adjust where the heat is being applied.

From Nophead’s comment I gather that I was, indeed, running my extruder too hot.  I found that at my ABS temperatures (220+) made the PLA just drip right out of the heater – and once that had basically stop it would then intermittently release little amber droplets of plastic.  I must have been really cooking it.

With the limited printing I managed with PLA I found that it printed well with my non-temperature ABS Skeinforge settings.  So, before I go back to PLA I think I’ll finish tuning my ‘bot using Nick Ames’ Skeinforge tutorial.

Rebuilding my extruder

Over the weekend I rebuilt my extruder after some adventures with a blowtorch.

I used Rick’s single nichrome wrap method, which served me well on my last re-build.  The documentation of his method is absolutely fantastic and a must-read if you’re rebuilding your heater.  (That page is about PLA, but the nichrome wrapping is pretty universal).

I’m not sure if I wrapped my thermistor better or what, but I seem to be getting more consistent readings from it.  Perhaps this is due to RepG v12?  I would tend to think not since I’m using RepG v12 with the Zach 1 temperature table – the same table I was using before RepG v12.

How are you printing with PLA?

I’d like to print in PLA, I really would.  No warping?  No rafts?  Smells like syrup?  Makes kittens and rainbows?  Sign me up!

Rick from MakerGear has the following suggestions for printing in PLA:

  • Have a 150-160 C degree temperature for the entry of the barrel
  • He notes that the nozzle temperature is roughly 190 C degrees
  • However, later he suggests printing at 220-235 was possible
  • He suggests not to worry overmuch about PLA in the threads – its just one of those things

Nick McCoy offered several pieces of wisdom:

  • He found that 10W-30 oil added lightly to the PLA as it entered the extruder, by adding oil to a piece of cotton wrapped around the filament, helped it print without jamming
  • He noticed that pausing the extruder for more than a few seconds would jam the barrel
  • He found he could print at 180-210 degrees (I assume he’s measuring the nozzle temperature as you would with an ABS setup)

Nick’s results suggesting a nozzle temperature of 180-210 seem to match up with Rick’s findings of 190 or so.  I think I’ll give Polly another shot and see if I can extrude at those temperatures.

Reusing the PTFE barrier

Long story short – it’s possible.

I was concerned that after having PLA ooze through the threads that I would be forced to use my backup PTFE barrier.  However, I’ve been pleasantly surprised to discover that I can print just fine with my reassembled unclogged extruder.  I’ve been able to print several things without so much as a hiccup.

So be delicate with your PTFE even after plastic has oozed into the threads – you may just be able to use it if you can clear out the plastic from the threads.