Spacexula to the rescue!

One of only two photos on Flickr that came up with the search term "Spacexula"

One of only two photos on Flickr that came up with the search term “Spacexula”

My friend Spacexula just sent in this AWESOME suggestion on how to display 1000 origami cranes in a durable pleasing way.1 2 I’m going to give you a link to his website and blog, but before you click, know that the top post on his site today is very NSFW.3 Spacexula suggests:

Cast all the cranes into a clear block of resin.

http://www.amazon.com/Entropy-Resins-11CLR008-Casting-Gallon/dp/B007NTU89E/ref=sr_1_1?s=industrial&ie=UTF8&qid=1367347089&sr=1-1&keywords=clear+casting+resin+gallon

Can be picked up locally for around $20 a gallon.

If you suspend them all on fishing line stringers you could likely fit them all in a single concrete casting tube

http://www.homedepot.com/p/SAKRETE-8-in-x-48-in-Concrete-Form-Tube-65470075/100321209

I freaking LOVE this idea.  The only thing I would need to test first is whether the resin would stick to the cardboard form creating a cloudy cardboard layer on the outside of the resin tower.  That said, I love love love this idea and feel quite committed to it already.

Default Series Title
  1. I should mention, this is not the first time I’ve blogged with the title, “Spacexula to the rescue!“ []
  2. Photo courtesy of John Abella []
  3. Okay, you asked for it…  Don’t blame me. []

Kodak, Kodak, Kodak…

Over the last few weeks Kodak has been on NPR several times.  Kodak invented digital camera technology, but never tried to push it – since it didn’t advance their core method for making money… selling film.  I’m reminded of this because I’ve finally come very very close to finally using up my 5 pound coil of black ABS that I’ve had since December of 2009.

I’m both excited and saddened at this prospect.  In the last two years I’ve run through 5 pounds of clear PLA, 5 pounds of black ABS1 , and another kilogram of clear PLA.  I’ve used a smattering of other colors, but not a whole lot yet.  Black has been my go-to color since I’ve had so damn much of it.

  1. Almost []

Hi Rez Printing Problems

The stuff nightmares are made of: 1/4 of Disney's head

The stuff nightmares are made of: 1/4 of Disney's head

Earlier I had wondered about some of the challenges facing high resolution printing.  Specifically, I had suggested that a lower resolution would be better for overhangs, speed, and (after the suggestion of Erik) interlayer adhesion.

It looks like Dave Durant has a proof of concept with 1/4 of Disney’s head. 1  The layer height is unbelievably small – but as he points out:

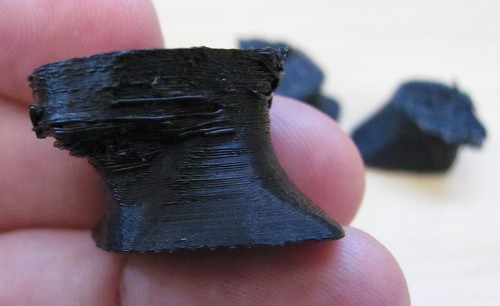
Even smallish overhangs seem to be far harder to print at this layer height. I tried to print this one several times and it always went pear shaped as it got close to his chin, which is a pretty agressive overhang. Serious blobbage. :(

This certainly seems to demonstrate the flip side of my hypothesis – that thin layers are not good for printing overhangs.  I’ve been printing with a layer height of about 0.33mm.  This seems to give me enough resolution and overhang printability to make whatever I’ve needed so far.  However, I think it also gives us a reason to have several different configurations for a MakerBot for each kind of plastic:

  1. Thin layer printing
  2. Good overhang printing
  3. High speed/thick layer printing
  4. Printing small holes?

What other kinds of profiles would you suggest?

  1. Dave – your Flickr account says all rights reserved.  Obviously, I’m attributing this to you.  If you would like me to remove the picture, I will do so. []

Rubik’s Cube Fail

I just tried to print up the 1x2x3 Rubik’s cube puzzle from TomZ.  I really like the idea of it.

Unfortunately, it’s just not working for me.  I had to rotate all of the STL’s 90 degrees to make them printable.  Once most of the parts were printed I discovered it’s not going to fit together.  The swivelly bits on “Part 1” are too large to rotate freely inside the center cubes.  If the grooves in “Part 2” were much larger it wouldn’t fit inside the part.

At this point, it’s probably easier to start building the entire puzzle from scratch.  Here’s what I’m thinking:

  1. Make the swivelly bits on Part 1 smaller
  2. Make the grooves in Part 2 slightly larger
  3. Make a notch in Part 2 and Part 3 so that it can be put together with an M3x16 nut and bolt instead of a plastic pin

A bargain

The cheapest commercially available 3d printer on the market is the Dimension uPrint Personal 3D Printer, clocking in at $14,900.  The media cartridges run $250 – and consist of coiled ABS in a plastic box.  I can’t tell from their website how much plastic is in each cartridge, so I don’t know how cost effective it is.  I’m not positive exactly how their cartridges operate – but I would not be surprised if they were tamper resistant, not able to be refilled, and contained special chips which authenticated them as being untampered and coming direct from the manufacturer.

Am I jaded by inkjets?  Probably.  I’m tired of buying printers with 1/3 full cartridges and expensive refills.  The warranties are so much worse:

“Expensive manufacturer refills only!  Only use paper made from unicorn tears and the hopes and dreams of orphans!  Only power your machine with live baby seals.  Using reasonably priced alternative supplies, making disparaging remarks, failure to properly maintain your machine, or printing will destroy your machine and void your warranty.”

My MakerBot came with more plastic than I can print in two years runs just barely over $1,000 with shipping.  If something were to happen to MakerBot Industries, I can always find new filament elsewhere, adapt my ‘bot to a new source, or even a new material entirely.  Or, I could just toss in a Dremel and have a mini-CNC/drill press.

Well, there’s your problem

I’ve been fiddling with settings on my MakerBot for the last week or so trying to improve print quality.  Skeinforge setting this, Skeinforge setting that.  Up, down, left, right, set it to pi, increase the print temperature, decrease the raft radius, adjust the feedrate speed.  Unfortunately, all I managed to do was decrease print quality.  Over the last two days I noticed the filament was coming out fairly slowly and today I noticed I kept stripping the filament.

Well, it’s because ABS oozed down the barrel threads and around the nut.  Yay.  Time to break out the blow torch, eh?

In disassembling (mostly) the extruder I found:

  1. Plastic down the threads of the barrel
  2. Plastic that had oozed onto the nut below the barrier
  3. Plastic still stuck inside the barrel itself
  4. A plastic plug inside the PTFE barrier and a slight bulge to the barrier

Plastic on the threads is not a huge deal, but not trial either – it mostly peeled off in spirals.  Plastic on the nut is not a big deal – I pulled that off with some needle nose pliers.  Plastic inside the barrel can be drilled out using my drill bit and rubber band trick.1

Plastic inside the PTFE barrier…  well, now, that’s a different animal.  I’ve succeeded once in rescuing my PTFE barrier from PLA oozing down the threads, but in that case there wasn’t a plastic plug inside the PTFE.  The problem with a plastic plug inside the barrel is that I can’t really drill it out.  If I try to drill it out from the top, I’ll probably still leave a bit of plastic where the barrier meets the barrel.  If I try to drill from up from the bottom, I stand a good chance of ruining the part where the PTFE meets the barrel – creating a small gap where plastic can get stuck.

Thus, I think I will drill out the barrel and slap in a new PTFE barrier.  Since I have this old (ruined?) one lying around, I have sliced off about a 2mm wafer to use as a washer on my next heater assembly. Using a small hacksaw blade did the trick – even if it left me with a relatively uneven slice.

While I’ve been putting off buying additional parts for my MakerBot, I think it’s time to invest in some new bits.  I’m liking the MakerGear modular thermistor kit ($5), MakerGear modular heater core ($15), MakerBot heated build platform ($42), MakerBot SMT Soldering Toolkit ($50), and a hotplate.2

  1. Think of it as a poor man’s precision vise. []
  2. Cue George Plimpton: “And a hotplate!” []

RepRap interim challenge obstacles

The RepRap challenge has a number of obstacles for the interim award.  There are two in particular that seem insurmountable.

  1. Maintain a total materials and parts cost under $200 and that 90% of the volume of the printer parts be printed.
  2. The ability to print autonomously without a PC attached.

I have to imagine something large enough to accomplish all of the other goals would cost well over $200.00.  If an entire Darwin or Mendel were trasmorgrified King Midas1 style into pure plastic, I would think the plastic alone would eat up 90% of the budget.  Even the best deals around the internet for RepRap parts just the electronics are roughly $215.

I say it seems insurmountable – but if someone had told me two years ago I could one day buy a full kit for building a robot that would make me any plastic thing I could imagine for $1,000.00  I would have laughed at them.

  1. or Calvin and Hobbes []

Who needs lasercut acrylic when you have a MakerBot?

Printable extruder and now printable dinos!  I had tried my hand at printable dinos, but I’m not in Zaggo’s league.  While my designs were for printable dinos that could be as a single piece each, his are clearly more elegant and use much less plastic.

What’s interesting about the differences between our designs is that mine were based on trying to replicate the existing dinos in a printable manner.  However, the dinos themselves were designed based upon the constraints of having to design three dimensional parts by layering and fitting lasercut acrylic pieces.  The question I completely failed to answer, and which Zaggo addressed perfectly, is “How would you redesign this object if you only had to be concerned with the constraints of a MakerBot, not a laser cutter?”

If you aren’t constrained by having to assemble lasercut parts, why not print them in such a way that it uses less plastic?  Why not print them on their sides?  Even with a non-heated platform it should be trivial to get the bottom of these dinos flat.  If anything warps it will be the parts that hold up the extruder.  And even then the warp would only serve to keep a tight fit on the extruder by squeezing it together.

If you examine a plastruder you can see the filament and heater assembly are not perfectly centered within the unit.  My guess is that’s  why there are two dinos – one which reaches towards the center.  However, there’s no reason a printruder couldn’t be designed so that the heater assembly was in the middle of the printruder.  If this were the case you could just print up two sets of printable dinos – instead of a left/right or big/weird combo.  Zaggo’s design allows for supporting either a printruder or a layered lasercut acrylic plastruder.

And we’re one step closer to a printable MakerBot!

Printing mendel parts

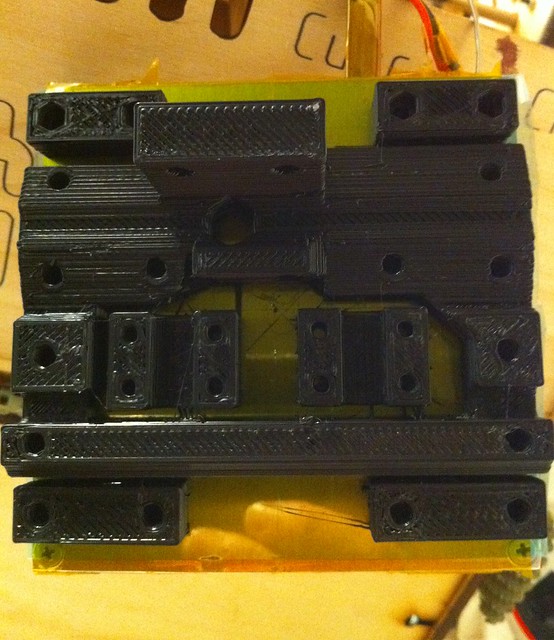
I’m not even sure I would build a Mendel if I had all the plastic parts.  But for some reason I still want to have all of those parts.  I have no idea why.  :)

I printed up a single spring out of PLA before my extruder got clogged up.  It’s my one and only Mendel piece.

Having this one piece languish next to my MakerBot strikes me as funny.

I think there’s a haiku in there somewhere.