Well, there’s your problem

I’ve been fiddling with settings on my MakerBot for the last week or so trying to improve print quality.  Skeinforge setting this, Skeinforge setting that.  Up, down, left, right, set it to pi, increase the print temperature, decrease the raft radius, adjust the feedrate speed.  Unfortunately, all I managed to do was decrease print quality.  Over the last two days I noticed the filament was coming out fairly slowly and today I noticed I kept stripping the filament.

Well, it’s because ABS oozed down the barrel threads and around the nut.  Yay.  Time to break out the blow torch, eh?

In disassembling (mostly) the extruder I found:

  1. Plastic down the threads of the barrel
  2. Plastic that had oozed onto the nut below the barrier
  3. Plastic still stuck inside the barrel itself
  4. A plastic plug inside the PTFE barrier and a slight bulge to the barrier

Plastic on the threads is not a huge deal, but not trial either – it mostly peeled off in spirals.  Plastic on the nut is not a big deal – I pulled that off with some needle nose pliers.  Plastic inside the barrel can be drilled out using my drill bit and rubber band trick.1

Plastic inside the PTFE barrier…  well, now, that’s a different animal.  I’ve succeeded once in rescuing my PTFE barrier from PLA oozing down the threads, but in that case there wasn’t a plastic plug inside the PTFE.  The problem with a plastic plug inside the barrel is that I can’t really drill it out.  If I try to drill it out from the top, I’ll probably still leave a bit of plastic where the barrier meets the barrel.  If I try to drill from up from the bottom, I stand a good chance of ruining the part where the PTFE meets the barrel – creating a small gap where plastic can get stuck.

Thus, I think I will drill out the barrel and slap in a new PTFE barrier.  Since I have this old (ruined?) one lying around, I have sliced off about a 2mm wafer to use as a washer on my next heater assembly. Using a small hacksaw blade did the trick – even if it left me with a relatively uneven slice.

While I’ve been putting off buying additional parts for my MakerBot, I think it’s time to invest in some new bits.  I’m liking the MakerGear modular thermistor kit ($5), MakerGear modular heater core ($15), MakerBot heated build platform ($42), MakerBot SMT Soldering Toolkit ($50), and a hotplate.2

  1. Think of it as a poor man’s precision vise. []
  2. Cue George Plimpton: “And a hotplate!” []

Who needs lasercut acrylic when you have a MakerBot?

Printable extruder and now printable dinos!  I had tried my hand at printable dinos, but I’m not in Zaggo’s league.  While my designs were for printable dinos that could be as a single piece each, his are clearly more elegant and use much less plastic.

What’s interesting about the differences between our designs is that mine were based on trying to replicate the existing dinos in a printable manner.  However, the dinos themselves were designed based upon the constraints of having to design three dimensional parts by layering and fitting lasercut acrylic pieces.  The question I completely failed to answer, and which Zaggo addressed perfectly, is “How would you redesign this object if you only had to be concerned with the constraints of a MakerBot, not a laser cutter?”

If you aren’t constrained by having to assemble lasercut parts, why not print them in such a way that it uses less plastic?  Why not print them on their sides?  Even with a non-heated platform it should be trivial to get the bottom of these dinos flat.  If anything warps it will be the parts that hold up the extruder.  And even then the warp would only serve to keep a tight fit on the extruder by squeezing it together.

If you examine a plastruder you can see the filament and heater assembly are not perfectly centered within the unit.  My guess is that’s  why there are two dinos – one which reaches towards the center.  However, there’s no reason a printruder couldn’t be designed so that the heater assembly was in the middle of the printruder.  If this were the case you could just print up two sets of printable dinos – instead of a left/right or big/weird combo.  Zaggo’s design allows for supporting either a printruder or a layered lasercut acrylic plastruder.

And we’re one step closer to a printable MakerBot!

PLA Woes

My adventure with PLA has ended in heartbreak.  It wasn’t working very well so I switched back to ABS – which was fine for a few prints.  Until I found it just wasn’t extruding and stripping the filament.

So, disassemble time.  My filament looked like it was getting shoved into a jam and splitting apart like a banana – with the center making it down to the nozzle through a small aperture.  I found I couldn’t remove the insulator – and upon looking closer found that a very small amount of PLA had oozed down and around the nut above the insulator/ washer.  I removed the extruder assembly from the ‘bot, and the heater assembly from the extruder, heated it back up and slowly removed the PTFE insulator.  I found the barrel was clogged with ABS as was the insulator.

I’ve managed to clean out most of the insulator, the nut, and the threads of the barrel using drill bits and precision screwdrivers.

I’m going back to ABS, I would rather deal with warp than the heartbreak of PLA ooze into the threads of my heater assembly.

New print: MakerBot Insulator Retainer Ring

Insulator Retainer Ring

Insulator Retainer Ring

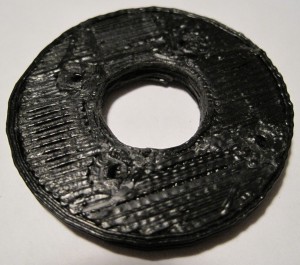
Lots of non-robot stuff keeping me busy…  but not too busy to print a replacement insulator retainer ring!  I should really start a list of the first things you should print once you get a MakerBot.  This should be way at the top, even above the Z-axis crank.

From what I gather from the MakerBot operators group, the 5mm acrylic insulator retainer ring that comes with the MakerBot kit will eventually fail.  If this happens, the heater will basically pop off and melt into whatever you were building at the time.

Really, it’s all about choices, right? The extruder motor is super slow but super strong.  Chances are it will eventually deform some part of your assembly.  With this in mind, you can build your heater assembly with and without the nut.  Depending upon which you do, different parts will be bearing the brunt of the force exerted by the extruder motor.

If you assemble the heater without the nut below the washer, the majority of the force will be applied by the motor to the filament and into the barrel and nozzle, eventually forcing the nozzle downwards, ruining the PTFE insulator barrier, stripping the PTFE barrier threads, pushing out the nozzle, and making a molten oozing mess of everything.

If instead you assemble the heater with the nut below the washer, the nut will hold the washer in place and the majority of the downwards force applied by the extruder motor will be placed on the insulator retainer ring.  If the insulator barrier ring fails, it will crack or shatter dropping the heater into whatever you were building.

The good news about the second method is that its pretty easy to print up a replacement insulator retainer ring to keep handy!

Heater barrel – backasswards?

Dangit.  According to the very latest changes to the MakerBot assembly wiki, I put the heater assembly together with the heater barrel upside down.  I’m not entirely sure what this means for my heater.  Clearly it was working well enough that I could extrude reasonably well.

The questions is – do I leave it as is or disassemble/reassemble?

If I leave it as is, I suppose there’s a chance I could bulge the insulator, ruining it.

I’ve already disassembled/reassembled once because of a bad thermistor connection.  If I disassemble again, I’m thinking the ceramic tape and nichrome may have had it.  Not to mention that I’m probably going to have a royal mess of plastic inside the barrel and nozzle to clean up.