Unfortunately, my Leonardo Robot has a broken hip – I kid you not. One of the hinge tabs on his hip snapped.
Fortunately, I’ve got a MakerBot. I can build him better than before. Perhaps with a 40% fill this time. ;)
Unfortunately, my Leonardo Robot has a broken hip – I kid you not. One of the hinge tabs on his hip snapped.
Fortunately, I’ve got a MakerBot. I can build him better than before. Perhaps with a 40% fill this time. ;)
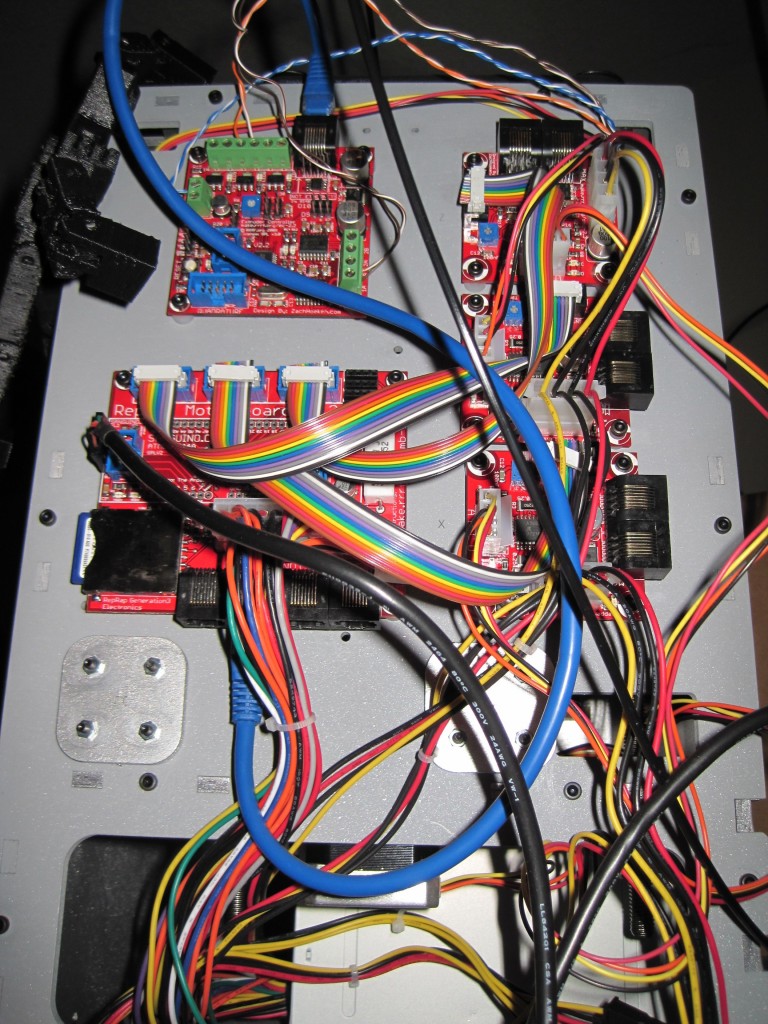
Tony Buser’s post about his Alternative Extruder Controller Mounting reminded me that I’ve been meaning to show a better picture of my own setup. I had blogged about it earlier, but not shown a good picture.

Here you can see where I’ve mounted the extruder board at the top left and how I’ve rotated the motherboard 90 degrees counter clockwise. This gives me better access to the SD card slot. If you don’t rotate the motherboard, the SD card slot is blocked by the extruder board.
Here you can see Leonardo Robot’s arm and how I’ve run the wires from the extruder motor and heater up to the board.
…are really what I thought they would be as a kid.
I can eat pizza for breakfast. I can have candy for dinner. I can stay up late. And, dammit, I can build a robot if I want to.
Neener neener.
Jrombousky designed his Leonardo Robot based upon the ratios in Leonardo DaVinci’s Vitruvian Man. He mentioned that it was based on these very cool papercraft Paper Robot. I just used his gcodes and they turned out just fine. This just supports my belief that a good set of Skeinforge settings may be nearly universal. In any case, here it is!
Some people have asked me about the MakerBot’s print resolution. Although this information can be found on the MakerBot wiki, there’s no harm in disseminating this data. 1 Before I get into some of the technical stuff, let me just say this – the print resolution is pretty freaking good for a $750 DIY robot and it will give a $15,000 commercial printer a run for it’s money.
As a printer that can create objects in three dimensions the normal two-dimensional printer resolution jargon of “DPI” or “dots per inch” doesn’t mean much. The printing resolution for the X/Y axes is 0.085mm and the resolution for the Z axis is 3.125 microns. Most of the time you’re going to have a Z axis resolution of about 1/3 of a millimeter. If you print with layers much smaller than that it will take forever to print without a huge increase in quality.
Or, to put it another way… if you were to hand me two objects one printed on a MakerBot and one printed on a commercial printer, I’m going to ask you why the heck one of them costs $14,000 more than the other. I’ve printed some pretty intricate and detailed stuff on my MakerBot. As I tune it I hope to improve it even more.

Freaking cool. This robot was designed by jrombosky by taking the measurements/proportions/ratios from Leonardo DaVinci’s Virtuvian Man. Even if these proportions were all messed up, this would still be super awesome. It’s a little printable robot!!!

It reminds me of a lego set from a few years ago:
Once I had the opto-endstops all soldered up, I really wanted to keep going. I made the Y-endstop cables, bolted the opto-endstops on, and bolted the motherboard and stepper motor boards to the MakerBot. Clipped in the cables and it looks like a robot after all! I’m going to need to organize those cables, but that will have to wait until all the other parts are in place.
An interesting side note – as I was moving the various axes someone noticed that little lights started flashing on the stepper motor boards! Cool! I presume moving the platform caused the motors to act like generators and pushing power to the boards, lighting up the LED’s.
Once the opto-endstops were done, I couldn’t resist bolting them on. Once I started doing that, I wanted to make the Y-endstop cables, then the ribbon cables, and wire it all up.
If nothing else, it looks like a robot now!
Oh, you know, about the same. Hung around, watched a movie, built most of a robot. The usual.
Really what I need to do is tinker less with WordPress and get cracking on this robot…
What was I thinking???
Such as: Should I paint? What color(s)?
I’m thinking I should paint. I figure it will help the robot body stand up to a little extra wear and tear while looking cool.
Not white or black. That’s SOooo October 2009. I’m liking gray/gunmetal/silver. I’ve only seen pictures of one silver MakerBot and I rather liked it. (Thank you to RDon Ebben/Robostang 548 for posting pics of his MakerBot 347.) The picture is a little dark, so I don’t think I can see it to its full effect.
Just the other day a user named unrepentantgeek posted a Google Sketchup version of a MakerBot, to make it easy to test out paint/color schemes. URG – you’re the best! Thanks to you, I got to test out this color scheme:
Roughly a 50% gray on the outside, silver on the inside. (I figure I can’t rightfully name the machine Bender unless it has a shiny metal assplate, right?)