MakerBot Hacking: More build space?

If you got a totally different set of lasercut body panels and larger threaded/precision rods it would be a snap.

But how would you get more build space out of your MakerBot without a big structural change?

I’m not sure how I would go about it – but I suspect I would start by fiddling with the Y stage.  As the smallest stage I suspect it may be the bottleneck.

MakerBot Build Status

The body is painted, bolted together, rods have been cleaned, XY stage installed, boards soldered and bolted on, cables run.1  I’ve affixed the opto-endstop triggers on the X and Y axes.

  • I have not installed the Z axis endstops mostly because I’m just not that keen on marring that beautiful clear acrylic sheet that is the Z stage.  I’ve created a little fitting out of balsa wood that will eventually support the opto-endstop triggers.
  • I’ve assembled the two “dinos” but not any other parts of the plastruder.
  • I need to assemble the rest of the plastruder, drop it in, and fire it up!
  1. Even if the opto-endstops are going to the wrong max/min ports for the moment. []

Stopping for now

The body of the MakerBot is complete, rods in, X and Y stages in, pulleys and belts on, motors bolted on.  No opto-ends stops yet for obvious reasons.  The opto-endstops also require popsicle sticks.

On to the plastruder.  I put together the Weird Dino and the Tall Dino, but the idler pulley requires super glue.  I don’t happen to have any lying around, so I’ll need to go out to the hardware store.  But, this is as good a spot to stop as any.

I originally intended to document each step – but the directions on the MakerBot wiki are so good that there’s just no need.  So, the pictures you’re going to see are going to basically jump from a bunch of spraypainted wood giant chunks of the robot already bolted together.

The build process, much of what consists of fitting pieces together and using the MakerBot “t-slot” semi-captive nut method, is very intuitive, relatively easy, and extremely gratifying.  Sometimes its a little bit of effort to get that nut in the notch properly, but it was never that bad.

Things I learned while painting my MakerBot

Painted my MakerBot lasercut wood parts (and plastic pulleys!) today.  Here’s what I learned:

  • Spray paint cans work better when they’re not pointed downwards, so it helps to angle/elevate one part of the painting surface. 1
  • Too much ventilation or cross ventilation will let debris fly into the room.
  • Position the things to be painted close together, it will help you paint faster and will waste less paint.
  • Use primer and buy two cans.  Although, had I positioned the pieces more effectively I may not have needed the second can.  Then again, I think it probably would have worked better to put even more primer than I did.
  • I wiped the edges of some of the smaller parts, but not all of them.  The end result is that some paint wiped off as it had adhered to the ash from the lasercutter.  I think I like this effect as it made the parts look a little worn, but you may not.
  • If you’re painting your MakerBot, don’t forget to consider painting the pulleys!
  • Sand down any stray plastic parts off of the printed pulleys before you paint them.  I didn’t realize the clearance on the small pulley was so low, and I had to sand the painted finish to get it to fit properly.
  • Make sure no parts accidentally shift and overlap before you start painting.  It won’t be a big deal, but it’s a little extra unnecessary work to paint it.
  • If you’re spraypainting different colors, cover other parts while you paint a new color.  A fine mist will be deposited on those other parts.  I like the effect, but it may not work for you.
  • Keep in mind that if you are using a primer and then a coat of paint some of the parts won’t fit as well (or may fit better!) when you go to assemble the robot.  I found it necessary to sand away nearly all of the paint on a few body panel tabs.  I also needed to sand away the pain that got on the inside of the round X and Y axis mount holes.
  • If you’re painting the “MakerBot Industries” logo on the front a different color than the surrounding body, you probably want to do it at this stage.  I didn’t even think about it until I started assembling the body.  It won’t be a problem to paint it by hand later, but I could have done this all at once.
  1. I guess this is why you see graffiti on walls, not floors. []

Mission critical decisions

Such as:  Should I paint?  What color(s)?

I’m thinking I should paint.  I figure it will help the robot body stand up to a little extra wear and tear while looking cool.

Not white or black.  That’s SOooo October 2009.  I’m liking gray/gunmetal/silver.  I’ve only seen pictures of one silver MakerBot and I rather liked it.  (Thank you to RDon Ebben/Robostang 548 for posting pics of his MakerBot 347.)  The picture is a little dark, so I don’t think I can see it to its full effect.

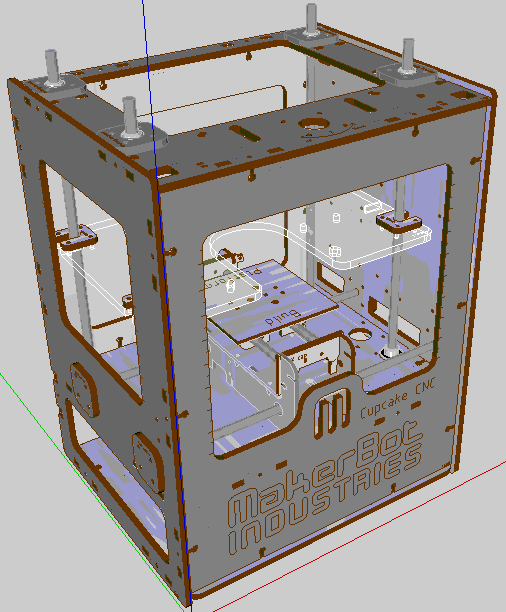
Just the other day a user named unrepentantgeek posted a Google Sketchup version of a MakerBot, to make it easy to test out paint/color schemes.  URG – you’re the best!  Thanks to you, I got to test out this color scheme:

Roughly a 50% gray on the outside, silver on the inside.  (I figure I can’t rightfully name the machine Bender unless it has a shiny metal assplate, right?)