How to Use a Vacuum Former

This is the second post in a short series about vacuum formers.  You can start with the first post about how to make your own inexpensive and easy to use vacuum former or skip to the bottom of this post with a list of all of the posts in this series.

  1. Theory

    This slideshow requires JavaScript.

    1. I discussed the theory behind a vacuum former in the prior post.  This post is really about how to actually use a vacuum former in conjunction with a heat source.
  2. Parts

    This slideshow requires JavaScript.

    1. “Buck”
      1. The things you’re going to create molds of with your vacuum former are called the “bucks.”
    2. Wire coat hanger
      1. The coat hanger will be bent out of shape and won’t be usable for hanging clothes after this.  A coat hanger from your local dry cleaner would do just fine.
      2. The good news is that this is the only thing, besides the consumable plastic plates, that you can’t put back into its ordinary service as soon as you’re done vacuum forming.
    3. 4 or more binder clips
      1. Pretty much any size binder clips would work, as long as they can get around the thick gauge wire of the coat hanger.  I only had four on hand, (which is probably the minimum necessary) but the more the better.  As you heat the plastic, it will contract and deform.  The more clips you have, the more circular you can keep the plastic as you lay it on top of the object.
    4. Oven mitt
      1. I used a cotton oven mitt that has a silicone rubber grip.  This is probably overkill, but better safe than sorry.
      2. Everything you’ll be touching with the oven mitt will be cool to the touch within about a minute of taking it out of the toaster oven.  I’m pretty sure a thin towel which has been folded over several times would work just fine.
    5. Toaster oven
      1. Preferably one that can do small round pizzas.  If you’re out shopping for one, try and find one that will fit the 10″ diameter plastic plates.  You can find a cheap toaster oven for about $30 on Amazon and about $15-20 on Craigslist.  If you’re short of funds, I’m pretty sure garage sales or Goodwill would have a bargain.
      2. Out of an abundance of caution, I was using my toaster oven outside on the off-chance that heating the plastic was giving off some undesirable fumes.  I’m also utilizing a used toaster oven donated by my brother.  I’m pretty sure the process of heating a few pieces of plastic in the toaster oven don’t make it unsafe for cooking food, but again, I’m erring on the side of caution here.
      3. There’s nothing special about the toaster oven; it’s nothing more than a convenient and cheap heat source.  If you were a more daring sort you could probably use your standard kitchen oven.  I suppose in a pinch you could also use a cheap heat gun, but I haven’t tried this yet.
    6. Pliers (Optional)
      1. I got these out to help shape the coat hanger.  In the end, I didn’t use it very much and it probably wasn’t necessary.
  3. Consumables
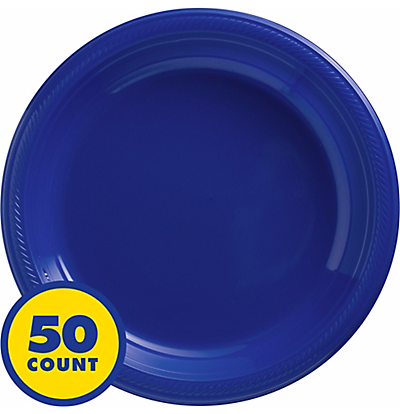
    Round plastic plates, 10 - 1/4"

    Round plastic plates, 10 – 1/4″

    1. Round plastic plates (~10″ diameter, without dividers?)
    2. These are just the bulk plastic plates we had left over from Party City.  Next time I’m there, I’ll check and see just what kind of plastic they’re made of.  Their website suggests they carry plastic plates with diameters from 9″ to 10.25″ to 10.5″.  The plates I had were 10.25″ and they worked out really well.  You can probably find a pack of 50 plates for less than $10.  You might be able to do even better by hitting up a dollar store.
  4. Make the Plate Holder

    This slideshow requires JavaScript.

    1. Using your hands or a pair of pliers, bend the coat hanger as pictured.  The goal is to get it to fit around the underside of the rim of the plate.
  5. Clip the Plate to the Plate Holder

    This slideshow requires JavaScript.

    1. Using four or more small binder clips, clip the coat hanger to the paper plate.  Put two clips on either side of where the coat hanger handle meets the plate.  Put the other two clips approximately 180 degrees from the first two clips.  If you have more than four binder clips, they would be helpful since the plastic will pull away from the frame as it heats up.  (I only had four on hand)
  6. Turn on the Toaster Oven
    1. Remove all the racks, except for the bottom drip tray, from the inside of the toaster oven.
    2. When it’s empty, turn it all the way up.
  7. Ready the Vacuum Former
    1. Set up your vacuum former as close to your heat source as is practicable.  You want to be able to transfer the molten plastic plate to the vacuum former as quickly as possible so that it doesn’t cool down in transit.
  8. Prepare Buck and Turn on Vacuum Former
    Vacuum former at the ready

    Vacuum former at the ready

    1. Organize the bucks (the things you want to mold) on top of the vacuum former, then turn on the vacuum.
    2. You may notice the vacuum pushes or pulls some of the objects out of the way.  Just rearrange them as necessary.  I try to place things so that they’re surrounded by the holes in the top of the vacuum former.
    3. Basically, you want the vacuum pulling on the hot plastic plate, but not sucking air freely from around it.  If the holes in the top of the vacuum former are spaced out way outside the perimeter of the plate, you’ll want to cover those holes up with some tape.  Regular masking tape worked just fine for me.
  9. Heat and Vacuum!

    This slideshow requires JavaScript.

    1. Put on your oven mitt, open the toaster oven, and hold the plate in the oven near the top heating element.
    2. The plates I used went through several physical changes before they were ready.  First they softened a little, then they actually flattened all the way out, then then pulled away from the wire frame, then, finally, the plastic got very droopy.  This whole process took less than a minute with the oven at full power.
    3. Once the plastic is nice and droopy, pull the frame out and place it on top of the vacuum former.
    4. The vacuum should pull the hot plastic around your objects.  After a few seconds the plastic should no longer be flexible and warm.  Once it’s cool, turn off the vacuum.

That’s it!

Bucket Vacuum Former
  1. How to Make a Vacuum Former
  2. How to Use a Vacuum Former
  3. Vacuum Former – Things to Form
  4. Vacuum Former – Ideas to Improve Vacuum Former
  5. Maker Faire 2017 How to Make a Vacuum Former Presentation Slides
  6. Vacuum Forming an Arc Reactor
  7. Maker Faire Application: Vacuum Forming Workshop

How to Make a Vacuum Former

First, a huge thank you to Airship Noir and their Maker Faire Kansas City 2016 project, “Make Your Own Vacuum Formed Steampunk Goggles.”  They were kind enough to post pictures and instructions about how they made an incredibly cheap, but effective, vacuum former.

Inspired by their project, I wanted to pay-it-forward and help others build their own vacuum former.  Here’s how I built mine:

  1. Theory
    1. A “vacuum former” is a device which allows you to create thin plastic molds of objects by heating a sheet of rigid plastic until it is very malleable, placing it over an object, and applying a suction to pull the flexible plastic around the object.
    2. The plastic shell can be used for a variety of purposes such as actual tools, creating reusable molds, or just a simple form fitting shell for another project.
    3. This set of instructions will teach you how to create a suction device for use with a heat source of your choice.
  2. Parts

    This slideshow requires JavaScript.

    1. Home Depot “Bucket Head” ($23)
      1. I had no idea this thing existed until I saw Airship Noir’s post.  It’s basically a vacuum that clamps onto a bucket, turning it into a cheap low-power shop vac.  I believe “Bucket Head” is the Home Depot branding for this, but that you can find alternates under the title of “Power Head.”
    2. 5 Gallon Bucket ($5)
      1. I bought a Home Depot brand bucket for this exact task.  Although I have other 5 gallon buckets, it was worth the $5 to me to make sure I had something that would easily attach and detach from the vacuum top.
    3. 1/2″ wooden dowel, 4′ in length ($2)
      1. My own design uses 3D printed parts, a length of a 1/2″ wooden dowel, and a little hot glue.  However, you can substitute whatever you have on hand.  The Airship Noir vacuum former used wood shims, some nuts and bolts, and PVC pipe.
  3. Tools
    1. Chisel
    2. Drill and 1/8″ drill bit
    3. Hot glue gun / hot glue
    4. Ruler
    5. Pen / pencil
    6. Hacksaw
    7. Sharpie
    8. Masking tape
  4. 3D Print Parts

    This slideshow requires JavaScript.

    1. You can download all the 3D printable parts from Thingiverse.
    2. Print one vacuum cork.  This will just be placed into the vacuum where the hose would normally go.  This will cause the vacuum to suck air through the bottom of the bucket.
    3. Print two dowel caps.  These will go on either end of a short length of wooden dowel, to keep the “float” inside the vacuum from falling into the vacuum.
    4. Print three bucket attachments and three “toes.”  These will be used, with wooden dowels to elevate the bucket off the ground.
    5. Print the PDF of a 1″ grid on paper.  This is actually a 1/2″ grid, with bold lines forming the 1″ grid.  I searched for more information about optimal hole size and placement, but didn’t find anything dispositive.  I think as long as you get close, you’ll be fine.
  5. Cut Wooden Dowels
    1. Use the hacksaw to cut three pieces of wooden dowel to approximately 8″ each.  These will become the feet for the bucket.
    2. Cut a fourth piece of wooden dowel to approximately 6″.  This will be used to keep the vacuum float from falling into the vacuum, when the bucket is turned upside down.
  6. Prepare the Bucket

    This slideshow requires JavaScript.

    1. Turn the bucket upside down and, carefully, use a chisel to remove as much of the raised areas at the bottom of the bucket.  Working slowly and carefully, it took me about 30 minutes to move the rim at the bottom of the bucket and all the little raised areas.
  7. Add Feet to the Bucket

    This slideshow requires JavaScript.

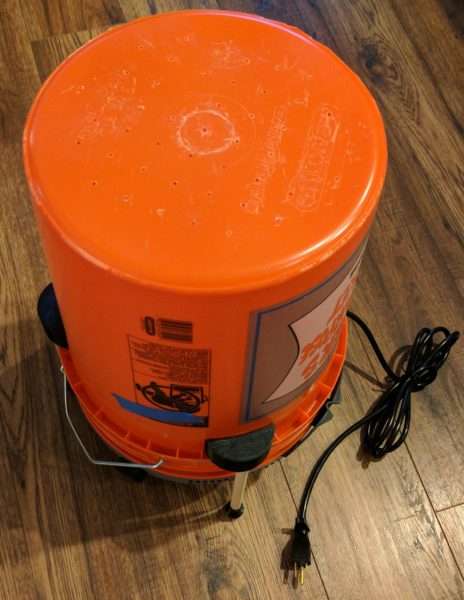
    1. When the “Bucket Head” attachment is on the bucket, the top will be rounded.  However, we’re going to need to turn the entire thing upside down to use the bottom of the bucket as the surface of our vacuum former.  This means we’ll need to raise the vacuum top of the bucket off the ground so that it can stand flat – and so we can access the power switch.
    2. I designed the three bucket attachment parts so that they will slide snugly into the rim under the bucket.  The rim has approximately 24 little fins under the rim.  Place each of the three feet equally around the bucket – approximately 8 fins apart.  Mark the outline of the part on the bucket with a Sharpie, remove the part, add hot glue, and slide the part back into place.
    3. Add a little hot glue to the end of each of the three 8″ wooden dowels, then some hot glue to the inside of the “toes,” then slide the gluey end of the dowel into the feet.  You should end up with three short “drumsticks.”
    4. Don’t glue these into the attachments at the bucket sides.  The attachment and bucket feet parts were designed to be as minimally obtrusive to the function of the bucket as possible.  If placed properly, they shouldn’t interfere with the handle or bucket usage.  The newly formed feet can be placed into the holes in the bucket attachments when you’re ready to start vacuum forming – and placed back inside the bucket for easy storage.
  8. Drill Holes

    This slideshow requires JavaScript.

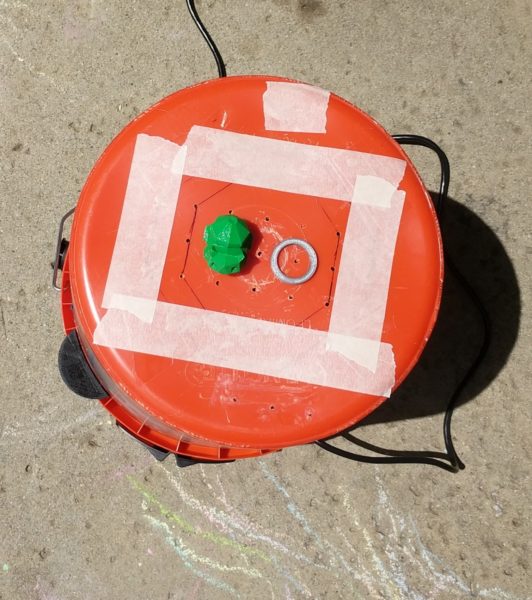
    1. Print the PDF of 1″ ruled grid paper from the Thingiverse page, courtesy of Kent State.  Center the paper on the bucket, then tape it down.
    2. Drill 1/8″ holes 1″ apart along the grid.
    3. A word about these holes.  The more holes you drill, the more holes you might have to cover up when making parts later.  However, the more holes you drill now, the bigger the parts you can make later.  It’s a little bit of a trade off.
    4. Once the holes are drilled, use the chisel to remove the burrs off the bottom of the bucket.  You don’t need to remove the burrs from the inside of the bucket, but I did to keep the inside of the bucket as clean and useful as possible.
  9. Raise the Float

    This slideshow requires JavaScript.

    1. Underneath the vacuum top there is a plastic cage surrounded by the filter, held in place by a big rubber band.  Remove the rubber band and filter and you’ll see a little plastic cup that is designed to act as a “float” inside the cage.  If you turn the vacuum upside down, the float will fall against the vacuum – and would prevent it from working.
    2. Holding the vacuum upright, insert the 6″ length of wooden dowel through the plastic cage and above the float, pushing it against the bottom of the cage.  Use the plastic dowel caps to hold the ends of the dowel in place so it won’t slip out or rattle.
  10. Completed bucket vacuum former!

    Completed bucket vacuum former!

    Put it All Together

    1. Place the Bucket Head on the bucket.  You may need to rotate the Bucket Head slightly to make sure you can insert the feet into the plastic parts glued to the sides of the bucket.
    2. Insert the feet into the holes in the bucket attachment parts.
    3. Invert the bucket and you’re done!

I’ll do another post soon about how to actually use the device.  If you’ve read the Airship Noir post, you know the basic steps are to place things on the bottom of the bucket, heat a plastic plate with a toaster oven, and lower the heated plate over the things you want to mold while the vacuum is one.

Bucket Vacuum Former
  1. How to Make a Vacuum Former
  2. How to Use a Vacuum Former
  3. Vacuum Former – Things to Form
  4. Vacuum Former – Ideas to Improve Vacuum Former
  5. Maker Faire 2017 How to Make a Vacuum Former Presentation Slides
  6. Vacuum Forming an Arc Reactor
  7. Maker Faire Application: Vacuum Forming Workshop

OpenSCAD Intermediates: How to Make Complex Organic Shapes

Cyborg Beast OpenSCAD prototype

Cyborg Beast OpenSCAD prototype

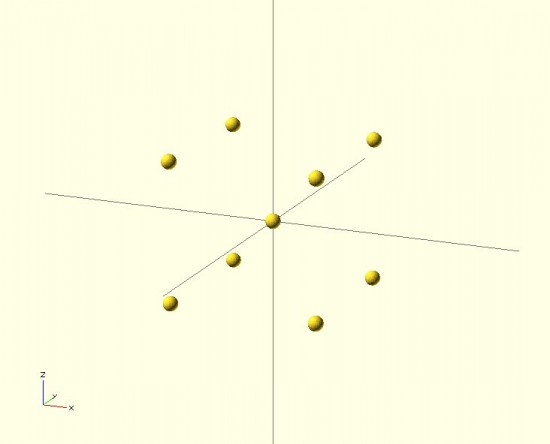
OpenSCAD tutorials for the MakerBot blog.  In that OpenSCAD tutorial series I covered the basics of the OpenSCAD interface, how to make 2D forms, how to make some basic 3D forms, how to position those forms in 3D space, the different ways to combine forms, how to create mashups of one or more existing STL’s and OpenSCAD forms, how to use modules to reuse your code to make your life easier, how to extrude flat 2D forms into 3D forms, and how to fix design problems.  One of the last tutorials was on how to make organic looking shapes using OpenSCAD.1  However, I have a few design tricks left to share.  A little over 18 months ago I left off the series suggesting as new topics.2 There’s one particular “trick” I am using a lot as I work on designing a printable parametric prosthetic. This trick is somewhat easier to explain using pictures.  Suppose you wanted to make a shape that looked something like a “jack,” but you wanted it to have curved surfaces at the center.  Let’s see what happens when we try to use the “hull()” command.  Do do this, we’ll make a sphere at the center and put eight more spheres around it.  The code for this example is basically irrelevant, but I’ll provide it anyhow.

sphere(r=10);
rotate([0,0,0]) translate([100,100,100*pow(2,0.5)/1.5]) sphere(r=10);
rotate([0,0,90]) translate([100,100,100*pow(2,0.5)/1.5]) sphere(r=10);
rotate([0,0,180]) translate([100,100,100*pow(2,0.5)/1.5]) sphere(r=10);
rotate([0,0,270]) translate([100,100,100*pow(2,0.5)/1.5]) sphere(r=10);
rotate([0,180,0]) translate([100,100,100*pow(2,0.5)/1.5]) sphere(r=10);
rotate([0,180,90]) translate([100,100,100*pow(2,0.5)/1.5]) sphere(r=10);
rotate([0,180,180]) translate([100,100,100*pow(2,0.5)/1.5]) sphere(r=10);
rotate([0,180,270]) translate([100,100,100*pow(2,0.5)/1.5]) sphere(r=10);

There’s a much easier way to create the 8 “orbiting” spheres, but that’s another post unto itself.  :)  Here’s what the above code will create:

Nine little spheres (I named one of them Pluto!)

Nine little spheres (I named one of them Pluto!)

Now, let’s use the “hull()” command to wrap around these spheres.

hull()
{
sphere(r=10);
rotate([0,0,0]) translate([100,100,100*pow(2,0.5)/1.5]) sphere(r=10);
rotate([0,0,90]) translate([100,100,100*pow(2,0.5)/1.5]) sphere(r=10);
rotate([0,0,180]) translate([100,100,100*pow(2,0.5)/1.5]) sphere(r=10);
rotate([0,0,270]) translate([100,100,100*pow(2,0.5)/1.5]) sphere(r=10);
rotate([0,180,0]) translate([100,100,100*pow(2,0.5)/1.5]) sphere(r=10);
rotate([0,180,90]) translate([100,100,100*pow(2,0.5)/1.5]) sphere(r=10);
rotate([0,180,180]) translate([100,100,100*pow(2,0.5)/1.5]) sphere(r=10);
rotate([0,180,270]) translate([100,100,100*pow(2,0.5)/1.5]) sphere(r=10);
)

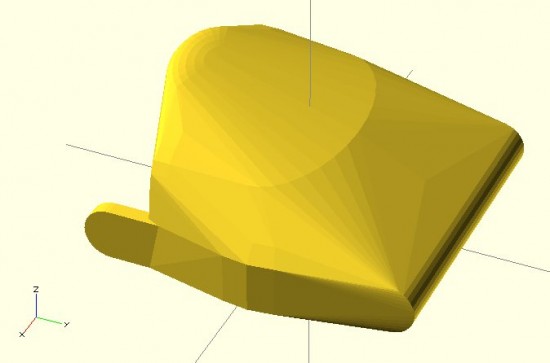
That code will make this:

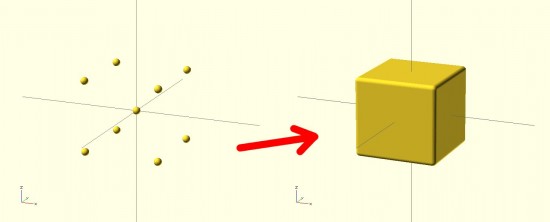
Nine spheres to... a box?

Nine spheres to… a box?

The result looks nothing like a jack! It looks more like a box with rounded edges. The limitation with the “hull()” command3 is that it connects all the outside points from the various shapes.  The result is more like what the objects would look like if you covered them in plastic wrap – but not what they would look like if you tried to use shrink wrap.4 However, our goal is to get a jack.  How should we go about this?  The same way we eat an elephant.56 We need to use “hull()” multiple times7 to connect the central sphere to the eight surrounding spheres.

hull() { sphere(r=10);
rotate([0,0,0]) translate([100,100,100*pow(2,0.5)/1.5]) sphere(r=10); }
hull() { sphere(r=10);
rotate([0,0,90]) translate([100,100,100*pow(2,0.5)/1.5]) sphere(r=10); }
hull() { sphere(r=10);
rotate([0,0,180]) translate([100,100,100*pow(2,0.5)/1.5]) sphere(r=10); }
hull() { sphere(r=10);
rotate([0,0,270]) translate([100,100,100*pow(2,0.5)/1.5]) sphere(r=10); }
hull() { sphere(r=10);
rotate([0,180,0]) translate([100,100,100*pow(2,0.5)/1.5]) sphere(r=10); }
hull() { sphere(r=10);
rotate([0,180,90]) translate([100,100,100*pow(2,0.5)/1.5]) sphere(r=10); }
hull() { sphere(r=10);
rotate([0,180,180]) translate([100,100,100*pow(2,0.5)/1.5]) sphere(r=10); }
hull() { sphere(r=10);
rotate([0,180,270]) translate([100,100,100*pow(2,0.5)/1.5]) sphere(r=10); }

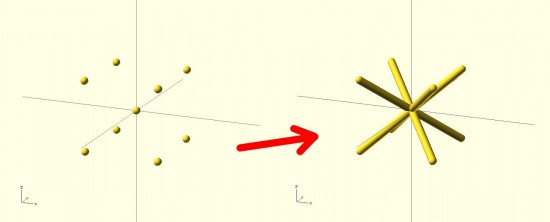
The result would look like:

Much better!

Much better!

By breaking the overall design into pieces, you can use the “hull()” command to connect pieces of the design to one another in a seemingly organic fashion.  Here’s a set of pictures of my most recent work that uses these design tricks.

This slideshow requires JavaScript.

  1. Full list here:

    1. OpenSCAD Basics: The Setup
    2. OpenSCAD Basics: 2D Forms
    3. OpenSCAD Basics: 3D Forms
    4. OpenSCAD Basics: Manipulating Forms
    5. OpenSCAD Intermediates: Combining Forms
    6. OpenSCAD Intermediates: Mashups
    7. OpenSCAD Intermediates: Modularity
    8. OpenSCAD Intermediates: Extruding 2D Objects
    9. OpenSCAD Intermediates: Fixing Design Problems
    10. OpenSCAD Intermediates: How to Make Organic Shapes
    11. OpenSCAD Design Tips
    12. OpenSCAD Design Tips: How to Make a Customizable Thing

    []

  2. These are, in no particular order:

    • How to sketch an object with OpenSCAD
    • How to easily make regular solids – other than cubes and cylinders, like hexagons, pentagons, octagons, etc
    • How to easily make symmetrical solids
    • How to easily make irregular, but symmetrical solids

    []

  3. I almost typed “problem,” but in this case it probably is just a feature []
  4. That’s the best analogy I can come up with []
  5. One bite at a time. []
  6. It’s such a damn shame when a cool domain name is taken – and there’s nothing there.  Such as eatanelephant.com []
  7. 8 times []

How to Make Awesome Cardboard Paper Mache Anything

Awesome Paper Mache Hats

Awesome Paper Mache Hats

A few weeks ago a friend of mine had a “bad movie night” where he was showing the film1Sharknado.”  Inspired by the theme for the party, I decided I had to wear a shark hat for the event.  After making my hat, my daughter requested a monkey hat.  This was not a request I could refuse.

I took pictures of the process to show you how you can make your own.  I haven’t ever tried to make paper mache hats before, so this was not only a lot of fun – but a great learning experience.  While I own the really great paper mache monster books by Dan Reeder, I only used them for inspiration and tried out a few new things on my own.

Even though I used this process to make hats, the directions here could easily be adapted to making anything out of paper mache.

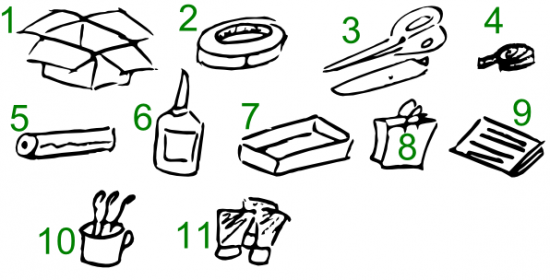
1. Step 1: Gather Materials and Tools

All the things you need to make your own awesome paper mache anything

All the things you need to make your own awesome paper mache anything

Here’s what you need to get started:

  1. Cardboard Boxes.  Cardboard forms the “skeleton” of the structure.  It’s cheap, ubiquitous, sturdy, and easy to cut and form.
  2. Masking Tape.  Once the cardboard has been cut, liberal use of masking tape will keep your creation together until it can be covered with paper mache.
  3. Scissors and Utility Knife.  Scissors can be very helpful in cutting cardboard or paper.  While scissors can be helpful, and appropriate for kids, I find a utility knife gets the job done faster.
  4. Measuring Tape.  If you’re not making a hat (or other apparel or armor) you won’t need this.  But it is helpful when making measurements.  ((In a pinch, you could just use a piece of yarn or string to mark lengths, and then put the yarn on the cardboard for reference.))
  5. Plastic Wrap.  Whether you’re working with gluey paper or paint, the process is messy.  I would recommend covering the work surface with plastic wrap.  I happened to have a really large plastic bag, which I taped directly to the table.
  6. Glue.  I just used a big bottle of Elmer’s white glue from the hardware store, but I’m pretty sure wood glue would have worked as well, if not better.  It’s also more versatile and sturdy.
  7. Plastic Tray.  The next time you get take-out or have a plastic liner from inside some packaging, save it.  It makes a great wide tray for mixing water and glue or when your project is dry, it is also great for mixing paints.
  8. Paper Grocery Bags.  The “twist” with this process is that I used torn up grocery bags, rather than the traditional newspaper.  It turned out this was a really good idea for a number of reasons.  Paper bags are a cheap and plentiful material.  When thoroughly wet strips of paper bags are easy to place, mold and shape. However, the most important features of paper bags is that they hold glue and water really well and then dry quickly into a sturdy hard shell.  In fact, they form such a sturdy surface that I only had to do a single layer of paper mache around the entire hat.  This means that you can quickly put down a single layer of paper bag strips all over your cardboard form, wait a few hours for it to dry, and then get to work finishing the project.
  9. Paper or Newspaper.  While grocery bags work really well to cover your cardboard form, they can leave some small gaps where they overlap.  When I found gaps in the project, I simply used a few thin strips of the newsprint style paper to cover the holes and smooth out spots on the rough paper bag layer.
  10. Cup of Water and Paintbrushes.  An old mug is best and pile of cheap dollar store brushes is probably fine.
  11. Paints.  I prefer acrylic paints.  They are cheap, can be diluted with water, easy to mix, they stay wet long enough for you to blend, but not so long that you have to wait days for it to dry.  They also clean up well with water.

2. Step 2: Create Cardboard Form

Process for creating awesome hat

Process for creating awesome hat

The process I used to create the cardboard forms for the hats was pretty quick and easy.  I measured the circumference of my daughter’s head and then the distance from her ears to the top of her head.  Using these measurements, I cut out a strip of cardboard as tall as the distance from her ears to the top of her head and as wide as the circumference of her head – with a little extra to allow for overlap.

This slideshow requires JavaScript.

In the pictures above you can see the strip of cardboard cut out and then taped into a cylinder with the masking tape.

This slideshow requires JavaScript.

Cut strips into the cardboard cylinder, fold them down, and add enough masking tape to mold it into a hat-shape.

3. Step 3: Add Embellishments

This slideshow requires JavaScript.

A paper mache hat is way more interesting with some kind of embellishment, like ears, shark fins, wings, or whatever else.  Here I cut ear shapes out of cardboard, curved them slightly, taped them to hold the curve, and then taped them to the hat.  When I made the shark hat, I cut a long slit into the hat through the tape and inserted the shark fin through the underside of the hat.  Don’t be afraid to use a lot of tape.

4. Step 4: Prepare the Work Surface, Paper Strips, and Glue Mixture

This slideshow requires JavaScript.

Cover the work surface with plastic sheeting.  I used a big plastic bag from a helium balloon order from my daughter’s birthday.  However, a big garbage bag or plastic wrap would also work well.  Paper bags from the grocery store work really well – but there are too thick in places.  Tear off the handles and pull the paper bag apart at the seams.  You’ll probably need to discard some of the sections where the the paper bag is too thick to use.

Add some glue (I used about a tablespoon) and warm water (about a half cup or so) to the plastic pan.  It should look like milk or heavy cream once you’ve mixed it up.

This slideshow requires JavaScript.

Completely soak the strips of paper bag in the glue mixture.  They should be completely soaked all the way through until they’re nearly translucent.  Unlike paper mache with thin pieces of newspaper, you won’t need to put layers and layers of paper on the form – just one layer where the pieces overlap a little should work fine.  The excess glue from the strips of paper will soak into the cardboard and help make the entire structure sturdy.

5. Step 5: Set Model to Dry, Patch Holes with Paper

This slideshow requires JavaScript.

Since the cardboard helps soak up the water, the entire structure should dry relatively quickly.  I put the shark hat outside in the sun for a few hours and it was ready for painting.  Once the hat is dry (or dry enough), you’ll probably notice some holes and gaps from the paper bag strips.  Tear up some newsprint paper, soak those in the gluey mixture, and cover and smooth out any defects.  Once these pieces dry, the project will be ready to paint!

6. Step 6: Paint to Suit

This slideshow requires JavaScript.

The great thing about acrylic paints is that they are so easy to work with.  They dry really quickly, so you can paint one side of the model, work on the other side, and then come back to the first side to add details.  In any case, just paint the project to suit and you’re done!

Each hat went together really quickly.  I put the cardboard form together in about 15 minutes, covered it with the gluey paper bag strips over maybe 30 minutes, let it dry for several hours, and then paint it over the course of maybe an hour.

If you make your own paper mache hat (or other sculpture), let me know in the comments!

  1. And I use the word “film” loosely here []

Maker MBA

MBA

MBA

I’ve been investigating the possibility of trying to make a business out of making.1 This got me thinking about the best series and the best single post about making money out of making.  I got a lot out of these posts and I hope you will too:

  1. Photo courtesy of Poster Boy []
  2. Besides, no one makes pocket sized business school graduates, amirte? []

Upcycling Plastic Bags into Fabric

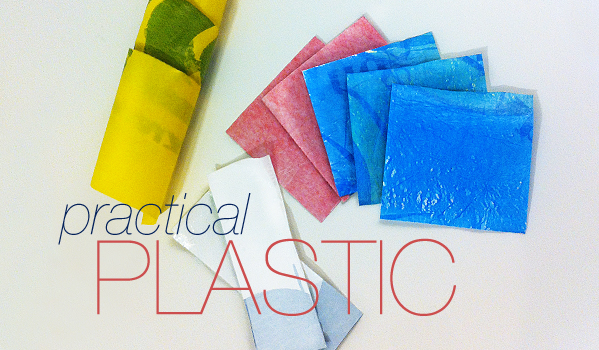
Releve Design - How to Fuse Plastic Bags

Releve Design – How to Fuse Plastic Bags

Last year was our family’s second time at the East Bay Mini Maker Faire.  October in Oakland tends to be a really rainy time – and the last few EBMMF’s are no exception.  The rain didn’t seem to dampen the crowds or diminish attendance, but it did make the experience a little more trying.  ((Don’t get me wrong – I love Maker Faire, even little ones.  But, the EBMMF has been a tough one to love.  There are small with tight quarters inside classrooms or open spaces outside – in the rain, there were long lines for the very few food options, and most of the vendors ran out of food really early on))

So, the point behind this post – I learned something really awesome I’ve been looking forward to putting to use.  Some ladies, unfortunately I don’t recall who, were teaching people how to fuse plastic bags into a fabric.  The basic process was shockingly easy – layered sheets cut from plastic shopping bags are ironed together between protective layers of paper.  This one site has a good detailed description of the process with lots of tips and suggestions.

I’d love to make a bag, backpack, project enclosures, package linings, maybe a kite, and/or parachute using this stuff.

Productivity Hack: Fight The Tab

Must resist tab!

Must resist tab!

One of the best things about modern browsers, the tab, is also the most destructive to my productivity.1 While I wouldn’t want to give up my tabs, I’ve found an awesome productivity hack to help me manage them.

1. The Problem

In short: cognitive clutter.  Visiting Twitter, a favorite blog, or some RSS feeds I’ll end up accumulating tabs in my web browser.  These tend to be things I know I may want to come back to later, but wasn’t ready to commit to bookmarking.

The problem with bookmarking a website is that either you have to spend a lot of time curating your bookmarks (into folders or hierarchies  or you just bookmark things willy-nilly.  What I needed was a way to save things I knew I wasn’t going to visit all the time – but which I might want to see again some day.  Since I was pretty sure I didn’t need a bookmark of these tabs, I would just leave them open (I’ll get to them some day and then close the tab).

Those open tabs created what I’m going to term cognitive clutter.  Whenever I looked at the top of the browser, all I saw were a line of icons – things I felt like I needed to read or do.2

I’m pretty sure this is exactly why Evernote has a business model – people want to save the things they see or think in a searchable fashion.

2. The Solution

The answer was e-mail.  While I don’t need MORE e-mail, my e-mail is already a repository for information that I want to keep because I may some day need or want to look back on it, but not a place where I went to refer to something all the time.

Now I send myself an e-mail with the subject “bookmarks” and then dump any links I’m not going to get to immediately and don’t warrant a bookmark.  To find something that I once saw, all I need to do is search for an e-mail with “bookmarks” in the subject line, from me, and then perhaps a word about the thing I’m trying to remember.

Really, I use this same system for a lot of other things as well.  I e-mail myself “todo” lists, “song” lists, and other lists.  Things I don’t need to remember, but don’t want to forget forever.

Anyhow, I hope this has been of some use to you.  :)

  1. Photo courtesy of Bill Selak []
  2. And, really, cognitive clutter sounds SO much better than “digital hoarder” []

Mechanical Movements and Design Inspirations

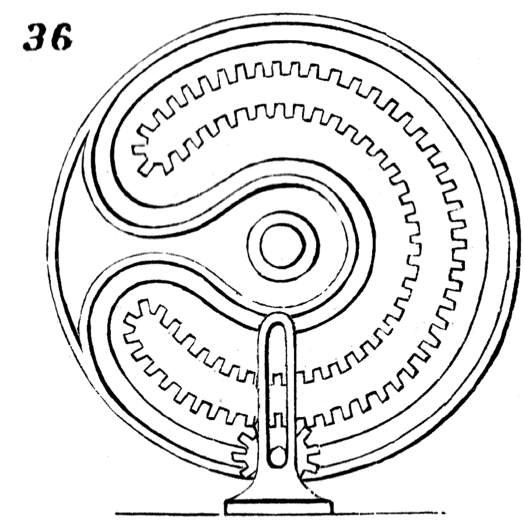
Mechanical Movement #36

Mechanical Movement #36

I’ve been working on a few different mechanical projects for a while now.  On the one hand, I’m severely limited by my complete and utter lack of mechanical engineering knowledge.  On the other hand, I’ve got a 3D printer so I can always arrive at a decent approximation through enough trial and error.

Of course, it’s not like it would kill me to actually learn something about the basics of mechanical engineering.  With a bit of googling, I found a page named, “Kinematic Models for Design” which links to a large number of historical texts relating to mechanical engineering – including works from Charles Babbage and Leonardo da Vinci.  I found two to be particularly useful – Mechanisms for Intermittent Motion, by John Bickford, 1972, and Five Hundred and Seven Mechanical Movements, by Henry Brown, 1871.

Last, but not least, I want to mention that a friend of mine, Rob Gisebert, told me about the website 507movements.com which is an online repository of the various movements from Brown’s book.  Even more interesting, many of these complex movements are are accompanied by animated versions of the drawings in the book.

New Google Groups to Discusss 3D Design Marketplaces

Looking towards the 3D future...

Looking towards the 3D future…

If you read this blog, I think you would be interested in joining a new Google Group for discussing emerging 3D design marketplaces.1 It was started a few days ago by the illustrious 3D designer and artist Emmett Lalish to start a dialog about designing in the brave new world of digital things.

I generally share my 3D designs freely on Thingiverse.  Some designs I don’t care much about, I share them in case someone else might fight them interesting or useful.  Some I don’t have much of a right to – a very slight variation / derivative of someone else’s work or a derivative of a work that walks the fine line that is “fair use” such as my OpenSCAD Voltron.  Some of my designs are things which I think I might be able to turn into something I could sell or be the start of a little business.

And some of my designs I want to share and am particularly proud of – such as my sushi set, pirate ship, and the printed parts for my PlotterBot.  For these very few designs, I choose a “non-commercial” license.  I’m so proud of these designs that I want to share them, and yet I feel that my creativity and hard work merits reward – especially if someone makes a profit off of them.

  1. Photo courtesy of David []

Who is tracking you? Collusion plugin for FireFox

If you want to see something that is simultaneously disturbing and ego-inflating, check out the Collusion plugin for FireFox. 1 A friend of mine e-mailed me the link to the LifeHacker post discussing it.  If you want to cut to the chase, the link to the Collusion plugin is right here.  After web surfing and blogging for about an hour, the little web it’s drawn so far is a little scary.


  1. In a perverse way, it is slightly ego-inflating because I’m clearly so very important to ALL these companies! []