Companion Robots and Maker Faire Season!

I’m super excited for Maker Faire Bay Area / Mare Island and Mini Maker Faire Rocklin.1  I’m not just excited to see everything, but to show all the things I’ve been working on for a while now.  It’s also time to pick up all the little dev boards I’ve somehow accumulated and see if I can make anything with them to show off.

  1. Project Boards
    1. Wemos D1 Mini.  A small insanely cheap (~$3?!) WiFi enabled dev board2 , which has 4MB onboard and can run Arduino.  I think it can also run MicroPython, but I haven’t tested this yet.
    2. Wemos 600 Pico.  An even smaller, even cheaper (~$2 when ordered from China) WiFi enabled dev board that runs… MicroPython?  I think??  I’m saying “I think” because I haven’t been able to get it to do anything yet.
      1. Since starting this blog post, I found a guide on installing MicroPython on Wemos boards that seems promising.
        1. Flashing MicroPython on an ESP8266
        2. https://github.com/espressif/esptool/tree/master
        3. Arguing with Python to let me use “esptool.py”
          1. esptool -p COM13 -c esp8266 flash_id
      2. As promising as that series of blog posts looked, I eventually scrapped the Wemos because it was just too much of a pain to get going with MicroPython.  I think I could have made it work, but for $7 I could also just use the Adafruit QtPy I already have.  The advantages of simply uploading code over a USB cable into a virtual drive just can’t be overstated.
    3. Other Boards
      1. I have a bad habit of picking up dev boards.  I’ve got several Adafruit QtPy’s, several Adafruit Trinkets, an Adafruit FX Sound Board, Raspberry Pi Pico (non-WiFi), various Digispark boards, a small handful of ATTiny85’s, and an even weirder assortment of VERY small programmable circuit boards (ISD1806B-COB) designed to go in greeting cards (just 6 seconds), etc.
  2. Companion Robot
    1. Background.
      1. I started this post at least a month ago when I only had a vague idea of what I wanted to make and even fewer skills.  After seeing my kid’s companion robot take shape, I wanted to get in on the action and make my own.  I decided to make a really small companion robot with just some LED’s, piezo, and small microcontroller unit.  I’d taken a stab at making a companion robot a few years ago, but set it aside for a variety of reasons and never went back.
      2. The idea for this new robot would be something a little less ambitious, make more use of NeoPixels than in prior projects3, with a little more interactivity, trying out some CircuitPython, and… let’s be real… more pizzazz!
    2. Idea:  Friendly Cloud/Vapor/Flame
      1. I still really like the copper-toned PLA I’ve been using since it has something of a steampunk flair to it.  I settled on repurposing a small plastic enclosure with a clear dome as the “body” for the robot.  I wanted it to look something like a small entrapped / captive / domesticated4 sentient cloud of vapor or perhaps flame held within a steampunk enclosure.
      2. As a very small, inexpensive board that could run either Arduino or CircuitPython, I decided on the Adafruit QtPy M0.  It could run NeoPixels, there were lots of cool guides on it, plenty of pinouts, and could definitely fit within the confines of my enclosure.
    3. Enclosure:
      1. I started the enclosure by trying to design and 3D print a part to mate with the clear plastic dome.  It took a few tries.

        This slideshow requires JavaScript.

      2. Once I had that, I extended the base so it could hold more electronics.  I could definitely have shoehorned everything into the dome, especially if I took up some of the space inside the dome, but even with an “elevated base” it was still plenty small and could use a battery pack rather than a rechargeable lipo.
      3. Once I had a good design for the enclosure, I tried to make it work with an existing 3xAAA battery pack.  In the process I yanked off the connector and ended up soldering the battery pack leads directly into the circuits.
    4. Internal Electronics
      1. I’m just not a great electrical engineer and am still copy/pasting from various guides, tinkering, changing bits of code, swapping out parts, and using “close enough” resistors.  Wiring up some LEDs or a piezo to a project isn’t very difficult – it’s some of the more fiddly bits.
      2. Piezo Element Speaker
        1. I wanted to use a piezo buzzer/speaker because they’re large and incredibly thin.  They’re not without their downsides.  The crystal wafer is also thin and a little fragile.  The piezo buzzer without additional electronics has the potential to act as a knock sensor and can generate a high voltage spike which can fry a board.  And, without additional electronics, the piezo just isn’t very loud.  There are some libraries for the Arduino that basically double the volume of a piezo by connecting it to two pins and then running each opposite of the other, doubling the voltage difference, but they only work for Arduino chips.5
        2. After searching for various ways to increase the sound of the piezo elements, I settled on trying to use the Adafruit piezo amp.  I bought two – and tried desoldering the terminal blocks.  This completely ruined one.  The other one worked great, but for the modest volume gain it was just too big in an already cramped enclosure.
        3. After searching around, I found some amplifier circuits using a small number of common parts.6
        4. Then I tried building an amplifier circuit using an NPN transistor.  After reviewing the datasheets for my NPN transistors (and PNP transistors), and breadboarding the circuit with resistors, I sketched it a few times, laid it down with copper tape, soldered it in place with SMD resistors, then pulled it off and placed it onto a piece of Kapton tape and put another piece on top – “laminating” it in place.
      3. Capacitive Touch
        1. Buttons are great and all, but with a capacitive touch pad, I could add metallic elements to my robot rather than a much bulkier button.  I bought a few brass upholstery tacks because they looked great – but they just would not accept molten solder.  I ended up cutting the prongs short with wire cutters, wrapping the stub with copper tape, then soldering the wires to the tape.  I’d also added a little piece of heat shrink tubing over the connection to help keep it together.  It’s been working well so far.
      4. LED Animations
        1. As we know from Phillip Burgess‘ incredible “power sipping NeoPixel” guide, we can conserve power and increase the impact of the LED’s by reducing the number of LED’s, keeping max brightness ~20% for a disproportionately large impact, running fewer LED’s at a time, and even running fewer colors at a time.  Between Phillip’s work, Todbot’s guide, and the specialized QtPy NeoPixel guide by Kattni Rembor, I was able to put together a few neat animations.
      5. Piezo Sounds
        1. I had a heck of time getting the piezo buzzer to do anything interesting.  Fortunately, with my kid helped convert the piano music for “Paint It Black” into tones for me.  I haven’t gotten all the note timings right, but I’m working on it!
  3. Future Modifications
    1. More Accessible Enclosure.  Right now the “lid” with a hole for the LED ring just sits on the enclosure with a light friction fit.  One idea is a hinged lid, either with a conventional hinge or perhaps a hidden swivel hinge.  The problem with that, of course, is it requires even more internal space.  Other ideas include a ring on top that screws down, holding the top down and in place.  I’m crap at designing screw threads, so I’ve avoided this.
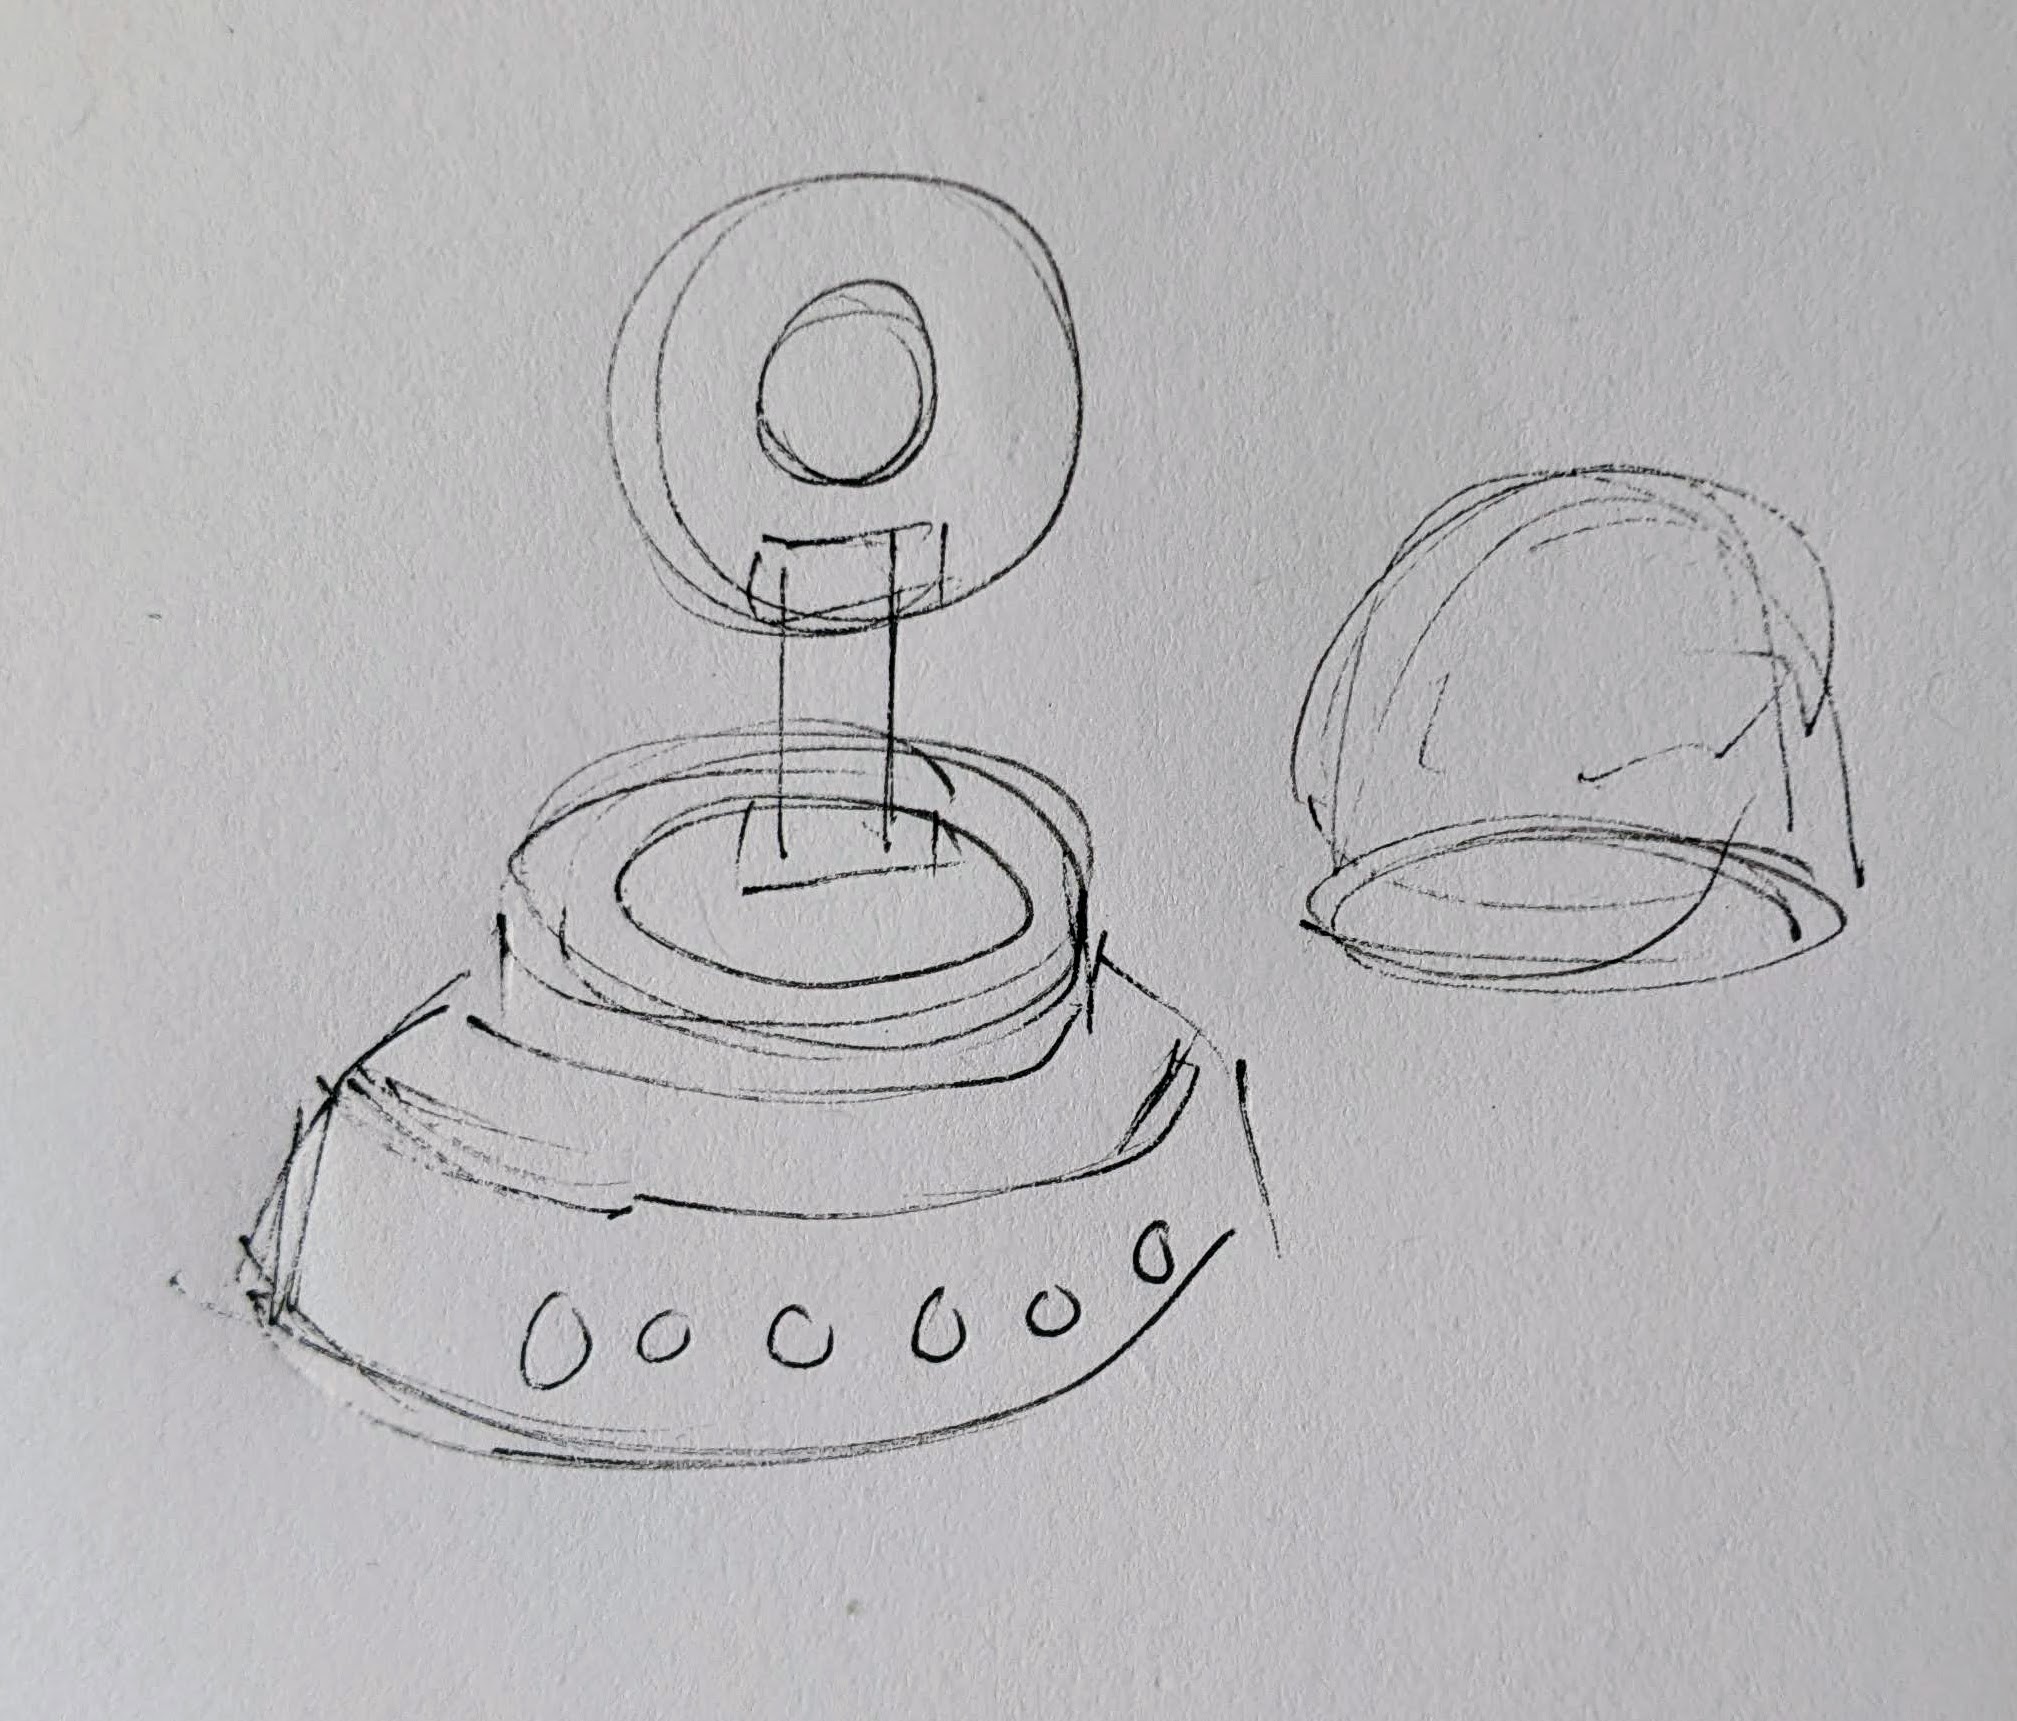
      Hinged lid for enclosure

      Hinged lid for enclosure

    2. Piezo Knocks.  Perhaps the next version will include some kind of tap / double tap / knock sensors using one or more piezo elements.
    3. Knobs.  There’s not a ton of room inside the enclosure, but by including a gear within a gear, I might be able to rotate part of the case and have it manipulate a potentiometer.
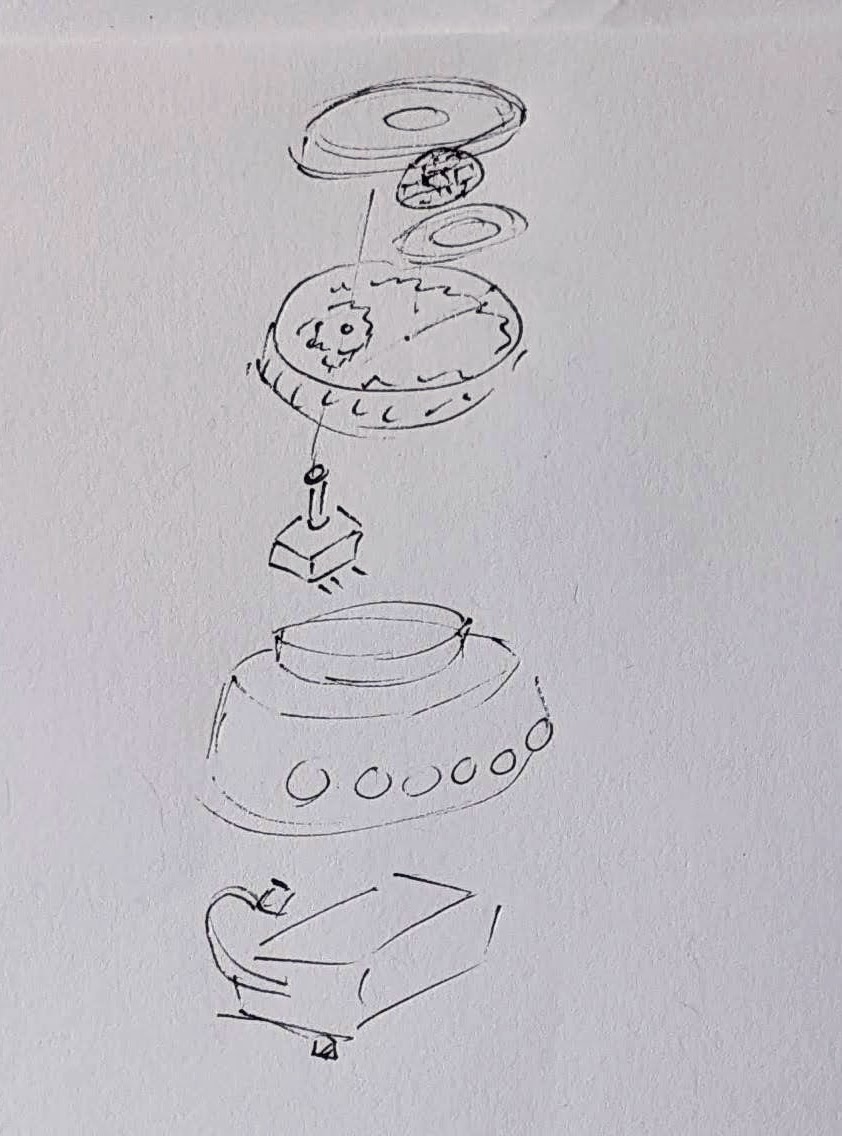
      Offset gear within gear, manipulating an off-center internal potentiometer

      Offset gear within gear, manipulating an off-center internal potentiometer

    4. Motors.  A robot that just flashes lights and makes a few beeps can still be pretty interesting.  However, I have some neat potential features that could be added with just one or two motors.  There are some interesting limitations with the current incarnation of this robot and using a QtPy.  I’ve only got 10 pinouts7 , 1 for NeoPixels, 1 for the piezo, 6 in use for the capacitive touch sensors, leaving 2 for other potential tasks.8  However, space is already tight so one or two micro servos would be a big space commitment.  I’ve seen some really tiny micro servos that might work, but I have no idea where to source them.  One silly idea is a “weapons system” using a spring loaded projectile activated by a very small servo.
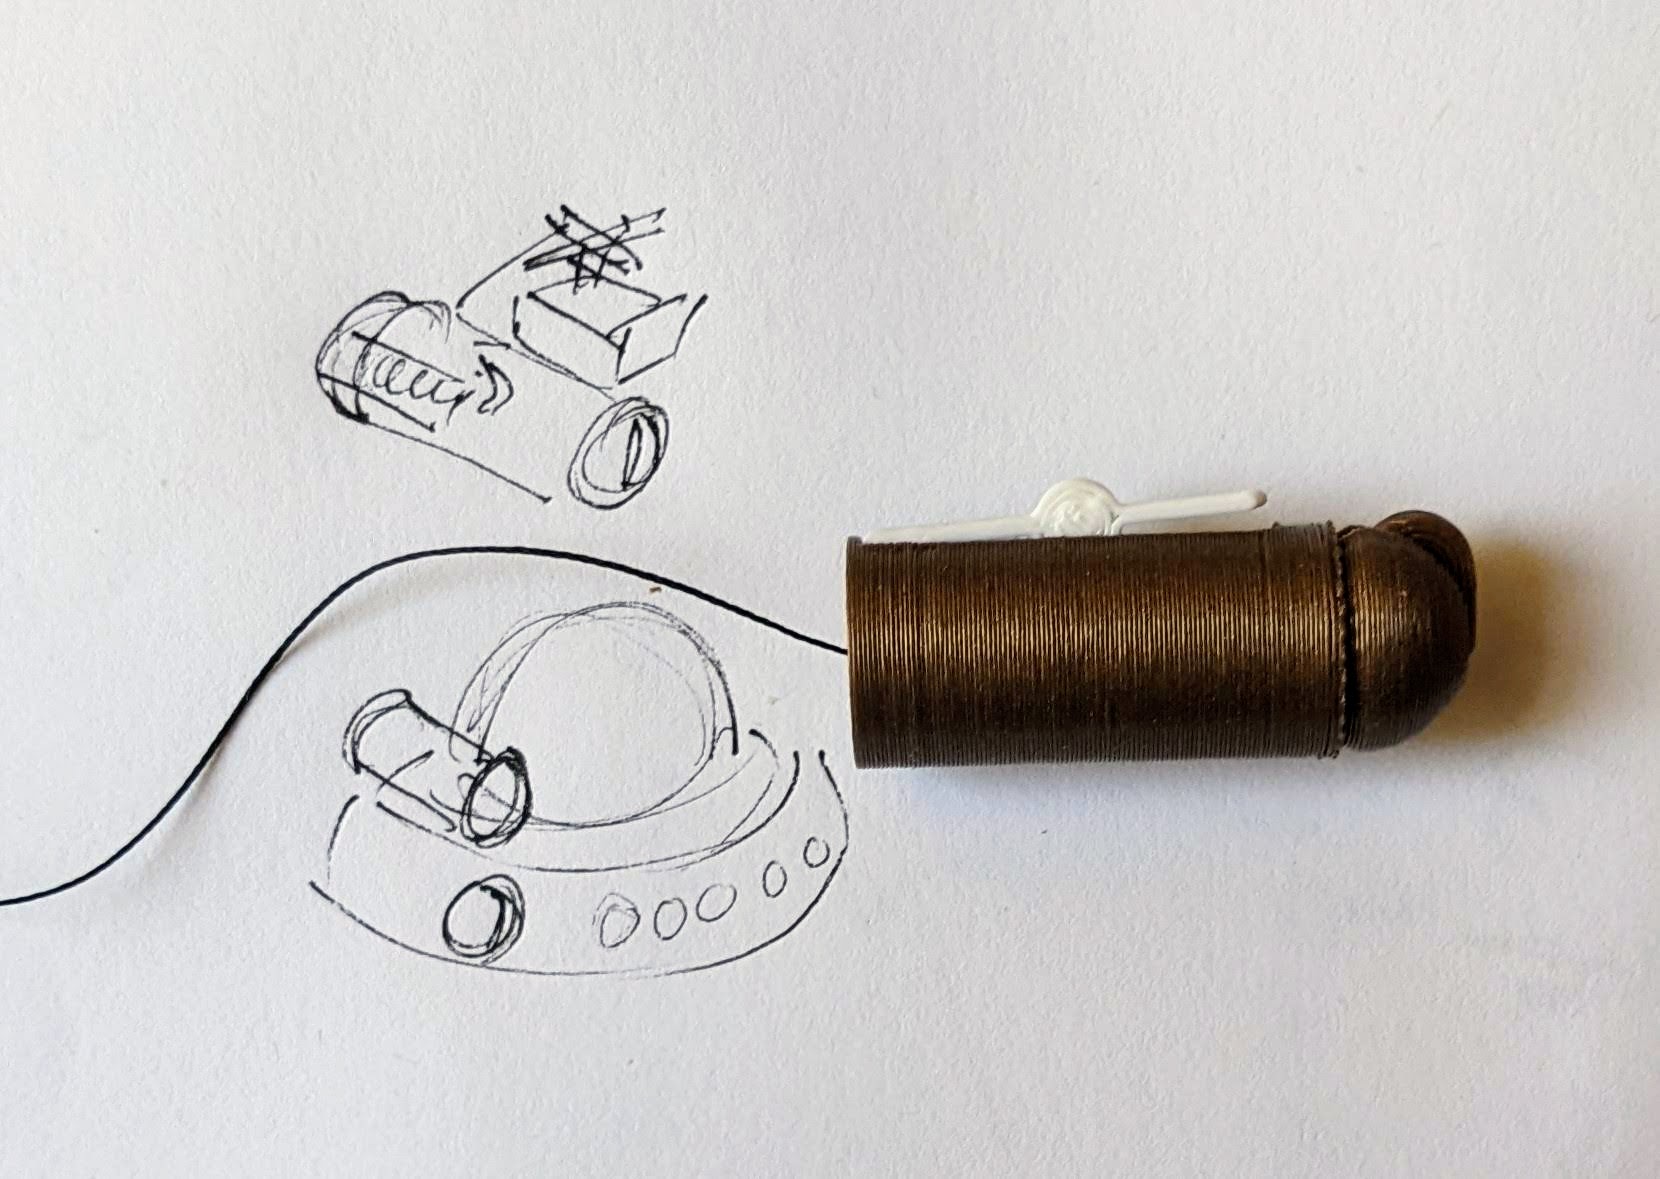
      A small spring loaded projectile launcher, actuated by a small servo

      A small spring loaded projectile launcher, actuated by a small servo

    5. Creating Tone Library.  The basic piezo tones are easy enough to play, but including the entire list of tones and the frequencies associated with them seems eat up the poor little QtPy’s memory.  I think compressing them into a library might be the way around this issue.
    6. Playing WAV files.  WAV files are bulky, but that’s the only sound file format a QtPy M0 can play.  However, with the extra 2MB from the SPI chip installed, this shouldn’t be a huge problem.  I used Audacity to mix the sound clip down to mono then to 22 KHz sample rate.  My preliminary tests worked – but it was incredibly quiet.  I haven’t run it through the audio amplifier yet, but I’m planning to.
    7. Sleep / Deep Sleep.  Ever since I swapped out the tiny LiPo for a 3xAAA battery pack, I’ve had a lot more battery life, so adding sleep / deep sleep functions haven’t been a priority.  However, this inclusion just couldn’t hurt.
  4. Other QtPy and CircuitPython Resources
    1. Adafruit’s QtPy CircuitPython PWM resource
    2. TodBot’s CircuitPython tricks
Companion Robots: Building Robot Friends
  1. Cephalopod Robot Friend, the story so far
  2. Cephalopod Robot Friend Progress
  3. CuttleBot Body and OpenSCAD Design Tips
  4. An Assembled CuttleBot Body
  5. Building the Monocle Top Hat Cat for #MicrobitVirtualConcert
  6. Companion Robots and Maker Faire Season!
  1. I just got a notice they’re no longer a “Mini”! []
  2. pinouts for my future reference []
  3. LED goggles and a Marvel Universe inspired set of “Infinity Knuckles” []
  4. OMG dome-sticated?! []
  5. This is just my very basic understanding of how it works.  I’m entirely positive this is far too simplified. []
  6. And one very long article about using a lot of parts []
  7. 12 if you want to count the onboard NeoPixel []
  8. Or 4… []

Maker Faire Application: Vacuum Forming Workshop

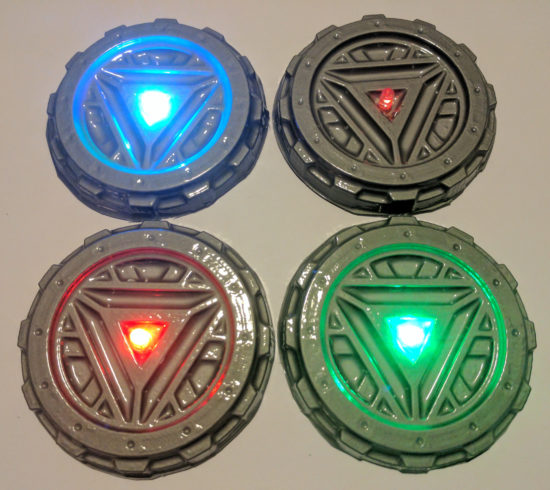
DIY Vacuum Formed Arc Reactors

DIY Vacuum Formed Arc Reactors

I’ve been making some notes as I work on my vacuum former and the proposed workshop for this year’s Bay Area Maker Faire.  Here’s some ideas and thoughts, in no particular order.12

  • Workshop Proposal
    • I’ve demonstrated my bucket vacuum former at my daughter’s school a few times – and it is always a huge hit.  The vacuum formed result looks like so much more than the product of very cheap and accessible materials.  Two years ago I put on a presentation at Maker Faire about how to build a vacuum former – and this year I want to try something even more ambitious.  Here’s the slideshow from 2017.

    • I want to do an entire workshop on how to build and operate a vacuum former – and then let people try to vacuum form their own objects.  One of my favorite things to vacuum form is an “Arc Reactor” and then augment it with an RGB flashing LED and a coin cell battery.  However, I think people would also enjoy making goggles and phone cases.  It takes about 30 seconds to heat up the plastic and just seconds to actually vacuum form a shape and let it cool down.

https://www.youtube.com/watch?v=9Prj04gPeLw

This slideshow requires JavaScript.

  • New Developments
    • Several months ago, just before Thanksgiving, our stovetop stopped working.  Yeah.  I know.  Talk about timing, right?  While we scrambled to get a new cooktop ordered, delivered, and installed, we also purchased an inexpensive hot plate from Amazon.  I had originally used an old hand-me-down large toaster oven to heat up the plastic, but wondered … is there a better way?  That toaster oven is huge and takes a long time to heat up.  This weekend I was delighted to learn the hot plate heats up very quickly, gets hot enough to soften the plastic, and works as a fantastic and compact replacement for the toaster oven.
      • There are a few caveats to using the hot plate.
        • The heat was more localized, causing the center of the plastic to become thinner and saggier.  When the plastic plates were heated in the toaster oven, they tended to heat more evenly.  Perhaps if I tried a lower heat setting or held the plastic plate higher, this might be mitigated.
        • It’s hard to get a sense of the plastic without actually watching it get soft and wobbly.  This is especially true when the plate is inside the toaster oven – there’s only room enough for one or two people to see what’s going on.  However, with the hot plate, there’s no enclosure3 to obscure an audience view.
        • I was somewhat paranoid about letting the plastic droop down onto the heating element.  I’m pretty sure it would smelled horrible, made a huge mess, been nearly impossible to clean, and made the hot plate unsuitable for any other purposes.  I may try to locate a cheap hot plate from a second hand / thrift store / goodwill to take to Maker Faire.  Though, now I’m also wondering if it might be possible to repurpose an old coffee maker, grill, griddle, or panini press, into the heater for this project.  Maybe if I covered the heating element in aluminum foil first, that would protect the surface?
      • The power switch of the vacuum head / bucket head is conveniently placed right on top for normal operation.  For unusual operations such as this, where the vacuum is upside down, it is decidedly inconvenient.  I used a power strip with a switch which made it much easier to operate the vacuum.  I think I may invest in a dedicated foot switch extension cord for this project.  It’s a very cheap upgrade that would make it a lot easier to do.
    • I also have a prior post discussing some additional ideas on how to improve this process.
  • Accessories / Things to Bring to Maker Faire.  There are SO many little parts to a project – forget any one little thing and you’re going to be making a last minute trip to the hardware store.4 Here’s a few lists of things I will need:
    • Parts
      • Bucket
      • Vacuum head
      • Hot plate
      • Power strip or foot switch extension cord
      • One or two wire coat hangers
      • 6x Small to medium binder clips
      • Wooden dowel (1x 6″ riser, 3x 8″ legs)
      • 3D printed parts (1x plug, 2x riser caps, 3x leg holders, 3x feet)
      • Hot glue
    • Building Tools
      • Drill (for drilling holes)
      • Ruler and / or paper grid
      • Chisels
      • Hacksaw (cutting the wooden dowels)
      • Hot glue gun
      • Sharpie
    • Presentation Tools
      • Heat gun
      • Scissors (cutting plastic plates)
      • Old socks (DIY oven mitts)
    • Materials
      • Examples of plastic plates in various stages of the process
      • Examples of items made, also in various stages of production
    • Consumables
      • Plastic plates
      • Tape (clear packing tape works well)
      • Fishing line
      • Elastic cord
      • Pens (metallic permanent markers)
      • LED’s
      • Batteries
      • Maybe stickers to give away?
Bucket Vacuum Former
  1. How to Make a Vacuum Former
  2. How to Use a Vacuum Former
  3. Vacuum Former – Things to Form
  4. Vacuum Former – Ideas to Improve Vacuum Former
  5. Maker Faire 2017 How to Make a Vacuum Former Presentation Slides
  6. Vacuum Forming an Arc Reactor
  7. Maker Faire Application: Vacuum Forming Workshop
  1. As always, as much to inform you, dear reader, as to order my own thinking and jot things down before I forget them []
  2. DOCUMENT!!! []
  3. And, now that I think of it, it may be the enclosure which causes more even heating… []
  4. Not that this is a bad thing.  But, I’d rather have to go because I want to do go []

Maker Faire 2018 – 3D Printing for Home Improvement

If you’re here checking out my site after my presentation, you can check out all the slides from my presentation above. If you’d like more information about the individual things in the slides, I posted an update for most of them over on Hackaday. If you’ve still got some questions, feel free to leave a comment below, hit me up on twitter, email me directly.

Practical 3D Printing for Everyone

This slideshow requires JavaScript.

3D printing can sometimes get a bad rap.  At first people are excited by the possibilities, then after printing a few trinkets the novelty can really start to wear off.  However, our 3D printers have become an absolutely critical part of our home repairs.

We have printed literally dozens and dozens of things in and around our home.  As of the time I’m editing this post, we’re up to 82 things so far!  The vast majority of these are completely bespoke custom creations, with a few things that are printed from Thingiverse or mashups with things from Thingiverse.

My proposed Maker Faire Bay Area 2018 Presentation submission is for a presentation that discusses:

  1. Practical things everyone can 3D print for their own home
    1. Repairs
    2. Improvements
    3. Other useful things
  2. 3D Printing with Family and Friends
    1. Specifying a purpose (“Honey, can you make me something that…”)
    2. Specifying dimensions and purpose (“I need something that will…”)
    3. Simple techniques for creating replacement parts (using good reference photos, GIMP, Inkscape, and OpenSCAD)
  3. 3D Design with Family and Friends
    1. Photographs
    2. Sketches
    3. TinkerCAD and Sketchup
Default Series Title

Hacked Tap Light Enclosure

Just seeing a post and pile of code about a project isn’t always that interesting.  The nifty thing about this project is also one of the problems.  They’re cosmetically identical – so you can only tell which one you’ve got by activating it.  :)

I couldn’t be more pleased with the way this project came out.  I basically took my daughter’s setup based off an Adafruit Circuit Playground, built a more specialized (and louder!) version into a breadboard using an Adafruit Trinket, and then ported the entire design into an ATTiny85.  The only thing I would change about it would be to add a socket for the ATTiny to make it easier to modify down the line.

Default Series Title

Maker Faire 2018: The Wandering Artists – 15 Second Drawings

This slideshow requires JavaScript.

My daughter and I are super excited about our Maker Faire project this year.  Last year she brought her “15 Second Drawing Challenge” project to Benicia Mini Maker Faire and Maker Faire Bay Area.

Her project was so much fun that when she invited me to team up and take the show on the road, I jumped at the chance.  This year we’re bringing a new and improved timer/buzzer hacked together from a cheap tap-light and a pop-up table/booth.

We’re taking photos of the build process and will post them along with tutorials, parts lists, and source code for everything.  Here’s everything you need to know to build a cheap timer-buzzer out of a tap light.

Default Series Title

Maker Faire 2017 How to Make a Vacuum Former Presentation Slides


In case you missed me at Maker Faire Bay Area 2017 this year, here are my slides!  Don’t forget to check out all the blog posts with even more detail and pictures.  You can find all the links, including to the 3D printable files, below.

Bucket Vacuum Former
  1. How to Make a Vacuum Former
  2. How to Use a Vacuum Former
  3. Vacuum Former – Things to Form
  4. Vacuum Former – Ideas to Improve Vacuum Former
  5. Maker Faire 2017 How to Make a Vacuum Former Presentation Slides
  6. Vacuum Forming an Arc Reactor
  7. Maker Faire Application: Vacuum Forming Workshop

I swear I’m not jealous!

Green eyed monster

Green eyed monster

Before Maker Faire announced the official call for Makers, I had already downloaded and printed out the “call for Makers” information from the most recent Maker Faire and handwritten all of my responses in the form – just so I would be ready to submit my application to be a Maker this year. ((Photo courtesy of @Doug88888)) I ended up submitting my application within just a few hours of the call going out.

After I had submitted my application, my daughter wanted to submit her own application.  Of course I was happy to help her, so I helped her prepare an application and submitted it on her behalf a little after 11pm on March 14, 2013, just under the wire.

Today Maker Faire sent her an acceptance!  My daughter is going to be exhibiting at Maker Faire Bay Area 2013!

.

..

I just hope my acceptance letter comes soon.  :/  Senior year all over again…

How should I give out two Free Maker Faire Bay Area tickets?

Geek Chic @ Maker FaireGeek Chic @ Maker Faire

After we already bought weekend passes for the Maker Faire Bay Area, I happened to have been given an two day pass tickets. (( Photo Credit: Steve Jurvetson via Compfight))

Now, what is the best way to give these out?  I think I’d like to do a design challenge, but I haven’t decided.  Do you have any suggestions?