
Why do DrawBots draw on walls?

A wall crawler - on the floor
A wall crawler – on the floor

A commenter named Ellison left a deceptively simple question on my first post in this DrawBot series.1

Ellison:  Why do it on a wall? Why not a drawing robot that draws on a large piece of paper on the ground? I think you’ll get better results from that.

I think there are a lot of good reasons reasons – some aesthetic, some technical, some practical – for having a DrawBot that draws on walls (or other vertical surfaces).

Aesthetically, I really like having a DrawBot that draws on vertical surfaces.  When placed in the room or an adjoining room, I can watch it scritch-scratching away at an enormous drawing.  In much the same way a snail’s meandering trail can be captivating, a DrawBot working out a TSP single-line-art drawing turns an apparently meaningless series of turns into a mass of scrawls that resolve into a work of art as soon as you take a step back. 2

Technically, the DrawBot is an exceedingly simple device.  You could build it out of little more than Arduino, a motorshield, two motors, string, a pen, and whatever you might have lying around.  Much of these pieces you could probably even scavenge for or salvage from other things.  In fact, only the Arduino and motorshield are things you wouldn’t be able to dumpster dive for.  The device works by moving the two motors in concert, such that by varying the length of string reeled in or out by a given motor is used to move the pen in an XY plane.  The one “ingredient” not listed in the preceding sentences is, of course, gravity.  If the point where the two strings meet at the pen did not hang essentially straight down, pulled constantly by gravity, the pen could go just about anywhere.  If you were to place a normally vertical standing DrawBot flat on the ground, the pen would no longer be pulled away from the two motors – and would just flop onto the drawing surface.  Now, you could add two more motors and more string and build a gondola that holds the pen vertically on a flat DrawBot surface while writing a lot more code…  However, I am doubtful you would get any more precision out of such a setup.  And, if you really require precision – an XY plotter might be more to your liking.  An XY plotter build would require lots of hardware (belts and metal rods or metal extrusions), more tools, and be big and heavy, and limited in the size of its drawing capabilities.  It would also be capable of really amazing speeds.  That’s a lot of extra materials, work, custom coding, and loss of drawing capacity for a dubious trade off in

As a matter of practicality, the simplicity of design and materials means this is an extremely cheap project.  An Arduino is only going to set you back about $30 and clones are as cheap as $15.  I picked up two of Adafruit’s motor shields on sale for $12 each, but they’re normally $20.  Screws and/or bolts, beaded cord or wire or fishing line, a big piece of wood or mounting things directly to a wall, 3D printed spools or just leftover spools from thread, a 3D printed gondola or a lasercut gondola or even a big red binder clip.3  Seriously, if you’ve got about $35 and some free time, you’re basically half way to building an awesome fun robot that can make arbitrarily large drawings.  If you’re willing to buy all the materials, it probably won’t cost you more than $150.

I’ll say it again – a Polargraph DrawBot is a quick, cheap, easy, entertaining, and useful robotics project – especially for beginners.  Outside of my 3D printers, this was easily the most rewarding DIY project I’ve ever attempted.  The results are astoundingly disproportionately awesome to the amount of time, energy, skill, and money used to achieve them.

Seriously, what are you waiting for?!  Go order a Polargraph kit from Sandy Noble45 or source the parts from Adafruit6 .7  Or, if you’re going to scavenge and/or source some parts, check out my Polargraph DrawBot parts/shopping lists.

Default Series Title
  1. Photo courtesy of The Kozy Shack [↩]
  2. And, I wonder – if you could map all snails in the world at the same time, could they be working in concert on an enormous message?  Perhaps something along the lines of “So long, and thanks for all the fish”? [↩]
  3. I just love that Polargraph video by Sandy Noble.  To see binder clip in action, skip ahead to 0:27. [↩]
  4. Whose open source work I use for my own DrawBot [↩]
  5. The next time he’s in stock, you better pull the trigger – he runs out of stock SUPER fast [↩]
  6. Where I bought most of my parts! [↩]
  7. And, why not tell them I sent you too? [↩]

DrawBot Practice Tip: A Watched Pot

Winter Is Coming
Winter Is Coming

It’s been a while since I’ve talked about my DrawBot.  In large part that’s because it’s been a while since I’ve even used my DrawBot.

After a little dry spell of making, I’ve been rocking the DrawBot.  Previously I had been drawing things about the size of a sheet of paper.  While this meant the drawings were relatively quick, it also meant I could just print whatever I wanted directly onto a 8.5″x11″ sheet of paper using my traditional black and white laser printer.  This weekend I’ve cranked out a few drawings – but on a much grander scale.  Several months ago I picked up a large roll of white paper at the local office supply store – and I’ve since created about three 3-foot tall drawings.  One is a House Stark direwolf from Game of Thrones, one is an R2D2 commissioned by my daughter, and a third is an R2D2 and C3PO also at the request for my daughter.1

The last one is particularly cool.  I’ll take a picture for you later.  There’s a lot of room for improvement with the gondola.  The current setup is… let’s say… non-optimal.  I’m working on an improved version.

Where was I?  Oh yes!  The watched pot!

I’m using Sandy Noble’s seriously awesome Polargraph software to power my DrawBot.  I’m rocking version 0.182 and noticed that when I’ve got the program on the “Input” tab it draws about 42 points a minute and when it’s on the “Queue” tab it draws about 96 points a minute when working on SVG / vector graphic.  The cool part about drawing with the “Input” tab open is that you can see the drawing in progress.  So, when I’m watching the drawing, it runs slower.

Default Series Title
  1. She likes R2D2. [↩]
  2. He’s continually working on the software and is already out with v.0.19! [↩]

Two new DrawBot links! And an update!

Thanks to Dan Royer, I’ve added two new links to my really huge list of DrawBots.  That brings the total to 28 drawing robots! 1  That’s a really incredible number of people who have shared documentation for their hard work.  Six months ago I wouldn’t have guessed there were more than a dozen such projects on the ‘net.  Clearly, the six-month-younger version of me is a fool.  Thank god I know better, eh?

So, Dan appears to be using an Arduino + Adafruit motor shield, much like I’m using, but he’s running custom Gcode software with a Java GUI.  It looks like Dan was wrestling with the problem of how to maximize drawing speed without causing his ‘bot to hang over the serial connection.  If he gets some decent speed out of his setup, I’m definitely going to give that a shot.

Unfortunately, I haven’t done much in the way of robotic drawings lately.  After experimenting with TSP drawings and finding out they would take an excruciatingly long time I set my drawbot aside for a little while.  Fortunately, Sandy’s been on the case and has worked out a new firmware version that might prove to be twice as fast as the one I’m currently using.

Default Series Title
  1. <queue thunder and lightning> 28! 28 drawing robots!  Ah-ha-ha-ha-ha! [↩]

Speedier DrawBot Drawings

When using my DrawBot to draw pixelated drawings (versus TSP or vectors)1 I don’t really notice a pause from the machine between each pixel.  It takes a few seconds to shade each pixel, then it moves to the next spot and starts over again.  However, when trying to draw TSP art I discovered that the time spent shading a picture obscured the amount of lag time that occurred between each drawing point!  As I tried to draw a TSP portrait of my family I found it was taking about 3 seconds between each little point – which translated to a VERY VERY long time for a VERY small drawing.

When I asked Sandy about this, he suggested that this lag would be eliminated by drawing from an SD card.

Sandy’s current setup, which allows for computer free printing, consists of an Arduino Mega 2560 R32 , a MicroSD card breakout board3 , and an Adafruit Motor Shield4 .  Thus, the electronics setup would cost about $100 if you were starting from scratch, or another $80 if you have been following along at home and have a similar setup to mine.  Apparently the problem is you can’t just shove a MicroSD card into an Arduino.  If you try to add one to an Arduino, then the card shield will end up taking up the pins necessary to use the Motor Shield.  Since the Arduino Mega has a lot of extra pins, some of those can be used towards accessing the MicroSD card.

However, I thought I had seen an Arduino that had a MicroSD slot on board. 5  When I searched around Adafruit, I found this Ethernet Shield R3 with MicroSD connector6 .  Not only does this little shield fit my existing Arduino Uno, have a MicroSD slot, and have an Ethernet port, but it also has input pins so that it can be stacked!  This makes me then wonder…  Could I just pop this $45 board between my Arduino Uno and Motor Shield, add some software and get cooking?  I have to admit, the idea of spending $45 more, rather than $80 more for a Mega and MicroSD breakout board appeals to me.  I suppose there’s the added benefit that I might be able to run a REALLY long ethernet cable to the ‘bot if I so desired since it would have a built-in ethernet port on the Ethernet Shield.

Now, I’m the first to admit that I know next to nothing at all about programming Arduinos or fiddling with such things.  I’m just a fair hand at slavishly following some other person’s excellent directions.  Please do me a favor and let me know whether you think adding this Ethernet shield between my Uno and the Motor Shield will or will not work.

Default Series Title
  1. Actually, the TSP drawings ARE vector graphics… [↩]
  2. $65 at Adafruit [↩]
  3. $15 at Adafruit [↩]
  4. $20 at Adafruit [↩]
  5. Spoiler alert: I was wrong [↩]
  6. $45 at Adafruit [↩]

TSP FTW!

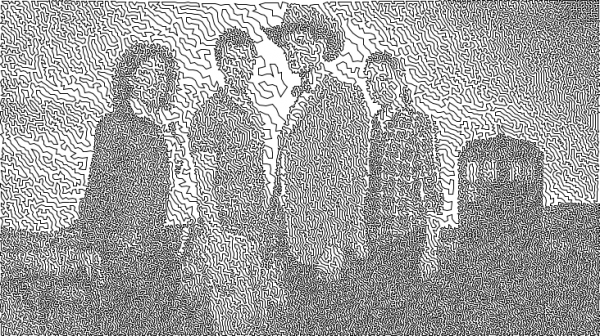
Doctor Who Season 6 TSP Single Line Drawing

I have been having SO MUCH FUN with traveling salesman problem / single line art!  I can’t wait to draw some of these with my DrawBot!

And, really, how much more perfect could this project get?  It’s a TSP nerdy math single line art drawing of my favorite sci-fi show for drawing with a robot I built using printed parts from my 3D printing robot. 1 2 3

Default Series Title
  1. Oh, nirvana! [↩]
  2. I suppose the only way to make it better is to draw the image on a pizza using spray cheese. [↩]
  3. Actually, I take that back.  Ew. [↩]

Restarting a Stalled DrawBot Drawing

Over the last two days or so I’ve drawn the largest picture yet with my DrawBot.  I started it on Friday night and, with numerous pauses and other misadventures, finished it this morning.  The drawing is roughly 12″ x 18″ or so. 1  With no apparent rhyme or reason the drawing would pause numerous times.  I would estimate about 25 or so.  Also, the pen had a difficult time towards the end.  I believe this was in part due to the angle of the pen on the drawing surface and the quantity of the ink left.  As of this morning I was still using version 1.1.2, but I’m installing version 1.1.4 right now. 2

Here are some additional thoughts:

  • In an earlier post I had mentioned I was having stalling problems while drawing.  Sandy asked whether I was able to change serial ports to a different one and back again.  The answer is “sort of.”
  • When there’s a stall, here’s what I do:
    1. Click “SETUP->SERIAL PORT…“
    2. Click on some other serial port other than the one I’ve been using
    3. Disconnect and then immediately reconnect the USB cable from the computer
    4. Click on the original serial port I had been using
    5. As soon as the Drawbot reestablishes a connection with the Polargraph controller software, it starts drawing right where it left off
  • I used to export a copy of the existing queue before doing all of this, and while it is still a very good idea, it doesn’t seem necessary.
  • This exact process has worked several times in a row without a problem.  Interestingly, step number 3 above3 is critical.  If I exclude this step the program crashes.
  • For this drawing I used a Pilot Precise Rolling Ball V5, extra fine tip, black.  I had used a red pen of the same make for a prior drawing and it worked reasonably well.
  • I’m in the process of designing a new pen gondola.  I think something that can angle the pen downwards would help the pen apply ink to the page.
  • Interestingly, I noticed after about 80% of the drawing was done the pen had a little bit of paper fuzz on it.  Once I removed this, the pen seemed to work a lot better.
  • The pen stopped drawing completely after about 85% of the drawing over all.  This was a bit disappointing.  However, since I was drawing from the top right to the bottom left and the version of the Polargraph controller I was using allows you to specify which area to start from, I just restarted the same drawing from the bottom right corner and ended up with a very satisfactory result.

In other words, it’s a nice day to start again.

Default Series Title
  1. I rolled it up and gave it to a friend before I thought to take a photogram [↩]
  2. One of Sandy’s latest posts suggests there’s a 1.1.5 available, but I couldn’t find it. [↩]
  3. The disconnect and reconnection of the USB cable from the computer [↩]

DrawBot – Another Successful(ish) Drawing!, and an Update

A summer rose from our garden, drawn by a freakin’ narcoleptic robot

The drawings are getting better with a little tinkering.  I’ve designed, printed, and installed new motor spools.  These have a thicker central core, so they should be able to collect more monofilament line with slightly less distortion.  I’ve made a few changes to the setup.  Dialing in the starting area and calibrating the starting home point were pretty important.

I’m still having a little trouble with the robot occasionally stalling out.  Although, now I think it is a symptom of the controller software rather than a problem with the Arduino.  There’s no set time after printing, no set time after running the program, or other noticeable precipitating event which seems to cause this problem.  At some point during a drawing, the controller software just reports the Arduino as being busy. 1  Here’s what I do to correct the problem:

  1. Disconnect the USB cable from the laptop
  2. Click “Queue->Export Queue” and save as a text document
  3. Open the text document and perform the following operation
    1. Select, copy, paste the first line above the first line – so now you see a duplicate.  So, for instance in the image above I had to copy “C05,2700,2370,10,247,END” and paste this above the same line – so that it would look like the robot would be receiving the same command twice.
    2. Edit the line “C05,2700,2370,10,247,END” so that I change the command to start with “C09” and delete the last two numbers and the “END” statement, so that it now looks like, “C09,2700,2370,END”
    3. Save the text document with these changes
  4. Shut down/close the controller software
  5. Restart the controller software
  6. Reconnect the USB cable to the laptop
  7. Click “Setup->Serial Port…” and click on the serial port of choice
  8. Click “Queue->Import Queue” and choose the text document I just edited
  9. Start the queue again!

The reason I suspect this is a controller software and not an Arduino firmware issue is that I don’t have to reset the Arduino at any point – just disconnect the USB, restart the controller software, reconnect the USB, and start the queue again.  I would think that if there were a problem with the Arduino firmware, I would need to reset the board itself.

The lowest you can specify as the “grid size”2 in the Polargraph controller software is “20,” but you can use a smaller value by editing the “polargraph.properties.txt” file.  In the image above I used a grid size of “10” which appears to cover 1/4 the area of the size 20 pixel.  That image probably took about five hours to draw.  I think it looks really nice.  The image above seems to have been distorted by my scanner.  It came out almost perfectly square with a slight warp to the top right corner. 3  You can see some bare spots in the image above – that’s where the pen, for whatever reason, just wasn’t making a mark on the paper.  I suspect it has something to do with that region of the paper being either slightly smoother and/or slightly more depressed than the surrounding regions.  Otherwise, there would be no reason why the next row would have a similar defect nearby.

I’ve noticed the controller software also tends to forget the machine width, page size, and page position.  I’ve updated this, saved it, and uploaded it to the Arduino several times, but it doesn’t seem to stick past a reboot of the software.  Ultimately, these are very minor concerns and really just something to be aware of when I’m printing.  I just about couldn’t be happier with the controlling software.  That piece of software plus the Arduino sketch together have basically made this a nearly effortless project.  Besides a hiccup soldering a circuit board wrong, this entire project went together very quickly and yielded almost immediately gratifying results.

I’ve done several drawings in the last few days.  I’m still having trouble getting a perfectly rectangular and centered result.  I may have to adjust the Y offsets and double-check my machine measurements.  I still also notice a slight upwards warp to a drawing in the top right corner.  But, I’m looking forward to additional experimentation – it’s all part of the adventure!

Last, but certainly not least, I want to make it clear that Sandy Noble’s software for the Polargraph/drawbot is really really great.  That I am having some minor calibration troubles speaks more to my incompetence than Sandy’s excellent program.  So, a great big thank-you to Sandy for his continued hard work on this software!

Default Series Title
  1. Aren’t we all, Arduino?  Aren’t we all? [↩]
  2. What is essentially the pixel size [↩]
  3. This one was commissioned at the request of my daughter and now hangs in her room. [↩]

DrawBot – Onwards and Upwards!

A few thoughts about operating a DrawBot, in semi-organized fashion:

  • Vertical Surface Drawing.  There is an interesting tension in the design of a vertical line-driven drawing robot.  As the drawing surface orientation approaches horizontal, the easier time the robot will have using a standard pen to draw, the more difficult it will be to control the drawing component via a line system, the  greater the weight that would be required,1 a greater weight puts a greater stress on the line and the motor and has some effect on the responsiveness of the drawing component, and the more the weights on the drawing component would be in contact with the drawing surface – possibly causing smudges.  The closer the surface is to vertical, the easier it will be to actually operate as a line-driven robot, the less weight required,2 but the more difficult it would be to have a pressure from the drawing component on the drawing surface.
  • Robot Portability.  Right now my robot is quite portable – and, of course, there are costs and benefits associated with this.  Right now I’m limited to the “size” of my robot at 2’x4′ since that’s the size of the piece of plywood I bought and on which the motors are mounted.  However, it is very easy to just move the robot by putting the plywood in a different location in the house.
  • Robot Location.  This is, in some senses, the flip side to robot portability.  I’d love to put the ‘bot up on the wall and draw something really really huge.  I don’t see that happening until I’m more comfortable running the robot, have found a better pen/paper combination, and – perhaps most importantly – figured out how to run the robot wirelessly or off an SD card.
  • Drawing To-Do’s:  Ideally, I’d like to put the robot to work drawing something on an epic scale.  A high resolution photograph of earth, moon, or pretty much anything from NASA.  Perhaps a map of middle earth, the 100 acre woods, or the Princess Bride story?  A photograph of the world at night, with highlights of the world’s electricity consumption.  Or, some of the INSANELY awesome super sweet posters from various XKCD comics.
Default Series Title
  1. This my theory, anyhow.  My reasoning is that as the surface approaches horizontal, the more weight you’d need to pull at the drawing component because more of the force of the weight would be absorbed directly by the drawing surface itself – along with some friction as it passes over the surface as well. [↩]
  2. See reasoning regarding weight above. [↩]
Test