MOAR WHISTLES

The other day I was trolling Thingiverse1 looking for the best quick-printing model to show off DIY 3D printing to 3rd graders.

After a bit of searching, I found it: the simple whistle.

There are whistles a-plenty on Thingiverse, but the DarkAlchemist remix of the muddtt Emergency Whistle is easily the smallest by far.  I compared these two against several other options, tossing all of them into my slicing program and doing a visual double-check for good measure.

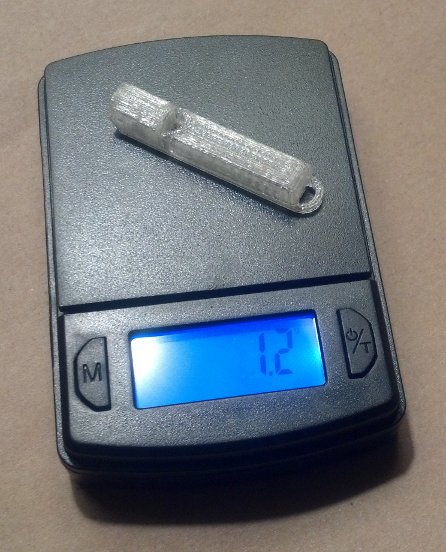
Emergency whistle, clear PLA as designed by DarkAlchemist

Emergency whistle in clear PLA as designed by DarkAlchemist

There’s no doubt about it – these are SMALL.  They are less than 2.7cc2 and weigh about 1.2 grams a piece.  Best of all, they print very quickly.  Printing just one whistle with 0.2mm thick layers, including printer warm up time, took 7 minutes.  10 whistles at once?  Only 47 minutes.

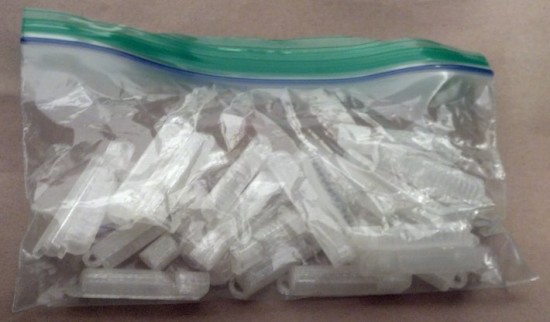
Naturally, I took the opportunity to print up 20 more whistles.  This is what 30 whistles looks like:

THIRTY emergency whistles, clear PLA as designed by DarkAlchemist

THIRTY emergency whistles in clear PLA

That got me thinking – could they be even smaller?!

Turns out they can.  I redesigned the whistle in OpenSCAD with a hacky thickness adjustment.  In doing so I discovered that the existing designs on Thingiverse used 1mm thick walls.  A one-millimeter wall thickness is pretty good if you have a small part that needs to be sturdy – but a bit of an overkill if you just need a small functional quick-printing thing.  By removing the little loop at the end of the whistle and creating a wide hole in the top of the whistle, I reduced a fair bit of plastic while keeping the ability to be connected to a cord.

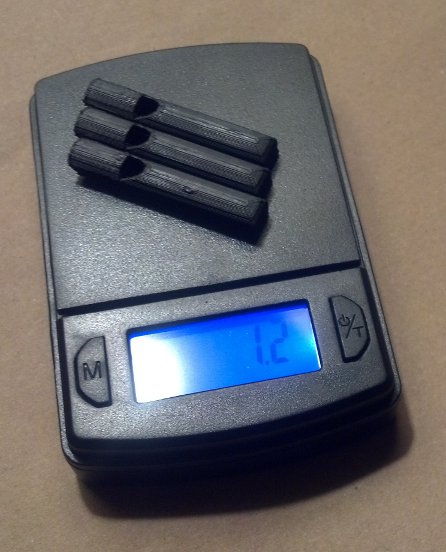
I exported a version with 0.5mm thick walls and a copy with 0.4mm thick walls.  Printed at 0.2mm layers the 0.5mm thick walled version was functional – but the 0.4mm thick walled version was not.  The layers didn’t fully overlap, causing small gaps which prevented the whistle from making any noise.  Printing the 0.4mm thick walled version at 0.1mm layers3 turned out both beautiful and functional.  Best of all, they’re 1/3 the weight of the 1mm version!4

Three emergency whistle in black ABS as remixed by MakerBlock

Three emergency whistle in black ABS as remixed by MakerBlock

A friend recently suggested that his plastic filament supplier of choice ships via Amazon Prime for a ridiculously low $22-23 per kilogram.  Ignoring the amortized cost of the robot and electricity, I could make about 2,500 whistles for about 0.88 cents a piece!

Now, just imagine the following scene.  I take my HedonismBot ((As my MakerBot Replicator 1 Dual Extruder is named)) to my daughter’s third grade class.  I show off the robot printing a single whistle and call a random student up to test it.  Thank you, a pat on the head, and the whistle is yours!  Golly, I guess that’s the whole show everyone.  Oh, you want a whistle too?  Check under your desk.  You get a whistle!  You get a whistle!  You get a whistle!  You ALL GET WHISTLES!  What’s that?  Your sister is in second grade?  It just so happens it only took 80 hours of printing to make enough whistles for every damn student, teacher, and student teacher in the school.

MOAR WHISTLES.

  1. and Youmagine!  I can’t forget you Erik and Team Ultimaker! []
  2. Close approximate dimensions: 8mm x 8mm x 42mm []
  3. Basically, twice the vertical “resolution” []
  4. Just 0.4g each?! []

Was This Made on a MakerBot?!

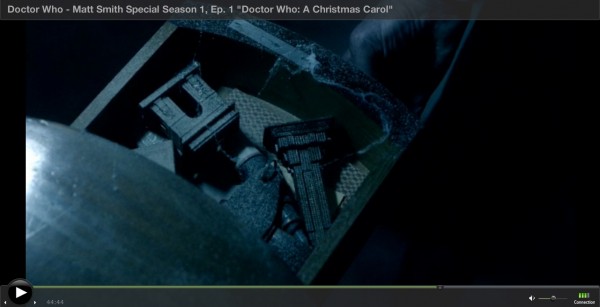
Doctor Who Christmas Special 2010: A Christmas Carol

Doctor Who Christmas Special 2010: A Christmas Carol

Netflix has nearly all of the “new series” Doctor Who episodes available for online streaming.  As a guy who grew up watching the show, having it on tap is just plain awesome.  Unfortunately, Netflix does not carry one my favorite episodes ever – the Doctor Who Christmas Special from 2010 entitled, “A Christmas Carol.”  You can’t get the DVD from Netflix and you can’t watch it online.

Thankfully, Empire State Building.  The screenshot appears above.

So, what do you think?  Does that Empires State Building look as if it was printed on a 3D printer?

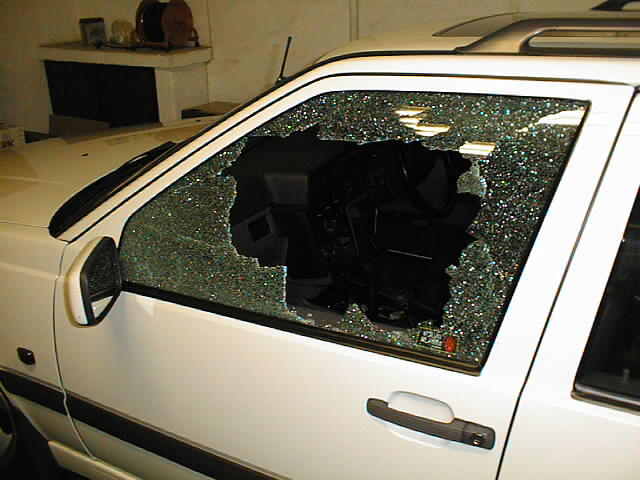
Robbed. During broad daylight. At work. By the mailroom guys.

At least, this is what it felt like

At least, this is what it felt like

I was waiting to surprise you with this, but last week I bought a MakerBot and had it shipped to work. 1

Well, it arrived today… and really… I suppose this is my own fault… but… you see… I was just robbed.

One of the best and most irreplaceable things about getting an awesome new robot is unboxing it.  The mailroom guys at work, well intentioned though they are, opened my MakerBot box.  I suppose I could have told them in advance that the robot should be arriving soon and to be on the look out for it.

Nevertheless!  Tonight I have to clear a space in my Robot Work Area so that I can add my Replicator to the line of robot workers.  But what to name it?  My MakerBot Cupcake CNC is named “Bender,” the MakerBot Thing-O-Matic is named “Flexo.”  There are so many Futurama robots to choose from.

I suppose I could chose a non-Futurama name for my new robot, but it really seems such a shame to break a streak.

  1. Photo courtesy of Timo Newton-Syms []
  2. She’s also a bending unit! []

Maker Faire 2012 – Torn

So, here’s the thing.  I really really really like the Maker Faire.  I’m just torn as to the most optimal way to experience it.

First of all, I love taking my wife and daughter to Maker Faire.  Getting to see so many amazing things all in one place – and getting to see them all through my daughter’s eyes is absolutely incredible.  I could spend the entire weekend just walking from exhibit to exhibit with them.

Second of all, I love talking to Makers and finding out what they do, what they love to make, and how they learned all the things they did to get there.  I honestly feel smarter just for having gone each year.1

Third, helping man the MakerBot table last year was AWESOME!  There was basically a constant crush of people coming by all super interested in what a MakerBot was and what it could be used to make.  Everyone was friendly, polite, interested, and had such excellent and insightful questions.  Imagine a place where you got to just hang out with people you like2 and people would stop by and ask you to tell them all about your favorite hobby.  Chances are you could talk endlessly and cheerfully about it.

Fourth, I’ve build and made some things over the last year of which I’m kind of proud.  While all the actual innovation credit must go to Sandy Noble and others, I like to think that my little drawing robot is uniquely mine.  It would be a lot of fun to put it up and have it draw a huge picture all weekend.  It would be even better with a time lapse video playing nearby.

So, what’s a maker to do?  Experience Maker Faire with the family, spend my time talking to makers, man the MakerBot table, or put something on display myself?  In all likelihood I’ll probably hit the Maker Faire before the family is up, help MakerBot, catch up with the family. 3

Oh, Natalie Imbruglia, only you know how I feel!

  1. Admittedly, it wouldn’t take much for that to happen []
  2. Such as the MakerBot crew! []
  3. But, it would also be cool to set up my drawbot in the background. []

DrawBot – The Assembly, Part VI

Okay!  It was a good day for drawing robots in the MakerBlock household!  Here’s what we got accomplished:

  • I designed some motor mounts, printed one… and had to redesign it.  Gotta love having a 3D printer!
  • I selected a long shallow pine box to hold the motors and electronics.
  • I tried a variety of sound insulating materials.  Bubble wrap was easily the most effective, but least practical.  I settled on some corrugated cardboard.  I placed some cardboard between the motor and the motor mount and between the motor mount and the wood.
  • I soldered some longer wires to the motor leads.
  • I drilled holes in the wooden box, attached some monofilament line to the spools, put the spools on the motors, mounted the motors, ran the leads to the Arduino, powered it up… and it moved around and stuff!

As this point the next step is to mount it on the wall and actually attempt to draw stuff.  Yay!

Default Series Title

DrawBot – The Assembly, Part V

I just finished soldering the Adafruit Motor Shield … this time with all the bits in the correct places.  The Adafruit directions are incredibly detailed, I just soldered a few parts in wrong like an idiot last time. This time it went much smoother and much quicker.

I just wired up the two steppers, plugged in the power adapter, plugged in the USB cable, uploaded the Polargraph firmware, fired up the Polargraph software, and asked it to try to draw something.  And it started to twitch away in what appeared to be a meaningful pattern!!!

Huzzah!

Now… for sleep!

Default Series Title

DrawBot – The Delivery, Part VI

Okay, that was FAST.  I ordered the Adafruit motor shield from MakerBot on 1/26/2012 just after midnight and it arrived today a little after noon.  That’s about two-and-a-half days for the parts to be packed, shipped, make it from Brooklyn, NY to Oakland, CA and then to my secret robot lair in the Bay Area.1  While at the hardware store today I picked up some small eyescrews and new tips for my soldering iron.  Tonight I’ll assemble the board.  Again.

I can honestly say that I was mightily tempted to purchase a third motor shield along with this second.  However, as I have no immediate designs on a secondary DrawBot2 I’m not ready to admit the possibility of defeat.  In the words of Kongorilla, I will not fail.3

Actually, now that I’ve got these new soldering iron tips, I stand a chance of being able to desolder the mis-soldered parts. 4 My old soldering tips were old, tarnished, and somewhat crusty.  The soldering tip I’m replacing is all of these things plus it is in the rough shape of a flathead screwdriver. 56

Wish me luck!

Default Series Title
    • Delivered, January 28, 2012, 12:09 pm, [SECRET ROBOT LAIR], CA [9XXXX]
    • Out for Delivery, January 28, 2012, 8:14 am, [SECRET ROBOT LAIR], CA [9XXXX]
    • Sorting Complete, January 28, 2012, 8:04 am, [SECRET ROBOT LAIR], CA [9XXXX]
    • Arrival at Post Office, January 28, 2012, 5:17 am, [SECRET ROBOT LAIR], CA [9XXXX]
    • Depart USPS Sort Facility, January 28, 2012, OAKLAND, CA 94615
    • Processed through USPS Sort Facility, January 28, 2012, 2:26 am, OAKLAND, CA 94615
    • Electronic Shipping Info Received, January 27, 2012
    • Depart USPS Sort Facility, January 27, 2012, BETHPAGE, NY 11714
    • Processed at USPS Origin Sort Facility, January 26, 2012, 11:40 pm, BETHPAGE, NY 11714
    • Accepted at USPS Origin Sort Facility, January 26, 2012, 10:25 pm, BROOKLYN, NY 11217

    []

  1. I’ll want to make sure I can get this first one sorted before I try []
  2. Actually, that’s a little more bravado than I’m really capable of.  If I fail, I fail – I just have no intention of ending at failure.  Rather, I’m committing to repeated failures … until I end up with a working DrawBot []
  3. Gah, why didn’t I pick up a desoldering pump while I was out today?! []
  4. And chipped, at that. []
  5. It’s really quite a miracle I got the first board soldered at all in the first place. []

DrawBot – The Face Palm

Okay.  Confession time.

First, if you have been following along at home, I’m sorry – I have been leading you on a fool’s quest.  I did warn you at the outset I had no idea what the hell I was doing.  Carry on, don’t worry about me, I’ll go down with this ship.

Second, here’s the actual confession.  Despite amazingly detailed directions from Adafruit’s website, I soldered the Adafruit Motor/Stepper/Servo Shield for Arduino Kit v1.0 totally totally wrong.  I soldered one of the L293D chips into the location for the 74HC595N integrated circuit chip.  And I wondered why it didn’t work.

This would completely explain why the shield made a pop noise, why there was the smell of burning, and why one of the L293D chips (which was not an L293D chip AT ALL) was getting super hot while the other was just fine.  I just tried to de-solder the L293D chip, but that’s not going to work.  I’ve de-soldered a part before, but surface mount parts are MUCH easier to de-solder. 1

At this point my choices are, from wisest to most foolish:

  1. Abandon all hope and prayer of building a DrawBot.  Power down my laptop, unplug my router, take the battery out of my phone and stop inflicting my delirium on the world.
  2. Order another Adafruit Motor/Stepper/Servo Shield for Arduino Kit v1.0, and start again. 2
  3. Keep trying to de-solder that damned L293D chip, hope and pray I didn’t destroy both the L293D and the 74HC595N, then try to put them in their proper spots.
  4. Damn the torpedoes!  Full speed ahead!  Who cares that one sad little chip refuses to act like another sad little chip?!  More power and brute force will carry the day.  If I cannot make this work, I will ride this project straight into HELL!  Mu-ah-ha-ha!!!3

I’ve taken a stab at desoldering the L293D, but it just isn’t working.  The solder isn’t really coming out.  Even if it does, I’m going to have one hellishly ugly board by the end of the day – and I’ve probably already burned out the L293D and/or the 74HC595N.

At this point, I think I’ll opt for #2 above.

Default Series Title
  1. Score one for SMT, eh? []
  2. It’s a nice day to start again. []
  3. The world is ours, let’s use it up. []