
The other day I was trolling Thingiverse1 looking for the best quick-printing model to show off DIY 3D printing to 3rd graders.
After a bit of searching, I found it: the simple whistle.
There are whistles a-plenty on Thingiverse, but the DarkAlchemist remix of the muddtt Emergency Whistle is easily the smallest by far. I compared these two against several other options, tossing all of them into my slicing program and doing a visual double-check for good measure.
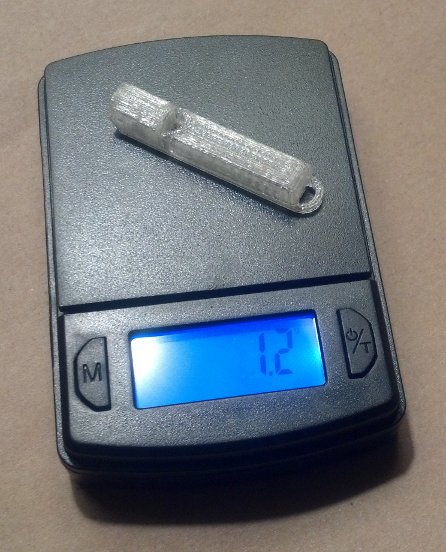
There’s no doubt about it – these are SMALL. They are less than 2.7cc2 and weigh about 1.2 grams a piece. Best of all, they print very quickly. Printing just one whistle with 0.2mm thick layers, including printer warm up time, took 7 minutes. 10 whistles at once? Only 47 minutes.
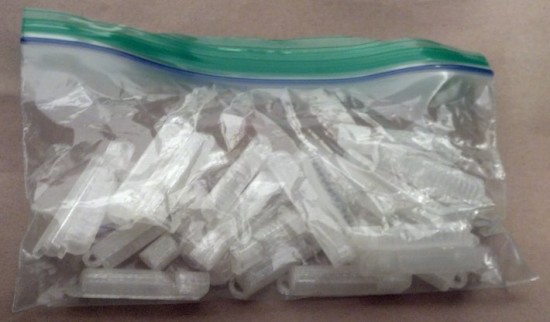
Naturally, I took the opportunity to print up 20 more whistles. This is what 30 whistles looks like:
That got me thinking – could they be even smaller?!
Turns out they can. I redesigned the whistle in OpenSCAD with a hacky thickness adjustment. In doing so I discovered that the existing designs on Thingiverse used 1mm thick walls. A one-millimeter wall thickness is pretty good if you have a small part that needs to be sturdy – but a bit of an overkill if you just need a small functional quick-printing thing. By removing the little loop at the end of the whistle and creating a wide hole in the top of the whistle, I reduced a fair bit of plastic while keeping the ability to be connected to a cord.
I exported a version with 0.5mm thick walls and a copy with 0.4mm thick walls. Printed at 0.2mm layers the 0.5mm thick walled version was functional – but the 0.4mm thick walled version was not. The layers didn’t fully overlap, causing small gaps which prevented the whistle from making any noise. Printing the 0.4mm thick walled version at 0.1mm layers3 turned out both beautiful and functional. Best of all, they’re 1/3 the weight of the 1mm version!4

A friend recently suggested that his plastic filament supplier of choice ships via Amazon Prime for a ridiculously low $22-23 per kilogram. Ignoring the amortized cost of the robot and electricity, I could make about 2,500 whistles for about 0.88 cents a piece!
Now, just imagine the following scene. I take my HedonismBot ((As my MakerBot Replicator 1 Dual Extruder is named)) to my daughter’s third grade class. I show off the robot printing a single whistle and call a random student up to test it. Thank you, a pat on the head, and the whistle is yours! Golly, I guess that’s the whole show everyone. Oh, you want a whistle too? Check under your desk. You get a whistle! You get a whistle! You get a whistle! You ALL GET WHISTLES! What’s that? Your sister is in second grade? It just so happens it only took 80 hours of printing to make enough whistles for every damn student, teacher, and student teacher in the school.
Loudest 3D Printed Whistle
