DrawBot – Drawing Success(ish)!!!

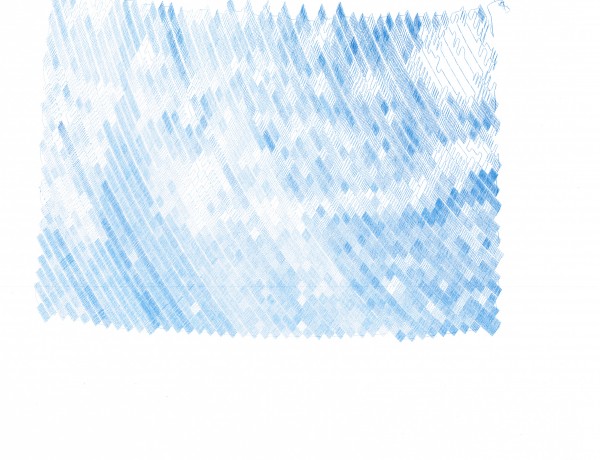
Starry Night by Van Gogh, drawn by a freakin’ narcoleptic robot

Starry Night by Van Gogh, drawn by a freakin’ narcoleptic robot

I think that turned out rather well!!!  If you look closely at the area circled in red in the next picture, you’ll see where there is a discontinuity in the line.  You may have to look at the large version to really see where this happens.
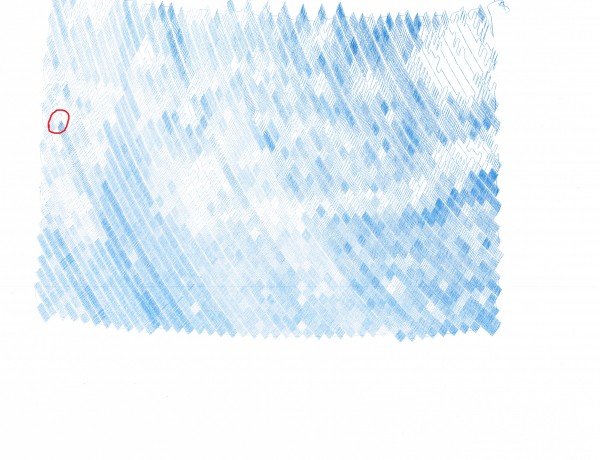
Starry Night by Van Gogh, drawn by a freakin’ narcoleptic robot, with the error circled

Starry Night by Van Gogh, drawn by a freakin’ narcoleptic robot, with the error circled

I suspect that my attempt to fix the stalled drawing probably did not have a role to play in the robot drawing off the top edge of the paper.  I think that is my fault for badly centering the paper on the robot.  Let’s see it again, without the red circle, with the original image overlaid.
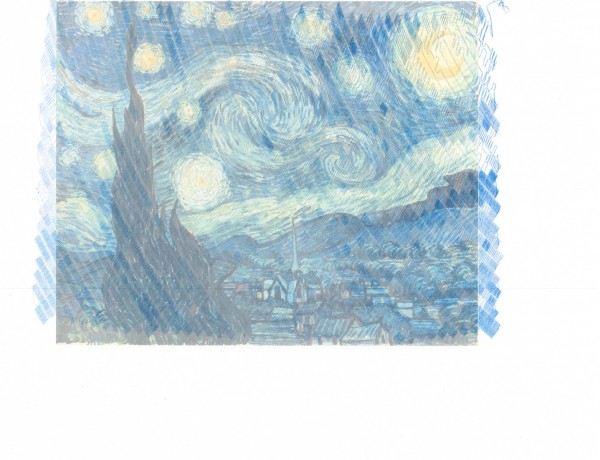
Starry Night by Van Gogh, drawn by a freakin’ robot with narcolepsy, overlaid the subject image

Starry Night by Van Gogh, drawn by a freakin’ robot with narcolepsy, overlaid the subject image

There is clearly some calibration and whatnot to be done, but I’m still amazingly pleased with the results.  As much as I’ve blogged about drawing robots, the entire process from assembling parts ordered online to having a machine that actually draws stuff has been amazingly painless.  Based on the image above, it looks like I need to:

  • Adjust the aspect ratio, so that the image isn’t made too wide by the drawing process.  I suspect this has something to do with the “Setup->Machine Width” setting.  That was the setting that caused the drawing to be unnaturally narrow.
  • Adjust the amount of line that is unspooled in the center of the drawing.  I suspect this has something to do with the “Setup->MM per Rev” setting.  I have nothing upon which to base this suspicion except that my feeling is the robot is spooling out too little line.  I suspect that if I tell it that the spool is slightly smaller (closer to 47 than the 50 I’m using now) I would end up with a better result.
Default Series Title

DrawBot – Calibration

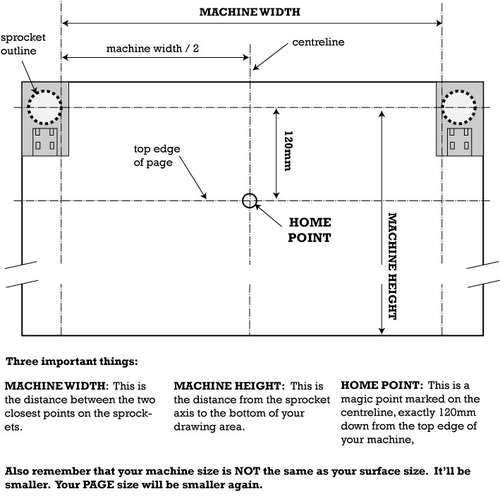
Polargraph Calibration by Sandy Noble

Polargraph Calibration by Sandy Noble

Calibrating my DrawBot was apparently important to its operation.  Who knew?!  If you’re following along at home, you’ll definitely want to check out Sandy Noble’s instructible on Polargraph calibration.  I’ll put my settings here, but they probably won’t be that helpful to you unless you’re using the same exact equipment and hardware as I am.

  • Setup->MM per Rev = 50
    • Based on the actual spool center diameter, this should be 47.  But, with some line wound onto the spool, it should be more like 54.  So, of course, I chose something that was neither.
  • Setup->Steps Per Rev = 400
  • Setup->Machine Width = 844
    • Although the “Machine Width” is defined by Sandy as “The distance between the two closest points on the sprockets,” I used a different figure.1  Since my machine uses spools, rather than sprockets, and the spools are unwound on the far side of the spool, I measured from the far edge of the spool’s core the the other far edge of the other spool’s core.  I figure this is probably the best measurement of the width of the line available to the machine.
  • Setup->Machine Height = 848
    • This is a relatively arbitrary specification given that my spools have about four times as much filament than I could use in my current configuration.  I intended this to be 844, but must have typed it in wrong.  :)
  • Setup->Page Width = 216
    • Rounded up from 215.9, which is 8.5 inches converted to millimeters.
  • Setup->Page Height = 279
    • Rounded from 279.4, which is 11 inches converted to millimeters.
  • Setup->Pen Tip Size = 0.12
    • With my 2’x4’x0.5″ board covered in butcher paper, I’ve marked out on the paper the locations of the various important lines for my machine.
Default Series Title
  1. Heaven forbid I do something normal, right? []

DrawBot – Why are you crying?

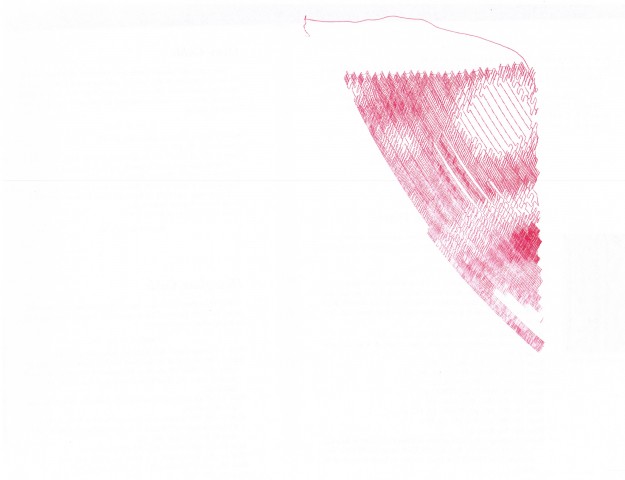
Starry Night by Van Gogh, drawn by a freakin’ robot with ADD

Starry Night by Van Gogh, drawn by a freakin’ robot with ADD

After about half an hour I noticed my drawing robot was not making the low scritchy scratchy humming drawing noise.  I’ve started the drawing again…  It looked like it should have been working, the controller software indicated it was still connected, the command queue was still loaded, the Arduino + Motor Shield were still lit up, but it just wasn’t moving.

In retrospect, I should just have hit the reset button on the Arduino.  I think that would have made it pick up with the last command.  But, then I wouldn’t have the lovely picture above to show you!

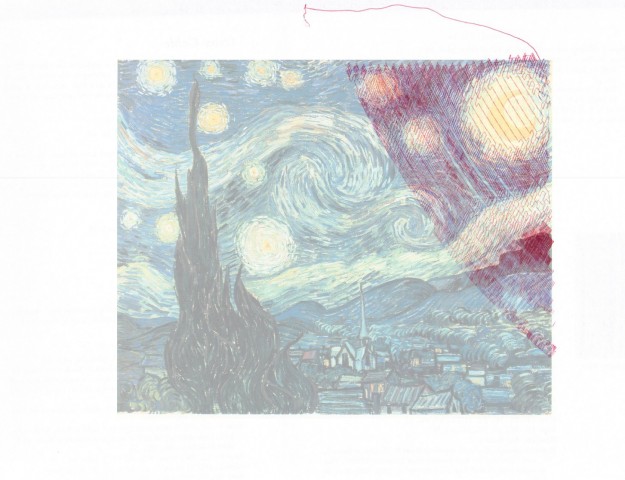
Actually, I’m really really happy with the drawing quality.  Check out what it looks like when overlaid the subject image:

Starry Night by Van Gogh, drawn by a freakin’ robot with ADD, overlaid the subject image

Starry Night by Van Gogh, drawn by a freakin’ robot with ADD, overlaid the subject image

Default Series Title

ProfileMaker update

I’ve made a few slight modifications to ProfileMaker.

First, after testing it seems that the apparent optimal W/T is approximately 1.67 or so.  Using this value for target W/T setting has lead to my cleanest and most sturdy prints.  Admittedly, I haven’t done proper science-testing to determine the optimal value – but I do not believe it could be far off.  Thus, I’ve removed this setting option and ProfileMaker will calculate the optimal thread width based upon a W/T value of 1.667 and whatever layer thickness you choose.

Secondly, I’ve removed the automated profile creation system.  Not many people seemed to be using this and this feature gets quickly outdated a new versions of ReplicatorG are released.  While the five critical settings provided by ProfileMaker have been unaffected by recent changes to ReplicatorG’s Skeinforge engine, lots of the other settings have been juggled around.  Skeinforge is too much of a moving target for me to try to keep up.  Ideally, you’ll find a good set of profile settings you like and will still be interested in using ProfileMaker to adjust the five critical settings.

It is my hope that by making these minor changes everyone will have an easier time using ProfileMaker and get better results.

Please let me know what you think!

ProfileMaker: More than 209 profiles and 58 people served!

More than 58 people have generated profiles with ProfileMaker1 !

Seriously, you need to stop printing calibration cubes and fiddling with Skeinforge.  Find out more than 58 people have discovered and start using ProfileMaker to create your Skeinforge profiles.  You can either manually enter the values provided by ProfileMaker into Skeinforge or have it e-mail you a ready-to-slice Skeinforge profile.

Always wanted to try printing at 0.25mm per layer or with 1.75mm filament or in PLA?  Your ‘bot can do it.

  1. Powered by SCIENCE! []

I would like to thank my agent…

…the Hollywood foreign press…

Actually, huge thanks to Dave Durant for the math and answering questions, Renosis for exhaustive testing and feedback.  Thanks also to all of the other beta testers of whom there are too many to name.  Um, they’re playing the music,…  uh, uh, Honey – we did it!  Um…  Free Tibet!  and… um…  I’m King of the World1 !!!

In seriousness, since the launch of the first ProfileMaker v1.0 less than a week ago there have been 152 profile settings generated and the beta testers generated 270 profile settings through ProfileMaker v2.0.  Version 2.0 incorporates many of the things mentioned in the recent poll. 2  Here are some of those improvements:

  • ABS as well as PLA
  • Works with 1.75 and 3mm or any filament diameter you choose
  • Ability to change the feedrate, the mysterious gear swell, and gear diameter

I’ve already begun work on ProfileMaker 3.0.  If you want to help as a beta tester, or get the math involved, or want to help kick the tires of the user interface please drop me a line or leave a comment.

  1. of web based 3D printing calculators that solve for flowrate for stepper extruders []
  2. Still active as of right now – but get your votes in if you want to let your voice be heard []

Creating an Online Profileinator

I’m always juggling multiple projects – that seems to be the mark of a Maker and/or a Maker with ADD. 1  I’m looking to tinker with a clockwork spider, an open source disc shooter, possibly an open source shooter compatible with Nerf darts, and now…  I’d like to create a web app that aids in the calculation of good profile settings.

I’ve downloaded a bunch of different Thing-O-Matic, Cupcake, PWM and RMP calculators off of Thingiverse and am tinkering with them to get a better understanding of how they run these calculations. 2  Once I understand these, I’d like to make a very simple front end for these calculations.

If you have a good idea of how these things work, please leave a comment or shoot me an e-mail through the contact form.  Thanks!

  1. Which, in my experience, might just be a redundant statement []
  2. I’ve put out the call to Dave Durant to help me get a better grasp on these calculations… []

New favorite test object?

The low profile whistle.

Not sure if it came out well?  If it whistles, it came out fine.  If it doesn’t, you need to tweak the profile more.  That’s a crazy dead simple non-subjective litmus test.  It’s a big-ish file, clocking in at 14 minutes, but this is for the “large” whistle.  I need to download the SCAD file and try out one of the small whistles.

It’s alive!

I’ve got my Thing-O-Matic operational.  There were some initial hiccups, but it seems to be working.  However, I definitely need to calibrate Skeinforge and the “end.txt” cool down settings for this machine.  More on those details over at the MakerBot blog.  My initial print, a mini mug1 , turned out reasonably well – but is a little too sparse for actual toasting.

  1. Natch []