Sunday, October 15
Zone 2 – Make: Demo Stage
4:30 pm – 5:00 pm
Let’s goooooooooooooooooooo!
Companion Robots and Maker Faire Season!
I’m super excited for Maker Faire Bay Area / Mare Island and Mini Maker Faire Rocklin.1 I’m not just excited to see everything, but to show all the things I’ve been working on for a while now. It’s also time to pick up all the little dev boards I’ve somehow accumulated and see if I can make anything with them to show off.
- Project Boards
- Wemos D1 Mini. A small insanely cheap (~$3?!) WiFi enabled dev board2 , which has 4MB onboard and can run Arduino. I think it can also run MicroPython, but I haven’t tested this yet.
- Wemos 600 Pico. An even smaller, even cheaper (~$2 when ordered from China) WiFi enabled dev board that runs… MicroPython? I think?? I’m saying “I think” because I haven’t been able to get it to do anything yet.
- Since starting this blog post, I found a guide on installing MicroPython on Wemos boards that seems promising.
- Flashing MicroPython on an ESP8266
- https://github.com/espressif/esptool/tree/master
- Arguing with Python to let me use “esptool.py”
- esptool -p COM13 -c esp8266 flash_id
- As promising as that series of blog posts looked, I eventually scrapped the Wemos because it was just too much of a pain to get going with MicroPython. I think I could have made it work, but for $7 I could also just use the Adafruit QtPy I already have. The advantages of simply uploading code over a USB cable into a virtual drive just can’t be overstated.
- Since starting this blog post, I found a guide on installing MicroPython on Wemos boards that seems promising.
- Other Boards
- I have a bad habit of picking up dev boards. I’ve got several Adafruit QtPy’s, several Adafruit Trinkets, an Adafruit FX Sound Board, Raspberry Pi Pico (non-WiFi), various Digispark boards, a small handful of ATTiny85’s, and an even weirder assortment of VERY small programmable circuit boards (ISD1806B-COB) designed to go in greeting cards (just 6 seconds), etc.
- Companion Robot
- Background.
- I started this post at least a month ago when I only had a vague idea of what I wanted to make and even fewer skills. After seeing my kid’s companion robot take shape, I wanted to get in on the action and make my own. I decided to make a really small companion robot with just some LED’s, piezo, and small microcontroller unit. I’d taken a stab at making a companion robot a few years ago, but set it aside for a variety of reasons and never went back.
- The idea for this new robot would be something a little less ambitious, make more use of NeoPixels than in prior projects3, with a little more interactivity, trying out some CircuitPython, and… let’s be real… more pizzazz!
- Idea: Friendly Cloud/Vapor/Flame
- I still really like the copper-toned PLA I’ve been using since it has something of a steampunk flair to it. I settled on repurposing a small plastic enclosure with a clear dome as the “body” for the robot. I wanted it to look something like a small entrapped / captive / domesticated4 sentient cloud of vapor or perhaps flame held within a steampunk enclosure.
- As a very small, inexpensive board that could run either Arduino or CircuitPython, I decided on the Adafruit QtPy M0. It could run NeoPixels, there were lots of cool guides on it, plenty of pinouts, and could definitely fit within the confines of my enclosure.
- Enclosure:
- I started the enclosure by trying to design and 3D print a part to mate with the clear plastic dome. It took a few tries.
- Once I had that, I extended the base so it could hold more electronics. I could definitely have shoehorned everything into the dome, especially if I took up some of the space inside the dome, but even with an “elevated base” it was still plenty small and could use a battery pack rather than a rechargeable lipo.
- Once I had a good design for the enclosure, I tried to make it work with an existing 3xAAA battery pack. In the process I yanked off the connector and ended up soldering the battery pack leads directly into the circuits.
- Internal Electronics
- I’m just not a great electrical engineer and am still copy/pasting from various guides, tinkering, changing bits of code, swapping out parts, and using “close enough” resistors. Wiring up some LEDs or a piezo to a project isn’t very difficult – it’s some of the more fiddly bits.
- Piezo Element Speaker
- I wanted to use a piezo buzzer/speaker because they’re large and incredibly thin. They’re not without their downsides. The crystal wafer is also thin and a little fragile. The piezo buzzer without additional electronics has the potential to act as a knock sensor and can generate a high voltage spike which can fry a board. And, without additional electronics, the piezo just isn’t very loud. There are some libraries for the Arduino that basically double the volume of a piezo by connecting it to two pins and then running each opposite of the other, doubling the voltage difference, but they only work for Arduino chips.5
- After searching for various ways to increase the sound of the piezo elements, I settled on trying to use the Adafruit piezo amp. I bought two – and tried desoldering the terminal blocks. This completely ruined one. The other one worked great, but for the modest volume gain it was just too big in an already cramped enclosure.
- After searching around, I found some amplifier circuits using a small number of common parts.6
- Then I tried building an amplifier circuit using an NPN transistor. After reviewing the datasheets for my NPN transistors (and PNP transistors), and breadboarding the circuit with resistors, I sketched it a few times, laid it down with copper tape, soldered it in place with SMD resistors, then pulled it off and placed it onto a piece of Kapton tape and put another piece on top – “laminating” it in place.
- Capacitive Touch
- Buttons are great and all, but with a capacitive touch pad, I could add metallic elements to my robot rather than a much bulkier button. I bought a few brass upholstery tacks because they looked great – but they just would not accept molten solder. I ended up cutting the prongs short with wire cutters, wrapping the stub with copper tape, then soldering the wires to the tape. I’d also added a little piece of heat shrink tubing over the connection to help keep it together. It’s been working well so far.
- LED Animations
- As we know from Phillip Burgess‘ incredible “power sipping NeoPixel” guide, we can conserve power and increase the impact of the LED’s by reducing the number of LED’s, keeping max brightness ~20% for a disproportionately large impact, running fewer LED’s at a time, and even running fewer colors at a time. Between Phillip’s work, Todbot’s guide, and the specialized QtPy NeoPixel guide by Kattni Rembor, I was able to put together a few neat animations.
- Piezo Sounds
- I had a heck of time getting the piezo buzzer to do anything interesting. Fortunately, with my kid helped convert the piano music for “Paint It Black” into tones for me. I haven’t gotten all the note timings right, but I’m working on it!
- Background.
- Future Modifications
- More Accessible Enclosure. Right now the “lid” with a hole for the LED ring just sits on the enclosure with a light friction fit. One idea is a hinged lid, either with a conventional hinge or perhaps a hidden swivel hinge. The problem with that, of course, is it requires even more internal space. Other ideas include a ring on top that screws down, holding the top down and in place. I’m crap at designing screw threads, so I’ve avoided this.
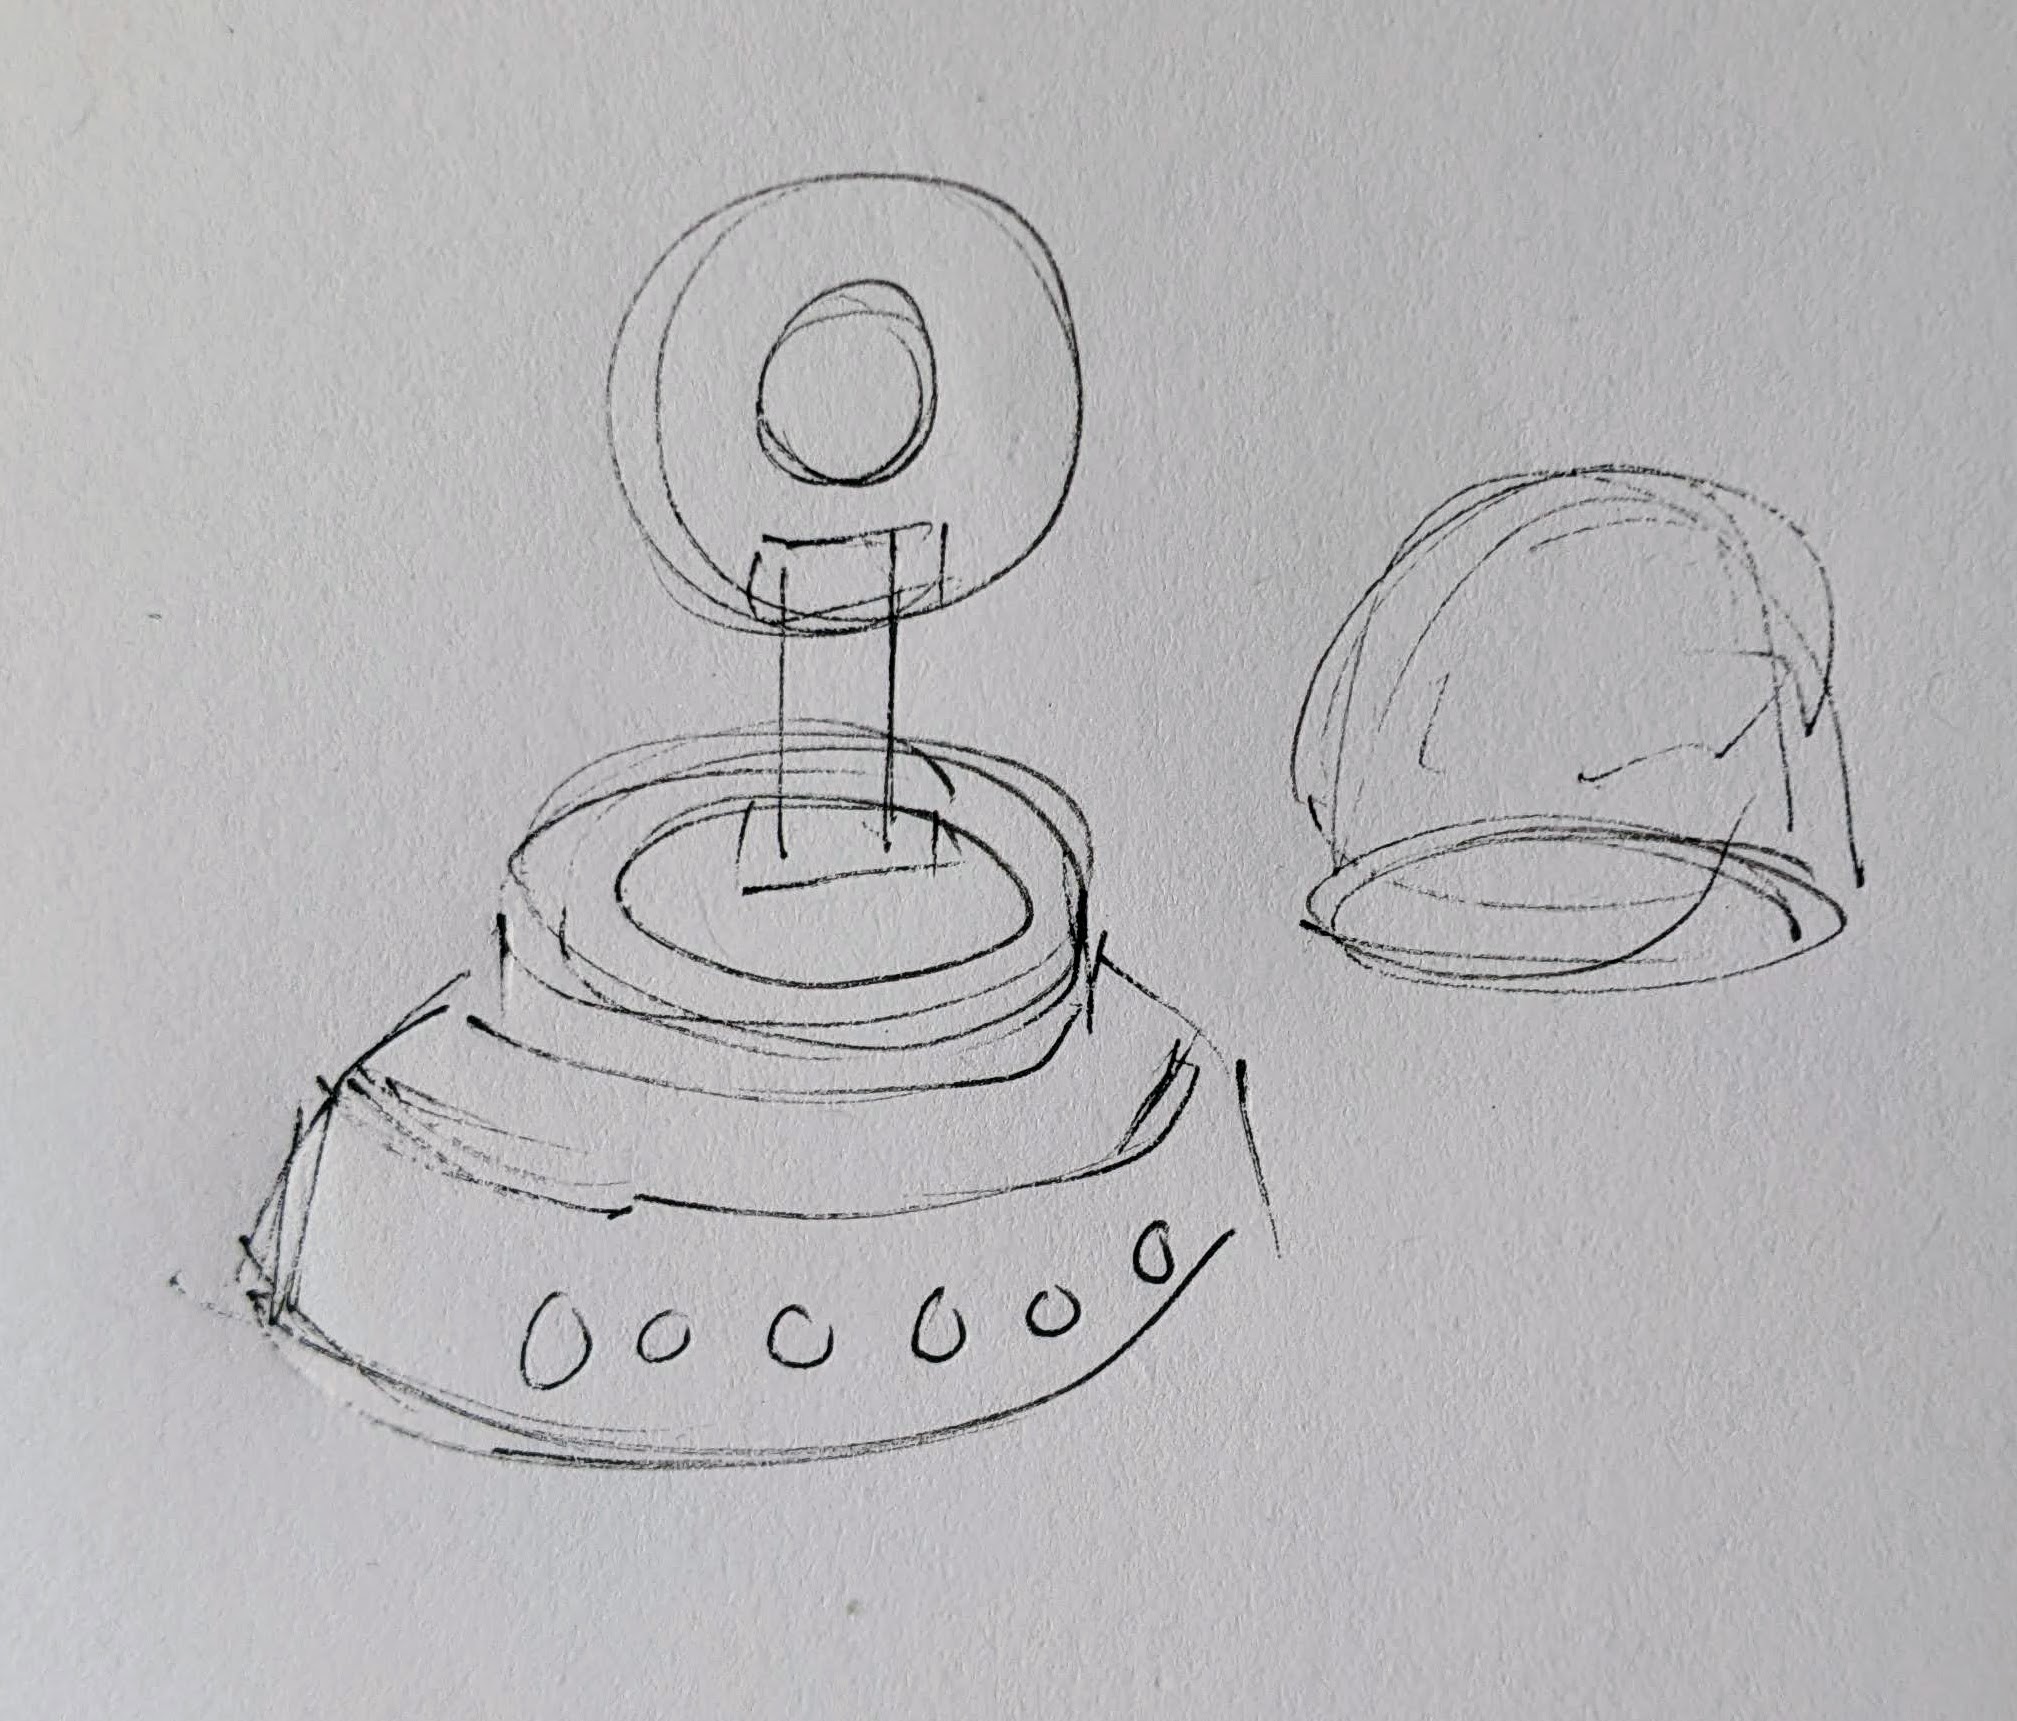
Hinged lid for enclosure - Piezo Knocks. Perhaps the next version will include some kind of tap / double tap / knock sensors using one or more piezo elements.
- Knobs. There’s not a ton of room inside the enclosure, but by including a gear within a gear, I might be able to rotate part of the case and have it manipulate a potentiometer.

Offset gear within gear, manipulating an off-center internal potentiometer - Motors. A robot that just flashes lights and makes a few beeps can still be pretty interesting. However, I have some neat potential features that could be added with just one or two motors. There are some interesting limitations with the current incarnation of this robot and using a QtPy. I’ve only got 10 pinouts7 , 1 for NeoPixels, 1 for the piezo, 6 in use for the capacitive touch sensors, leaving 2 for other potential tasks.8 However, space is already tight so one or two micro servos would be a big space commitment. I’ve seen some really tiny micro servos that might work, but I have no idea where to source them. One silly idea is a “weapons system” using a spring loaded projectile activated by a very small servo.
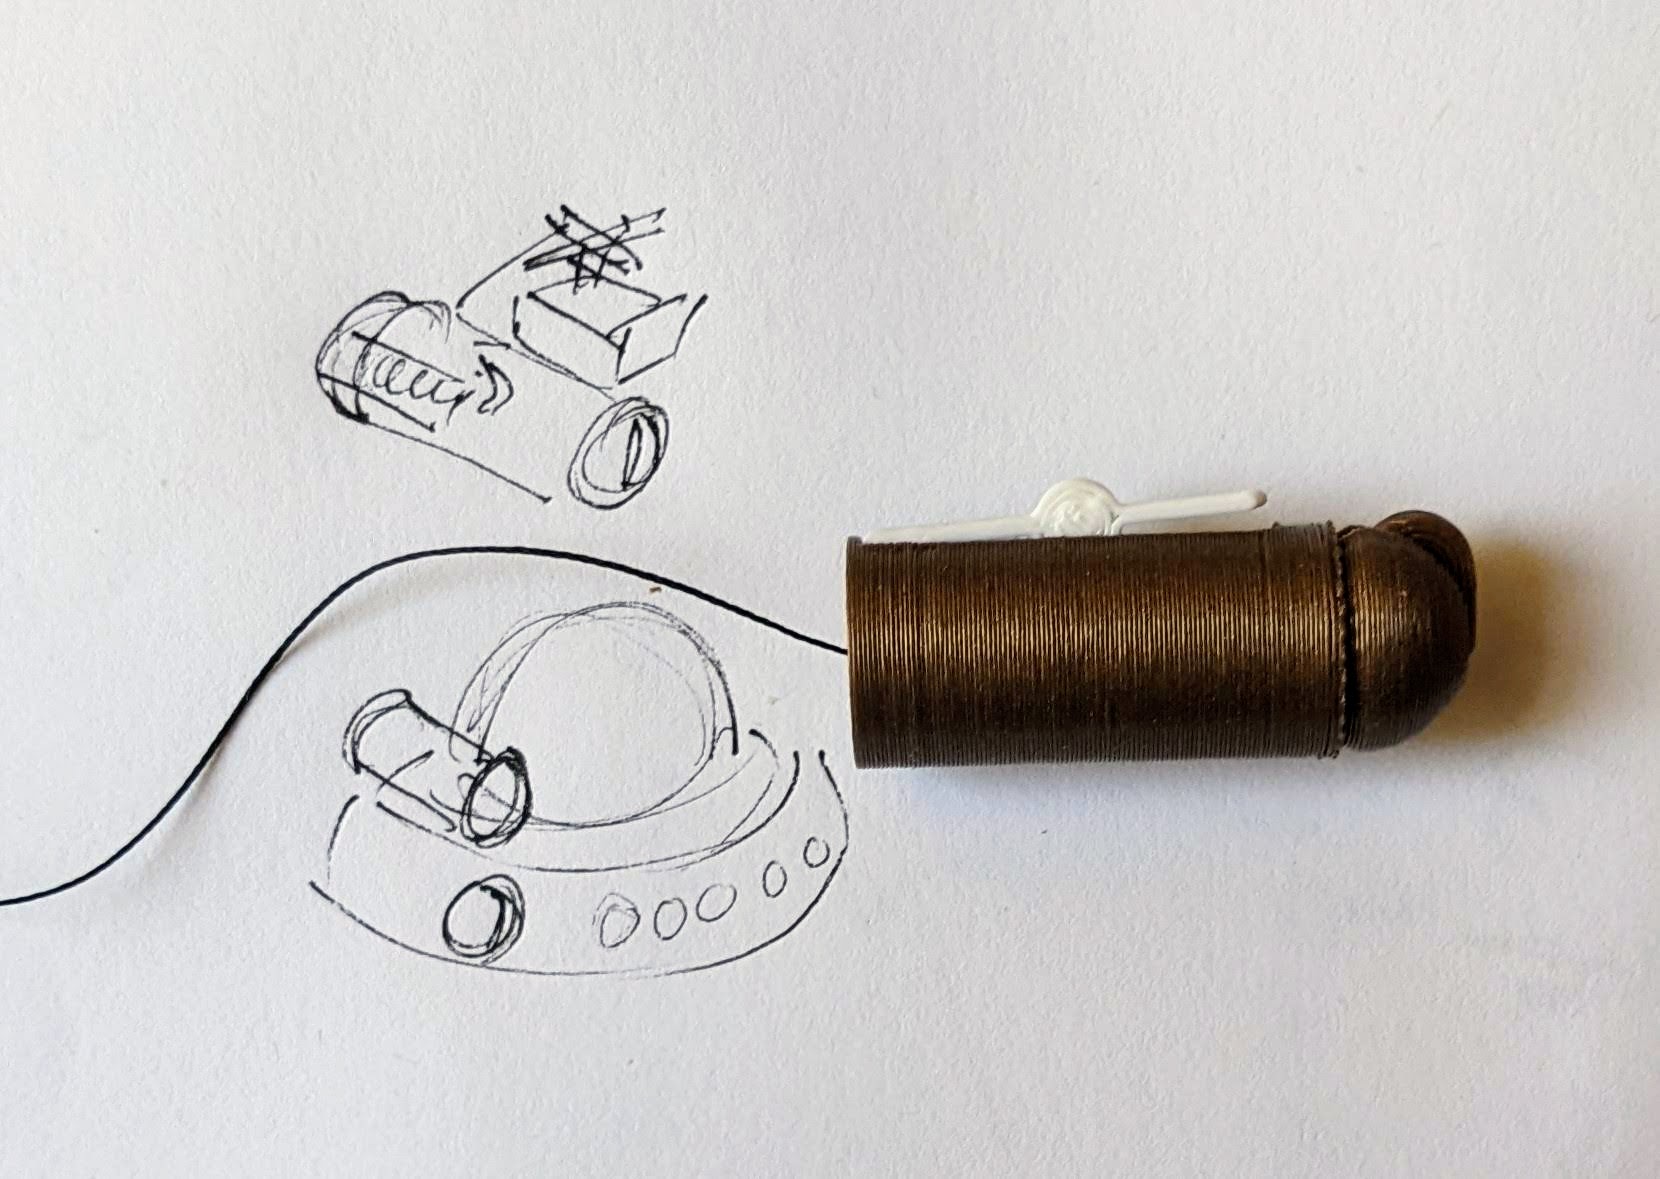
A small spring loaded projectile launcher, actuated by a small servo - Creating Tone Library. The basic piezo tones are easy enough to play, but including the entire list of tones and the frequencies associated with them seems eat up the poor little QtPy’s memory. I think compressing them into a library might be the way around this issue.
- Playing WAV files. WAV files are bulky, but that’s the only sound file format a QtPy M0 can play. However, with the extra 2MB from the SPI chip installed, this shouldn’t be a huge problem. I used Audacity to mix the sound clip down to mono then to 22 KHz sample rate. My preliminary tests worked – but it was incredibly quiet. I haven’t run it through the audio amplifier yet, but I’m planning to.
- Sleep / Deep Sleep. Ever since I swapped out the tiny LiPo for a 3xAAA battery pack, I’ve had a lot more battery life, so adding sleep / deep sleep functions haven’t been a priority. However, this inclusion just couldn’t hurt.
- More Accessible Enclosure. Right now the “lid” with a hole for the LED ring just sits on the enclosure with a light friction fit. One idea is a hinged lid, either with a conventional hinge or perhaps a hidden swivel hinge. The problem with that, of course, is it requires even more internal space. Other ideas include a ring on top that screws down, holding the top down and in place. I’m crap at designing screw threads, so I’ve avoided this.
- Other QtPy and CircuitPython Resources
- Cephalopod Robot Friend, the story so far
- Cephalopod Robot Friend Progress
- CuttleBot Body and OpenSCAD Design Tips
- An Assembled CuttleBot Body
- Building the Monocle Top Hat Cat for #MicrobitVirtualConcert
- Companion Robots and Maker Faire Season!
- I just got a notice they’re no longer a “Mini”! [↩]
- pinouts for my future reference [↩]
- LED goggles and a Marvel Universe inspired set of “Infinity Knuckles” [↩]
- OMG dome-sticated?! [↩]
- This is just my very basic understanding of how it works. I’m entirely positive this is far too simplified. [↩]
- And one very long article about using a lot of parts [↩]
- 12 if you want to count the onboard NeoPixel [↩]
- Or 4… [↩]
Beep Boop: Emotions for ED-E
So I’m trying to program emotions for ED-E.
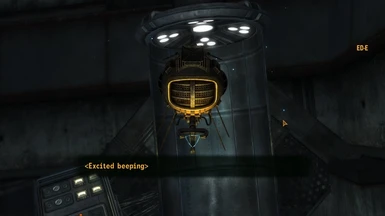
In Fallout New Vegas, ED-E doesn’t use regular dialogue, but communicates through beeps. Basically, he gets <(Emotion) + beeping> as his dialogue. Obviously the only way to research his beeping for this project is to replay Fallout New Vegas and talk to everyone’s favorite eyebot. I came up with a list of some of the emotional beeps he has in the game (and some that I just want) to start programming into him. I have ideas for what I want him to sound like, but I just need to find the right pitches and durations.
By this I mean I am sitting in my room and saying “beep beep” to myself at different pitches in sync with a program I wrote.
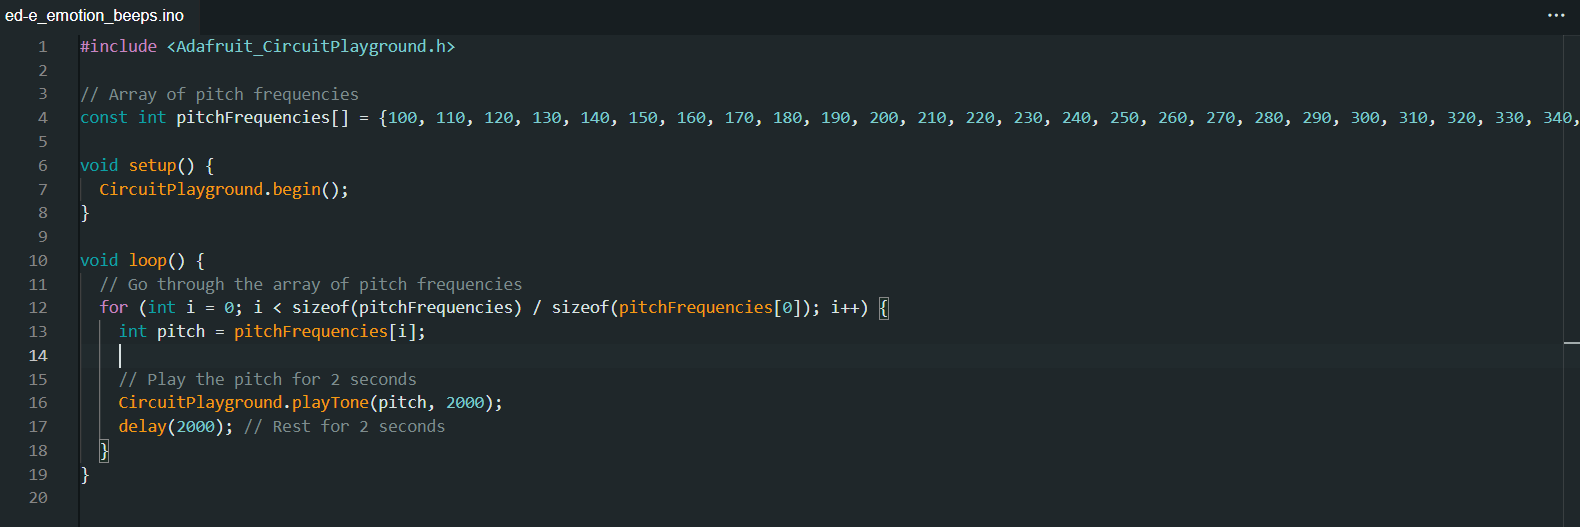
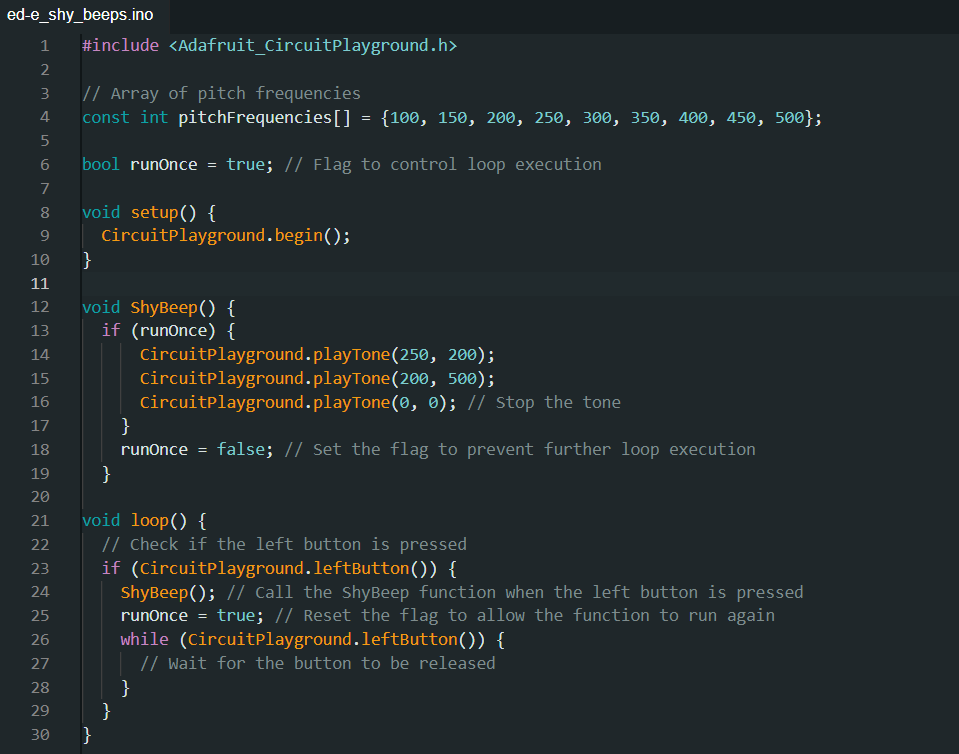
- I almost decided to use the definitions of pitch from my Rickroll code so I could just ask the computer to start at middle C and go down or say I want the pitch to be a half note in 3/4 time. I then realized I was making this WAY more complicated than it needed to be and just used seconds and hz like a normal-ish person [↩]
- I seriously love Circuit Playgrounds. They have everything. [↩]
- Just kidding ED-E, I love you [↩]
ED-E Project: Origins
Hi, I’m DexterStarfighter, offspring of MakerBlock.1 I am a maker and artist with possibly too many interests that include drawing, writing, cats, theatre, video games, horror podcasts, folklore, coding, Jenga, history, triangles, succulents, and reading literally anything. I have been going to MakerFaire for basically my entire life and it has always been something I look forward to for the whole year. As soon as Dad told me MakerFaire was coming back, I knew I had to make something super cool for the occasion. This brings me to my latest project, a companion robot.
First, some background. My favorite game is part of the Fallout series (New Vegas, if you were wondering). I started the Fallout series because my dad played them when the first Fallout came out and I wanted to be able to share a cool game with him. I started Fallout 1 and loved it, then played Fallout 2 and 3. Over the summer, Epic Games released Fallout New Vegas with all DLCs for free and of course, I played the crap out of that.23
In Fallout New Vegas, there are various companions you can take with you on your journey through the Wasteland. There are human companions of course (and ghoul and nightkin), but you can also take with you one nonhuman companion. At first I was super disappointed that I couldn’t find Dogmeat. I don’t actually like being around dogs in real life, but I got Dogmeat in Fallout 1 and somehow I have become very attached. (I do not even want to think about how many times I have reloaded a save to keep that little jerk alive.) I quickly got over my disappointment though, because there is a statue of a dinosaur and now I’m disappointed that you can’t have a dinosaur robot companion. Anyway, in my travels through the Mojave, I found two interesting nonhuman companions. The first one I found was this little eye bot named ED-E. I play as a charismatic nerd (high INT and CHA with good repair, speech, barter and science) so I was able to fix him up. ED-E was still only able to beep in ways I couldn’t understand and when I brought him to where I was supposed to for his quest, there was some sort of glitch and I couldn’t interact with the lady for the quest. ED-E seemed kind of lame to me then, so I took him back to the place I found him and left. I later ran into a dog named Rex who I had to take care of for an Elvis impersonator (no, really) and found he was a pretty good companion.
Flash forward to the endgame. I had met a cowboy robot, climbed a dinosaur statue, resurrected a B-29, fought a soldier for a dog’s brain, charmed a scientist, accidentally sided with the mafia, cleaned out an entire casino, assassinated a 261-year-old man, had my vital organs removed, stolen 27 bars of gold, befriended a man wrapped in toilet paper, and was well on my way to conquering New Vegas for myself. I had only one more thing to check off my list: walking the Courier’s Mile. Don’t worry, I won’t spoil the Lonesome Road quest for you- I’ll just tell you that I met ED-E again. Somehow, within the first few minutes of interacting with him, I had become so completely charmed by this little robot that I would do literally anything to protect him. I’m not sure what about ED-E made him so endearing to me, but he became my best friend.

In 2019, I met Odd_Jayy at MakerFaire. I remember seeing his spider bot and thinking how cool it was. I’ve always liked the idea of a companion bot, but I’ve never actually had a specific idea of what I want out of one. When dad told me that we would be going to MakerFaire again, I immediately thought of an ED-E companion bot.4 Dad loved the idea too and gave me lots of good tips on how to get started. I have a tendency to get lost in the details, so he helped me focus on the big picture and the first steps I could take to achieving my goals.
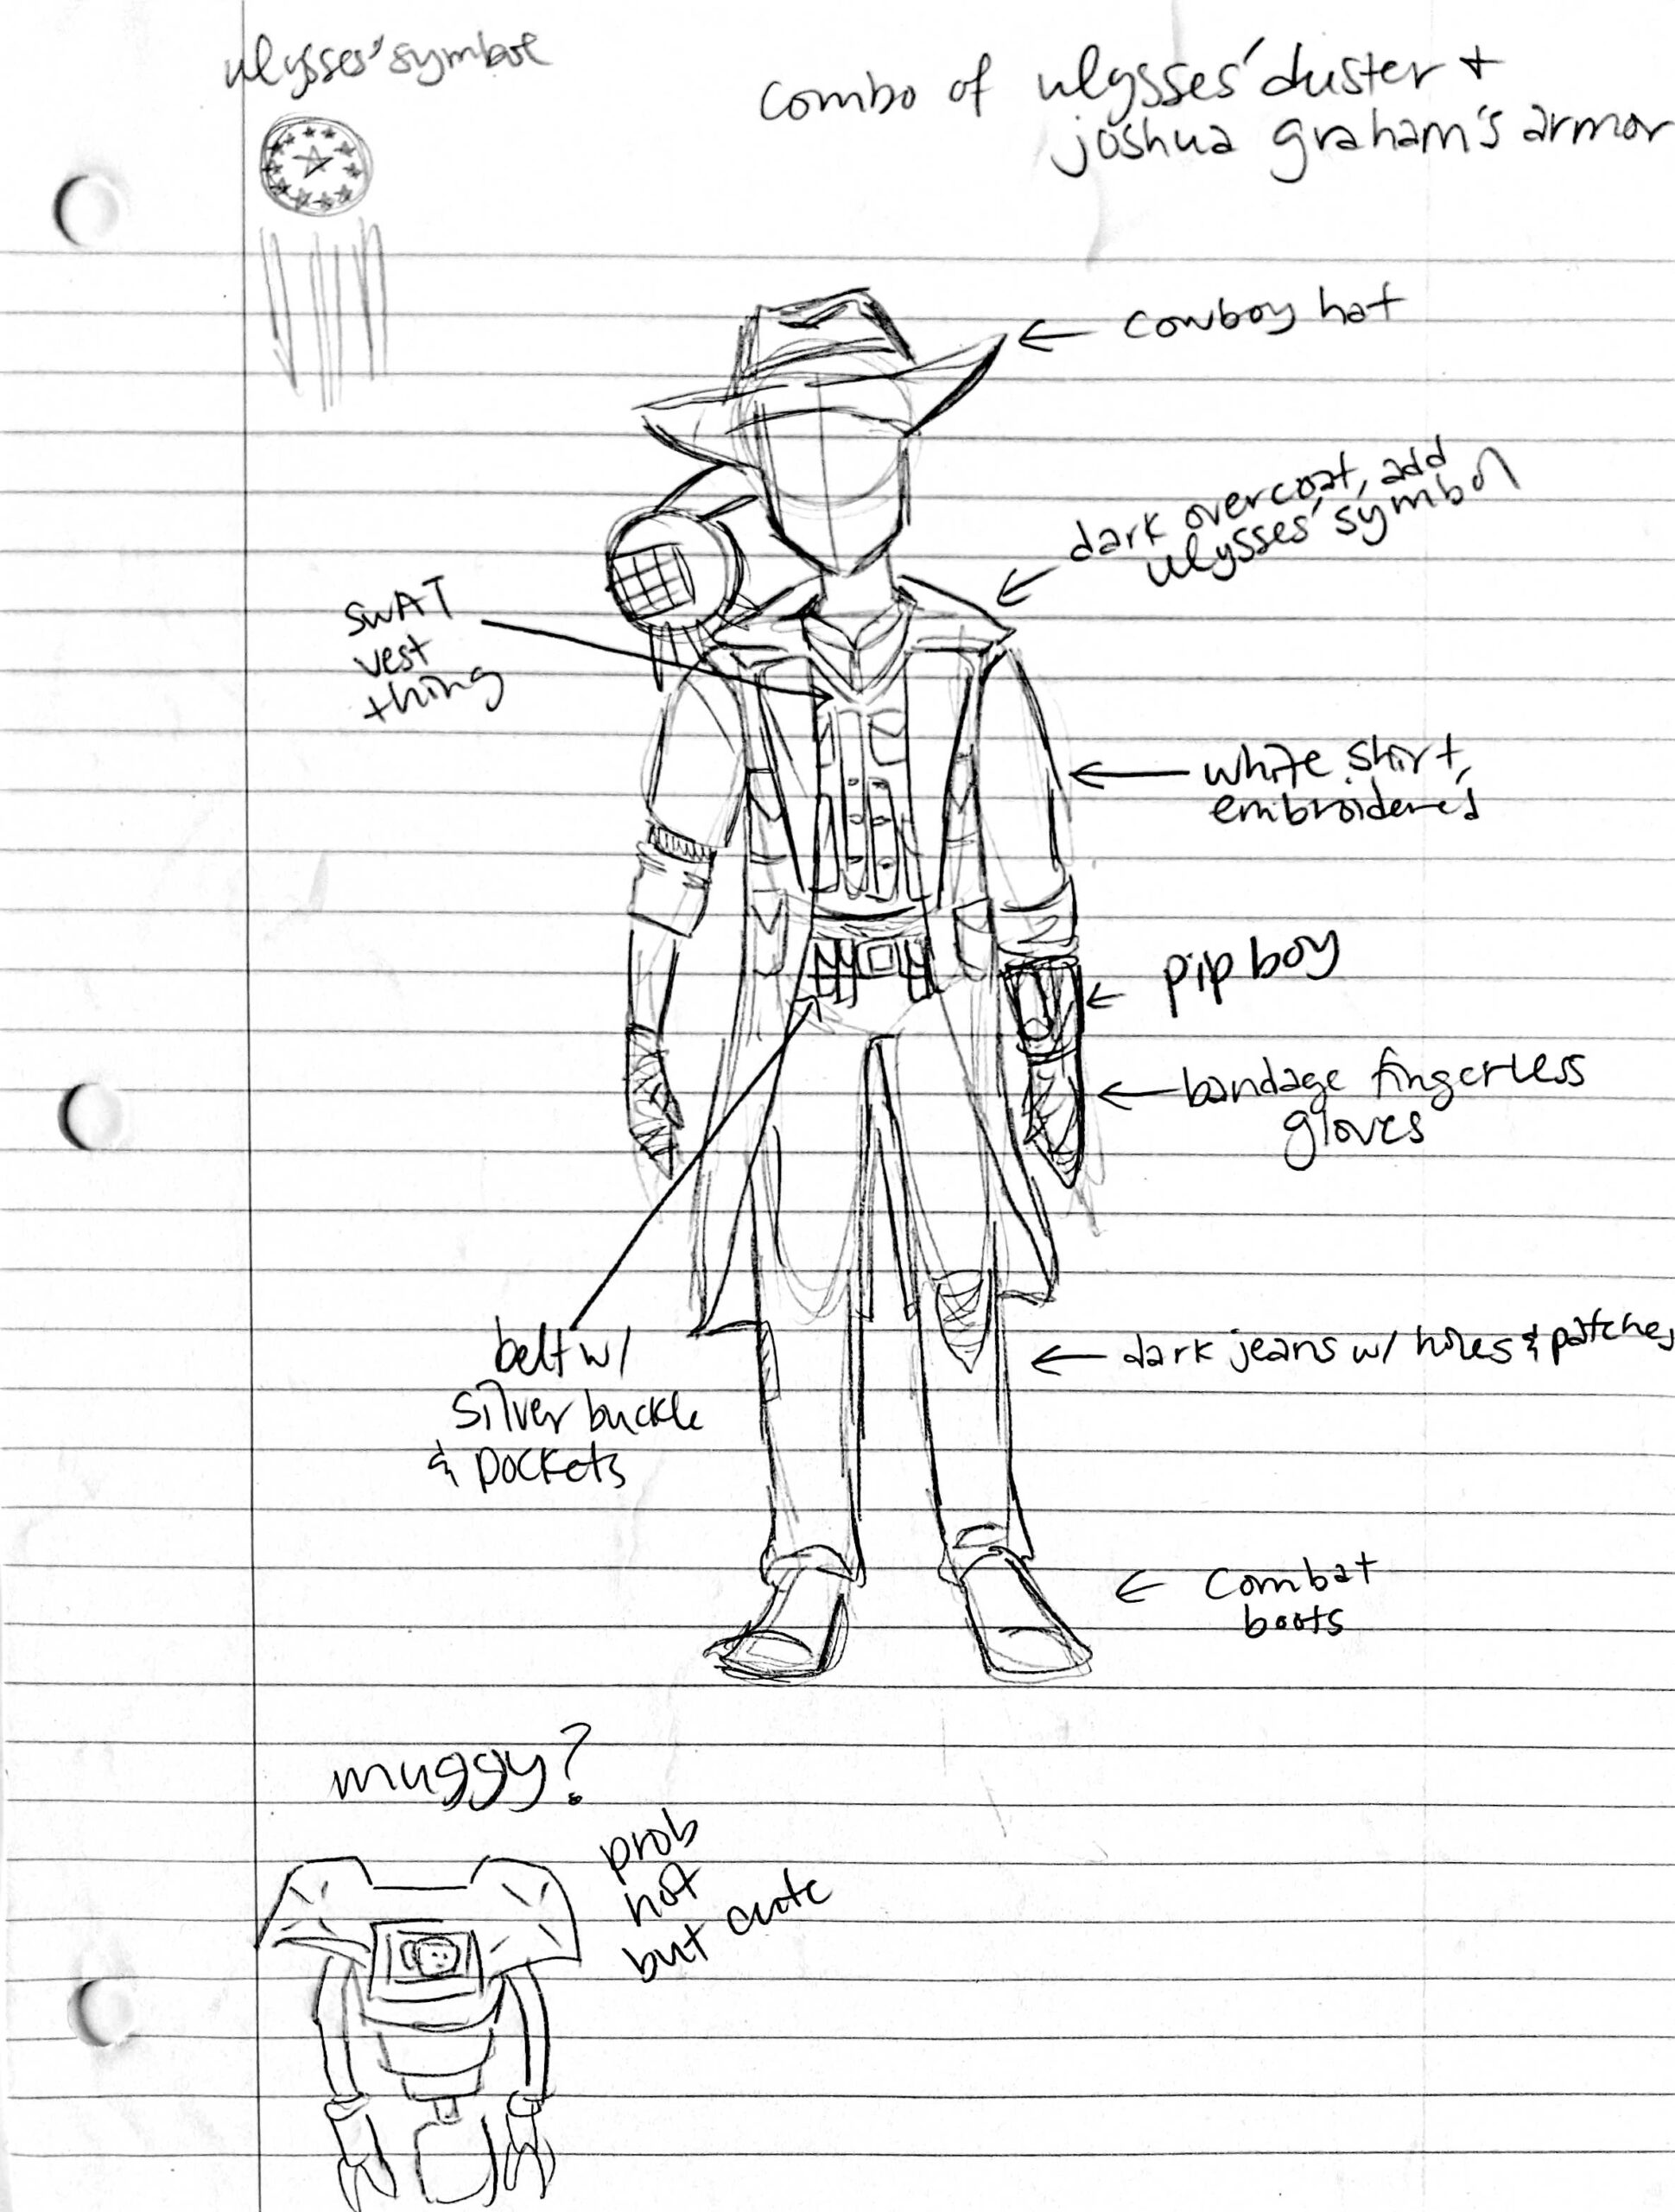
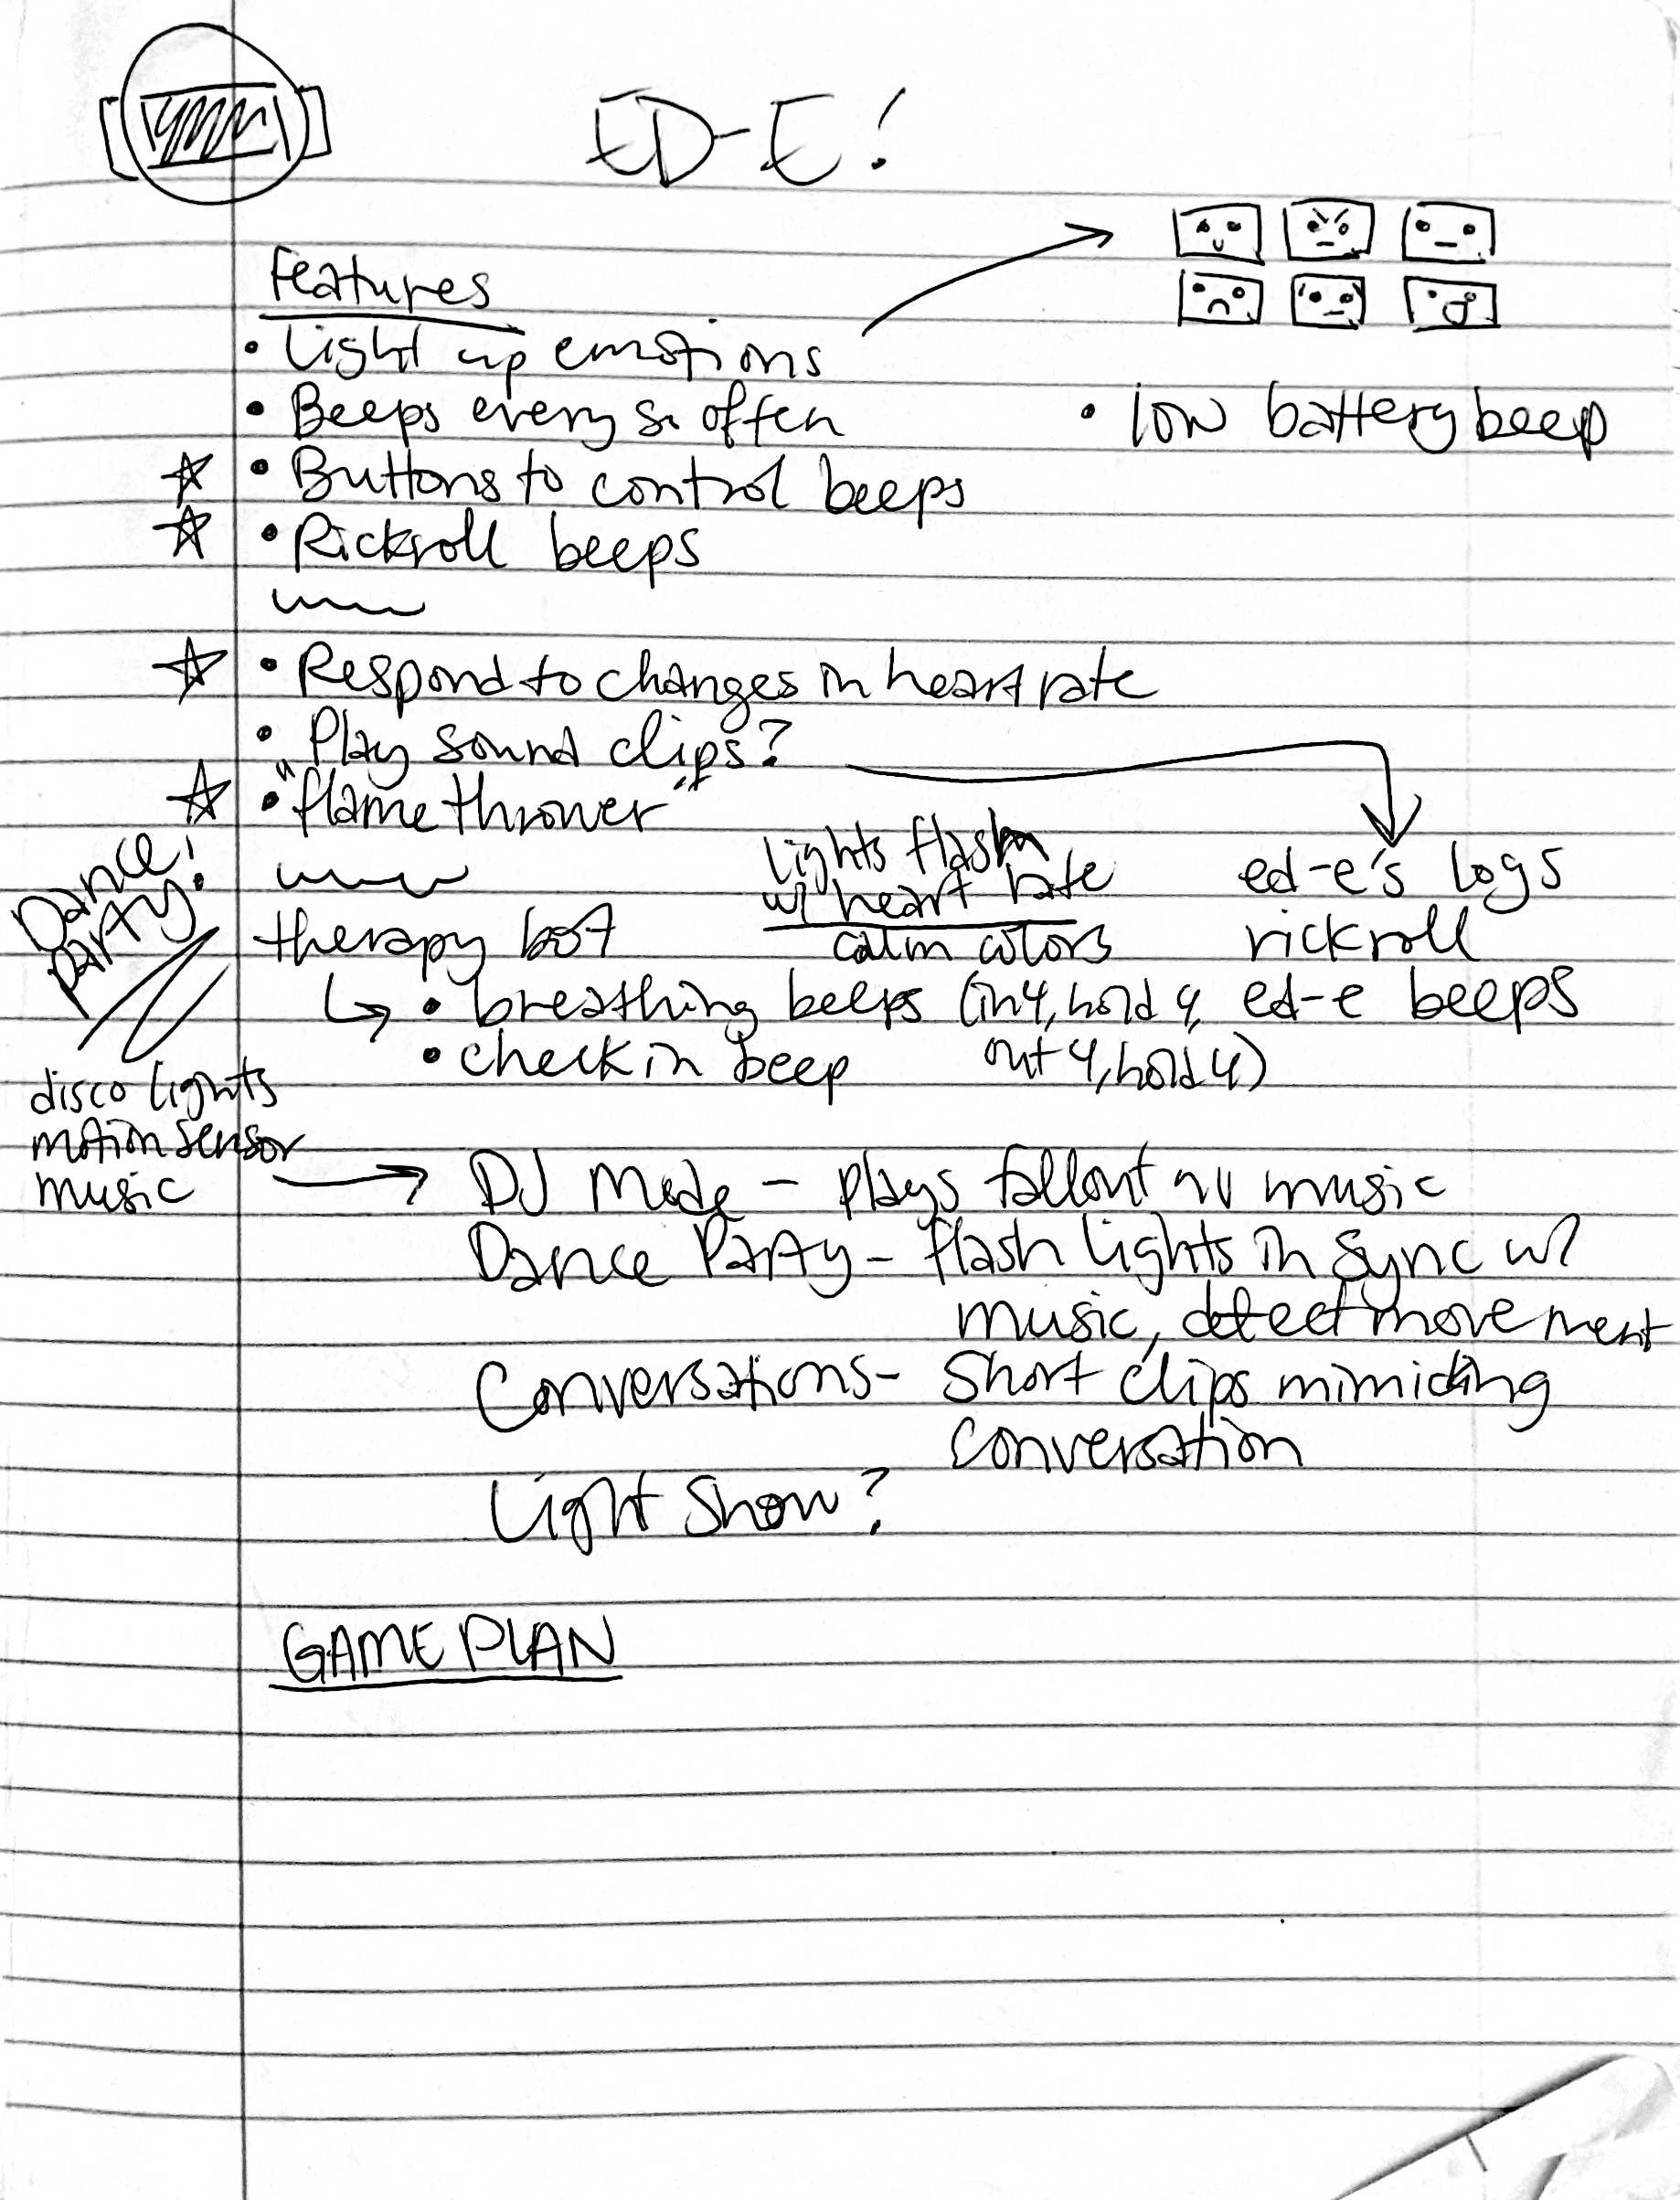
I have a lot of ideas about what I want ED-E to do eventually, but I’m a complete beginner at Arduino programming. Knowing this, Dad suggested starting small. First, turn on one light. Then multiple lights. Then make them flash. Then make them change colors. Then add beeps. Stuff like that. I was like “cool, cool” and immediately programmed ED-E to beep the entirety of Never Gonna Give You Up instead of doing literally anything sensible.
I regret nothing. It was frustrating at first because I was super out of my depth. I used Chlorondria’s arrangement of Never Gonna Give You Up and used ChatGPT to help me learn how the code works. ChatGPT was super helpful because I could get feedback on why my code wasn’t working. The sense of accomplishment when I finally recognized the tune made all the frustration so incredibly worth it.
After my self-indulgent first project for ED-E, I moved on to taking Dad’s suggestions. Sort of. I’m a teenager, and therefore I am legally obliged not to listen to any authority figures, real or perceived. I made ED-E flash some rainbow lights. I started with just red lights and it took a while to make the code work, but once I made it work, I just changed the color brightnesses. Fun fact: my ED-E bot now actually glows two shades of blue in his rainbow light show pattern. For some reason I decided RGB stood for Red Yellow Blue and messed up with the color values when I was trying to make green and accidentally made a light blue. The light blue actually looked pretty cool, so I decided to keep it.
Today, I worked more on5 ED-E’s… musical function. I’m going to warn you right now: there will be spoilers for MakerFaire below! I intend to take ED-E to MakerFaire with me, and if you meet him, there will be some fun surprises in store for you. Not if you read the spoilers, though. MakerFaire is a big place and I don’t expect everyone who visits this page to run into me at the Faire, so I’ll include some stuff about the surprises below.

***SPOILERS START***
If you’re still here, I assume you want to read this. One of my favorite things about ED-E in Fallout are the little conversations you can have with him. I want to be able to have a few little “conversations” with my companion bot, kind of like in the game. I’m going to have a Pip-Boy with various buttons to run functions for ED-E, but one of the first conversations I thought of had to do with his musical function. This was my idea:
Me: Hey, ED-E. Do you wanna sing them your favorite song?
ED-E: [Shy beeping]
Me: Aw, are you shy?
ED-E: [Shy beeping]
Me: Come on, ED-E. We’d all really like to hear you sing!
ED-E: [Questioning beeping]
Me: Yes, of course! Listen, I’ll ask them. Do you want to hear ED-E sing his favorite song?
Other person: Yes!
Me: See, ED-E?
ED-E: [Pleased beeps, wait, then Rickroll beeps]
Obviously, I’m not going to make ED-E understand my words and respond to them. ED-E will be a shoulder mounted bot, so I want to be able to have conversations that trigger based on movement. I’m using a Circuit Playground, so I intend to take full advantage of all the different sensors it has. I programmed ED-E to run his Rickroll function if he senses a significant change in acceleration. I’ll pop my shoulder like I’m giving him a nudge, triggering the function. He waits for 8 seconds to give me time to talk, then plays the Rickroll beeps.
I have to admit, this took a WHILE to get right. It was still incredibly satisfying to see it all come together and go right. I was so excited when it started working! I did a lot of testing to get the sensitivity right because I don’t want it to trigger if I’m just walking around. I’m still fine tuning that part because I bumped the cord earlier and he started Rickrolling me. Then again, maybe ED-E just has a funny sense of humor.
***SPOILERS END***

So, what’s next for ED-E? I think the next thing I want to work on is getting his beeps right. I can make him beep music, and that’s great, but I also want to have him beep every so often and have “conversations” with him. I’m going to program some little beep clips for different emotions or situations that I can then mix and match into various conversations. I might also actually listen to Dad for once and work on a light show.
Thanks for reading about my ED-E project! I’ve enjoyed working on him and I’m so excited to share him with other makers. I’ll try to post updates regularly (they shouldn’t be as long as this one since you won’t need all the background next time). Thank you to Odd_Jayy for the inspiration, Chlorondria for the musical arrangement, ChatGPT for the troubleshooting help, Adafruit for making awesome boards, whoever made Fallout New Vegas, MakerBlock for being a great dad and helpful sounding board, and to you for reading this post.
ED-E Companion Bot Project
- I considered saying progeny and descendant of the House of MakerBlock, but offspring sounded the best. Progeny sounded weird and the descendant thing reminded me of Game of Thrones, which I have not read or watched, but I might someday and I don’t want to invite spoilers. [↩]
- I love Epic Games. Free games every week? Yes please! Disclaimer: I am not being sponsored by Epic Games, but if I was, that would be awesome. [↩]
- New Vegas is best Fallout, you can fight me on this. [↩]
- I also considered a Muggy companion bot. I love Muggy and if ED-E turns out well, Muggy might be my next project. [↩]
- Lol, moron [↩]
Coding with an LLM Sidekick
I fell down a rabbit hole recently which lead me to think about my experiences in the nascent field of “prompt engineering.”12
As a thought experiment, I was thinking about what I’ve managed to accomplish working with an LLM, the challenges along the way, and perhaps even where I can see the frayed edges of its current limitations.
After several starts and stops trying to hire someone to assist with a website I own, I turned to the idea of getting help from an LLM. 3 4 After all, some of them were touted as being able to actually draft code, right? Besides, if the first step in even hiring a developer is just being able to describe what you need, and the first step of getting an LLM to generate some code is defining what I need, then…

-
Task 1: Pie Chart WordPress Plugin
- I started off with a simple and easy to define task. My original plugin was a quick and dirty bit of code, so if ChatGPT could create a WordPress plugin, there was a chance it could do something simple like this.
- My first attempt was a wildly spectacular, but highly educational, failure. A brief description of the plugin’s function was enough to get a WordPress plugin template file with very little functionality. Then came the arduous LLM wrangling, my asking it for refinements, it losing track of the conversation, and the endless sincere heartfelt apologies from ChatGPT about forgetting really basic pieces of information along the way. Some changes were minor, but changing the names of variables, functions, the plugin, switching API’s, forgetting requirements, etc. It was constant whack-a-mole that spanned nearly 90 pages of text.
- My next attempt was more focused. I created a framework for discussions, provided more context, goals, descriptions of workflow, and resources for examples. The result was a lot better, with portions of largely functional code. However, the LLM kept forgetting things, renaming variables, files, directories, etc.
- Next I created the directory structure and blank placeholder files, zipped these, and uploaded them as an attachment for the LLM to review – along with a description of the contents and the above additional context. This was even better than before, but after a certain depth of conversation no amount of reminding could bring the LLM around to the core of the conversation.
- My thinking was that after a certain level of conversation, the LLM was not going to be able to synthesize all of nuance of our conversations plus the content of the code drafted. To get around this I would begin a conversation, make a little progress, then ask it to summarize the project, the current status, and a plan for completion – which was fed into an entirely new conversation. This way, Conversation N was able to provide a succinct and complete description which Conversation N+1 could use as a jumping off point. My thinking was that the LLM would be best positioned to create a summary that would be useful to another LLM.
- This process of minor “restarts” in the conversation was one of the most successful and powerful techniques I’ve employed to combat LLM hallucinations and forgetfulness.
-
Task 2: Blog Post Series Plugin
- After rewriting the above pie chart plugin using an LLM, I turned my attention to a slightly more complicated plugin. The pie chart plugin is really just a single file which turns a shortcode with a little bit of data into a nice looking pie chart. There’s no options page, no cross post interaction, database queries or anything. It was really just a test to see if an LLM could really draft a basic piece of working code.
- The series plugin is still a reasonably simple piece of code, but it has several additional feature which require a settings page, saving settings, custom database queries, and organizing information across multiple pages. It’s also one of the most used plugins on this website.
- I figured I would try feeding the LLM a description of my plugin, all the code in a directory structure, and then my initial “base” prompt which explains our roles, needs, resources, and scaffolding for a discussion. I asked the LLM to summarize the function and features of the plugin, which it did quite nicely. I added a few additional features I had previously worked on and asked it to incorporate this into the description. Asking the LLM to simply “build this WordPress plugin” was met with a “you need to hire a developer” recommendation. However, asking it to propose a workflow for building a plugin with these features was successful. I was provided with a roadmap for building5 my plugin.
- This system worked reasonably well, allowing me to compartmentalize the steps, backtrack, retrace, revise code, working on a section, then another, sometimes going back to a prior sections at the LLM’s direction. The LLM still tended to get lost, renamed variables/paths/directories/filenames, but it was less pronounced than before. I did find it harder to use the “summarize and restart” strategy when dealing with a multi-step code development system. However, it was still workable since I could upload all the code produced so far.
- The result was a new plugin, with better functionality than what I’d written myself 10 years before. Here, the new strategy of having the LLM break the project into sections and providing a roadmap was particularly helpful.
- Strategy: Conversational Scaffolding
- I mentioned “conversational scaffolding” and “frameworks” for discussing things with the LLM above. This was an overarching and evolving strategy I use to help focus the LLM on the goals, keep it on track, and hopefully help it provide meaningful and useful replies. The full text of my “prompt framework” file is too large to include here, but I’m happy to provide the highlights.
- Personas. I assigned the LLM three distinct personas with differing backgrounds, strengths, and goals. Their personas were defined in reference to one another, so the first would activate, the second would then review and interact with the first, after this process completed the third would be activated, perhaps interact with the first two, then it would move on. I would say this process was rather successful.
- Myself. I would describe myself, my goals, level of expertise, etc. I found that I if I referred to myself as an expert, the LLM would not be as likely to offer me code proposals – but if I described myself as a newbie, it would recommend I hire a developer rather than tackle such a complex problem myself.
- Rules for Conversation. These are a collection of 12 rules (at last count) which helped myself and the LLM interact. The high points are:
- Answer Numbering, Answer Format, Eliminate Guesswork, Organize Assumptions, Conversational Review, Complex Answers, Context Refresher, Problem Solving Approach, File Structure, @Rules, and Personas.
- Each of these items were followed by a few sentences explaining something about how the LLM should be expecting to receive information and react. My favorite of these was the rule “@Rules” which directed the LLM to begin it’s response by reviewing the Rules and following them.
- Knowledge. There are a number of programming languages and technical topics I’m interested in and have used an LLM to address. To this point, I solicited a list of useful resources from the LLM and started including a “Knowledge” section where I listed dozens of the most important resources for the languages and API’s I most commonly use.
- By beginning each prompt with the above “framework” (~10k of text) and following it up with a short description of my project or a file to consider, I found I was able to jump right into the project without having to provide additional significant background information.
- Task 3: “Project Drift”
- This is a considerably more complicated task I will simply refer to as “Project Drift.” This isn’t a real codename since the developer base is all of exactly one dude, but I don’t want to name the location/website for a variety of reasons. In any case, Project Drift involves multiple user interfaces, numerous settings, database queries, data sanitation and validation procedures, administrator functions, and numerous other facets. All of the above tasks and attempts were basically part of the run-up to this (ongoing) project.
- Using the LLM’s ability to open and read a ZIP file, as well as propose code, has been invaluable. This in conjunction with my prompt framework allows me to get the LLM up to speed after a micro-restart – and it’s summarization procedures help me get back in the mindset after I’ve stepped away from the project for a few days.
- Since this project isn’t done yet, I can only give a progress report. It’s going very well. Much of the heavy lifting, scaffolding of the code, can be assembled for me, tedious database queries and chunks of code provided. There are still large areas where the LLM is unable to be very helpful – and that relates to pinpointing a bug in the code (or between code sections). This still requires a knowledgeable hand at the helm.
- As a solo-coder, having the assistance of another “persona” to keep me on track with a given section of code has been helpful. I have only assigned three personas, but I could see adding a few more to fulfill different roles.
I would estimate Project Drift is roughly 30-50% complete, but this is still an incredible amount of progress in a very short time. I would also estimate it has cut the amount of my development time by 90% (but on the easiest and most tedious stuff).
Software Development with LLMs
- Series Plugin Test for Illustrative Purposes Only
- ChatGPT WordPress Plugins
- Coding with an LLM Sidekick
- I know, it feels pretentious, doesn’t it? [↩]
- I’ve got the same knee-jerk reaction to “visionary,” “thought leader,” “polymath,” and “futurist.” [↩]
- Don’t get me wrong, some of the developers I’d hired simply disappeared while other relationships didn’t work out due to timing. I don’t think anyone was malicious, just… busy, really. [↩]
- Still, the job needs to be done. [↩]
- Re-building? [↩]
EDC Bag Materials, Designs, Etc
I’ve been spending way too much time fiddling around thinking about a new every day carry bag, but not a lot of time actually doing anything about it. I’ve got piles of notes, lots of links, sketches, and product photos. Here’s a lot of them:
My notes and brainstorming are also rather extensive:
- Different Potential Uses
- Work (laptop, charger), day trips (water bottle), hiking (water bottle, clothing, snacks), running errands / tech / game nights / art
- EDC Items
- An EDC Bag should be able to accommodate things that I’d be likely to carry about 80% of the time.
- Mask, sanitizer, tissue, handkerchief, wipes, plastic baggie
- Cell phone, bluetooth pocket, charger pouch, sunglasses, pens, small pad of paper, ¼ A4, Kindle
- Keys on interior carabiner, ring whistle loop/loud whistle, lanyards
- Interior lining for wallet with RFID blocking, zip ties, carabiner (in pocket?) for keys
- On outside, hotel key, BART card
- Design Requirements / Goals
- When empty, it should be as flat as possible
- Wide straps for comfort if carrying something heavy, plus good for stowing a cell phone
- Pull rings, paracord top grip handle (also this guide), quick access pockets
- Bidirectional, so the main features can be worn over either shoulder
- Reduction of metal, heavy parts
- Outside straps which can be keep an umbrella, roll of material, or jacket
- Outside zippered pouch on the inside (against the body) to make it less likely to be pick pocketed, internal loops for clipping / hooking keys, rings, lanyards
- Reinforced corners, grommets
- Laptop pouch inside which is higher, area for charger to fall lower
- Pouches and pockets near the top
- How many pockets, pouches, zippered, velcro, etc?
- Materials
- Heavy nylon or similar
- Internal lining with fleece, ripstop nylon
- TPU (thermoplastic polyurethane) or PU (polyurethane) coatings
- Foam for padding
- Paracord for draw strings, grip wraps
- Zippers
Custom Every Day Carry Bag
Sewing Practice
About two years ago I purchased a few kits from RipstopByTheRoll.com – their Zipper Pouch Kit and their $10 kit. They were partially for sewing practice and brush off long dormant sewing skills, but mostly for learning some new skills. (You see, I have zipper cowardice.)
I did do a little bit of sewing at the beginning of the pandemic. 1
In learning how to get started sewing (again) I had to make sense of my sewing machine, settings, and sewing basics:
- Brother XM3700 overview, settings
- I had no idea what I was doing or what the dials were supposed to do. Clockwise from left to right, they are the string tension (should stay between 3-5), left-right movement (irrelevant to straight stitches and seemingly best between 2-3 for zig zags), stitch length (between 1-3), and then the stitch selection dial (sticking with 2 for straight stitch and 3 for zig zags)
- Using the automatic needle threader which way more helpful than I expected it to be
- I created a “stitch sampler” where I noted the settings used for each stitch
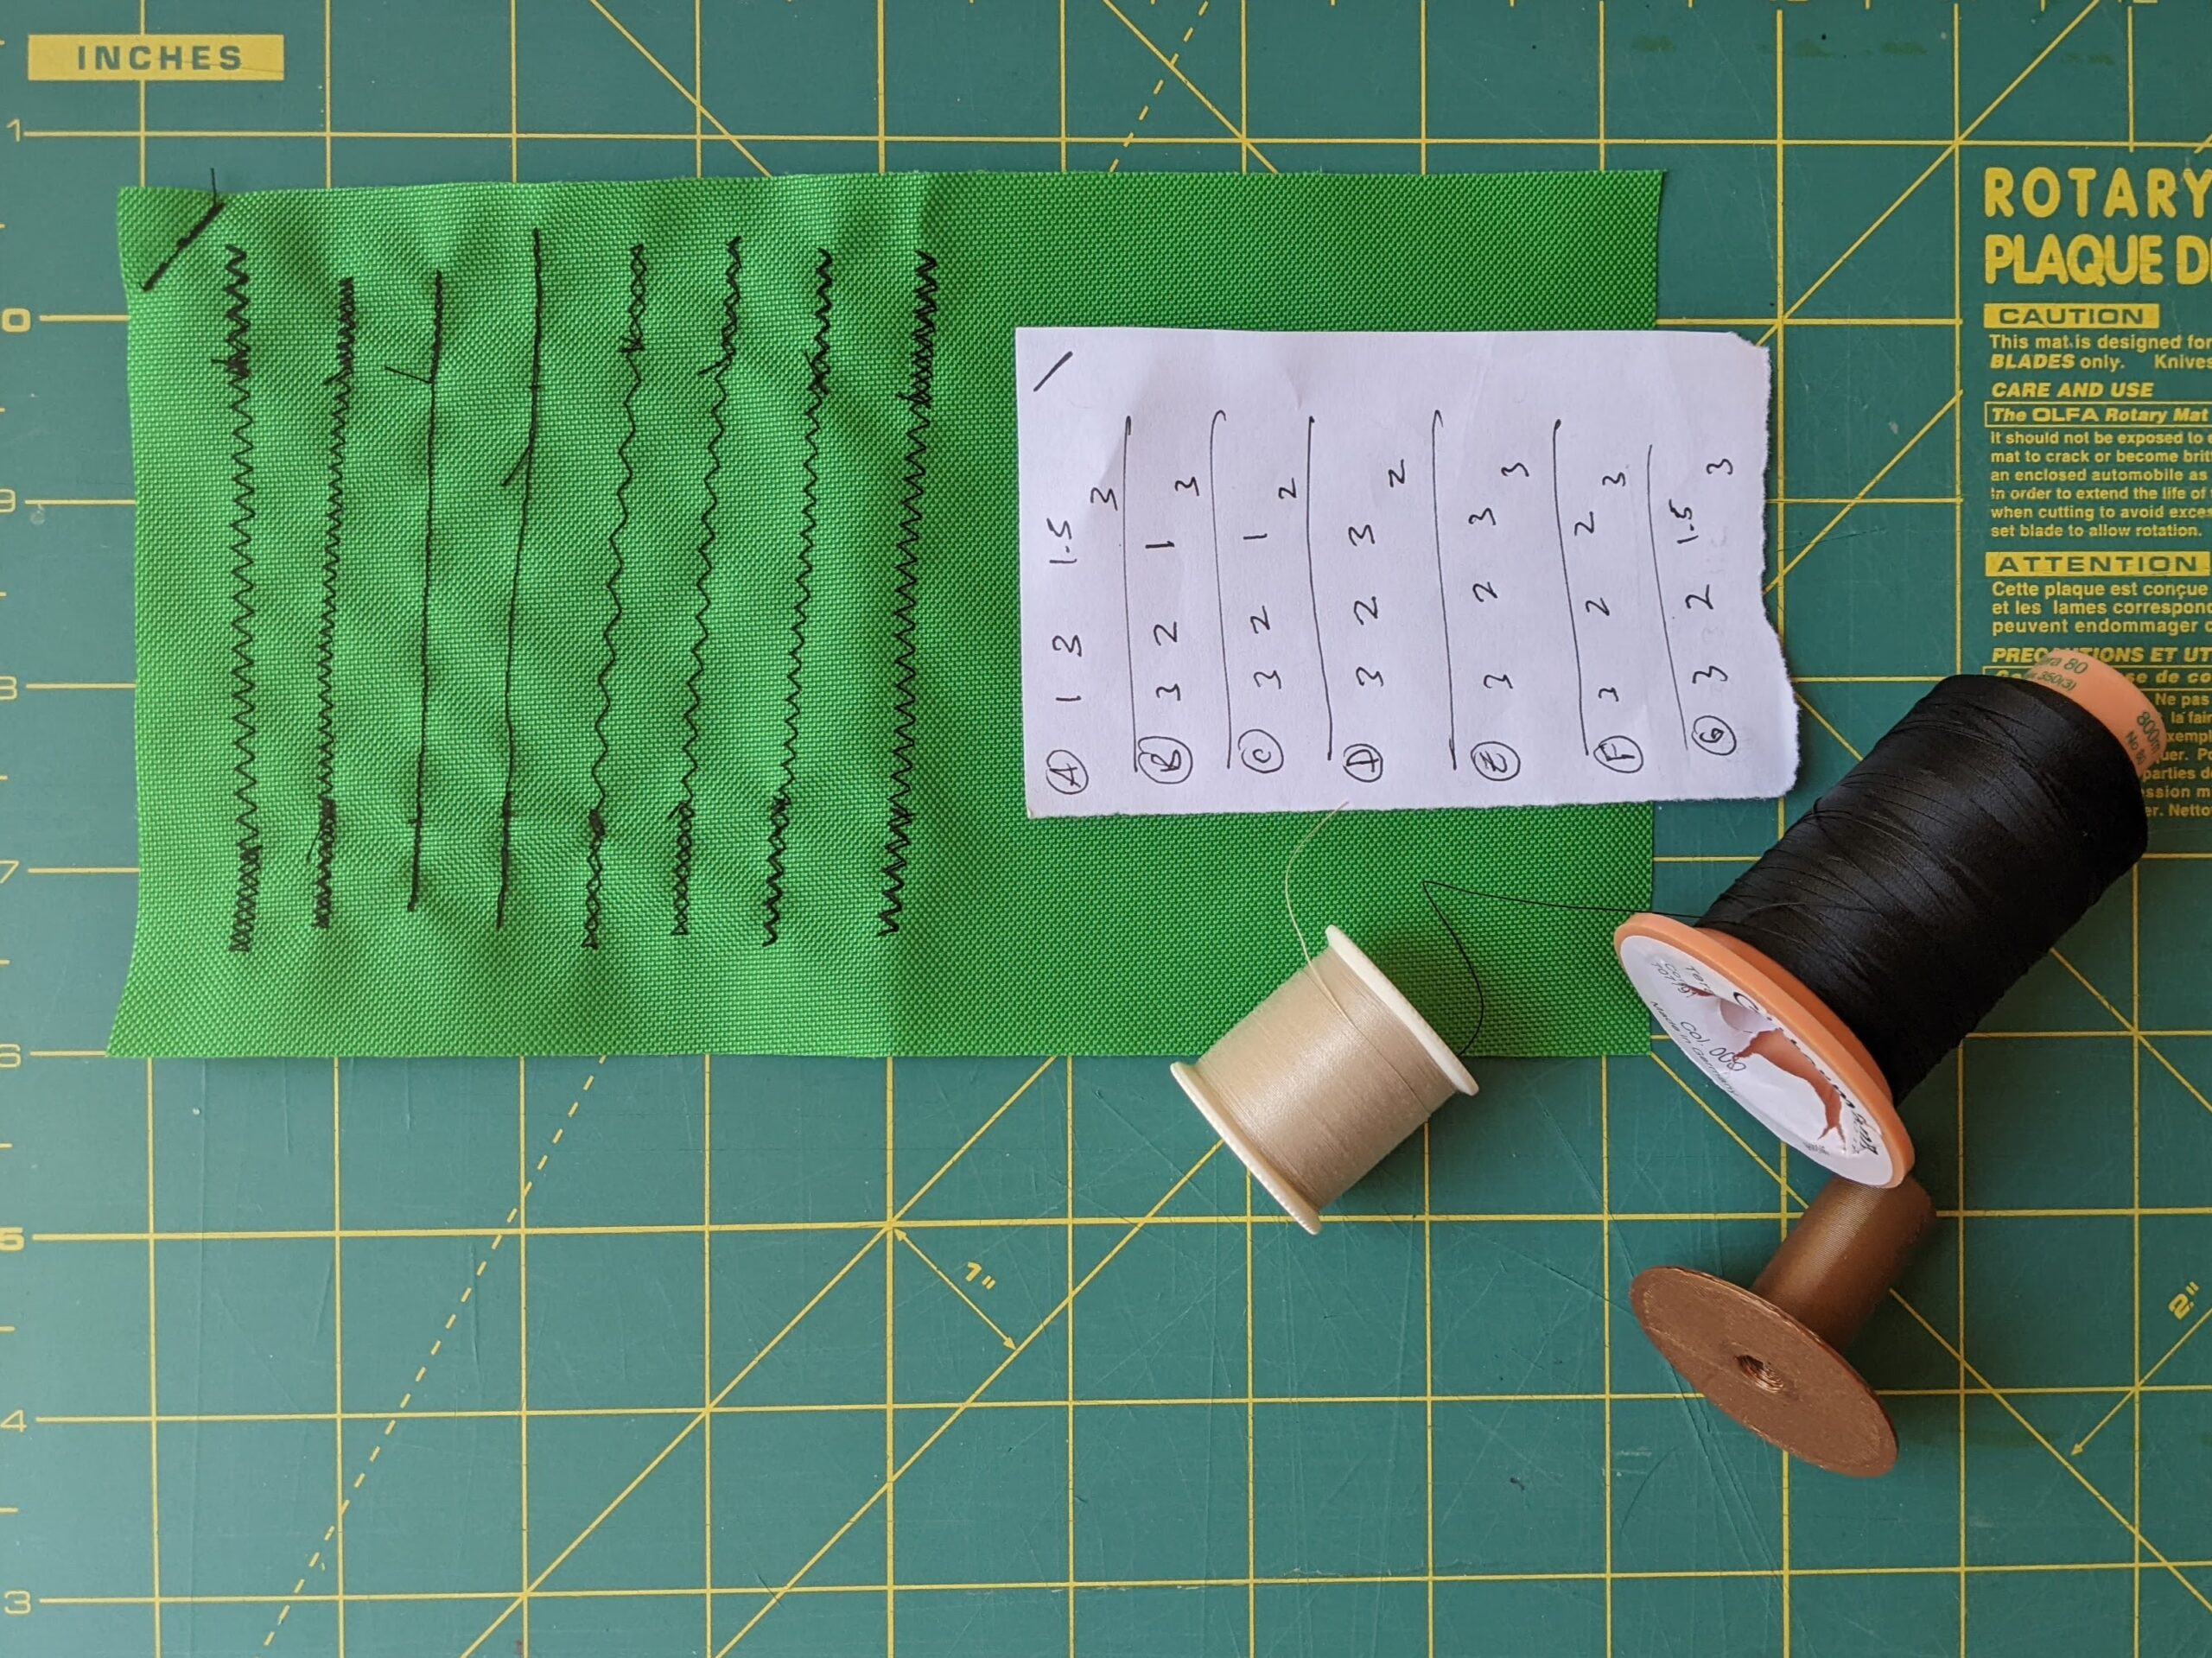
Annotated stitch sampler, with a stripe in one corner to orient the stitch setting guide - I quickly discovered that the large Gutermann’s thread spool I’d purchased had way too large a core to work with the spool holder on my sewing machine. Thus, I created a plastic insert that helped keep it from wobbling, which meant it would sometimes bounce right off the spool holder. It was a little wobbly, so I printed a second one which worked beautifully.
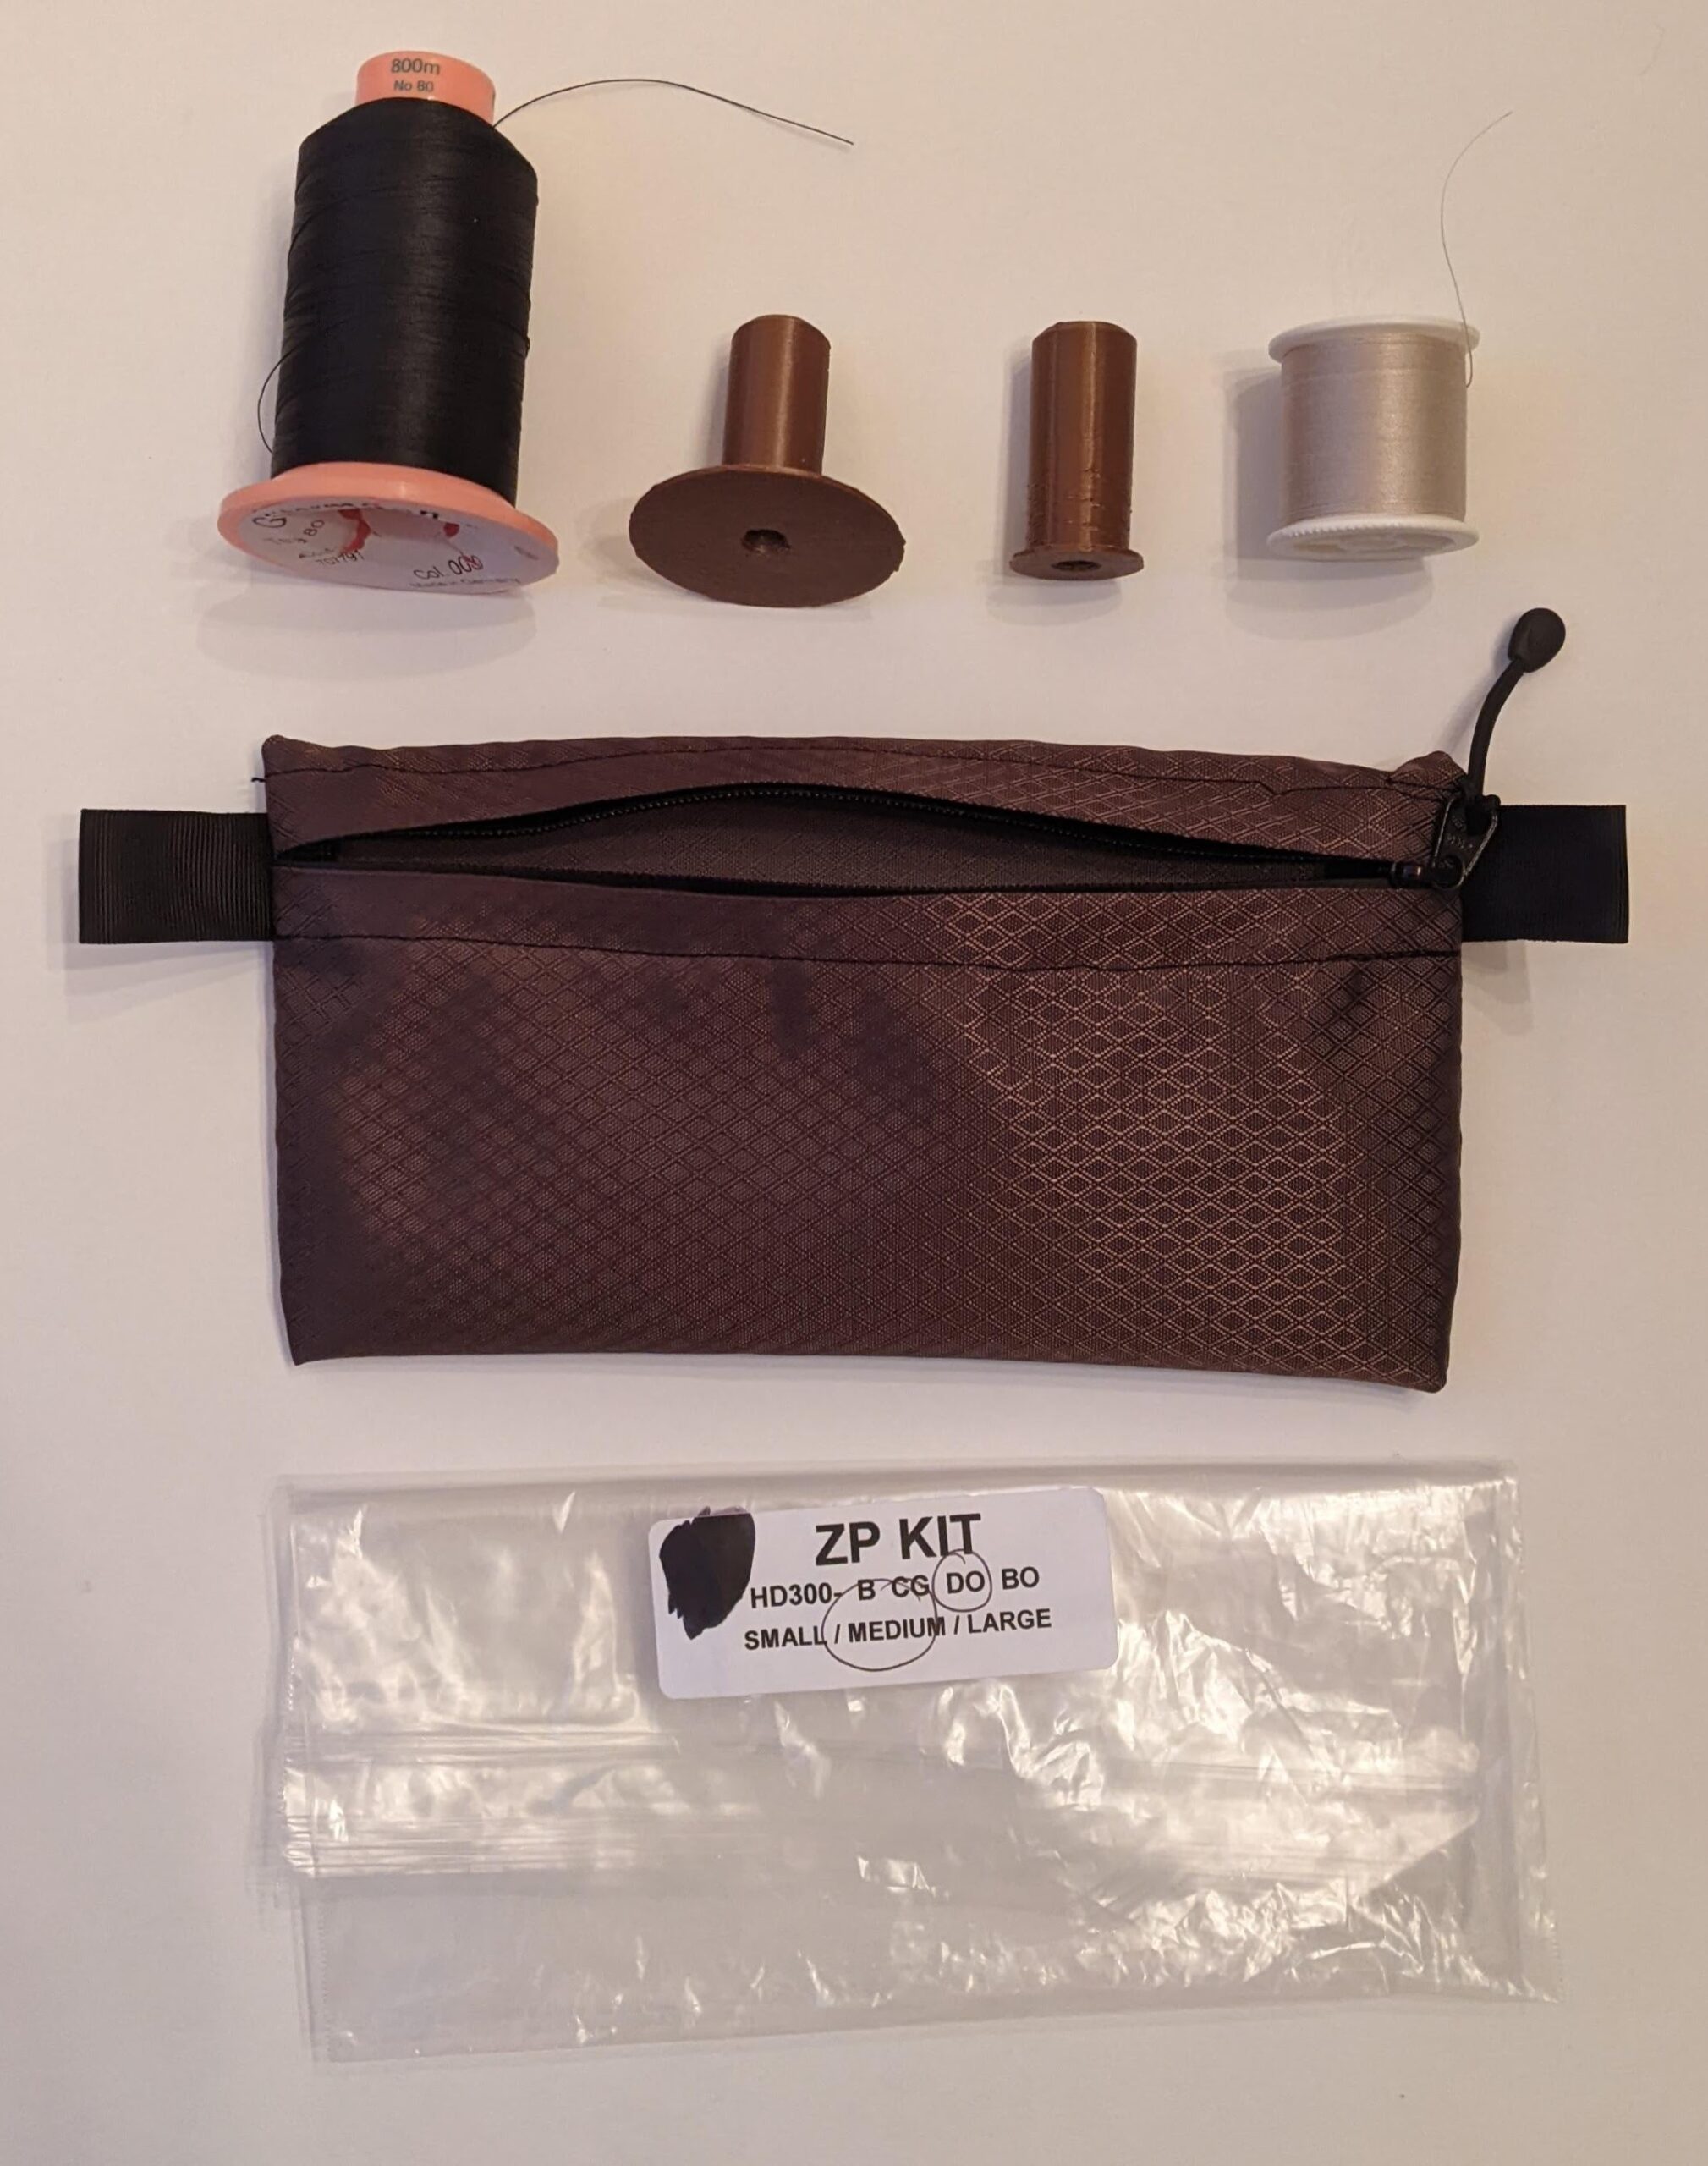
RBTR zippered pouch, and spool adapters pictured
- Zipper sewing foot
- RBTR $10 “Stuff Sack” Kit

RBTR Stuff Sack - RBTR Zipper Pouch Kit
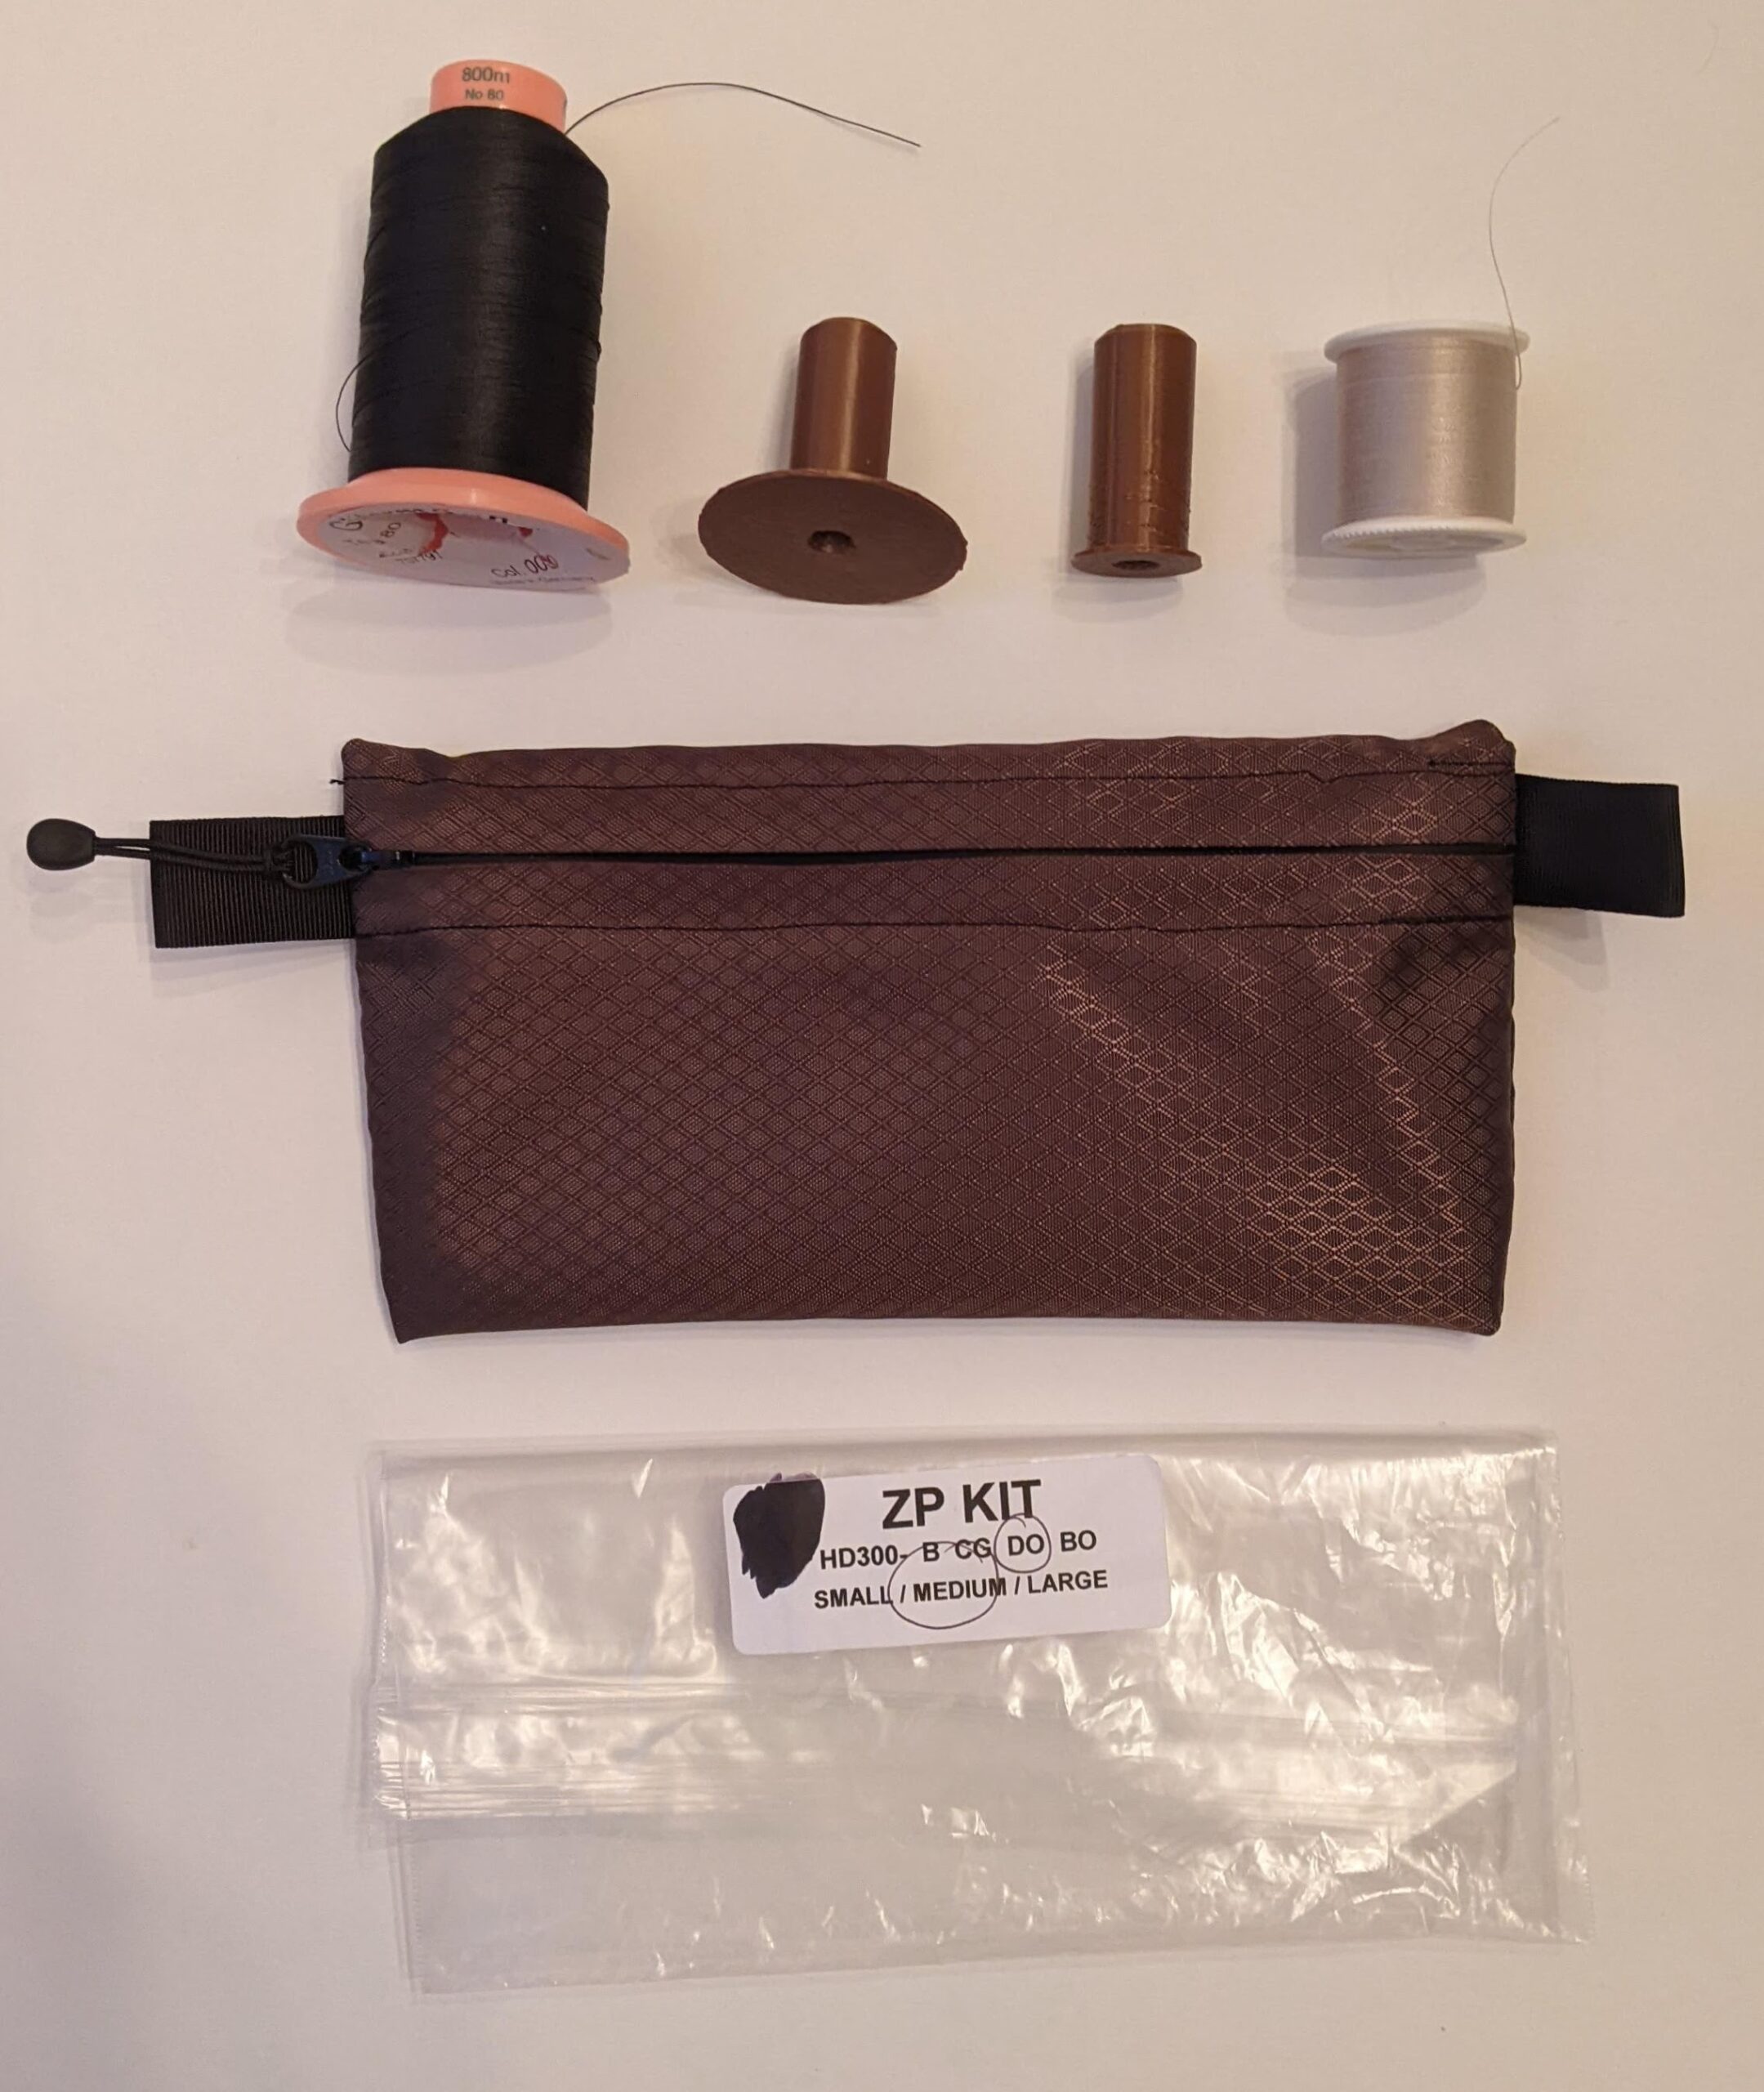
RBTR Zipper Pouch kit, all zipped up - When it comes to the guides by RBTR, I really have no notes. Their video guides are helpful, detailed, and very accessible. I got over my zipper cowardice very quickly by just watching the video a few times, letting it play while I went slowly, and pausing to go over each step. I’m hopeful I’ll be able to use the skills I’ve developed here to build a new EDC bag.
Custom Every Day Carry Bag
Custom Every Day Carry (EDC) Bag
It’s been more than nine thirteen years since my last blog post regarding my every day carry bag. Something must have happened between August of 2019 when I started this blog post and July of 2023, but for some reason, I just can’t seem to think of what could possibly happened to have derailed an idea. Rather than putting this post off any longer, I’m just going to publish it largely as-is.
Perhaps it’s time for a progress report or update?
Back around about the summer of 1994 I wanted a bag to carry my stuff in. 12 I needed it to hold a binder, pens, pencils, and other assorted college student things. Since this was my very first sewing project, I vastly over planned, prepared, and engineered everything. I made a lot of mistakes, but nothing catastrophic.
LESSONS
- Material. It turns out that canvas was eventually scrapped in military uses because it doesn’t resist abrasion well and will rot and decompose if not stored carefully. I also never treated mine to be waterproof with wax or some other substance. A more modern and durable material is probably ballistic nylon or Cordura. For a much more lightweight bag, a ripstop nylon, polyester, or polypropylene may work better.
- Hardware. I used 2-inch wide plastic buckles and clips on the bag as well as nylon webbing.3 These were the only sizes I could find back in 1994 at the local sewing / crafts store, so that’s what I bought. In anticipation of making a new bag, I’ve already bought webbing made from seat belt material and plan to 3D print all new hardware. I would probably add some loops of fabric or cord for attaching a small carabiner, lanyard, or keys.
- Sewing. I’m proud of this bag. While there are a few rookie mistakes4 , it has held up incredibly well over the last 25 years. I planned it out, drew everything out on large sheets of paper, transferred the designs to the canvas, cut everything leaving generous sewing allowances, and sewed it up with my mother’s already ancient sewing machine. Next time, I’ll focus on x-box stitching on straps and better stitching practices.
- Zippered Cowardice. I admit my own cowardice as a beginner tailor in actively avoiding zippered pouches or pockets. I’m not certain how important having zippered enclosures in a bag is, but it’s nice to have these. Then again, I could probably just as easily have a velcro closed pouch that would serve just the same purposes and be less… clanky.
- Flatness. One of the things I appreciated most about the bag I made was that when it was empty/nearly empty, I could simply cinch up the strap and sling it across my back, where it would be basically hidden underneath a fleece vest I wear a lot. This made it easy to take with me – or just ignore when not needed. On a recent trip to an amusement park, I used one of those give-away schwag drawstring backpacks to similar effect. When not in use, I just wore it underneath my vest. When I needed it to care stuff for myself or family, I could tuck some small things inside it – or take it off and wear as intended.
BAG TYPES
- Backpack. A normal school-type backpack with two shoulder straps, large interior zippered area for books, binders, supplies, and a smaller outside zippered area for smaller supplies such as pencils, pens, etc. There are usually a large number of interior pockets.
- Laptop Backpack. This type of backpack has an extra padded divider or compartment for protecting a laptop and a little extra space for carrying power cords and such.
- Satchel. A soft sided cross body single strap with a flap that folds over the front and can be buckled closed.
- Courier/Messenger Bag. A wide side slung bag with a wide strap suitable for carrying several stacks of large documents. Usually has a large flap that folds over the front that buckles closed.
- Laptop Bag. Similar to a messenger back, but just wide enough to accommodate a laptop in a padded interior section, typically with a handle on top.
- Tactical Backpack. A backpack with a LOT of pockets, straps, buckles, harnesses, handles, etc. Ranges from small to very large.
- Fanny Pack. I hate to admit the practicality of these bags because they’re so incredibly ugly.
- Sling Messenger Bag. “A bag with one strap that is designed to be carried on one shoulder.” These tend to have a narrow and rounded triangular appearance, with a strap attaching to the left or right of the base.
- Cortility Bag. In episode #69 of the Cortex Podcast on 5/22/2018, CGP Grey talked about getting a small bag to carry a minimum amount of useful things since his everyday wear does not have enough storage. Such things included his wallet, phone, headphones, earplugs, airpods case, a small camera, aspirin, etc. This is my exact problem. I want to be able to carry just a few more things with me.
- Drawstring Backpack. These are the kinds of bags that are basically drawstring bags where the loops of cinching cord are anchored at the bottom, so they can also serve as backpack straps. They’re simple, easy to make, pack down super small, but they’re also… simple and don’t have a lot of room for many features.
STUFF
- Stuff I Carry. I’m not a survivalist, camping enthusiast, or have any special need for a bug-out bag. Hopefully, I’ll never find myself in such a position that this bag will be what makes the difference. With changes in life and lifestyle over the years, the things I need to carry has changed as well.
- High School / College: Books, notebooks, pens, pencils, playing cards
- Grad School: Laptop plus books, notebooks, pens, pencils
- Work Life: Sunglasses, bulky cell phone, laptop, small notebook/paper, pens, pencil, camera
- Life Work:
- Sunglasses, small cell phone, small notebook/paper, pens, pencil, small tools, sometimes a charger/portable battery and/or a laptop,
- Bag Needs. While pondering what I really need a bag for these days. I’m no longer really very far from the things I need whether I’m at work, home, with the family, or just someplace near my car. Now I’m of two minds on the topic. Part of me wants something akin to a “tactical backpack” which is, depending upon your viewpoint, a glorified fanny pack worn across the back or a single strap side sling narrow backpack with lots of hooks, loops, straps, etc. Part of me wants an unobtrusive and nearly invisible “drawstring backpack.”
I still use that old bag fairly regularly.
Annnnnd, that’s about where my blog post from 2019 left off…
Custom Every Day Carry Bag
- My Ultimate Bag
- Custom Every Day Carry (EDC) Bag
- Sewing Practice
- EDC Bag Materials, Designs, Etc
- Off the rack options for EDC bags
- Mind you, this was back in the mid-90’s when it wasn’t uncommon for someone to have a fanny pack [↩]
- Looking back, I was going for more of a manly Indiana Jones satchel / bugout bag [↩]
- The technical term for these nylon straps [↩]
- having way more than 10 stitches per inch basically perforated the canvas underneath the webbing [↩]
ChatGPT WordPress Plugins
This is kinda bananas. Years ago I wrote a plugin to solve a problem I had. I wanted a simple WordPress plugin where I could insert a shortcode into a blog post, specify a series title, and have it automatically search up all the other blog posts that used the same shortcode and series title, and then insert a nice looking list of blog posts in that series in chronological order.
It was one of my first plugins, still available on WordPress.org – just hidden since it hasn’t been updated in almost a decade. It still works to this very day, if occasionally a little buggy. After several WordPress versions, it no longer properly displays the series title, which is a real shame.
On a whim, I tried using ChatGPT to generate some plugins.
Here’s an example of my old plugin and the new ChatGPT written plugin (in this order):
Default Series Title
See how bad that was? It completely mangled the title.
Edit: Since publishing this post, I realized that I would have to choose between
- Leaving the old defunct plugin in place just to make a point about how it didn’t stand the test of a decade’s worth of WordPress updates, but then also leaving broken series titles sprinkled through my back catalog of blog posts.
- Go back through nearly 10 years of blog posts12 to change them over to the new plugin shortcode.
- Disable the old plugin, but have the new plugin work with the old shortcode as well as it’s own new shortcode, at the cost of losing an example of how bad the old plugin performed.
I went with option 3. Just take my word for it, it looked bad.

Now for the ChatGPT version:
Software Development with ChatGPT
It took me about an hour to whip up a working WordPress plugin with the same core functionality. I would break down the time I spent as follows:
But, that’s not all! You see, as I was writing this blog post, I realized it would be fun to include a pie chart to indicate the time I’d spent on this. Unfortunately, the plugin I had written to do exactly this many years ago has apparently completely given up the ghost. Thus, before I proceeded to this very sentence, I used ChatGPT to create a plugin for displaying custom pie charts!
Obviously, this plugin took a lot longer. The first few versions were having all kinds of problems between the HTML Canvas code and trying to figure out how to make sure the javascript was not loading too early or too late. In the end, I just asked it whether it was capable of even creating a pie chart – and it gave me a piece of workable javascript. I told it to refactor the plugin using this same javascript, and then it was a matter of fine tuning the result.
If you don’t know anything about writing WordPress plugins, you could probably use ChatGPT to create a very simple plugin. However, once it got slightly more complicated, it would likely require some troubleshooting to figure out what was happening. In the series plugin it took me a while to root through the WordPress functions to figure out that apparently ChatGPT was trying to use a function in a way that simply did not work. I explained to ChatGPT that that particular function could not operate in that way, explained how the data it was feeding into that function needed to be first modified, and then asked it to refactor the code. From that point forward, it started to look a lot better. There were some additional quirks – like putting more than one series title in a single post would only display one. I suspect these problems of ChatGPT taking a shortcut to generate code, hardcoding certain variables and names, not considering that it might need to operate more than once on the page, may be difficult for it to anticipate and address. Without some degree of WordPress development knowledge, I think a novice user armed only with ChatGPT would need to do a lot of refactoring, asking the program to generate the plugin all over from scratch many times, before arriving at a workable result. Then again, a million monkeys at typewriters, right?
I think ChatGPT could be great for creating relatively simple plugins like a series plugin, a pie chart plugin, or even a table of contents plugin. However, having seen how much time it cut out of the development process, I think it would be interesting to try developing an A/B testing plugin or more complicated plugin.
I think the next task to see if I can get it to generate QMK code for a keyboard, Arduino code, Raspberry Pi code, or a chrome extension.
I can already see some ways to improve both of the ChatGPT generated plugins used in this blog post. My series plugin included two arrows at the bottom so the reader could navigate to the prior or next post in the series. And I think it would be great if the chart plugin had a feature where I could specify the units, so the magnitude data would be included with the labels. I may try getting it to shoehorn these updates later…
If you see these reflected in the charts above, I must have already done it. :)
Software Development with LLMs
Series Plugin Test for Illustrative Purposes Only
The only purpose for this post is to serve as a reference for a more interesting and useful post.
Software Development with LLMs
- Series Plugin Test for Illustrative Purposes Only
- ChatGPT WordPress Plugins
- Coding with an LLM Sidekick
Software Development with LLMs
- Series Plugin Test for Illustrative Purposes Only
- ChatGPT WordPress Plugins
- Coding with an LLM Sidekick
[]
