I should really have entitled this post “How to mostly recover from a stalled print.” Several times now I’ve had a problem with the DrawBot stalling out and stopping a print. When this has happened, hours can pass and the little ‘bot will do nothing at all.
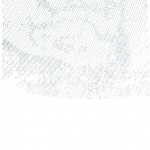
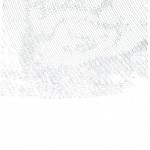
Such as last night. It was probably 80% done drawing Starry Night when it … just… stopped.
Here’s what I saw and here’s how I (mostly) fixed it:
- The Symptoms
- No DrawBot movement1
- No scrolling of the command queue
- The ‘bot status read “BUSY [insert normal seeming string command I didn’t write down]”2
- The motors were quite warm
- And the poor little Motor Shield was warm as well3
- The Fix45
- I figured that, for whatever reason, the little ‘bot just seized up – but that perhaps if I could get it to respond to commands I might set it back on track.
- The control software was responsive enough that I could “Queue->Export Queue“, which I did.
- The problem with trying to reset the board or the control software and just feeding it the remaining part of the queue is that it wouldn’t remember where it was. So, I figured if I could convince it that it was already where it was supposed to be, it might just continue on as if everything were okay.
- I had seen from prior command queues that the code, “C09,NUMBER1,NUMBER2,END” appeared to be the way the machine would apply “Input->Set Pen Position.”
- I then looked at the code that I had exported from the queue. The first item was:
- C05,3103,4350,29,133,END
- So, I edited the text file so that it read as follows:
- c09,3103,4350,END
- C05,3103,4350,29,133,END
- …the rest of the command queue
- Which I believed essentially tell the ‘bot that it was where it was supposed to be and to continue on as if everything was normal.
- I then disconnected the USB cable
- Closed the control software
- Restarted the control software
- Reconnected the USB cable
- Reestablished contact with the ‘bot, “Setup->Serial Port” and selected the port of choice for my laptop
- Clicked the queue to start it up again…
- It seems to have worked – but may possibly have shifted up one pixel. This is why I say this was mostly a recovery. I suspect that if I should have moved the pen down a little and see if I could get it to draw the next pixel in line.
I’ll scan and post this drawing as well and will point out the spot where I tried this little fix.
Default Series Title- Doctor, she’s been acting listless… [↩]
- … and unresponsive… [↩]
- …and has a fever! What should I do?! [↩]
- VERY nearly almost called this the Cure and linked to a YouTube video. It’s really just too damn early in the morning for me to write such a thing or you to read such a thing. As much as I like the Cure, they’re not morning music, you know? [↩]
- Like the Smiths [↩]