

In continuing with my Doctor Who fanboy prints, I’d like to create a Time Lord Seal coin. Coins are cool. The BBC put up the design file associated with the Time Lord Seal from The End of Time.
In continuing with my Doctor Who fanboy prints, I’d like to create a Time Lord Seal coin. Coins are cool. The BBC put up the design file associated with the Time Lord Seal from The End of Time.
This morning I received an e-mail from Bre out of the blue introducing me to Travis Goodspeed. Apparently Travis has been working on building sonic screwdriver guts out of the GoodFET, a universal JTAG programmer, a “sonic screwdriver of hacking.” Travis suggested a GoodFET could be programmed to act as a TV-B-Gone, light show, or any number of other things. Given that his circuit board is about 3″ x 0.85″ x 0.2″1 , there shouldn’t be a problem finding space for it in the sonic screwdriver I’m in the middle of designing. 2
Freaking sweet.
So, here’s my real life sonic screwdriver wishlist:
I’ve been slowly working on the design of a printable (and fully MakerBottable) sonic screwdriver. This model of the sonic screwdriver is built up of a number of concentric cylinders, has several significant overhangs well in excess of 45 degrees, and is larger than the MakerBot’s built capacity. In order to deal with these design problems, I modeled it in sections.
In order to make the overall result something I could just pop/snap/slide together I designed it making some sections which were split vertically and other sections which slide around those sections to keep them together. In order to make the parts quickly printable I designed all the parts at around 0.5mm thickness.
About 40% of the way through the print one of the vertical sections wasn’t coming out properly – probably because it was too thin. The parts were too thin and flexible and ended up tearing between layers and just being too flimsy.
I also noticed something odd – the extrusion was too thin on that side of the model. I can’t be sure why this is happening – but I suspect it’s due to the extruder not getting a good enough grip. Perhaps I need to floss the extruder pulley or install a new extruder idler wheel. However, it doesn’t explain why the extrusion was too thin on just that one side and no other spots.
Suggestions?
I recently bought the Perhaps with a joule thief?)1 Since I know very VERY little about electronics, I’d appreciate some diagrams, descriptions of parts, etc.
My end goal is to install this device into a MakerBot made replica of the 11th Doctor’s Sonic Screwdriver.
If you’re interested in this project or just want to help, I’ll gladly accept any assistance. Let me know if I can help with any printing projects in return.
Thanks!
Like just about everything else I write, this blog is about 70% on topic, 10% attempts at humor, 10% frivolity and nonsense, and about 10% completely wildly off topic. This mix is completely unintentional and yet ridiculously consistent.
This is one such off topic post. I just finished watching the Doctor Who season finale. I was a teenage Doctor Who fan in America. Back then I only knew of about three other people who were aware of and appreciated the show. But, this new series reboot and this season in particular are really good.
Okay, back to your regularly scheduled nonsense, frivolity, and sad attempts at humor. I may talk about MakerBots and RepRap stuff too later.
In the comments of a recent post Tony and I were discussing how we were each thinking about how to design and print an 11th Doctor sonic screwdriver. 1 2 Let’s set aside the nature of the object in question for a moment and consider the constraints, problems, considerations, and potential design solutions.3
There are a number of challenges facing one wishing to print this particular object. Although the discussion4 pertains to the design challenges and decisions in this project, I’m hopeful it will be helpful to myself or another when it comes to some other design. Thus, let us think only of the design challenges, problems, and potential solutions.
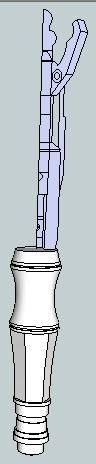
Even if you want to print the non-extending, non-spring loaded, non-LED, non-swiveling bits there’s a fair number of considerations. Often my most successful way of solving a problem is to just get started and figure things out as I go.
In this case I got started by examining the pictures Tony and I had located. Quite separately we had both pulled the images out of the animated GIF. I created a new smaller image of the open and closed versions side by side, for comparison’s sake. Then, I reoriented both of them so they were vertical rather than on a slant. Then I resized the picture of the screwdriver in someone’s hand5 6 so that it was roughly the same scale as the other two images. This was placed next to the first two. I traced the images in Sketchup and spun the parts around and ended up with a reasonable facsimile of a portion of the screwdriver.
The problem with designing and printing in segments is figuring out how to assemble it.
And, what about other considerations? If we want to install any electronics, lights, etc we probably want it to be easy to disassemble. Ideally, the entire assembly7 would be hollow in order to incorporate electronic parts. Besides, “if you can’t open it, you don’t own it,” right? That means no easy glue or snap fit solution. Bolting together means non-printable parts. I generally have a preference for 100% printable designs when I can manage. Here are some of the ideas I considered and dismissed:
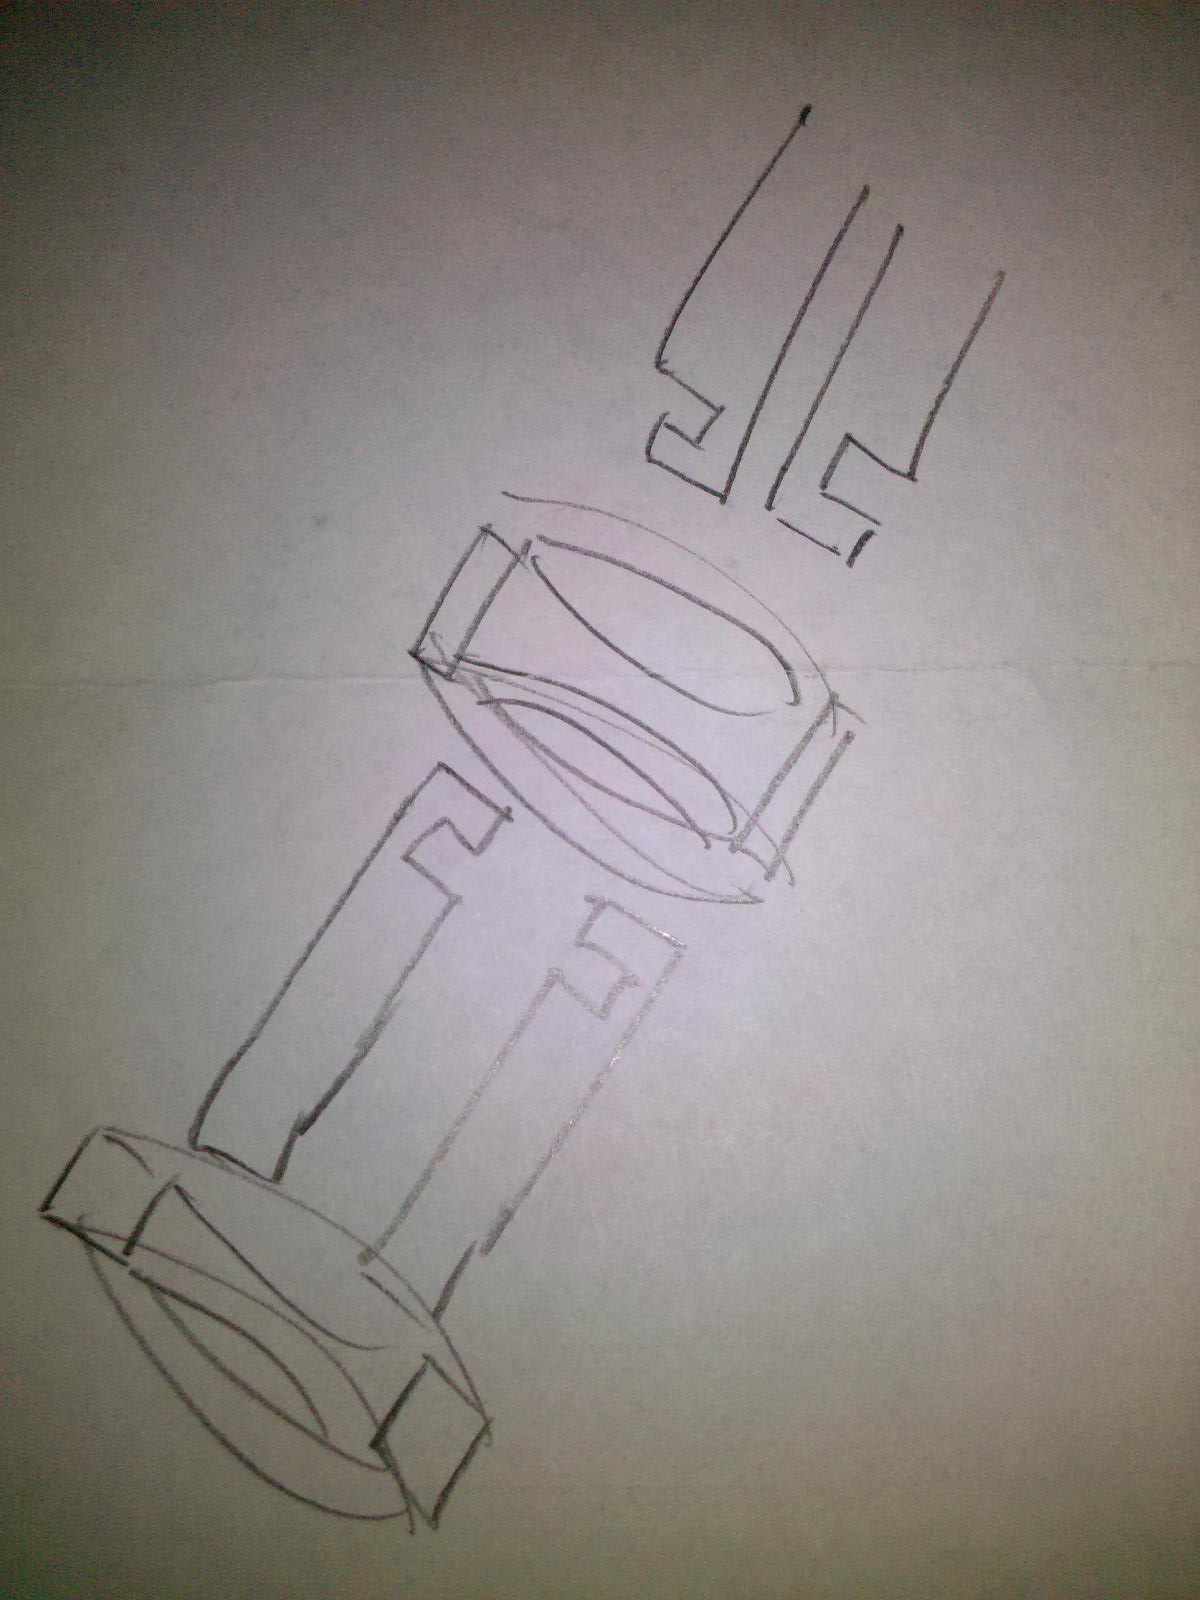
While sketching up the above in Sketchup8 I hit upon an idea. I could print the assembly in sections9 – but not necessarily similarly constructed sections. In this I was inspired by some of the design ideas I saw/recreated while creating a derivative 3x2x1 Rubik’s cube from TomZ’s 1x2x3 Rubik’s cube. If you look at the design of this style of Rubik’s cube (either of these will do) you’ll notice the two cubes at either end have little bits that stick out into half-cylinders which widen into half-disks. When you take two of these end cubes and set them together you end up with a full cylinder terminating in a full disk. These two are then captured in the two center cubes which have half-cylinder, half-disk grooves – which allow the two end pieces to rotate freely.
So, what if I printed large sections of the screwdriver as pieces that fit together vertically – but had a groove around the edge? You could leave the inside mostly hollow. Then, you could slide a ring or thin cylinder around it. If so, the ring would keep the two halves in place. The ring could be kept in place either by friction or a notch/groove system. The point is this design would:
Napkin sketch on right.
Amusingly, this only gets me 1/3 of the way. I still need to figure out how to design the bits that slide and the bits that swivel the claw like bits at the end. So, Tony, what you got?
Update: Cyrozap – sory fore mispellnig yoru mane.
Now that I’ve got the process for creating a cookie cutter design file, it goes pretty quickly. Unlike several of recent designs (Dalek, sonic screwdriver, etc), this design is fairly simple. The STL output from the Sketchup plugin didn’t even need any cleaning up/repairing.
In any case, share and enjoy this TARDIS cookie cutter.
Those of you who are not fans of Doctor Who may want to just skip this post.
In any case, what I’d really like to do is to design and print a life-size model of a sonic screwdriver. Ideally it would have a spot for inserting an LED, space for a battery, switch, and be able to extend just as the one in the TV show.
Until then, here’s a sonic screwdriver cookie cutter.
I’ve uploaded my designs for a Dalek cookie cutter to Thingiverse.
I don’t even eat that many cookies. It’s just that these are just fun to design. I realize there’s an SCAD Thing on Thingiverse for creating cookie cutters. However, I’m just not familiar with SCAD and Sketchup with a few key STL plugins is SOOO easy to use.
My design process is essentially:
I’ve posted a few times about useful Sketchup plugins, so if you’re getting started with Sketchup and MakerBot that’s a good place to start.
I rather enjoy building the easy-to-use user interfaces for another website of mine. I’m always tweaking it and trying to make it better. Small change, test, ask for input, LRR.1
My last post gave me a great idea. A large physical console with actual knobs, switches, and dials that all operate Skeinforge. If I had one of these, I would want it to look like the center console of a TARDIS. Some of the best Doctor Who moments are when he’s zipping around the console, tapping, flipping, twisting, turning and generally being wacky.
Imagine being able to do that sort of thing and then have a plastic object (of a seemingly correspondingly random quality) pop out of the center?