Prepping for Maker Faire Bay Area 2024

It’s always a whirlwind heading into Maker Faire.  This year is no exception.  This past weekend we got things mostly ready for the Rocklin Maker Faire.  All of our robots were functional, which was really great.  A quick update to document progress and also act like a to-do list of sorts:

  • MakerKnit’s companion robot
    • My wife has knit her octopus
    • I’ve installed the Adafruit QtPy, NeoPixels, and touch sensors connected via BrownDogGadgets conductive thread through the legs
    • It’s been programmed to “blink” the two LED eyes randomly plus a small number of light shows for the body
    • Designed/3D printed several eyes, settling on a nice design that should make the eye animations look good
  • Kim’dael LightningSlayer’s Pendant
    • The youngest’s project has morphed from an LED arm to a CircuitPlayground in a pendant that just plays some notes when she presses buttons.
    • A long extension for the battery pack, using thicker gauge wire wound through the back of stock CircuitPlayground enclosure, is now the “necklace” portion for this project.
  • Dexter Starfighter’s ED-E
  • MakerBlock
    • My robot wasn’t quite ready for Maker Faire last year, but “ready enough” to share.  Last year the little bot was just sitting in a jar I carried around and not really visible to anyone.
    • This year I’ve added feet (entirely cosmetic), changed the battery pack around so it is removeable, swapped out dome diffusers, and am working on new animations/behaviors.
    • I realized that my old LED goggles were… janky.  This was because I had soldered some buttons to one side and then wired them into the Trinket directly, without any resistors.  While it /worked/, it caused some problems whenever I pressed a button.  I pulled the Trinket out and swapped in my new favorite board, the QtPy.
      • I really prefer programming / updating via CircuitPython over Arduino since there’s no pre-compile time and fussy Arduino connections.
      • Besides the programming/uploading, I love the built in RGB, up to 6 capacitive touch sensor, and easy serial communication
      • As an added plus, I soldered on the 2MB flash chip so the project as a ton of space. 1
      • And at almost the same price as a Triket ($0.50 more than the original, $0.50 less than the M0 Trinkets), it’s just easier to swap them into any project I would have previously put a Trinket into
  •  Soldering
    • I’ve really upgraded my soldering experience and it’s made a world of difference.  We moved about a year ago and there’s a space in the house where I can keep a soldering station out and ready to use.  Just having it available is such an upgrade.  I’ve had several handheld / pen style soldering irons over the years and they’re usually pretty terrible.  In fairness, this is also because I’m kinda terrible at soldering.  I had a basic garbage soldering iron from the local hardware store, upgrade one that had a little temperature control from Adafruit, and then upon the recommendation of a friend upgraded a few weeks ago to an X-TRONIC soldering station.
    • I gave my old soldering iron to my neighbor so he could work on a project for his wife.  As I got to finishing up work on the above projects I realized I couldn’t find my pen soldering iron from Adafruit – and that I didn’t want to find it anyhow.  It was fine.  It worked.  But, my soldering iron holder was cheap and flimsy and easy to tip over and the helping hands I had from Adafruit were “okay” for very small projects, but the joints came loose easily and the helping hands kept falling off.  Rather than spend $20 on another soldering iron I would hate, I dropped $70 on the X-TRONIC station which has built in helping hands and soldering iron holder.  Setting aside that it heats up very quickly, has good temperature control, melts solder quickly, and has great helping hands… it has a way to hold the soldering iron in a way that isn’t constantly anxiety inducing. 2
    • Having the soldering station handy has meant I don’t really mind whipping out a quick battery pack extension cable for our projects.  I just need to strip some wires, fire it up, drop some solder, and turn it off again.
    • I may have ruined the first soldering iron tip kinda quickly.  Again, I have no idea what I’m doing.  I would add solder, dip the tip in flux, wipe on sponge, and then do it all again.  This is a terrible process since all it does it add extra contaminants and gunk to the tip, reducing the ability of it to transfer heat effectively.  Instead, after watching a video, I learned I should run it at the lowest temperature appropriate for the solder/joint, just dab the tip in the brass wool to clean it up a little, then maybe wipe on the slightly damp sponge, and absolutely coat the tip in solder before putting it down.

Things left to do!

  • Things to finish
    • I’d really like to finish up the Fallout themed shirt/vest to go with my project
    • A way to attach my wife’s octopus to a purse strap
    • A better way to wear my robot on my shoulder – may use a similar foam paldron
    • A big chunky seat belt looking thing for the strap wearing my robot
    • I’ve got designs for a new bag to wear/carry around Maker Faire, but haven’t sewn them up yet – maybe this week!?!!?
  • Make sure we have
    • Enough batteries, battery packs, etc for our projects
    • USB chargers for our LiPo batteries in goggles
    • Finish my goggles (install battery, update code, possibly change out diffusers
    • Bring a few Maker Coins to give out (I bought 100 of the 5,000 minted, probably never to be minted again…)
    • Ways to show people links to learn more about our projects – probably via QR codes – though I might also use an RFID tag :)

Okay, back to work on… work… so I can get back to making!

  1. Note to self:  It requires a different version of CircuitPython, Haxpress, to make use of the chip storage []
  2. I used to tape the cord of my soldering iron to the table and then place it on the flimsy stand []

Companion Robots and Maker Faire Season!

I’m super excited for Maker Faire Bay Area / Mare Island and Mini Maker Faire Rocklin.1  I’m not just excited to see everything, but to show all the things I’ve been working on for a while now.  It’s also time to pick up all the little dev boards I’ve somehow accumulated and see if I can make anything with them to show off.

  1. Project Boards
    1. Wemos D1 Mini.  A small insanely cheap (~$3?!) WiFi enabled dev board2 , which has 4MB onboard and can run Arduino.  I think it can also run MicroPython, but I haven’t tested this yet.
    2. Wemos 600 Pico.  An even smaller, even cheaper (~$2 when ordered from China) WiFi enabled dev board that runs… MicroPython?  I think??  I’m saying “I think” because I haven’t been able to get it to do anything yet.
      1. Since starting this blog post, I found a guide on installing MicroPython on Wemos boards that seems promising.
        1. Flashing MicroPython on an ESP8266
        2. https://github.com/espressif/esptool/tree/master
        3. Arguing with Python to let me use “esptool.py”
          1. esptool -p COM13 -c esp8266 flash_id
      2. As promising as that series of blog posts looked, I eventually scrapped the Wemos because it was just too much of a pain to get going with MicroPython.  I think I could have made it work, but for $7 I could also just use the Adafruit QtPy I already have.  The advantages of simply uploading code over a USB cable into a virtual drive just can’t be overstated.
    3. Other Boards
      1. I have a bad habit of picking up dev boards.  I’ve got several Adafruit QtPy’s, several Adafruit Trinkets, an Adafruit FX Sound Board, Raspberry Pi Pico (non-WiFi), various Digispark boards, a small handful of ATTiny85’s, and an even weirder assortment of VERY small programmable circuit boards (ISD1806B-COB) designed to go in greeting cards (just 6 seconds), etc.
  2. Companion Robot
    1. Background.
      1. I started this post at least a month ago when I only had a vague idea of what I wanted to make and even fewer skills.  After seeing my kid’s companion robot take shape, I wanted to get in on the action and make my own.  I decided to make a really small companion robot with just some LED’s, piezo, and small microcontroller unit.  I’d taken a stab at making a companion robot a few years ago, but set it aside for a variety of reasons and never went back.
      2. The idea for this new robot would be something a little less ambitious, make more use of NeoPixels than in prior projects3, with a little more interactivity, trying out some CircuitPython, and… let’s be real… more pizzazz!
    2. Idea:  Friendly Cloud/Vapor/Flame
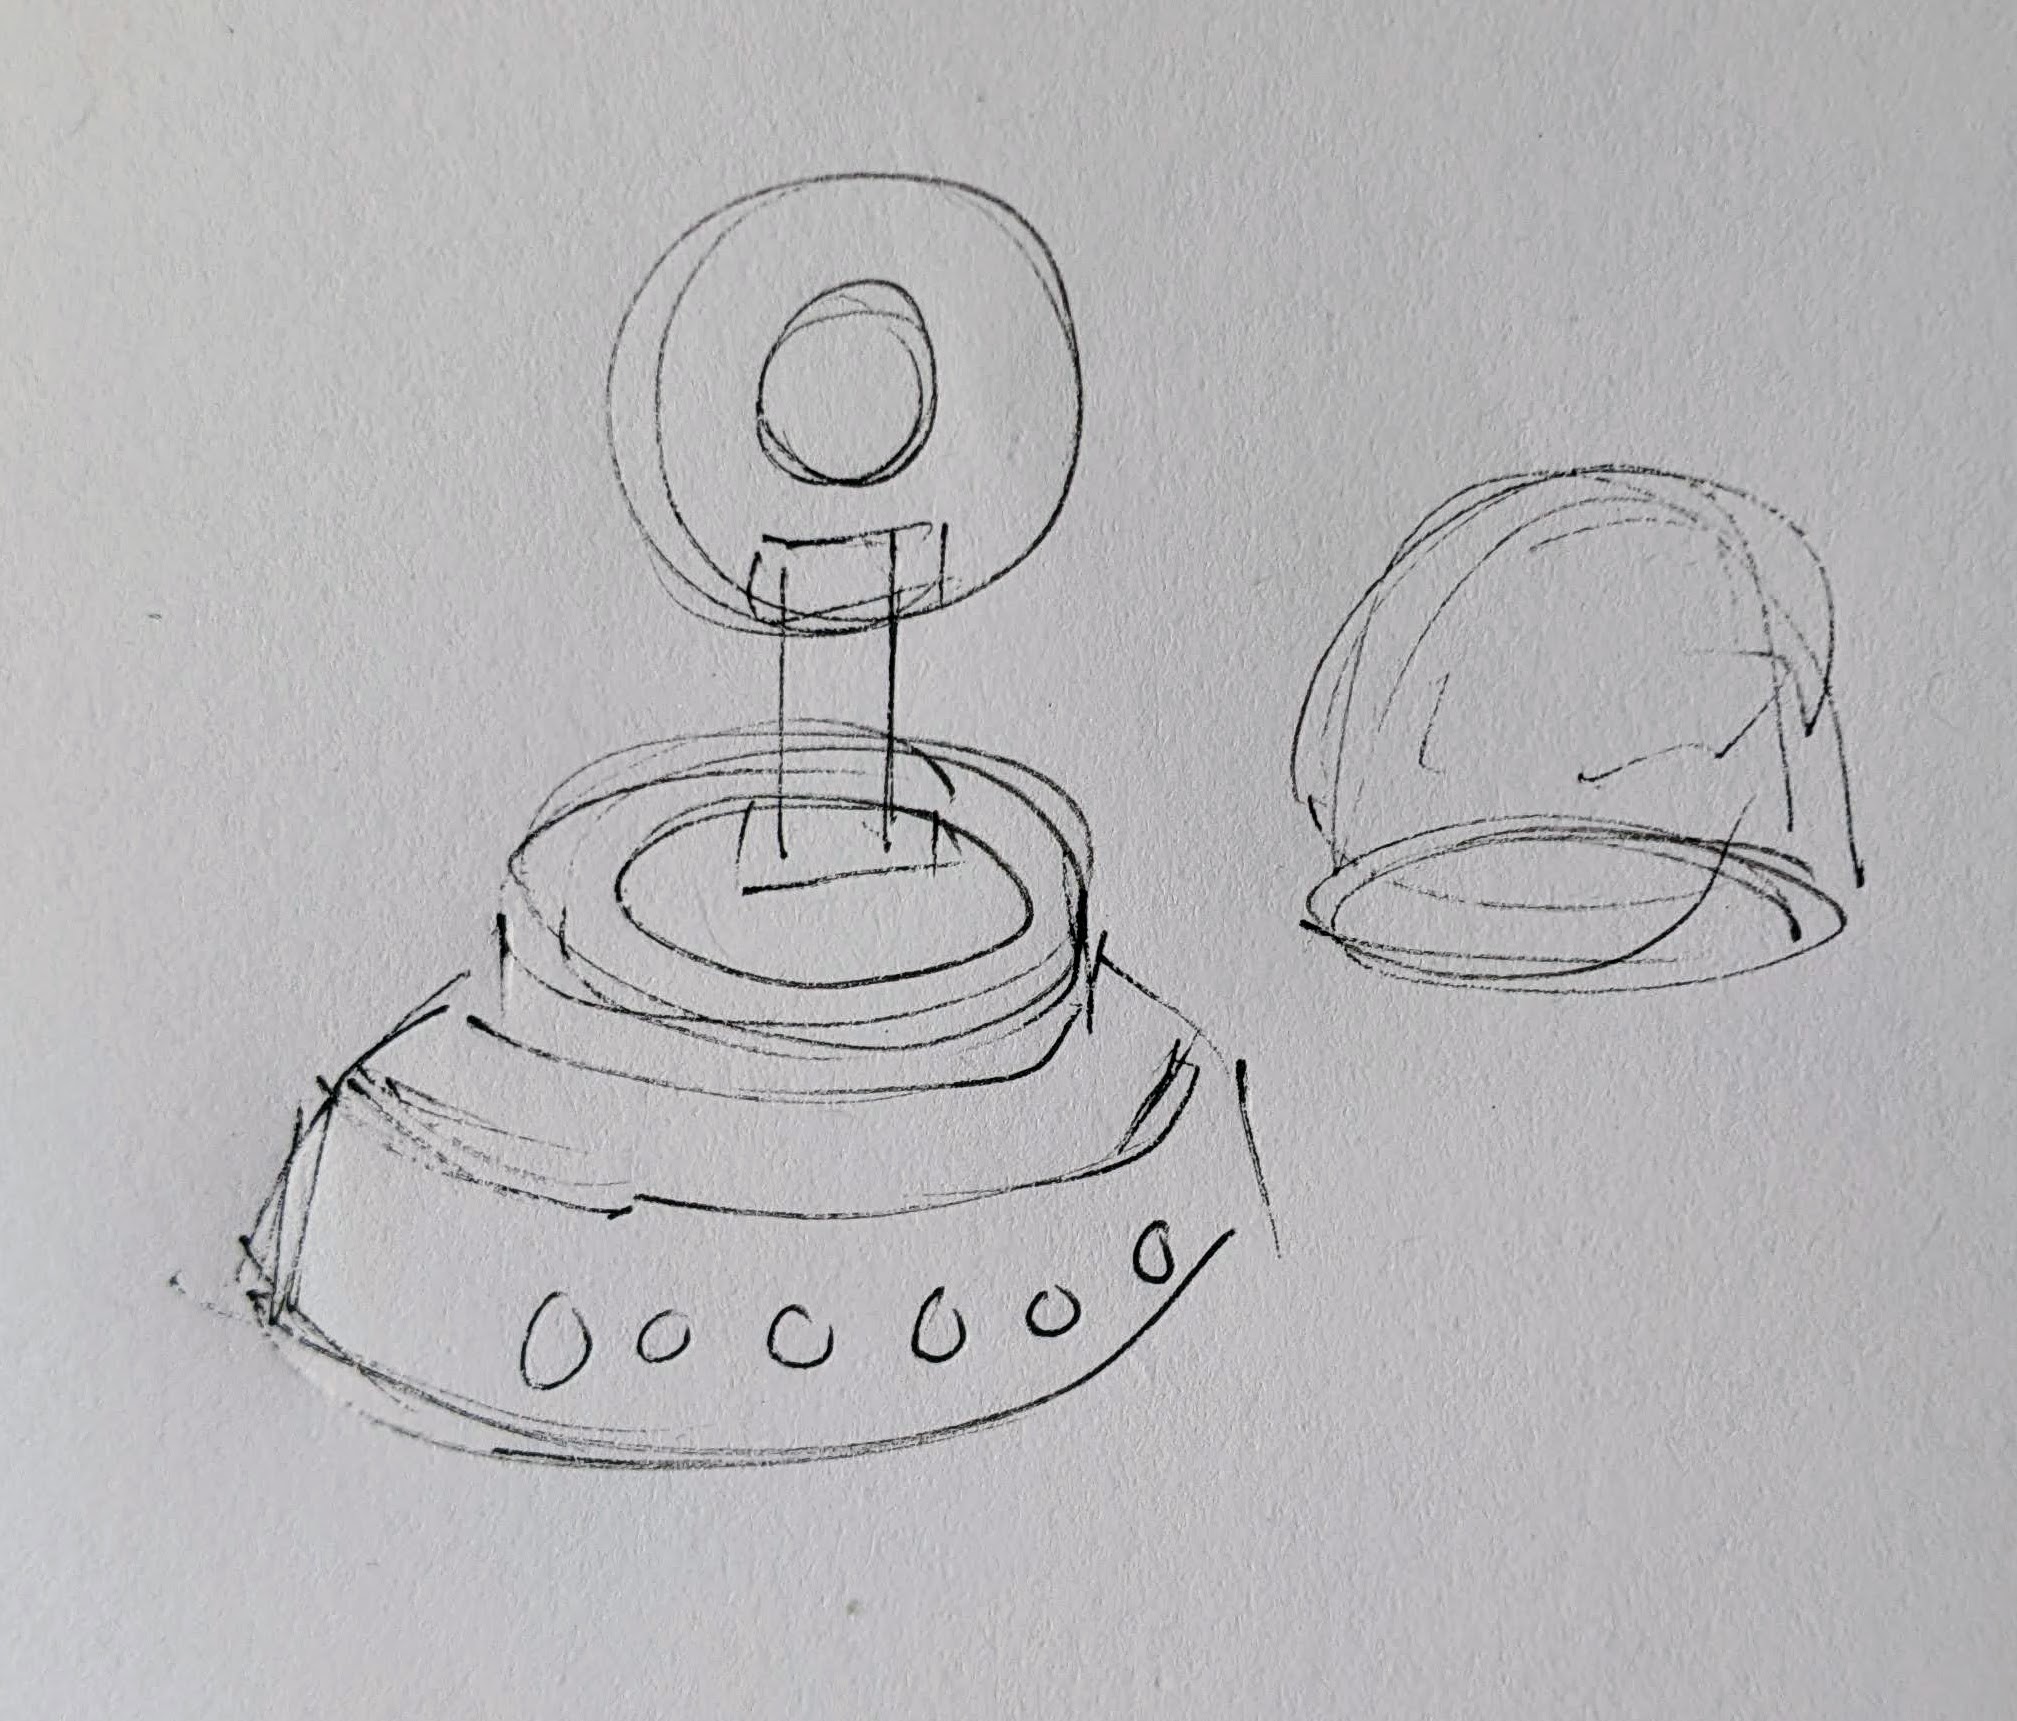
      1. I still really like the copper-toned PLA I’ve been using since it has something of a steampunk flair to it.  I settled on repurposing a small plastic enclosure with a clear dome as the “body” for the robot.  I wanted it to look something like a small entrapped / captive / domesticated4 sentient cloud of vapor or perhaps flame held within a steampunk enclosure.
      2. As a very small, inexpensive board that could run either Arduino or CircuitPython, I decided on the Adafruit QtPy M0.  It could run NeoPixels, there were lots of cool guides on it, plenty of pinouts, and could definitely fit within the confines of my enclosure.
    3. Enclosure:
      1. I started the enclosure by trying to design and 3D print a part to mate with the clear plastic dome.  It took a few tries.

        This slideshow requires JavaScript.

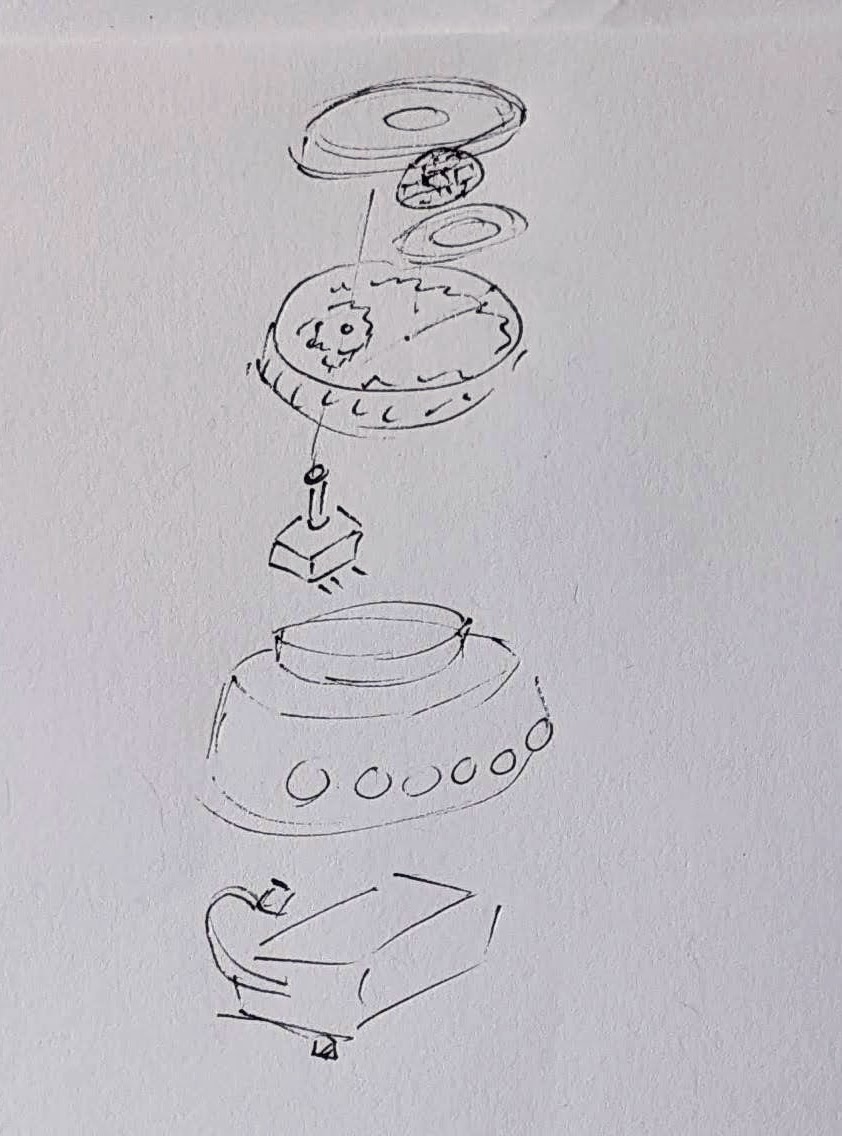
      2. Once I had that, I extended the base so it could hold more electronics.  I could definitely have shoehorned everything into the dome, especially if I took up some of the space inside the dome, but even with an “elevated base” it was still plenty small and could use a battery pack rather than a rechargeable lipo.
      3. Once I had a good design for the enclosure, I tried to make it work with an existing 3xAAA battery pack.  In the process I yanked off the connector and ended up soldering the battery pack leads directly into the circuits.
    4. Internal Electronics
      1. I’m just not a great electrical engineer and am still copy/pasting from various guides, tinkering, changing bits of code, swapping out parts, and using “close enough” resistors.  Wiring up some LEDs or a piezo to a project isn’t very difficult – it’s some of the more fiddly bits.
      2. Piezo Element Speaker
        1. I wanted to use a piezo buzzer/speaker because they’re large and incredibly thin.  They’re not without their downsides.  The crystal wafer is also thin and a little fragile.  The piezo buzzer without additional electronics has the potential to act as a knock sensor and can generate a high voltage spike which can fry a board.  And, without additional electronics, the piezo just isn’t very loud.  There are some libraries for the Arduino that basically double the volume of a piezo by connecting it to two pins and then running each opposite of the other, doubling the voltage difference, but they only work for Arduino chips.5
        2. After searching for various ways to increase the sound of the piezo elements, I settled on trying to use the Adafruit piezo amp.  I bought two – and tried desoldering the terminal blocks.  This completely ruined one.  The other one worked great, but for the modest volume gain it was just too big in an already cramped enclosure.
        3. After searching around, I found some amplifier circuits using a small number of common parts.6
        4. Then I tried building an amplifier circuit using an NPN transistor.  After reviewing the datasheets for my NPN transistors (and PNP transistors), and breadboarding the circuit with resistors, I sketched it a few times, laid it down with copper tape, soldered it in place with SMD resistors, then pulled it off and placed it onto a piece of Kapton tape and put another piece on top – “laminating” it in place.
      3. Capacitive Touch
        1. Buttons are great and all, but with a capacitive touch pad, I could add metallic elements to my robot rather than a much bulkier button.  I bought a few brass upholstery tacks because they looked great – but they just would not accept molten solder.  I ended up cutting the prongs short with wire cutters, wrapping the stub with copper tape, then soldering the wires to the tape.  I’d also added a little piece of heat shrink tubing over the connection to help keep it together.  It’s been working well so far.
      4. LED Animations
        1. As we know from Phillip Burgess‘ incredible “power sipping NeoPixel” guide, we can conserve power and increase the impact of the LED’s by reducing the number of LED’s, keeping max brightness ~20% for a disproportionately large impact, running fewer LED’s at a time, and even running fewer colors at a time.  Between Phillip’s work, Todbot’s guide, and the specialized QtPy NeoPixel guide by Kattni Rembor, I was able to put together a few neat animations.
      5. Piezo Sounds
        1. I had a heck of time getting the piezo buzzer to do anything interesting.  Fortunately, with my kid helped convert the piano music for “Paint It Black” into tones for me.  I haven’t gotten all the note timings right, but I’m working on it!
  3. Future Modifications
    1. More Accessible Enclosure.  Right now the “lid” with a hole for the LED ring just sits on the enclosure with a light friction fit.  One idea is a hinged lid, either with a conventional hinge or perhaps a hidden swivel hinge.  The problem with that, of course, is it requires even more internal space.  Other ideas include a ring on top that screws down, holding the top down and in place.  I’m crap at designing screw threads, so I’ve avoided this.

      Hinged lid for enclosure

      Hinged lid for enclosure

    2. Piezo Knocks.  Perhaps the next version will include some kind of tap / double tap / knock sensors using one or more piezo elements.
    3. Knobs.  There’s not a ton of room inside the enclosure, but by including a gear within a gear, I might be able to rotate part of the case and have it manipulate a potentiometer.

      Offset gear within gear, manipulating an off-center internal potentiometer

      Offset gear within gear, manipulating an off-center internal potentiometer

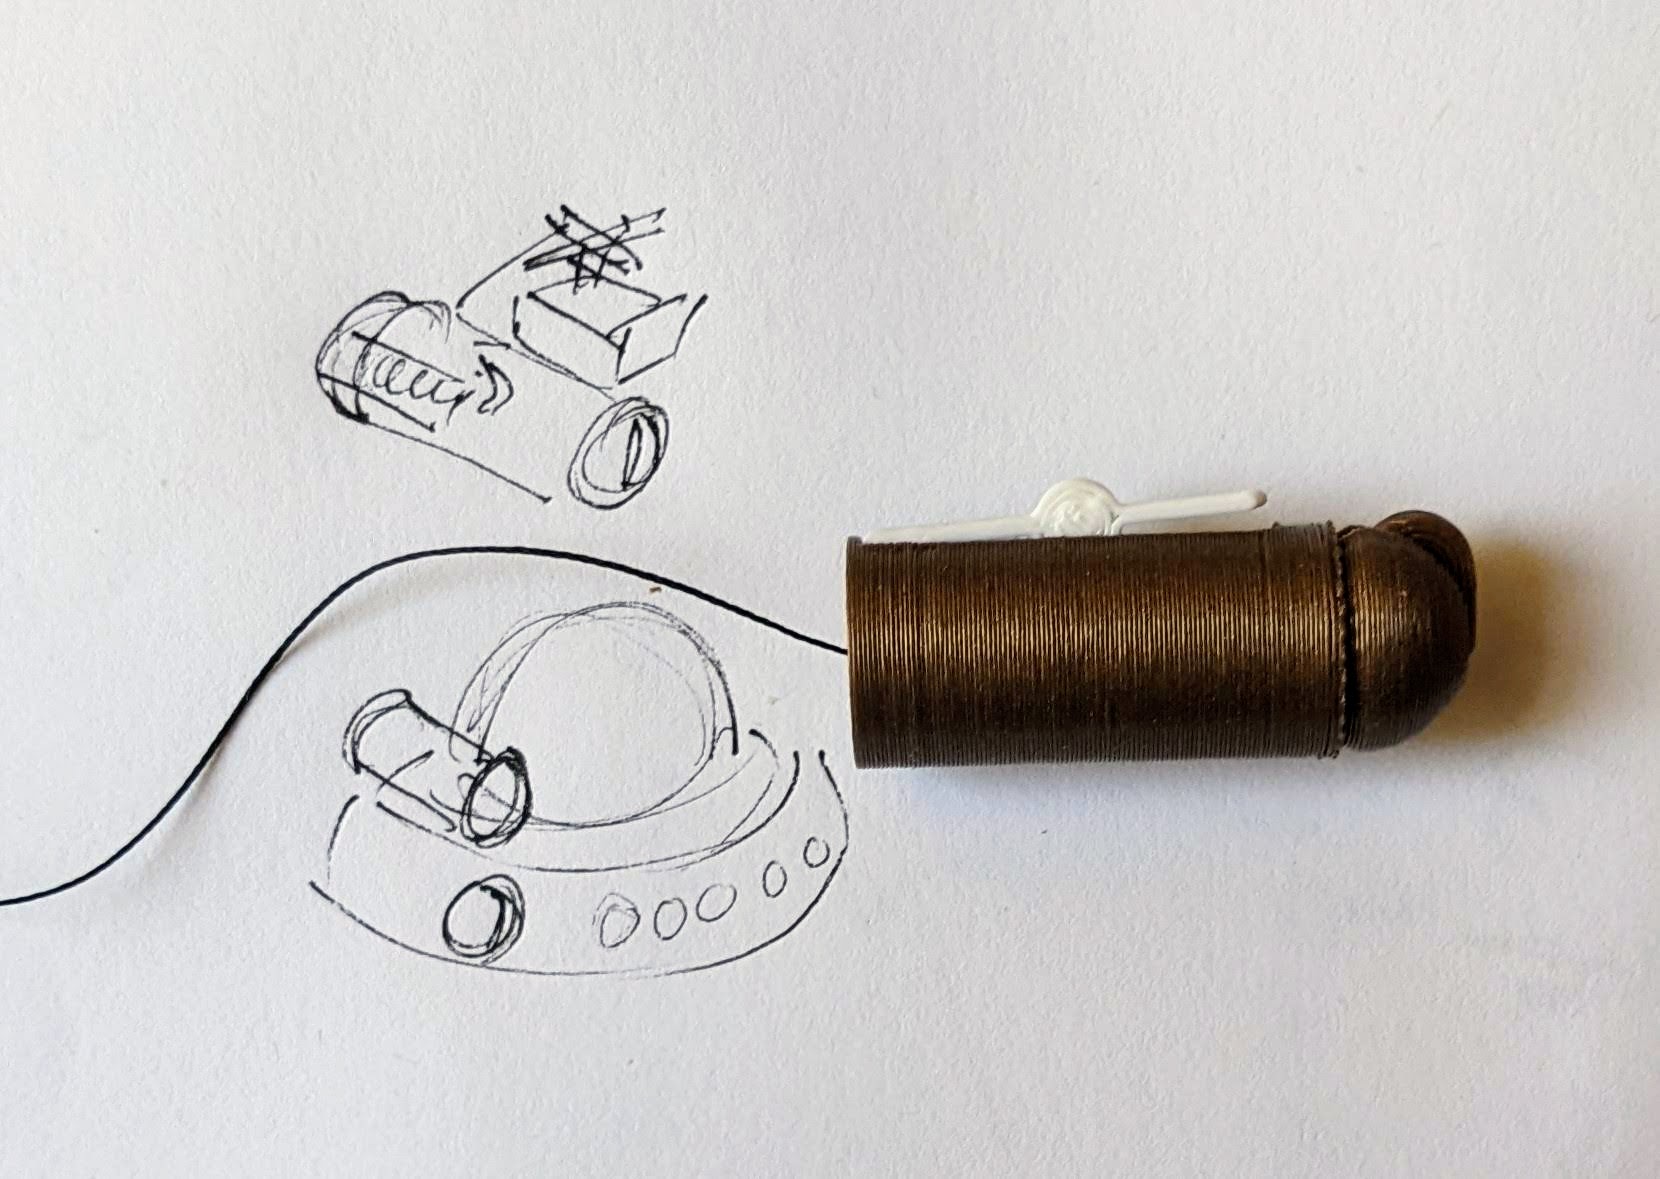
    4. Motors.  A robot that just flashes lights and makes a few beeps can still be pretty interesting.  However, I have some neat potential features that could be added with just one or two motors.  There are some interesting limitations with the current incarnation of this robot and using a QtPy.  I’ve only got 10 pinouts7 , 1 for NeoPixels, 1 for the piezo, 6 in use for the capacitive touch sensors, leaving 2 for other potential tasks.8  However, space is already tight so one or two micro servos would be a big space commitment.  I’ve seen some really tiny micro servos that might work, but I have no idea where to source them.  One silly idea is a “weapons system” using a spring loaded projectile activated by a very small servo.

      A small spring loaded projectile launcher, actuated by a small servo

      A small spring loaded projectile launcher, actuated by a small servo

    5. Creating Tone Library.  The basic piezo tones are easy enough to play, but including the entire list of tones and the frequencies associated with them seems eat up the poor little QtPy’s memory.  I think compressing them into a library might be the way around this issue.
    6. Playing WAV files.  WAV files are bulky, but that’s the only sound file format a QtPy M0 can play.  However, with the extra 2MB from the SPI chip installed, this shouldn’t be a huge problem.  I used Audacity to mix the sound clip down to mono then to 22 KHz sample rate.  My preliminary tests worked – but it was incredibly quiet.  I haven’t run it through the audio amplifier yet, but I’m planning to.
    7. Sleep / Deep Sleep.  Ever since I swapped out the tiny LiPo for a 3xAAA battery pack, I’ve had a lot more battery life, so adding sleep / deep sleep functions haven’t been a priority.  However, this inclusion just couldn’t hurt.
  4. Other QtPy and CircuitPython Resources
    1. Adafruit’s QtPy CircuitPython PWM resource
    2. TodBot’s CircuitPython tricks
Companion Robots: Building Robot Friends
  1. Cephalopod Robot Friend, the story so far
  2. Cephalopod Robot Friend Progress
  3. CuttleBot Body and OpenSCAD Design Tips
  4. An Assembled CuttleBot Body
  5. Building the Monocle Top Hat Cat for #MicrobitVirtualConcert
  6. Companion Robots and Maker Faire Season!
  1. I just got a notice they’re no longer a “Mini”! []
  2. pinouts for my future reference []
  3. LED goggles and a Marvel Universe inspired set of “Infinity Knuckles” []
  4. OMG dome-sticated?! []
  5. This is just my very basic understanding of how it works.  I’m entirely positive this is far too simplified. []
  6. And one very long article about using a lot of parts []
  7. 12 if you want to count the onboard NeoPixel []
  8. Or 4… []

Building the Monocle Top Hat Cat for #MicrobitVirtualConcert

This slideshow requires JavaScript.

The last few months there have been some pretty amazing little robots posted online for the Tinkering Studio / Exploratorium #MicrobitVirtualConcert.  I wanted to make something and participate and my 6 year old was interested in helping out.  I don’t have a Micro:Bit, but I’ve got a few other microcontrollers and the Adafruit Circuitplayground Express is perfect for this kind of project.

Here was our basic process:

  1. Brainstorm ideas
  2. I eat a frozen pizza and save the cardboard
  3. Sketch of robot – and what it should do
  4. Taping sketch of robot over white cardboard
  5. Tracing sketch with a pencil with enough pressure to leave an indentation
  6. Coloring robot
  7. Measuring / designing a 3D printed plastic part to fit the servo (before I committed more plastic to it)
  8. Scratching my head and jamming together circuitpython code for servos and musical notes together.  I had really wanted to also have the eyes light up with Neopixels too, but…
  9. Ultimately, I had a sketch for lights + musical tones and another for servo + musical tones.  My daughter made the executive decision to go with servo + musical tones. 1
  10. Revising the design to include some “wings” for more surface area to glue to the card board and increase stability
  11. Adding extra “wings” so that the popsicle sticks could pivot on a piece of paperclip in the plastic holder, rather than in the cardboard
  12. “Drilling” holes in the popsicle sticks with drill bits rotated by hand
  13. Gluing in servo holder and just lashing bits of things together in the back with hot glue, blue tape, and some wire
  14. Testing different kinds of tails before gluing the final version in place
  15. The code and STL’s aren’t anything amazing and I didn’t do a lot to comment them.  However, if you might find them useful, I’ve uploaded them to PrusaPrinters.

Here’s the final robot in action:

Companion Robots: Building Robot Friends
  1. Cephalopod Robot Friend, the story so far
  2. Cephalopod Robot Friend Progress
  3. CuttleBot Body and OpenSCAD Design Tips
  4. An Assembled CuttleBot Body
  5. Building the Monocle Top Hat Cat for #MicrobitVirtualConcert
  6. Companion Robots and Maker Faire Season!
  1. What can I say?  In order to bring her onto the project, I had to agree to give her final cut. []

My eyes! The goggles do nothing!

This slideshow requires JavaScript.

While I’m not much one for impulse buys, I was unable to prevent myself from purchasing the Adafruit Trinket-Powered NeoPixel Goggle Kit Pack.  If you’re on the fence about dropping the $40 for this kit, let me help you out with the pro’s and con’s list I went through before buying my own.

  • Cons
    • I literally have no practical uses for these goggles
    • Other than flashing lights, they don’t actually do anything useful
    • Once assembled, they can’t be used as goggles since (a) the LED’s are too bright to expose to even your closed eyes and (b) if you’re able to close off the glare, you’ll have an incredibly narrow field of vision
    • The kit is $40
  • Pros
    • They are seriously badass animated LED flashy goggles
    • Sourcing all the parts separately would easily cost you $50, which makes this a deal at $40

Kit Review

As I have come to expect from Adafruit, the kit is, in a word fantastic.  The parts are all packed neatly, wrapped, protected, and in a nice black cardboard box.  If you’ve never purchased a kit from Adafruit or checked out one of their tutorials, you’re really missing out.  The tutorials have lots of high quality pictures, helpful step-by-step directions, and little tips along the way that will undoubtedly make you a better hacker.

I got the basic electronics up and running pretty quickly.1 From there it was relatively easy to install them into the goggles.  My wife and daughter, both skeptical when I first told them about the goggles, immediately demanded their own upon seeing mine.

If you end up buying this kit, I would recommend not doing what I did – hotgluing the Trinket and NeoPixel rings in place.  Don’t get me wrong, this is exactly what you need to do to make affix these parts in place for wearing.  The thing is – within 24 hours of completing the project my mind was boiling over with ideas of how to Make it Better.™

Hacking the Goggles

The thing is, the kit is actually capable of doing a whole lot more with very minimal hacking.  Assembled exactly per instructions, the goggles use just one I/O pin on the Trinket, leaving four unused.  The evening after I had assembled the goggles, I dismantled them in order to pull out the Trinket, and soldered additional wires to pins 2, 3, and 4 and spliced three new wires to ground.  After soldering a big 12mm tactile button to each of three sets of wires, I hotglued the buttons above the right lens.  Now I can use these buttons to interact with the goggles in some small ways.

If you’re thinking of modifying your goggles like my own, you’ll need a little more ribbon cable, three big tactile buttons, a battery extension cable, black craft foam, and a hotglue gun.  You don’t really need the extension cable, but it will make keeping the battery inside the goggles and recharging the battery much easier.2

The Adafruit website provides several other ways to extend these goggles.  You can their tutorials to make the goggles sound reactive, controllable by bluetooth, or if you’re using something more powerful than a Trinket you can add an accelerometer.

My Setup

If you’d like to use my animations, you can find my code on GitHub.  I’ve updated the code with several animations:

  1. Larson Scanner.  This is just a single LED lit up, travelling from the left to right and back again.
  2. Wave Scanner.  Two LED’s are lit up, one travelling along the top of the lens and another along the bottom, until it reaches the far side of the goggles, then back again.
  3. Infinity Scanner.  A single LED travels around one lens, then around the other in an infinity pattern.
  4. Spinny Wheels.  Four LED’s on each lens spinning.  This is part of the original sketch from Adafruit.
  5. Sparks.  A single LED on each lens lights up briefly.  This is part of the original sketch from Adafruit.
  6. Sirens.  One red spinny wheel and one blue spinny wheel.
  7. aStrobe.  The right and left lenses flash white on and off.

The buttons have specific uses as well:

  • Button 1 (on pin 2) makes the current animation brighter
  • Button 2 (on pin 3) cycles through the animations
  • Button 3 (on pin 4) makes all LED’s light up bright red (won’t destroy your night vision!)
  • Button 2 and 3 simultaneously make all LED’s light up bright white (destroy everyone’s night vision!)

If you are going to go through the trouble of building this kit, I would highly recommend adding buttons to it3 and leaving the USB port on the Trinket exposed for later re-programming.  There are a few little tricks you can do with just a single button – treating a button click differently than a button press of a certain duration – but I feel that these would probably be more difficult to use than just adding a second button.  With two buttons, there are up to three combinations4 , with three buttons would have up to seven combinations5 , and four buttons seven billion combinations.6

At this point, I’m still experimenting with with ways to make the goggles more useful/awesome.  Perhaps another post is in order?

Default Series Title
  1. It would have been even quicker if my Trinket skillz weren’t so rusty []
  2. Beats the hell out of trying to get your goggles right next to a USB cable. []
  3. Or, at the least soldering wires to the pins for later use []
  4. 1, 2, and 1 + 2 []
  5. 1, 2, 3, 1 + 2, 1 + 3, 2 + 3, 1 + 2 + 3 []
  6. I might have gotten carried away with the math on the last one… []

That’s not junk!!!

... it's ART!

… it’s ART!

A few days ago I found a DYMO LabelWriter 400 Turbo had been tossed into a cardboard box with used toner cartridges and broken printer parts.1 After making sure this really was a box of lost things, I swiped the label printer along with its power cord.

Tiny little printers such as this kind of label writer never use inkjet cartridges or require laser cartridges.  They print using heat – like receipt printers.  The catch, since they can’t get you with inkjet/toner cartridges, is that the labels are stickers with specially treated heat sensitive non-sticky sides.

Ideally, I would love to feed this little printer some cheap receipt paper and run it as a small, cheap, USB tethered printer.  I already have an Adafruit IoT printer, which I love dearly – but it would be awesome to have one that my daughter could use.  Apparently this has already been done more than once.

After loading up the newest drivers for the printer and trying out the newest software for it, I couldn’t get my laptop running Win 7 to recognize the printer.  I’m looking forward to tinkering with this.  :)

  1. Photo courtesy of Tinkerbots []

Sourcing DrawBot Parts

This can be a surprisingly good place to shop for robot parts

This can be a surprisingly good place to shop for robot parts

I’ve previously discussed sourcing the main electronic components for a drawing robot.1 Since there’s more to a robot than just the electronics that make it work, I thought I would list my other resources in one place.

  • Electronics.  The electronics are the brain and heart of this project.  There’s really only two parts that could not be found or scavenged – these parts being the Arduino and the Adafruit Motor Shield.
  • Project Box. I’m using a long thin pine box left over after a huge catering party platter order. Frankly, you could mount the parts on nearly anything – a 2×4 or a nice custom box – it’s entirely up to you.  Heck, you could even screw these parts directly into a wall if you were feeling particularly adventurous.

  • Structural Parts.  Besides these main components, it’s really really useful to have a 3D printer to manufacture all the parts necessary to make it all work.  Motor mounts, spools, etc.  If you had a laser cutter or a ton of quick-set plastic, you could probably fabricate perfectly serviceable parts.  The parts I’ve designed are ideally suited for my own project, could be modified for your own project, or you could just design some parts from scratch.
  • Hardware.  There are also all the little bits of hardware to hold everything together.  I still have a ton of M3x16 bolts and M3 nuts left over from building a Cupcake CNC and Thing-O-Matic.  Besides these M3x16 bolts and M3 nuts, I did use two screwhead M3x16 bolts to hold the Polargraph case in place and eight M3x8 bolts to attach the two motors to the mounts.
    • McMaster has a truly amazing website.  Even if you want to build a drawing robot and have zero parts on hand, you could pick up all the hardware you need from them super-cheaply.  Update:  The only thing I don’t care for about their website is that they don’t have a way of getting an estimate on shipping.  Among McMaster’s virtues is their amazingly responsive customer support.  I just asked them for a shipping estimate on these parts and they got right back to me.  You could pick up a set of 100 nuts, 100 M3x16 bolts, and 100 M3x8 bolts for about $6.  This is an absolute bargain for way more nuts and bolts than you’ll ever need for this project.
    • Chances are if you really had to you could use whatever bits of hardware you can find lying around your place.  I’ve seen examples of similar drawing robots using zip ties to hold the motors in place.
  • Electronic Bits.  I still need to track down some rainbow colored ribbon cable and connectors.  While I do actually have all the pieces of scrap around my home to finish the robot right now, I don’t want to do this half-way.  I want to use a rainbow ribbon cable because (a) I need to extend the motor leads to reach the circuit board, (b) it would be very helpful to have each lead color coded separately, and (c) they’re really pretty.  As for the wire connectors, all the other parts to my setup are very modular and it would be very nice to have the electronic connections just as modular.  After searching around, I found that Sparkfun has all the little pieces I need to finish this project.

I recently had a very unsatisfactory experience trying to source some parts locally, so I”ll be placing an order for some ribbon cable and jumper wires from Sparkfun.

Default Series Title
  1. Photo courtesy of Jes []
  2. This is the type I have left over from building my MakerBots []

Speedier DrawBot Drawings

When using my DrawBot to draw pixelated drawings (versus TSP or vectors)1 I don’t really notice a pause from the machine between each pixel.  It takes a few seconds to shade each pixel, then it moves to the next spot and starts over again.  However, when trying to draw TSP art I discovered that the time spent shading a picture obscured the amount of lag time that occurred between each drawing point!  As I tried to draw a TSP portrait of my family I found it was taking about 3 seconds between each little point – which translated to a VERY VERY long time for a VERY small drawing.

When I asked Sandy about this, he suggested that this lag would be eliminated by drawing from an SD card.

Sandy’s current setup, which allows for computer free printing, consists of an Arduino Mega 2560 R32 , a MicroSD card breakout board3 , and an Adafruit Motor Shield4 .  Thus, the electronics setup would cost about $100 if you were starting from scratch, or another $80 if you have been following along at home and have a similar setup to mine.  Apparently the problem is you can’t just shove a MicroSD card into an Arduino.  If you try to add one to an Arduino, then the card shield will end up taking up the pins necessary to use the Motor Shield.  Since the Arduino Mega has a lot of extra pins, some of those can be used towards accessing the MicroSD card.

However, I thought I had seen an Arduino that had a MicroSD slot on board. 5  When I searched around Adafruit, I found this Ethernet Shield R3 with MicroSD connector6 .  Not only does this little shield fit my existing Arduino Uno, have a MicroSD slot, and have an Ethernet port, but it also has input pins so that it can be stacked!  This makes me then wonder…  Could I just pop this $45 board between my Arduino Uno and Motor Shield, add some software and get cooking?  I have to admit, the idea of spending $45 more, rather than $80 more for a Mega and MicroSD breakout board appeals to me.  I suppose there’s the added benefit that I might be able to run a REALLY long ethernet cable to the ‘bot if I so desired since it would have a built-in ethernet port on the Ethernet Shield.

Now, I’m the first to admit that I know next to nothing at all about programming Arduinos or fiddling with such things.  I’m just a fair hand at slavishly following some other person’s excellent directions.  Please do me a favor and let me know whether you think adding this Ethernet shield between my Uno and the Motor Shield will or will not work.

Default Series Title
  1. Actually, the TSP drawings ARE vector graphics… []
  2. $65 at Adafruit []
  3. $15 at Adafruit []
  4. $20 at Adafruit []
  5. Spoiler alert: I was wrong []
  6. $45 at Adafruit []

DrawBot – The Assembly, Part V

I just finished soldering the Adafruit Motor Shield … this time with all the bits in the correct places.  The Adafruit directions are incredibly detailed, I just soldered a few parts in wrong like an idiot last time. This time it went much smoother and much quicker.

I just wired up the two steppers, plugged in the power adapter, plugged in the USB cable, uploaded the Polargraph firmware, fired up the Polargraph software, and asked it to try to draw something.  And it started to twitch away in what appeared to be a meaningful pattern!!!

Huzzah!

Now… for sleep!

Default Series Title

DrawBot – The Delivery, Part VI

Okay, that was FAST.  I ordered the Adafruit motor shield from MakerBot on 1/26/2012 just after midnight and it arrived today a little after noon.  That’s about two-and-a-half days for the parts to be packed, shipped, make it from Brooklyn, NY to Oakland, CA and then to my secret robot lair in the Bay Area.1  While at the hardware store today I picked up some small eyescrews and new tips for my soldering iron.  Tonight I’ll assemble the board.  Again.

I can honestly say that I was mightily tempted to purchase a third motor shield along with this second.  However, as I have no immediate designs on a secondary DrawBot2 I’m not ready to admit the possibility of defeat.  In the words of Kongorilla, I will not fail.3

Actually, now that I’ve got these new soldering iron tips, I stand a chance of being able to desolder the mis-soldered parts. 4 My old soldering tips were old, tarnished, and somewhat crusty.  The soldering tip I’m replacing is all of these things plus it is in the rough shape of a flathead screwdriver. 56

Wish me luck!

Default Series Title
    • Delivered, January 28, 2012, 12:09 pm, [SECRET ROBOT LAIR], CA [9XXXX]
    • Out for Delivery, January 28, 2012, 8:14 am, [SECRET ROBOT LAIR], CA [9XXXX]
    • Sorting Complete, January 28, 2012, 8:04 am, [SECRET ROBOT LAIR], CA [9XXXX]
    • Arrival at Post Office, January 28, 2012, 5:17 am, [SECRET ROBOT LAIR], CA [9XXXX]
    • Depart USPS Sort Facility, January 28, 2012, OAKLAND, CA 94615
    • Processed through USPS Sort Facility, January 28, 2012, 2:26 am, OAKLAND, CA 94615
    • Electronic Shipping Info Received, January 27, 2012
    • Depart USPS Sort Facility, January 27, 2012, BETHPAGE, NY 11714
    • Processed at USPS Origin Sort Facility, January 26, 2012, 11:40 pm, BETHPAGE, NY 11714
    • Accepted at USPS Origin Sort Facility, January 26, 2012, 10:25 pm, BROOKLYN, NY 11217

    []

  1. I’ll want to make sure I can get this first one sorted before I try []
  2. Actually, that’s a little more bravado than I’m really capable of.  If I fail, I fail – I just have no intention of ending at failure.  Rather, I’m committing to repeated failures … until I end up with a working DrawBot []
  3. Gah, why didn’t I pick up a desoldering pump while I was out today?! []
  4. And chipped, at that. []
  5. It’s really quite a miracle I got the first board soldered at all in the first place. []