Loudest 3D Printed Whistle – now with 100% more science

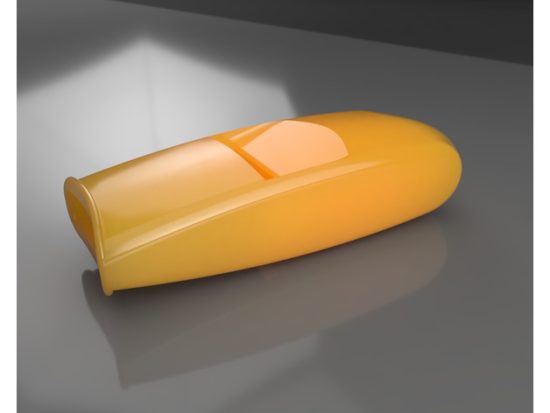
Extremely loud and compact emergency whistle v1

Extremely loud and compact emergency whistle v1

I ordered a decibel meter from Amazon the other day so I could drop some science on the claims from various 3D printed whistles on Thingiverse.  There are several that claim to be the loudest.  Well, today, I began my quest to put these claims to rest.

The closer the decibel meter is to a sound source, the higher it registers.  To eliminate some of these variables, I placed the decibel meter on a counter in front of me and a chair 24 inches in front of that.  For each of the whistles I was testing I stood just behind the chair and gave the whistle three hearty puffs.  The decibel meter, which was set to record and display the “max” reading, would then tell me the loudest reading for that set of three whistle toots.

Without further ado, I declare the “Extremely loud and compact emergency whistle” by Whistleblower on Thingiverse the clear winner at 121.1 decibels.  Both whistles by this designer took the top two scientifically determined spots.

NameThingiverse IDMass (grams)PricePrint Time (minutes)DecibelsSubjective Rank
Extremely loud and compact emergency whistle [v1]29330213.9$0.1222121.11
Extremely loud and compact emergency whistle [v2]29330213.7$0.1118111.53
v29 (Over 118 db!)117916013.9$0.4290110.44
2 chamber whistle (LOUD) [w5]26165128.1$0.2449109.52
Emergency Whistle with Solidworks 2014 source4951721.2$0.047101.85
Whistle Ring Modified [v2]20271151.6$0.05990.86

Just how loud is 121.1 decibels? 1  Well, for starters, it’s just above the pain threshold of 120 decibels.  It’s louder than:

  • Your iPod headphones at maximum volume
  • A baby crying, next to your ear
  • A full symphony orchestra
  • The subway
  • A sporting event
  • A chainsaw
  • A jetski
  • A marching band

It’s on par with:

  • Thunder
  • A shotgun
  • An ambulance siren
  • A rock concert

And, if you didn’t have earplugs, you would exceed the daily safe exposure limit for 121 decibels in 7 seconds.

There may be louder whistle on Thingiverse2 and, if so, please let me know.  I’ll print the model and test against the others in my arsenal.

Default Series Title
  1. This page has several charts to help explain. []
  2. Or some other online 3D design repository []

Loud 3D Printed Whistle Test, Take 2

Impatient for my decibel meter to arrive from Amazon and eager to get more feedback on the loudest 3D printed whistle, I brought the four loudest whistles to work and enlisted the help of two friends.  We performed the test much the same as the last time – only this time they were on one end of a large parking lot and I had driven to the far side to blow each whistle once, then repeated them each once.  Here’s the result on their subjective test:

NameThingiverse IDMass (grams)PricePrint Time (minutes)RankDecibels
Extremely loud and compact emergency whistle [v2]29330213.7$0.11181TBD
Extremely loud and compact emergency whistle [v1]29330213.9$0.12222TBD
2 chamber whistle (LOUD) [w5]26165128.1$0.24493TBD
v29 (Over 118 db!)117916013.9$0.42904TBD

Whether the1 loudest whistle is the v1 or v2 of the “Extremely loud and compact emergency whistle,” Thingiverse user whistleblower clearly designed an amazing, quick printing, low cost whistle.  It has a very high pitched piercing tone that can be downright painful to be near, let alone create. 2

As before there’s a number of different things that could be happening here.  Perhaps the particular tone of this whistle travels better through open spaces (such as a parking lot) rather than through a door and down a hall (such as inside my house).  I know there are some whistles that require a lot of blowing power to hit maximum volume and others which almost “choke” on too much pressure.

In two days my decibel meter will arrive and I’ll try all of these tests again and post a new table.  If you think you’ve got a contender or have seen a really loud whistle on Thingiverse, let me know in the comments so I can print and test it.

Default Series Title
  1. Subjectively []
  2. Again, I had my earplugs in for the test []

Loudest Whistle on Thingiverse… The Answer Might Surprise You!

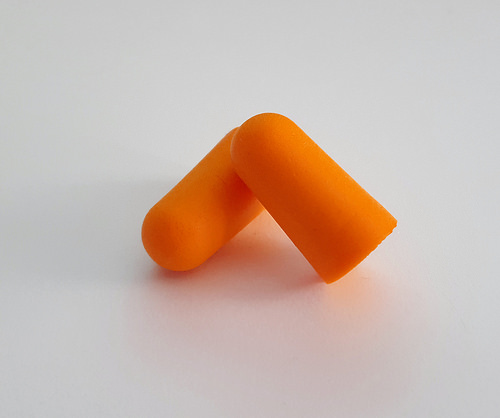
You'll need a pair of these earplugs

You’ll need a pair of these

Whistles have been a staple on Thingiverse for years, probably because they’re such a small, simple, and impactful way to demonstrate the usefulness of a 3D printer. 1 I don’t know how many there are, but there are a LOT of whistles on Thingiverse.  I’ve been curious about which whistles on Thingiverse are the loudest and conducted a semi-scientific experiment to figure this out.

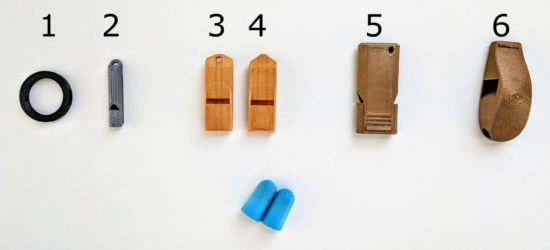
Six whistles

Six whistles

I say “semi-scientific” because I don’t have a decibel meter.2 My methodology was to have my family at one end of the house while I went to the other side, closed the door, put in my earplugs, and wailed away on six whistles as hard as I could.  In any case, here’s my findings:

NameThingiverse IDMass (grams)PricePrint Time (minutes)RankDecibels
Extremely loud and compact emergency whistle [v1]29330213.9$0.12221TBD
2 chamber whistle (LOUD) [w5]26165128.1$0.24492TBD
Extremely loud and compact emergency whistle [v2]29330213.7$0.11183TBD
v29 (Over 118 db!)117916013.9$0.42904TBD
Emergency Whistle with Solidworks 2014 source4951721.2$0.0475TBD
Whistle Ring Modified [v2]20271151.6$0.0596TBD

I added a few columns that may (or may not) be of interest to you.  I indicated the weight of each whistle, because sometimes I want to know how many whistles I could produce off a single spool of plastic.3  Sometimes I want to produce the loudest whistle for the time I have to produce a whistle.4  I showed the cost per model5 , because it brings me so much joy to know I can make my daughter’s classroom louder than a jet engine for less than the cost of a pack of gum.

I know there are a number of important variables are are simply not addressed in this test.  Different frequencies sound louder or might be easier to hear through the door.  I tried to blow each whistle the same amount, but some whistles are louder with less forceful or more forceful blows.  Once that decibel meter shows up, I’ll be sure to post another update.

Default Series Title
  1. Photo by mosambers []
  2. Yet.  At <$20 on Amazon, you can be sure I’ll be adding actual readings soon []
  3. With careful design, approximately 2,500 whistles per kilogram of plastic []
  4. The v2 of this whistle is the clear winner []
  5. Assuming a spool costs about $30, shipped []

Oh, OpenSCAD…

One of things I really like about OpenSCAD is how anything I make in it is guaranteed to be manifold.  It’s a solid modeler and by manipulating, adding, and subtracting solids – I should always end up with another solid.  I exported two of the parts necessary for a Pez Powered Disc Shooter only to discover that OpenSCAD refused to compile one of the parts – because that part had some polygons with an incorrect winding order.  Mind, I had no problems exporting the part in the first place – but importing it back?  Nope.

Oh, OpenSCAD, is our love affair over so soon?

Pick me! Pick me!

Okay, I’ve gotten the clearance from Pattywac to join in the United We Stand team design challenge.  Although I voluntarily take myself out of the running from every challenge, I love participating.  They’re just too much damn fun.  :)

I never participate in the judging on these things – but it would look a little odd to have me be both someone who blogs about something and a guy who is the subject of the blog post.  Blogging here at MakerBlock.com, I happily post about anything that comes to mind, even if it is ridiculously self-indulgent.  However, I really don’t want the posts at MakerBot to be about me – I want them to be about the awesome stuff people are doing in the DIY 3D printing community.

The potentially ethical problem I faced with this most recent challenge is that as a team design challenge, I wouldn’t want to disqualify an entire team of people just because I was on it. 1  So, my proposal to MakerBot and Pattywac was that as part of any team, I would agree to forgo any winnings of any kind. 2  This was acceptable to both.

So, are you interested in collaborating on this design challenge?  I’d be especially interested in getting collaborative help on any of my existing projects, going from my highest interest3 to lower interest4 :

  1. Clockwork spider5
  2. Open source disc shooter
  3. A printable clock that actually keeps time
  4. A sonic screwdriver
  5. A dalek that can rotate it’s head, roll, and move it’s gun, eyestalk, and plunger6
  6. A better Voltron
  7. A puzzle box
  1. And, really, having me on your team is hindrance enough. []
  2. I just want to feel included! []
  3. #1 []
  4. #7 []
  5. I’ve already had input and help from Dna on this []
  6. Mad props to innovationbylayers for the existing dalek on Thingiverse []

MakerBlock Thing-A-Day

Let’s see if I can upload a new thing to Thingiverse for each day in February.  This post will be my updated list of Things as I upload them.

Could I do this?

Thirty days of things?  I wonder if I could do it.  I’ve got less than 3 hours to post something for today.  Every single day?  Man.  That’s a serious time commitment.  Day job, blogging, a number of other various and sundry endeavors and obligations…

Well, let’s take this just one day at a time.

I know I can upload something for today, no problem.

Update:  Well, it’s really on 28 days of things.

Added Flattr

The interesting thing about Flattr is that in order to be eligible to receive funds, you need to be willing to share funds.  In any case, I’ve added a Flattr button to this site as well as to my MakerBlock Thingiverse page.

Because I’m such an optimistic guy, I also just ordered an extra large wallet from Amazon. 1

  1. And tore up my ticket for tonight’s lottery.  Pretty sure I won’t be needing THAT… []

Closed!

Thanks to MakerBot for retweeting my MakerBot poll.  The number of responses basically doubled in a single day.  It’s been a busy day so I’ll go into more detail this upcoming weekend.  For now, I’m going to close the poll and show the questions:

  1. Why are you interested in MakerBot
  2. Have you heard or read about RepRap or RepRap.org?
  3. Have you tried to design anything in 3D?
  4. Have you tried to upload anything to Thingiverse?
  5. If you had a MakerBot, what would you want to download from Thingiverse and print?
  6. If you had a MakerBot, what would you want to design and print?
  7. If you had a MakerBot, what would you use it for? (Help starving children, make toys, make tools, etc)
  8. Why haven’t you purchased a MakerBot yet?
    • It’s not worth $1,000.00 to own an awesome robot.
    • It’s not worth $1,000.00 to make my own stuff with an awesome robot.
    • I don’t have $1,000.00 to spend on awesome robots.
    • I’m interested in MakerBots, but not interested enough to buy an awesome robot.
    • I don’t think I have what it takes to build awesome robots.
    • I fear awesome robots.
    • My parents were killed by awesome robots.
    • My friend has an awesome robot, so I just use theirs.
    • I don’t think awesome robots are that awesome.
    • Other (please specify)

Spare parts

The last week has been a fruitful one for me, at least as far as printing things on my MakerBot is concerned.  I’ve designed, created derivatives, printed upgrades, updated the firmware, installed the latest (super sweet!) RepG, and even performed some maintenance.

One amusing and useful experiment was the serial production of the Z Axis Wobble Reducers by MakiYoshida.  Using my current settings I printed one.  Then I installed it and printed a second.  The second was a visibly better product.  I installed the second and printed a third.  The third was no better than the second.  I installed the third and printed a fourth.  I then installed the fourth… and didn’t bother to print with it.

Right now I have two of these wobble reducers installed on the front right and back left Z axes.  Installing one on the most warped rod (front right, for those of you playing at home) helped significantly.  Installing the second on the back left helped a little more.  Installing the third on the back right didn’t seem to make much of a difference, and may have been worse than the second print.  I didn’t realize why until I tried to install the fourth Z axis wobble reducer.

Once all of the wobble reducers were in place I found that the entire Z stage was too mobile – and would easily shift from left to right and back and forth.  When you have no wobble reducers one or more warped Z axis rods will force the entire stage out of whack.  When you have four wobble reducers, there is nothing keeping the Z stage steady.  Thus, the optimum number is between one and three.  However, I noticed that having two diagonally across from one another gave me enough wobble reduction to improve the print, but not so much flexibility that it could get pushed around in the middle of a print.

Part of the problem is that this particular wobble reducer will allow nearly unimpeded side-to-side motion.  However, these wobble reducers are also fantastic at compensating for a badly warped rod.  I suspect that mixing different kinds of wobble reducers might be my best bet.  I’m not really that interested in installing one of versions that requires precision rods, since it’s just one more thing I have to source for my MakerBot.  Ideally I can mix and match these two types of wobble reducers to improve the overall print.  The Z-axis floating arrester appears to keep the captive nut more … captive than the Z axis wobble reducers I have installed.  This may provide the exact combination of rigidity and flexibility I need to optimize my print quality and minimize layer shift as I print.

The upshot of all of this, and the reason for the post title, is that I now have two Z Axis Wobble Reducers by MakiYoshida that I’m not using.  Do you need one or two of these and feel like saving yourself the print time?  If so, drop me a line.