TLDR: The cards from DriveThruCards.com (DTC) arrived yesterday and I couldn’t be happier with the result. Great customer service, product, and value.
- Shipping: Great
- 3/19/2024: I ordered 120 cards around 2 AM PST in California.
- 3/19/2024: The DTC website was updated with the following statuses: Pending Payment Approval, Paid For, Sent to printer, Confirmed.
- 3/24/2024: I received a shipping confirmation email from DTC in Overland Park, Kansas with a USPS tracking number at about 4:32 PM PST.
- 03/25/2024: The date on the “External Packing Slip” included with the box.
- 3/28/2024: USPS sent me a notification the package arrived around 8:29 AM PST.
- This was basically exactly as long as my Reddit lurking had suggested (about 10 days) it would take.

Order confirmation and status screen
- Packaging: Great
- The cards arrived wrapped in a cellophane band, within packing paper, inside a small box (about 5″x5″x3.5″ cube). This was perfectly fine for these cards. They have options for tuck boxes and other containers, but I didn’t need or want these for this project.
- Card Quality: Great
- Text and images were sharp, legible, and colors rich but slightly darker than what I saw on my computer screen. By tinkering with Inkscape, I would guesstimate the final card was about 5-10% less bright than what I saw on my screen. Without comparing the cards directly against a large bright monitor, I don’t think I would have noticed this difference.
- When I set the deck down on a flat surface and run my finger over the side of the stack of cards, there’s a very slight variation over a few cards. It’s barely perceptible and probably totally fine for any kind of card usage or card game except a super precise cut for casino playing cards.
- When the cards are viewed edge-on in a stack, you can tell see a faint bit of the card’s edge color. I grabbed some “Magic: the Gathering” cards and looked at a mix of black and white bordered cards and noticed that even the black border cards seem to look white-ish when viewed edge on. The slight bit of color here doesn’t bother me at all and for most purposes would be totally irrelevant.
- The cards were 2.503″ or 63.57 mm wide and 3.506″ or 89.05 mm tall, or about 0.2% large. Some variation is to be expected in any order and this miniscule variation would be completely unnoticeable except I used digital calipers to measure them.
- The cards, printed on DTC’s “premium stock,” advertised as 11.4 pt (0.0114″) were 0.0115″ or 0.29 mm thick. Flicking the cards against a table, right next to an actual casino poker card, they felt identical. (The casino card has a slightly raised texture, but the flex, bounce, and flick of the card stock felt identical).
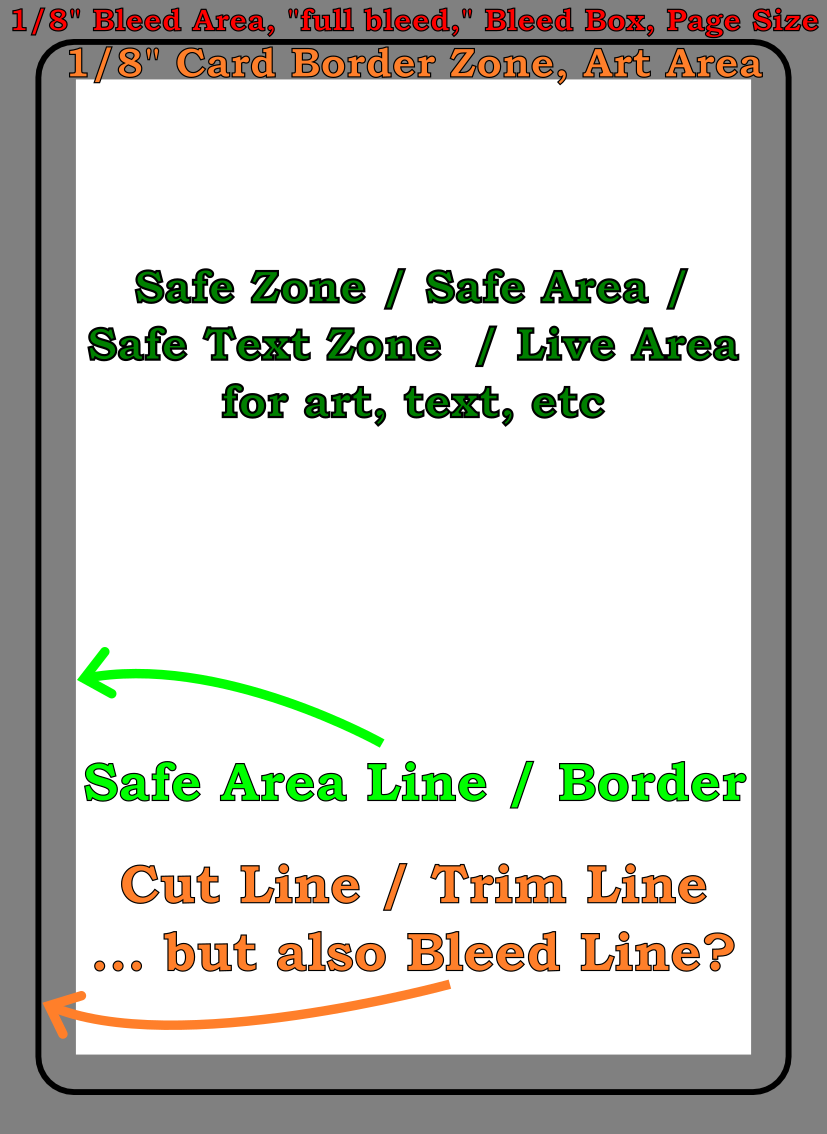
- Card Cut. This is the one aspect that didn’t come out exactly as I had planned. Ten of the cards I printed had borders, but they were visibly different widths at each end. These cards were Premium U.S. Poker sized (2.5″ x 3.5″), the PDF itself was 2.75″ x 3.75″ (to account for the 1/8″ bleed area at each edge). Unfortunately, I didn’t notice this until after I had used the cards a bit, so I don’t know whether top or the bottom was slightly thinner. Since these cards are basically dividers, this isn’t a huge deal for me. However, I’d prefer being able to get them back with an even border all the way around.
- Customer Service: I discussed the responsiveness of the DTC customer service team in the prior post. They went out of their way to help me with my project – and it really smoothed things for me.
I simply could not be happier with these cards. I will absolutely be trying them again.
Print On Demand Custom Cards
