Plastruder MK5, now with 85% less heartache!

Of all the bits to get working on my MakerBot, the Plastruder MK4 was the most challenging.  There were so many ways for some critical component of the Plastruder to go wrong.  You could:

  • Cut the wrong length or resistance of nichrome wire
  • A small patch of nichrome fiberglass insulation is scratched off, creating a short
  • The nichrome is not wound close enough to the barrel, requiring extra power to heat
  • There’s too much space between the barrel and nozzle, creating a gap where plastic and build up and cause a blockage
  • Heat can travel up the barrel and plastic can ooze up the threads
  • Heat can travel up the barrel, plastic can pool and then cool causing a blockage, bulge the PTFE
  • The thermistor can burn out or short out
  • Heat can cause the thermistor or nichrome to become unsoldered or lose connectivity

From the description of the new Plastruder MK5, it sounds like the improved designs solve all of the above potential problems!

Update: Beak90 offered several other possibilities!

  • one could not heat it up enough and strip the PTFE threads.
  • one could heat it too much and cause the PTFE threads to fail.
  • one could put the thermistor in the wrong place and have it read the wrong temp.
  • one could wind the nichrome in 2 layers and have it not heat enough.
  • one could tighten the nut on the barrel too much and cause extra stress on the PTFE causing it too fail.
  • one could forget to say the required magical incantations before firing up the plastruder causing everything to fail.

And, one more I just thought of:

  • Fail to play Daft Punk

Plastruder MK5 plans released!

The plans for the Plastruder MK6 look downright wicked

The plans for the Plastruder MK6 look downright wicked

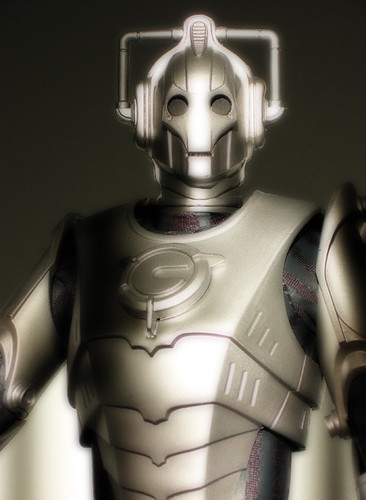
MakerBot just released the photostream and wiki instructions for the Plastruder MK5. 1 This looks like a total overhaul of their original designs. 2

It is based on Charles Pax’s Paxtruder which has such a small form factor that it is possible to squeeze two extruder heads into one Makerbot.  The Paxtruder also uses a delrin plunger which is used to push the filament against the extruder pulley, rather than the previous idler wheel design.  I like the delrin plunger idea since it would be a lot easier to adjust tension and remove/insert filament.  The idler wheel held in by a large bolt and nut works… but is finicky and sometimes prone to fussiness.

Out are the big/small/weird and whimsical dinos in favor of lasercut acrylic “arches.”  There may be a benefit to the arches over the dinos, but I’m not sure what it would be.

The entire heater element and extruder head has been redesigned as well.  I don’t recall seeing any published designs which reference this new system.  We’ve all seen power resistors in use in RepRap/MakerBot projects – but they’ve usually been relegated to heated build platform designs.  Now a pair are being used as the full heating element in place of tempermental3 nichrome wire.  The problem with the old nichrome wire wrapped around the barrel system is that if you need to rebuild the heater, you’ve got to toss out the old nichrome since the insulation is going to get peeled off as soon as you pull it off the barrel.

The new MK5 system uses a PTFE sleeve to feed the filament down into the heater.  Interestingly, the PTFE sleeve is encased in a snug metal tube which should prevent any bulging problems.

My understanding of the instructions is that the MK5 is far less prone to failure than the previous MK4 model Plastruder.  I’ll grant the Plastruder is easily the most4  challenging component of the Makerbot to get working.

The instructions also hint at Generation 4 electronics.  Right now I’m rockin’ the Gen 3 which have served me quite well.  I wonder what the Gen 4 has in store?  One thing I have to really like about the electronics is that I know they’ll never really be obsolete. 5  If I wanted to upgrade to Gen 4, I can always print off a Mini-Mendel or Mendel, and swap in the new electronics.

However, if this new system is as resilient as the instructions describe, I’m on board.  I’m probably not going to have a good excuse to test out this new Plastruder design for a while since my Plastruder has been behaving itself since the last time I rebuilt my Plastruder and I just scored some spare MK4 parts6

  1. Photo courtesy of Johnson Cameraface []
  2. A close tie for the photo was “Number 5 is alive!” a la Johnny 5 from Short Circuit.  I’m just too much of a Doctor Who fanboy to NOT use an “You will be upgraded” joke. []
  3. Pun intended!!! []
  4. Dang.  I’ve already used temperamental, finicky, and fussy…  Where’s my thesaurus?  Oh, that’s right – he’s out EATING Tony Buser’s Laser Dinosaur! []
  5. Bite me Cybermen! []
  6. Thanks again guys! []

MakerBlock’s MakerBot setup

I’ve posted about other people’s MakerBot work space set ups,1 but not much about my own yet.

Right now there’s a bunch of junk2 in the way so no pictures of the setup for now.  My MakerBot – “Bender,” a laptop3 , and a large long cardboard box with a wooden dowel running the length with badly cut cardboard spools holding what was once a 5 pound coil of black ABS4 , a very nearly 5 pound coil of clear PLA5 , and a full pound of white ABS I’ve never used. 678

All of this resides in our living room on an enormous former-library card catalog.  For those of you youngsters out there, a library card catalog is the kind of thing you see in the background scenes of Warehouse 13.  Imagine a huge chest about four feet tall that has lots of small, deep, drawers.  It is what libraries used to use to store information about their collections – an analog database.  Frankly, I didn’t realize the one I bought was quite so large. 9  It’s literally big enough for about six identical MakerBot/laptop/plastic coil setups to the one I have. 10  The drawers beneath the area where my Makerbot resides are devoted to tools and spare parts.  Right now the surface is covered in a number of unfinished projects and some totally finished projects.

Library card catalogs are super handy and useful ways to incorporate storage and a raised level surface for working.  The only problem is that these things are absolutely enormous and way way heavier than they look.

  1. Mattpr’s MakerBot cart , Tony Buser’s “Tea” #481 []
  2. FYI, junk = stuff waiting to be made into other, more useful or more amusing stuff. []
  3. Named Bleys, if you must know. []
  4. I would guess I’ve used about a pound over the last 8 months.  5 pounds is a LOT of plastic.  Dear faithful ABS, oh how I love thee… []
  5. Polly!!!!!!!!! []
  6. Though, I have very specific and immediate plans for it. []
  7. More on this later if you remind me.  I have a tendency to get lost in nested footnotes and parenthetical references. []
  8. Seriously, just imagine what my PHP code looks like.  Yikes! []
  9. Or far away.  Or would become so expensive.  That’s a story unto itself. []
  10. I best get printing more MakerBots, no?  Hmm…  I might have to print more laptops too… []

Anticipation

I remember waiting for the letter which would tell me whether I got into grad school.  Once you send off your application, it’s out of your hands and just need to be patient.  I was waiting to find out if I would get the small envelope1 or the large envelope.2

I hadn’t thought about the small/large envelope anticipation for a while now.  I was only really reminded when I recently applied for a job.  I saw the posting about 8pm or so and stayed up way later than I’d like to admit writing up my application.

Of course, I had to follow up my application with a post about dinosaurs and lasers…  Both of which I happen to just have lying around here at MakerBlock headquarters. 3

Will I get the small or large envelope???

  1. Boo!!! []
  2. Yay!!! []
  3. aka my living room []

Thank you MakerBot!!!

Fluorescent red ABS and spare parts kit!

Fluorescent red ABS and spare parts kit!

Thanks to the generosity of my family I placed an order for a bunch of the MakerBot1 parts for which I’ve been pining away.  Ordered on August 10th, the box arrived on August 16th.  One of the things ordered was the MegaRainbow ABS plastic pack.

However, the box contained something else – fluorescent red ABS and a spare parts kit!

Thank you MakerBot Industries!!!  I have, indeed, had a happy birthday.  :) 2 I promise to only use these parts for good. 34

  1. And MakerGear! []
  2. I would have posted this a lot sooner, but it’s been a crazy busy week. []
  3. As for the black ABS that came with my Deluxe Kit I’m sorry to say that I cannot make similar promises…  that stuff just has a life of it’s own. []
  4. Is it an EVIL Rubik’s cube? []

Sometimes a good deal isn’t

$3 utility knife and $1 utility knife

$3 utility knife and $1 utility knife

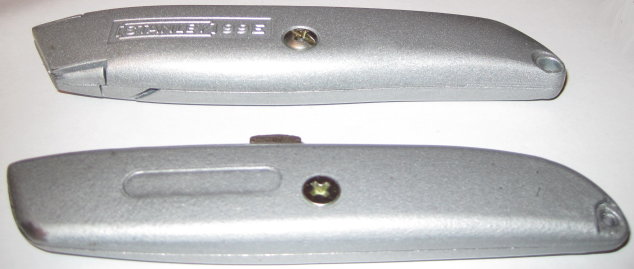
Several months ago I made an impulse buy at the local hardware store.  I picked up a utility knife that came with 6 blades for $1.  It was a good deal, if even for just the razors, and I couldn’t find my usual $3 knife.

Here they are, side by side.  My trusty Stanley utility knife on top.  This knife has a good heft, stores a few extra blades in its handle, and is slightly wider, making for a more comfortable grip.  The two sides also interlock as well as screw into one another.  Clicking the blade out another notch requires a small amount of force – just enough so you’ll never do it by accident – and so that it will stay in each notch as long as you don’t intentionally depress the button.

On the bottom is my no-name brand knife.  It’s lighter, slightly thinner, rattles with the extra blades inside, and the button to extend/retract the blade has a little bit of wobble and play to it.  Also, there’s no interlocking between the two halves.

What an extra $2 buys you

What an extra $2 buys you

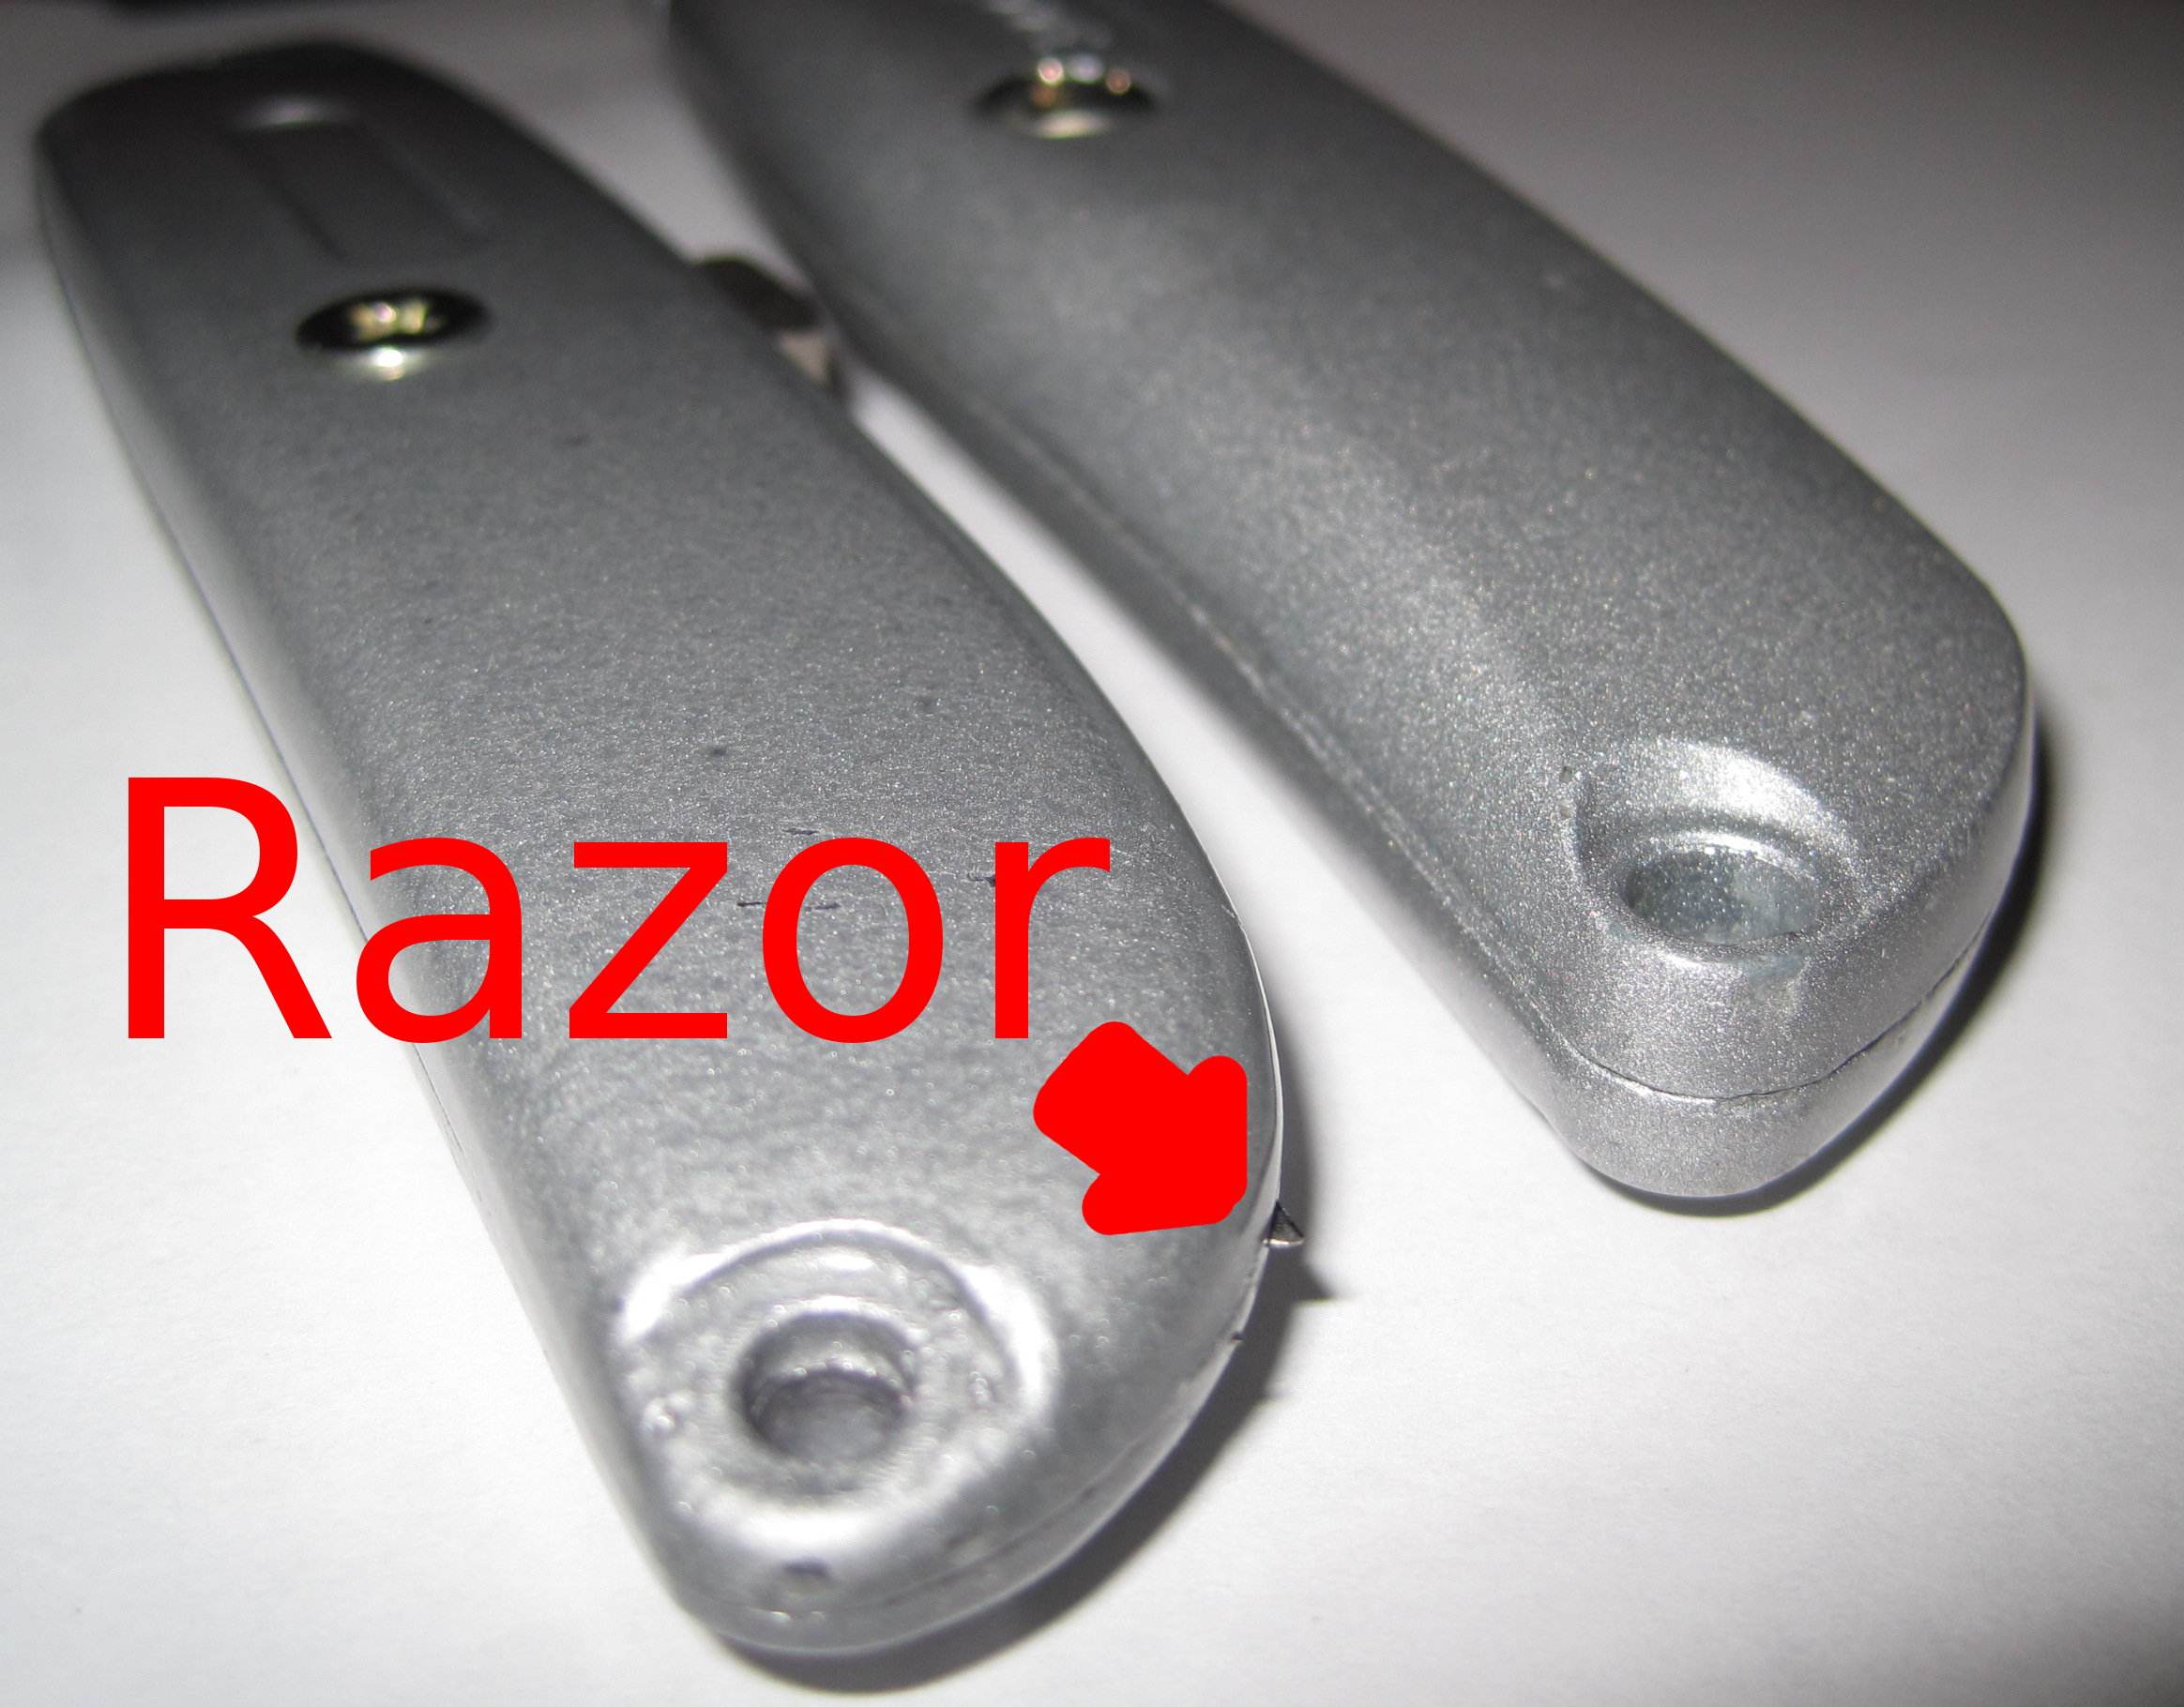
I discovered that the seams between the two halves of the cheapie utility knife left a lot to be desired.  While using the knife I felt a sharp poke in my palm.  Turns out that some of the spare razor blades were poking through the incomplete seam.

So, if you’re headed to the hardware store, invest the extra $2 in the better knife.  :)

MakerBot LCD screens

Perusing Capolight’s recent post about his LCD screen made me pine for an LCD display/simple SD print selection for my MakerBot.  I think Zaggo was working on something similar a while back.  Of course, there’s the RapMan with an integrated OLED screen.

I’m guessing I’m not the only one who would be interested in such an add-on for my MakerBot.  It’s not a terrible burden to have a computer constantly connected, but it would be nice to have the MakerBot slightly more independent of a computer.  Just bring plenty of plastic, electricity, and an SD card with your favorite things.

Lazzersaurus Rex, I choose you!

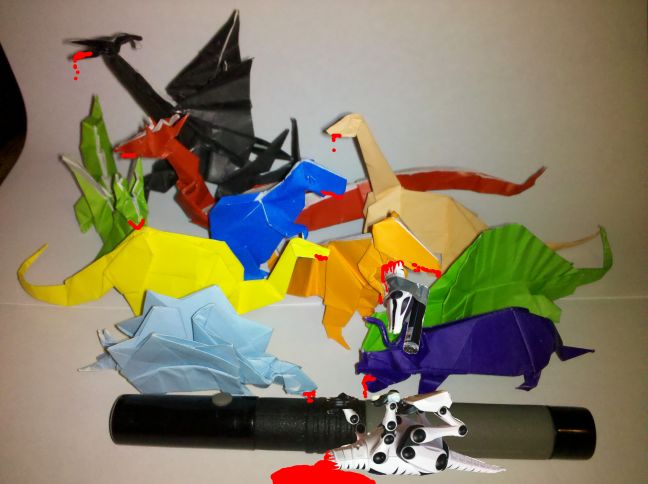
Tony Buser, my origami laser dinosaurs accept your challenge.

SyFy Movie:  MakerBlock origami laser dinosaurs Vs Buser's Laser Dinsosaur

SyFy Movie: MakerBlock origami laser dinosaurs Vs Buser's Laser Dinsosaur

Oh.  Dang.  That did not appear to go well for Team Buser. 1  You probably didn’t realize the scale of those origami dinosaurs before issuing your challenge.  See, that’s a laser canon, not a laser pointer.

Also, sorry about your robot dinosaur.  I’ll print you a new one.  :) 2

  1. You see, I use EVIL origami paper. []
  2. Friends again? []