I’ve always liked the idea of the Staples Easy Button. Not so much a button that says “That was easy,” but the idea of having an enormous button on my desktop that would do… anything at all. Official “Staples Easy Buttons” used to sell for about $20 and are now only about $7. But, this is still a lot to pay for a big button that I’d want to gut anyhow. Recently I figured out a way to build a big useful button, very inexpensively.
The secret sauce is … a tap light! You can buy a pack of 4 big (10cm diameter) tap lights for under $4 and they’ll ship free as a “Prime add-on.” For less than $1 each, you get a three AA battery holder, toggle on/off switch, a bright LED, all neatly organized into a big plastic button. This button also has another “feature” which is missing from many other pricier options. The dome over the light is white – which means you can put any color LED or, as I did, an Adafruit Neopixel inside and the dome will change color accordingly!
Here are some pictures of the disassembled tap light so you can see if it would work for you. I had originally bought these so that I could put a light right next to my newest 3D printer.123
There’s actually quite a bit of room inside the tap light for a small project. I was able to pack a Neopixel, a small buzzer, an ATTiny85, and a rat’s nest of wires. I expect this project to take a lot of abuse at Maker Faire, so I applied a liberal amount of hot glue inside to hold the wires down and out of the path of the springs, switch, case, and the likely path of the button dome.
Once reassembled, there really isn’t any way to tell the button was hacked. It looks identical to three other tap lights. I just love that I was able to make use of the battery holder and existing switch inside the project. The 4.5V supplied by the batteries is perfect for powering my ATTiny85 and lone Neopixel. If you’ve got a junk drawer, you could probably build something very similar for about $2-3.4 As it is, I “splurged” by using $1 worth of Neopixel because I was being lazy and didn’t want to either wire up three sets of LED’s or track down three resistors to go with an RGB LED. Even so, this is an incredibly cost-effective project enclosure.

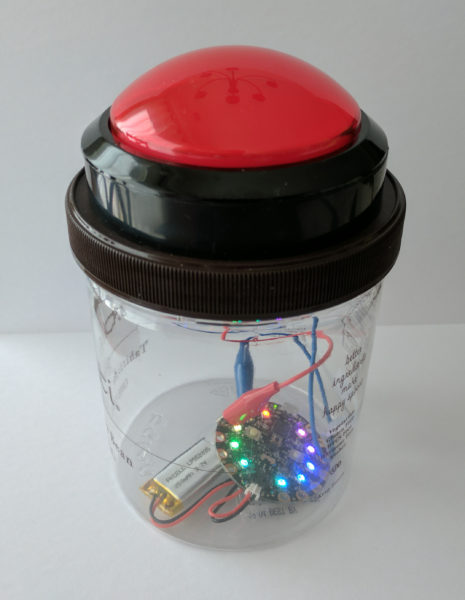
In case it’s of interest to you, this project is the newest iteration of our 15 Second Timer-Buzzer from my daughter’s 15 Second Drawings project for Maker Faire Bay Area 2017. The prior version used an Adafruit Circuit Playground, a 100mm Red Button, and a LiPo battery and probably cost around $40 or so. 5
All of the code is on Github. Basically, the buzzer flashes amber three times with a very short tone in between flashes, then turns green for 14 seconds, amber for one more second, and then turns red and buzzes angrily to let you know time is up. I had written most of the code to work on an ATTiny45… until the code ballooned to a whopping 4560 bytes and I had to switch to an ATTiny85.6 If I had to build this over again, I’d solder in an 8-pin DIP socket for the ATTiny rather than mutilating the chip and hot gluing it directly to the inside. ;)
Default Series Title- I have a power strip next to it, but it’s fully utilized, I only need a little bit of light sometimes, and I was getting tired of holding a flashlight on it at night [↩]
- In my tradition of naming my 3D printers after characters from Futurama, my Monoprice Mini Delta is named “Roberto.” [↩]
- My prior 3D printers are Bender the MakerBot Cupcake CNC, Flexo the MakerBot Thing-O-Matic, and HedonismBot the Replicator 1 Dual [↩]
- I figure about $1 for an ATTiny85 and $1 for the button. Most people can find a way to scrounge an RGB LED or a few different LED’s, an old buzzer or piezoelectric disc, and some bits of wire [↩]
- Not counting the gelato we ate, of course [↩]
- What a waste!!! [↩]
