
As I suggested yesterday, I began the rewarding process of applying finishing oil to the wood. After the wood had been sanded several times, I applied the oil to a clean cloth, wiped it on and rubbed it in. I then hung it inside a cardboard box outside in the warm weather for 3-4 hours, added another coat, rubbed the oil in with 1500 grit wetsanding sandpaper, let it dry, added a third coat with 1500 grit wetsanding sandpaper.
While the coats were drying, I pulled out the 3D printed turn around which I had sanded smooth last weekend, popped it onto a plastic rod from an old balloon, and hit it with some 13 year old silver spray paint. Here’s the collected progress photos on the turn around:
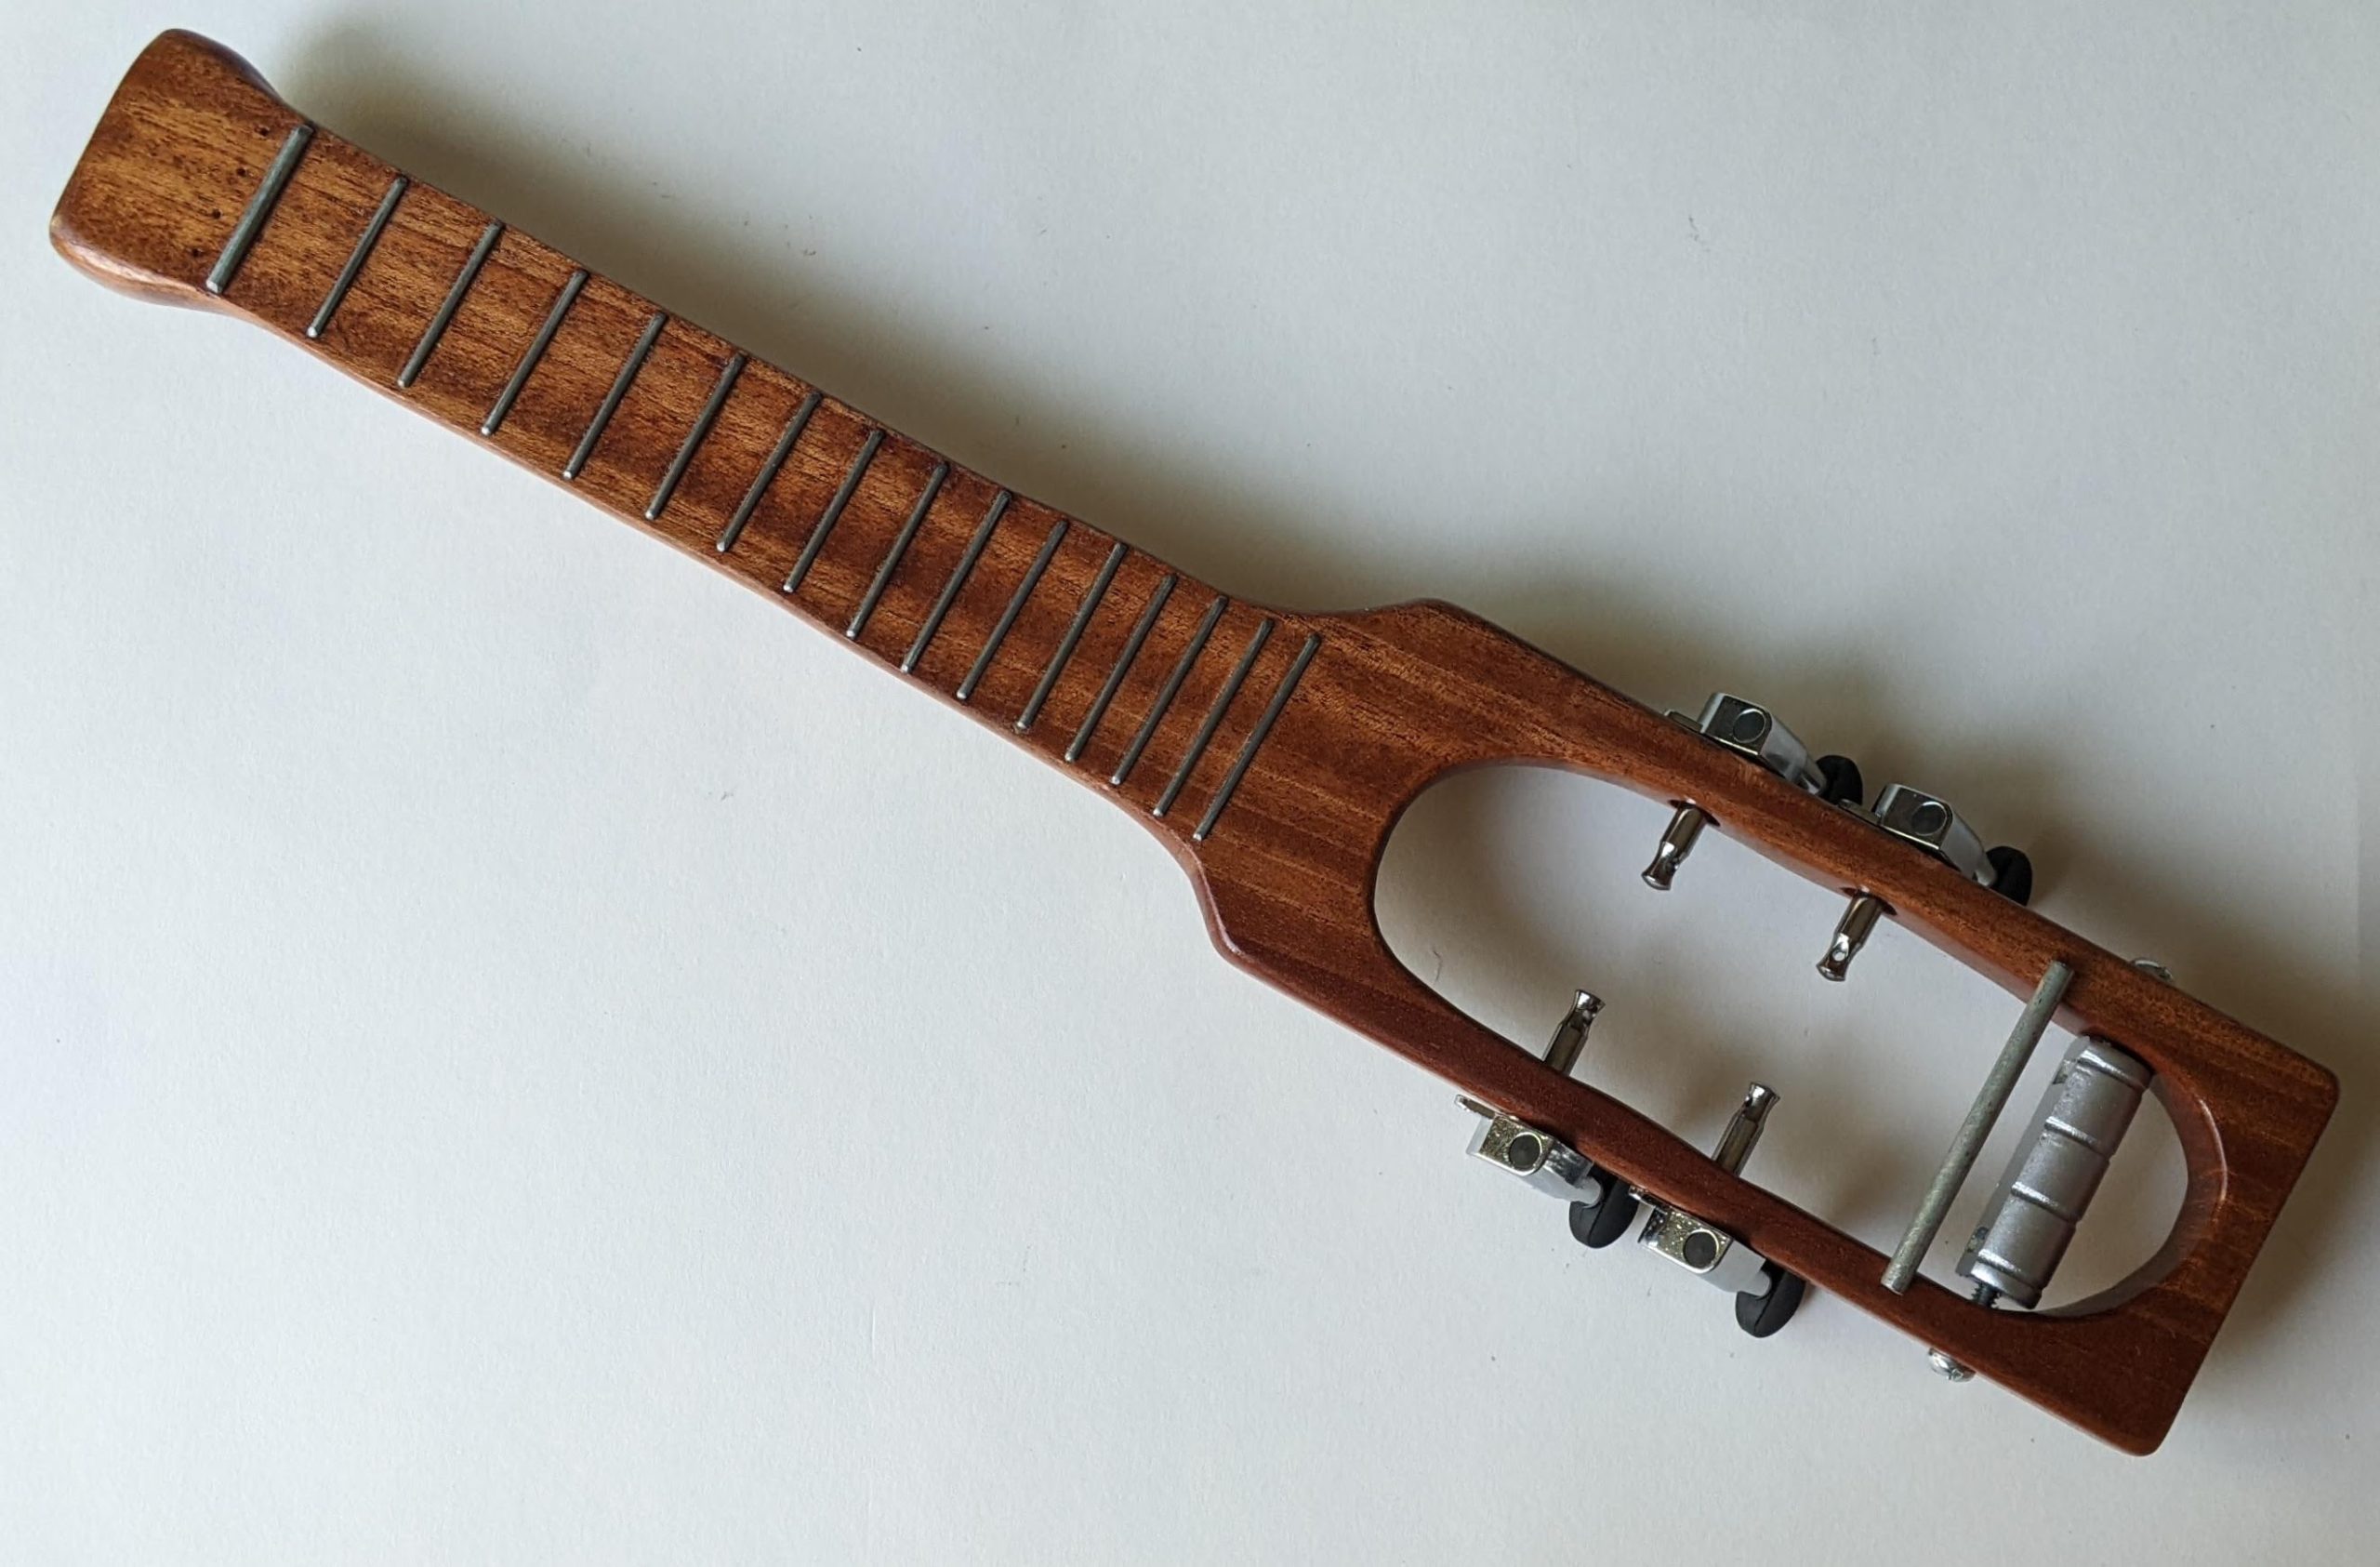
Here’s the latest photo of everything very nearly fully assembled:
What’s next?
- Deciding whether I’m going to add a fourth coat of finishing oil or give it a final buff with the paper shopping bag and move on to waxing. Setting aside the lighting differences in the above photos, I didn’t see a big difference between finishing coat 2 and 3, so coat 4 might just be diminishing returns and a way to plancrastinate finishing the project.
- Designing a small plastic bracket for the bridge. Deciding whether I want to keep it raw 3D printed PLA, paint it black, or paint it silver.
- String it up!
- If all goes well, I’d definitely spring for the GraphTech tuners to give the ukulele a lower profile.
- If it doesn’t go well… I suppose it’s back to the drawing board…
Lastly, a shout out to my new friend Tim who messaged me about a copy of my template. Soprano-travel-ukulele-template_013_v2.pdf (37485 downloads ) and 3D design files for the turn around here.
DIY Travel Soprano Ukulele- Learning Curves and Ukuleles
- Building a Travel Ukulele: Getting Started
- Building a Travel Ukulele: Cutting Stuff
- Building a Travel Ukulele: Cutting, Filing, Shaping
- Building a Travel Ukulele: Filing, sanding, filing, sanding, filing…
- Building a Travel Ukulele: Sanding.
- Building a Travel Ukulele: Test Fitting
- Building a Travel Ukulele: Preparation, Marking and Cutting Frets
- Building a Travel Ukulele: Shaping Frets, Sanding
- Building a Travel Ukulele: Building a Drill
- Building a Travel Ukulele: No Turning Back
- Building a Travel Ukulele: Sanding, sanding, and finishing
- Building a Travel Ukulele: Finishing, sanding, painting, etc
- Building a Travel Ukulele: So Much Experimentation, Bridges, Printing, and Sanding
- Building a Travel Ukulele: Plancratineering
- Building a Travel Ukulele: Swapping Hardware, Fret Experiments
- Building a Travel Ukulele: Bridge, Stringing It Up, and a Sound Test!
- Building a Travel Ukulele: Improvements
- Building a Travel Ukulele: Back to Basics
- DIY Soprano Scale Travel Ukulele
- Repairing My DIY Travel Uke
Looking great ! Love how the grain popped !
The 13 year old silver paint bought back cupcake memories, and made the turn around look awesome !
A
Thanks bud!!! I tried some silver sharpies / permanent markers, but they didn’t look nearly as nice as the spray paint. I think the bracket holder for the bridges should be in black, so I’ll be designing, printing, sanding, painting, installing these this weekend. :)