
This is the second post in a short series about vacuum formers. You can start with the first post about how to make your own inexpensive and easy to use vacuum former or skip to the bottom of this post with a list of all of the posts in this series.
- Theory
- I discussed the theory behind a vacuum former in the prior post. This post is really about how to actually use a vacuum former in conjunction with a heat source.
- Parts
- “Buck”
- The things you’re going to create molds of with your vacuum former are called the “bucks.”
- Wire coat hanger
- The coat hanger will be bent out of shape and won’t be usable for hanging clothes after this. A coat hanger from your local dry cleaner would do just fine.
- The good news is that this is the only thing, besides the consumable plastic plates, that you can’t put back into its ordinary service as soon as you’re done vacuum forming.
- 4 or more binder clips
- Pretty much any size binder clips would work, as long as they can get around the thick gauge wire of the coat hanger. I only had four on hand, (which is probably the minimum necessary) but the more the better. As you heat the plastic, it will contract and deform. The more clips you have, the more circular you can keep the plastic as you lay it on top of the object.
- Oven mitt
- I used a cotton oven mitt that has a silicone rubber grip. This is probably overkill, but better safe than sorry.
- Everything you’ll be touching with the oven mitt will be cool to the touch within about a minute of taking it out of the toaster oven. I’m pretty sure a thin towel which has been folded over several times would work just fine.
- Toaster oven
- Preferably one that can do small round pizzas. If you’re out shopping for one, try and find one that will fit the 10″ diameter plastic plates. You can find a cheap toaster oven for about $30 on Amazon and about $15-20 on Craigslist. If you’re short of funds, I’m pretty sure garage sales or Goodwill would have a bargain.
- Out of an abundance of caution, I was using my toaster oven outside on the off-chance that heating the plastic was giving off some undesirable fumes. I’m also utilizing a used toaster oven donated by my brother. I’m pretty sure the process of heating a few pieces of plastic in the toaster oven don’t make it unsafe for cooking food, but again, I’m erring on the side of caution here.
- There’s nothing special about the toaster oven; it’s nothing more than a convenient and cheap heat source. If you were a more daring sort you could probably use your standard kitchen oven. I suppose in a pinch you could also use a cheap heat gun, but I haven’t tried this yet.
- Pliers (Optional)
- I got these out to help shape the coat hanger. In the end, I didn’t use it very much and it probably wasn’t necessary.
- “Buck”
- Consumables
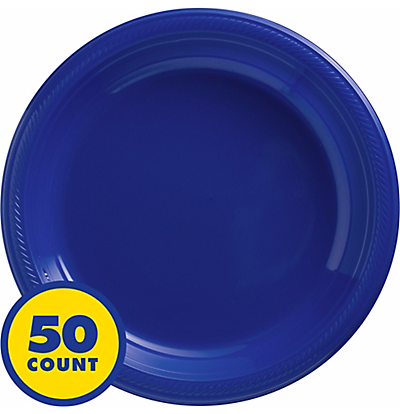
Round plastic plates, 10 – 1/4″
- Round plastic plates (~10″ diameter, without dividers?)
- These are just the bulk plastic plates we had left over from Party City. Next time I’m there, I’ll check and see just what kind of plastic they’re made of. Their website suggests they carry plastic plates with diameters from 9″ to 10.25″ to 10.5″. The plates I had were 10.25″ and they worked out really well. You can probably find a pack of 50 plates for less than $10. You might be able to do even better by hitting up a dollar store.
- Make the Plate Holder
- Using your hands or a pair of pliers, bend the coat hanger as pictured. The goal is to get it to fit around the underside of the rim of the plate.
- Clip the Plate to the Plate Holder
- Using four or more small binder clips, clip the coat hanger to the paper plate. Put two clips on either side of where the coat hanger handle meets the plate. Put the other two clips approximately 180 degrees from the first two clips. If you have more than four binder clips, they would be helpful since the plastic will pull away from the frame as it heats up. (I only had four on hand)
- Turn on the Toaster Oven
- Remove all the racks, except for the bottom drip tray, from the inside of the toaster oven.
- When it’s empty, turn it all the way up.
- Ready the Vacuum Former
- Set up your vacuum former as close to your heat source as is practicable. You want to be able to transfer the molten plastic plate to the vacuum former as quickly as possible so that it doesn’t cool down in transit.
- Prepare Buck and Turn on Vacuum Former
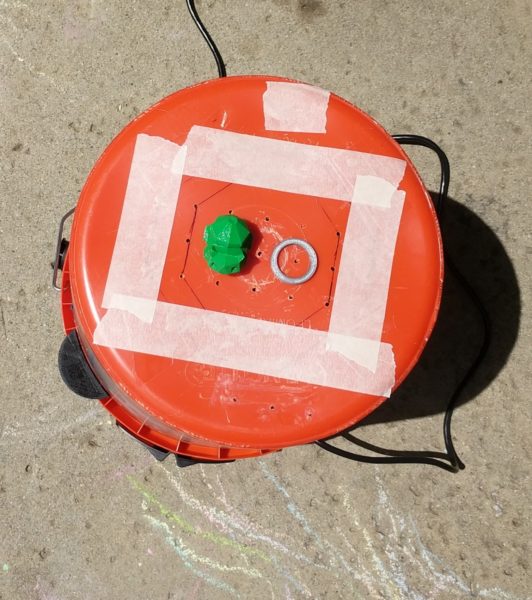
Vacuum former at the ready
- Organize the bucks (the things you want to mold) on top of the vacuum former, then turn on the vacuum.
- You may notice the vacuum pushes or pulls some of the objects out of the way. Just rearrange them as necessary. I try to place things so that they’re surrounded by the holes in the top of the vacuum former.
- Basically, you want the vacuum pulling on the hot plastic plate, but not sucking air freely from around it. If the holes in the top of the vacuum former are spaced out way outside the perimeter of the plate, you’ll want to cover those holes up with some tape. Regular masking tape worked just fine for me.
- Heat and Vacuum!
- Put on your oven mitt, open the toaster oven, and hold the plate in the oven near the top heating element.
- The plates I used went through several physical changes before they were ready. First they softened a little, then they actually flattened all the way out, then then pulled away from the wire frame, then, finally, the plastic got very droopy. This whole process took less than a minute with the oven at full power.
- Once the plastic is nice and droopy, pull the frame out and place it on top of the vacuum former.
- The vacuum should pull the hot plastic around your objects. After a few seconds the plastic should no longer be flexible and warm. Once it’s cool, turn off the vacuum.
That’s it!
Bucket Vacuum Former