This last Friday I journeyed to the Autodesk offices at Pier 9 in San Francisco to attend a meeting for e-NABLE, a group devoted to developing, making, and distributing DIY prosthetics. I have to admit that my own personal interests weren’t necessarily aligned with that of the entire group. I’m sure those there would forgive my trespasses, but I am far more interested in making the prosthetics and in making it easier for others to make similar prosthetics than I am in the actual mechanics of building an organization that does these same things.
I came away from the meeting having met some amazing people doing amazing things, and with considerably more knowledge than that with which I arrived.1 Just as with the RepRap project, the daunting part of getting started in this field is wondering where the heck to get started. There are so many different models being developed and so much information, that I just was not sure how to go about actually making such a prosthetic.
As frequent readers of this blog2 know, I like to treat this site as something of an online open notebook where I share my notes, thoughts, and ideas. Thus, here are the most helpful things I learned as a result of this meeting:
- Where to Get Started
- Jonathan Schull, an associate professor at the Rochester Institute of Technology, was patient and kind enough to provide me with some pointers on where to get started with producing 3D printed prosthetics. Jon suggested the Talon Hand for strength, the Cyborg Beast for general use, and the ODY Hand for young children. The Cyborg Beast instructions refer one to the measurement instructions for the Snap Together Robohand by Michael Curry aka Skimbal. The process, as far as I understand it, involves measuring the subject’s hand and scaling all of the parts up or down accordingly.
- Taking Measurements.
- Professor Jorge Zuniga, of Creighton University in Nebraska, is currently using a system for taking measurements that involves taking three photographs of a person’s upper extremities in different positions. The photographs are taken with a ruler in the image, so that the measurements may be extrapolated. In talking with Professor Zuniga, I learned that while this is a good way to get a lot of information very quickly (take three quick photographs), it can be labor intensive and time consuming to actually extrapolate the various measurements.
- It occurred to me that this sort of problem has actually been solved reasonably well. Marty McGuire 3 and Amy Hurst created a system for using pictures of hands with standardized objects to extrapolate hand measurements for the creation of custom 3D printed objects. In the case of their NickelForScale project, they used a photography setup and OpenCV to create custom rings. While OpenCV isn’t exactly the easiest thing to dive into, one it was figured out could reap huge time savings in gathering the measurements necessary to create custom prosthetics.
- Customizing Printable Prosthetics
- The multi-step process of taking pictures of a subject’s hands, extrapolating the necessary measurements, calculating the scaling factor, scaling the files up or down, then printing seems fairly involved to me. While none of these individual steps are actually that complex, it is entirely possible to automate much of this and lower the barrier to getting people involved.
- One interesting problem that is created by scaling parts is that certain parts of a design probably shouldn’t be scaled – such as the channels for routing cables or holes for the Chicago screws.4 This inadvertent scaling problem can be completely solved by use of a parametric modelling program, such as (my personal favorite) OpenSCAD. The “trick” is to scale the model and distribute the various channels for routing cables and screw holes to the appropriate positions to match the new scale – without scaling the diameter of these voids.
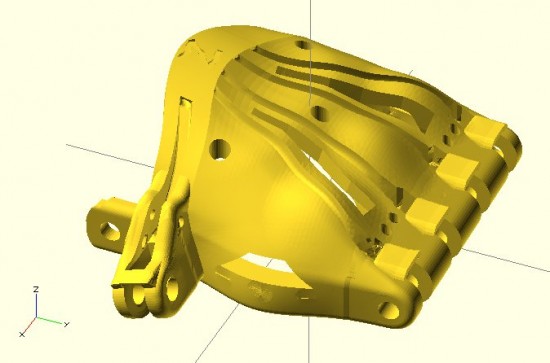
- One of the really great things about the Cyborg Beast prosthetic model is its extremely realistic and organic appearance. While OpenSCAD is definitely well suited to creating functional models, it is not as obvious how to create organic seeming solids. Fortunately, MakerBot’s handsomest and most modest blogger5 posted a very comprehensive tutorial on creating organic solids with OpenSCAD.
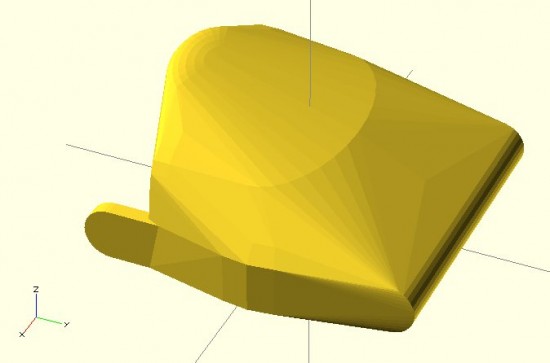
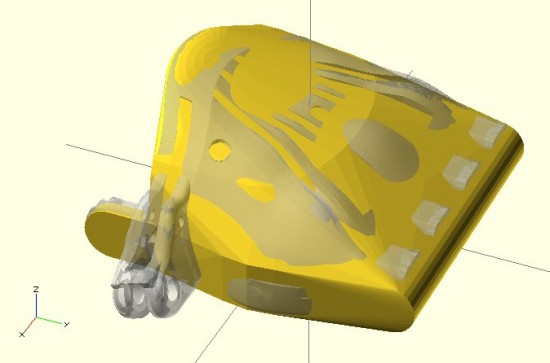
- Last night I got started on creating a parametric Cyborg Beast model. While I’m not going for a completely faithful translation of the Cyborg Beast into a parametric model, I’m shooting for a reasonable facsimile of the most important structural and cosmetic features of the Cyborg Beast. Below is a screenshot of this work in progress. There’s no thumb joint in this model yet, but it’s coming along.

Obviously, there’s more work to do embellishing this model, including adding the thumb joint, hollowing out the underside, adding the knuckle stops for the fingers, and the voids for routing the cables and screws. However, it’s not that bad for a little bit of quick OpenSCAD hackery. After that’s done, the various other parts would need to be replicated in OpenSCAD as well.


Nice work! Interesting, I’ve been emailing Jorge to start working on translating the Cyborg Beast into OpenSCAD, and have a GitHub repo set up collecting e-NABLE’s OpenSCAD: https://github.com/laird/e-nable /
Let’s collaborate on this!
@Laird: Awesome! Let’s do it! Most of what I’ve done so far is really about “sculpting” something to resemble the Cyborg Beast. My idea was to create an OpenSCAD version of the Cyborg Beast, which would be incredibly easy to scale up/down in Thingiverse’s Customizer. I still have a lot of questions and things to learn about how to make a customized version of a prosthetic. I’ll check out your repo tonight.
Cool. I know nothing about Prosthetics, but I have done tons with Customizer.
The approach I was considering was the same as I think you’re describing (kinda) – to take all of the Cyborg Beast components and remove all of the holes for bolts, etc., then export them as STLs. Then use OpenSCAD to assemble and scale them, then punch through the screw holes, etc., so (1) they align, and (2) they aren’t scaled. Then the underlying design can be modified in whatever Jorge is using, and all the OpenSCAD depends on is knowing the ‘control points’ so that it can scale and align the parts properly.