
My daughter and I have been working on a project to create paper mache fairies and fairy furniture.1
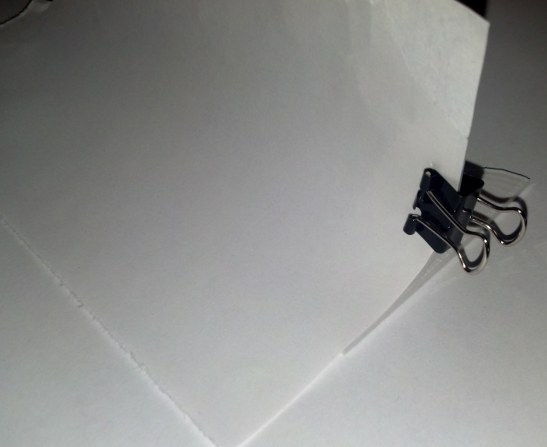
But first, I can’t help showing off this nifty 3D printable photographic background stand I designed. Inspired by some other designs on Thingiverse, my first draft worked exactly as I was hoping it would. Okay, back to the paper mache.
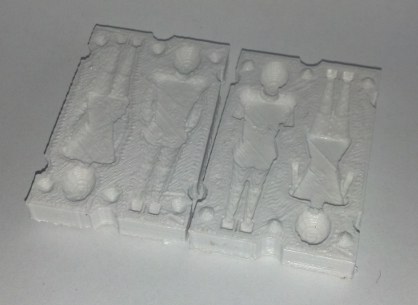
I designed two tiny human-ish figures in OpenSCAD, subtracted them from a block, and sliced the block in half to create a two-piece mold for what we were hoping would be tiny paper mache fairies. I was pretty sure the tiny figures wouldn’t come out well in the printed plastic mold and that the mold wouldn’t work well with the paper mache. However, my daughter really wanted to try to make fairies of this size (about 2″ tall) – so we gave it a shot.
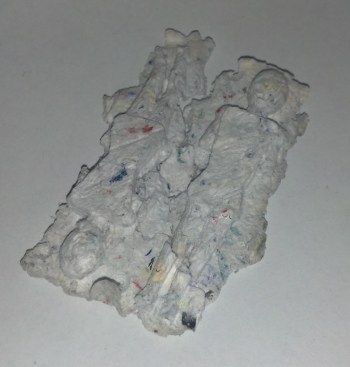
I squeezed the paper pulp so it wasn’t sopping wet, added a liberal amount of white glue, packed the printed mold with the mixture, and put a rubber band around it to keep it together. I gave it a few days, then pulled the mold apart. I wasn’t able to add much of the mixture into the upper half, so the reverse side didn’t seem to leave much of an impression. Once it was dry, the dried paper mache stuck to the bottom half of the mold so well it tore in several places as I got it out.
In any case, here are the lessons I’ve learned:
- The fairy bodies are somewhat angular – which I think made them difficult to remove from the mold. I would have made them more rounded in the first place, but there were already a lot of spheres and cylinders in the design which were causing some pretty long OpenSCAD render times.
- Larger molded objects would probably work better.
- The mold would probably release the cast object if I made the interior smoother – either with sanding or acetone.
- A release agent would probably help. Maybe petroleum jelly on the inside, perhaps plastic wrap?
- I should have sanded the tops of the mold halves – so they would mesh better. This might have allowed the paper mache to be pressed better into the top part of the mold.
- It may help to add something to the paper mache mixture to make it stronger. My thought is pieces of frayed yarn or pieces of a cotton ball. This may give it more strength and flexibility.
- It’s hard to tell if it would matter, but more glue might have helped.
- I think it would have helped to create the mold in multiple pieces – similar to this Chris K. Palmer early Thingiverse chocolate mold.
- I’ll leave it to your imagination to decide who chose the subject matter [↩]
Nonstick cooking spray makes a great mold release for DIY molds.
Zheng3: Ah! Wonderful! Thank you!
Have you seen this:
http://www.thingiverse.com/thing:31581
@owenscenic: Aaaaah! That was a trap!
I had seen these, but totally forgotten about them. Since the paper mache is so very thick and un-pourable, there will be some significant difference – but I think I should read Cerebrus333’s and Jasonwebb’s posts before my next attempt. Thanks for the head’s up!
Cerberus333’s Things: http://www.thingiverse.com/cerberus333/collections/cerbys-crawlers
Jasonwebb’s Two-Part Mold Generator: http://www.thingiverse.com/thing:31581
Jasonwebb’s Open Mold Generator: http://www.thingiverse.com/thing:32657
I think the issue is that the paper mache must dry to be able to set. So, when you sealed it into plastic, with very little of it exposed to the air, you created a situation where it couldn’t really dry. And while the “draft angle” and any roughness of the mold surface may have contributed to the problem, if the paper mache was still damp, it wouldn’t have mattered if those other issues were fixed.
Another approach is to just press the paper mache into the mold, but do not put them together. Even the edges of the mache to be flush with the surface of the mold. Then, they can dry. After they are removed, you glue them together, using some fresh mache along the seam to hide it.
I have not used this technique, I only heard about it in passing in regards to using plaster molds for the mache casting. Of course, there will tend to be some distortion of the casting as it dries. It may be best to remove it from the mold while it is still a little soft, so that the two halves can be made to fit each other better.
@Joe Dunfee: That’s such a good idea. I had wanted to mold the paper mache all at once, but doing it in halves and gluing it together makes so much more sense. Thanks for the suggestion!
Don’t think openscad is really suited to modelling people.
Could you start with a makehuman output?
http://www.makehuman.org
@John Cliff: I totally agree – OpenSCAD isn’t very well suited to people. But, it’s what I know. :) When all you have is a hammer, all your problems look like nails.