If you see me at Maker Faire this weekend, you will likely catch me wearing my vacuum formed goggles and arc reactor. I was inspired by my vacuum former and this awesome Instructable by dgrover.
Once you have everything set up, this neat little “arc reactor” only uses about 50¢ of materials and doesn’t require any special soldering skillz.1 Here’s how you make your own:
- Make the form
- I specifically bought a stack of silver plastic plates for this project. 50 plates for $10 was a pretty good deal. ((In case you care, I use affiliate links))
- You could use dgrover’s lasercut files or design your own model. I designed my own, based on their designs and added 10 degrees of draft to the edges to help it release from the mold.
- You’ll also notice lots of little holes in the nooks and crannies of the model. Those serve a dual purpose of allowing the vacuum to pull the plastic down into those parts and then letting air in when you’re ready to release the 3D printed part.
- Add the LED and Battery
- Gather the tools and materials
- 5mm fast flashing RGB LED ($7 for 100 LED’s!)
- 3V Coin Cell battery, CR2032 ($25 for 100 batteries!)
- Push pin
- Optional: Hot glue gun and glue
- Poke two small holes in the center of the form for the LED leads.
- Push the LED through the holes. I would recommend adding a drop of hot glue just under the LED moments before you pull it against the vacuum formed part. This will help keep it in place.
- Bend the two leads as shown just using your fingers. Notice the bottom lead is bent roughly 90 degrees and the top lead is curved.
- Add the battery. The LED is polarized, so it will only light up when the battery is properly connected. So, just put the battery in, then flip it over if it doesn’t light up. :)
- Gather the tools and materials
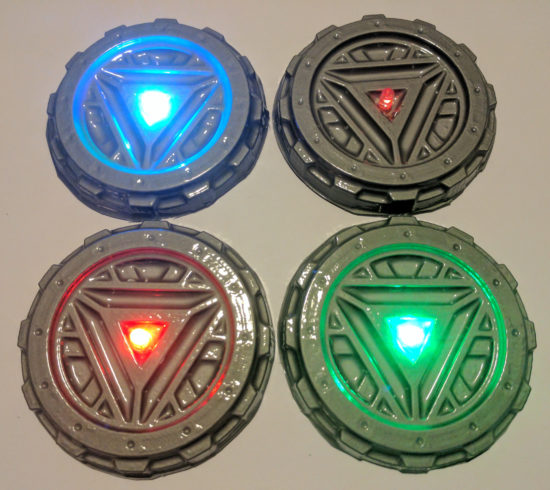
DIY Vacuum Formed Arc Reactors
I really couldn’t be happier with the results. It looks way more impressive than the 57¢ worth of materials would suggest.
Bucket Vacuum Former- How to Make a Vacuum Former
- How to Use a Vacuum Former
- Vacuum Former – Things to Form
- Vacuum Former – Ideas to Improve Vacuum Former
- Maker Faire 2017 How to Make a Vacuum Former Presentation Slides
- Vacuum Forming an Arc Reactor
- Maker Faire Application: Vacuum Forming Workshop
- You could easily adapt these instructions to add some sweet LED color changing lighting to any other project [↩]