Preparing to paint

Here’s what I did to get ready to paint:

  • Gathered a lot of cardboard boxes, opened up and laid flat
  • Taped said cardboard into large overlapped sheets, taped up any holes
  • Bought primer, dark gray
  • Opened the garage for ventilation
  • Changed into clothes I didn’t mind getting dirty
  • Looked carefully at the various diagrams to make sure I’m going to paint certain parts the colors I want

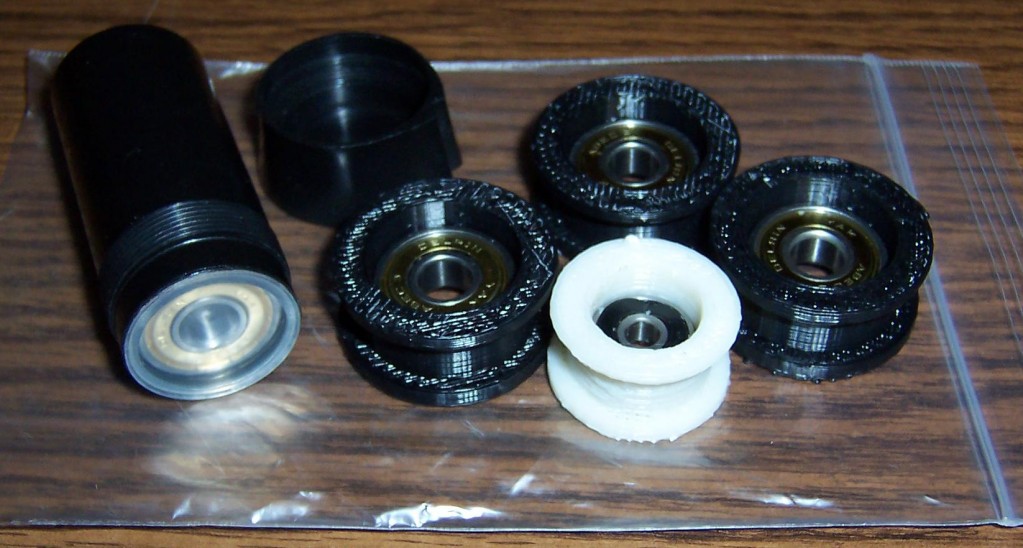
Printed Pulleys Assembled!

I’ve just take the first step to building my MakerBot!  Admittedly, two of the bearings were already in the printed pulleys, but that’s just not the point.  I’ve taken a material step towards building it!  Huzzah!

Printed pulleys assembled!

Printed pulleys assembled!

Oh, and I don’t think I was supposed to have a pack of 8 extra bearings.

No, no, I’m supposed to have these 8 bearings.  I suppose it would help if I read the directions.  (I’m just so used to grabbing things and tossing them together and expecting them to work.  I guess it’s a little more complicated than that when you’re building a robot, eh?)

Second Law, Schmecond Law

Unfortunately, in the haste to get the MakerBots out the door for the holidays the guys at MakerBot left out opto-endstop kits on some shipments.  These guys have been super responsive even before I bought a kit from them, so I’m not that concerned.  Frankly, it’s a little bit of a relief that I can skip the soldering stuff for now and move on to some of the pulley making steps.

In any case, as I understand it, these are not vital to the proper functioning of the MakerBot and that they’re really just a failsafe if the ‘bot forgets the second law of robotics.

ETA

I’ve been blathering about my MakerBot kit to anyone and everyone who will listen for weeks and months now.  All that is left to do is build it. 1  A friend asked me how long it would take me to build it.

Thinking aloud, I reasoned that if two skilled people could build one MakerBot in a weekend, I might have a shot at building one in about two to three weeks.2

I hope that’s not too optimistic.  :)

I guess that’s what Christmas miracles are for, eh? 3

  1. Oh, that’s all? []
  2. Though a YouTube video suggest two people can build one in a single night. []
  3. Actually, I would love to finish it in time for Christmas so I can print out some snowflakes for the tree, but I just don’t see it in the cards. []

Soldering?

I have NO idea what I’m doing!

If you’ve got a Batch IX MakerBot all the surface mount boards should have arrived pre-soldered.  This means the first actual material step to building the robot is to solder the opto-endstops.  These are little circuit boards that contain optical switches that will prevent the machine from moving the build platform (and print head?) too far in a particular direction.  You can find the kits for the opto-endstops in the MakerBot store.  According to the page for these kits:

An optical switch usually used to detect when your robot has reached the minimum or maximum position of travel.

An optical endstop AKA opto endstop is a switch made out of light. When something interrupts the light-beam, then it signals the motherboard. Useful for detecting if your robot is attempting to self-destruct. ;)

Also, there are no moving parts to wear out, so they will last pretty much forever.

So, when all is said and done, hopefully I will have taken this:

OptoEndstops Parts

OptoEndstops Parts

To this:

OptoEndstops v2.1

OptoEndstops v2.1