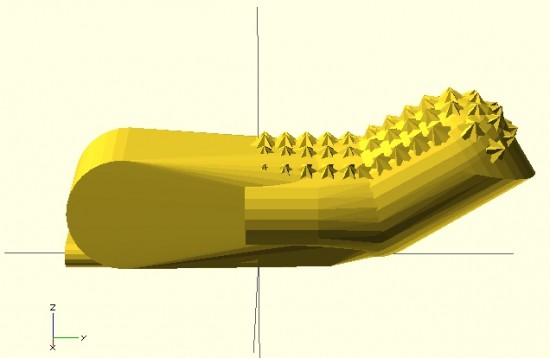
Solid finger tip for Cyborg Beast
Above is my first attempt at designing a “solid” finger for the Cyborg Beast DIY printable prosthetic in OpenSCAD.1 The reason this is a “solid” finger is that I haven’t subtracted out any material to allow this partial finger to connect with anything else.
The problem with scaling (up or down) any design that requires fasteners and hardware is that when you do, the holes for the hardware are similarly scaled. This leads to more post-printing work drilling holes to widen them or to find larger fasteners that won’t rattle around in too-large holes.
Thus, if the hardware consists of 3mm screws, the holes for the hardware should be 3mm no matter how much the parts are scaled up or down. To make matters more interesting, not all holes in the model should be excepted from scaling. The above finger tip has a plastic end that is supposed to fit into a mid-finger piece – and those parts should be scaled up or down according to the size of the overall hand. Thus, some voids should be scaled2 and others not at all.3
I’m rather happy with how this finger has turned out so far. It has most of what I understand to be the essential features of the Cyborg Beast fingertips, including little nubs along the finger pad to allow for gripping. I intend to make this an option, in case a user would rather use something like Plasti-Dip to make grippy finger pads, rather than relying on printed plastic bumps.
However, converting a decent design into a parametric design requires a little more work. The way I go about designing a parametric model is to first design one instance of the thing, in this case the finger tip. My next step is to poke through the OpenSCAD code to locate those aspects parts that contribute to the models’ essential features – length of the finger tip, for instance. Once I’ve found these bits, I then try to modify them so that I can insert different variables and arrive at sane variations on the model.
Wish me luck!4
Default Series Title