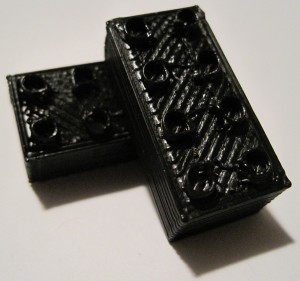
THIS is what I’ve been dying to print.
How did I achieve such a feat? Printing from the SD chip. For those of you who aren’t sure how to do this, it’s a lot easier than you think. I was wondering if there was some complicated kind of upload/buffering command. I just wasn’t seeing instructions or a how-to anywhere. Well, that’s because its pretty freaking easy. I printed to a file, popped an SD chip into my laptop, copied the file to the chip, popped the chip into the ‘bot, and then chose to print from SD card option in ReplicatorG.
My first attempt to upload code to the chip was through the USB cable. While this is certainly feasible, it’s painfully slow. It took about two minutes to upload 200k through the USB cable versus less than two seconds worth of writing to the chip.
Admittedly, this wasn’t what I had tried first. I discovered that by moving the extuder board to the same side as the motherboard, I had blocked the SD chip port. Bummer. To solve this problem I unbolted the motherboard, rotated it 90 degrees counter-clockwise, put two more holes into the side of my MakerBot, and bolted it back on. 1
Now that I’ve printed up my first lego, I’m going to want to print:
- More legos, natch
- Wacky brand new legos
- Construx
- Replacement construx
- Wacky brand new construx
- I did this using the drill bit plus rubber band method described earlier. [↩]


Pingback: MakerBot and Legos | MakerBlock